In Windows Vista, the Backup Status and Configuration tool was the place where one could (or at least try to) backup pictures, music, media and documents on their Vista computer. However, it seems Vista’s designers have made every effort possible to make the backup tool as un-configurable as possible; even preventing us from choosing exactly which file or folder we want to backup. Instead, the Backup Status and Configuration tool will only allow us to select what GENERAL file type we want to backup, not its location. Read my article on backup status and configuration in Vista for more on that issue.
Note: That is why more advanced users might want to consider using a different and more customizable backup software. Perhaps try installing Windows XP Ntbackup on Windows Vista.
In Windows 7 this has changed, and it seems that there’s a good chance that we’ll finally get a good and working tool this time.
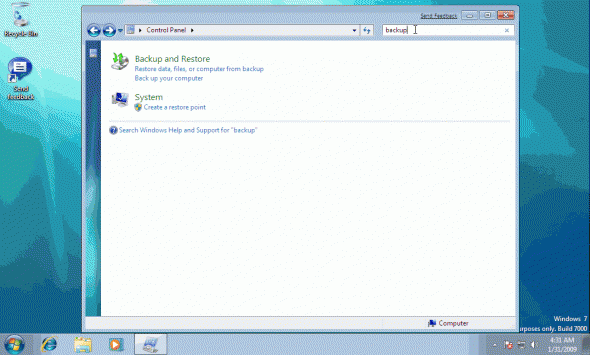
In Window 7 (beta phase, build 7000), the Backup Status and Configuration tool is replaced by a tool called “Backup and Restore”. You can access it by going to the Control Panel and typing “backup” in the search box. One of the results will lead you to it.
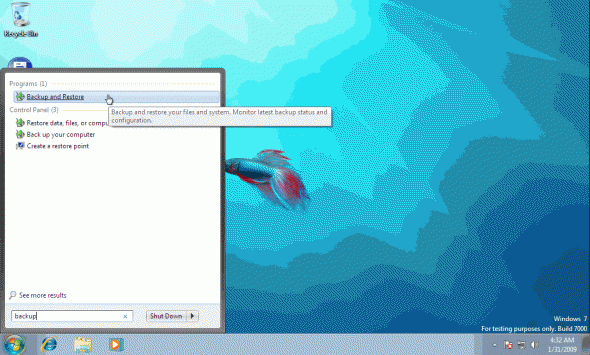
You can also type “backup” on the Start Menu search box, and again, one of the results will lead you to it.
You can also run the following command from the Run or search box option:
sdclt.exe
(if you really must know, you can also use %systemroot%system32control.exe /name Microsoft.BackupAndRestoreCenter to do the same thing…)
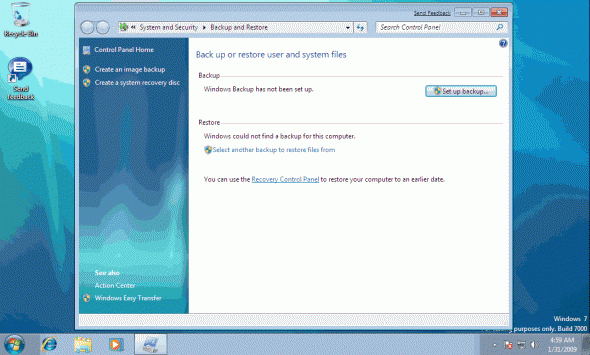
The Backup and Restore tool will open.
Press “Set up backup” if you wish to backup something.
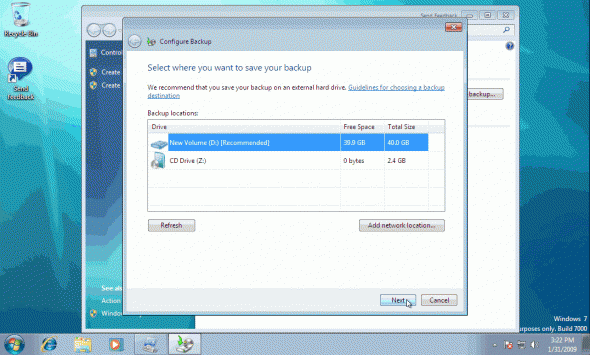
Windows Backup will start, and the first thing you need to configure is your target media on which you want to place the backup. You can only select local hard disks or writable media. If you select writable disks as your backup media, make sure that they are writeable, which means that you can add, delete, or change content on them. If you decide to use this method and have a lot of files to back up, be sure you have enough discs to finish the job. The Backup and Restore tool tells you how much space you need each time you perform a backup and recommends the type of media to use. That is also true for external hard disks. Select your backup media and press Next.
Note: Be sure to check disk and storage considerations when using Windows 7 Backup and Restore for more information.
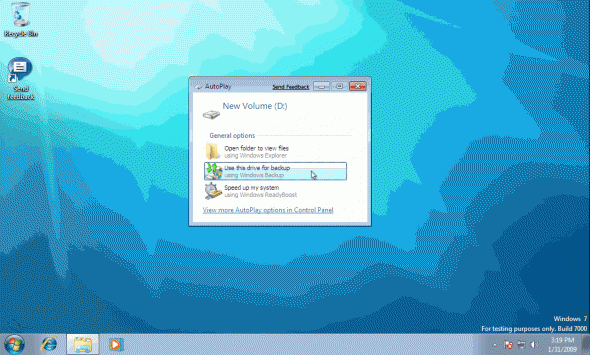
BTW, when you insert a new hard drive (such as an external USB drive) and Windows 7 recognizes it, it will prompt you if you wish to use it as the target for your backups. This can be changed later, but if you do select it, the Backup Files will begin.
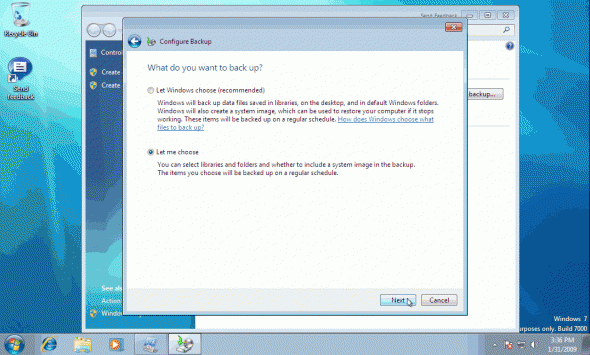
Next, select what you want to back up. You can let Windows choose what is backed up or you can select the individual folders and drives that you want to back up.
If you let Windows choose what is backed up, the following are included in your backup:
- Data files that are saved in libraries, on the desktop, and in default Windows folders including Pictures (Digital photographs, clipart, drawings, and other image files)
- Documents (Word processor files, spreadsheets, presentations, and other document files)
- Music (Music, play lists, CD tracks, and other audio files)
- Video (Videos and movies)
- E-mail (E-mail messages and contact lists that are stored on your computer
- Compressed files (such as zip, rar, and cab) and Additional files.
Note: Only local files in libraries are included in the backup. If you have files in a library that are saved on a network drive or on the Internet, they will not be included in the backup.
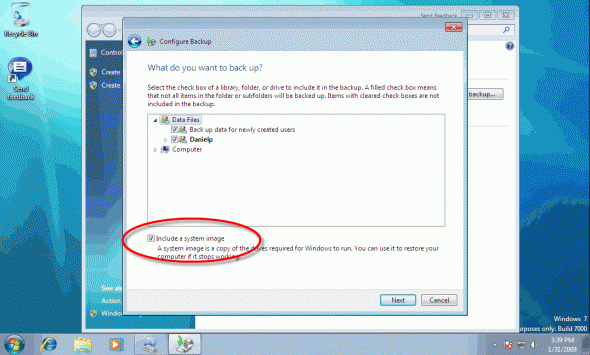
Another interesting note: If the destination drive is formatted using the NTFS file system and has enough disk space, a system image of your programs, Windows, and all drivers and registry settings will automatically be included in the backup. This image can be used to restore the contents of your computer if your hard drive or computer stops working.
If you choose to manually select the individual folders, libraries, and drives that you want to back up, all local files in the selected folders, libraries, and drives will be backed up. However, Windows Backup won’t back up the following items:
- Files in known system folders (folders that contain files that Windows needs to run) – these are backed up only when you create a system image – read my “Working with System Image Backups in Windows 7”article for more information (insert link to existing article).
- Known program files (files that define themselves as part of a program in the registry when the program is installed).
- Files stored on hard disks that are formatted using the FAT file system.
- Files that are in the Recycle Bin.
- Temporary files on drives that are smaller than 1 GB.
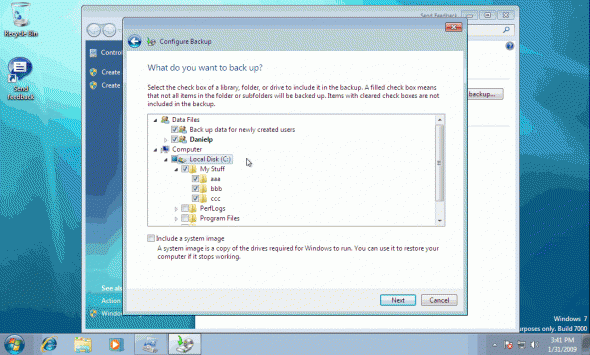
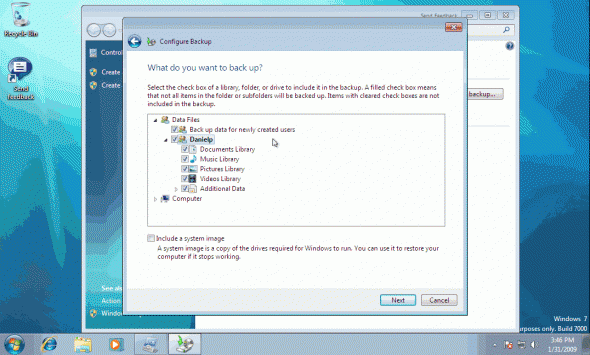
So, I selected to manually choose individual folders, libraries, and drives that I want to back up, and after pressing Next I was prompted with this screen. Behold! It seems that the Microsoft designers that worked on Windows Backup really “listened to the public” after all, and it now seems that one CAN individually select folders they wish to backup. I remind you, this was not possible in Vista…
If you expand your user name you will be able to select the types of files you wish to include in this backup.
When satisfied, press Next.
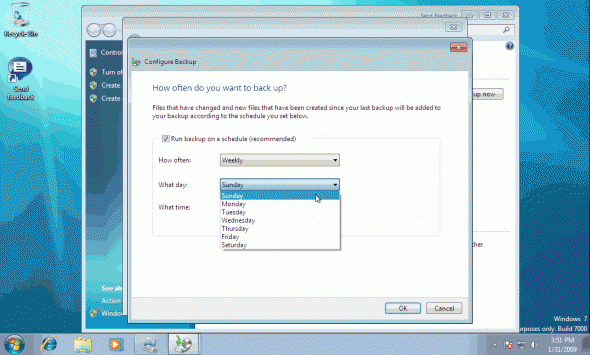
In the next window you can change the backup’s schedule. By default it will take place each Sunday at 7:00 PM. Press Change Schedule and make whatever change you need.
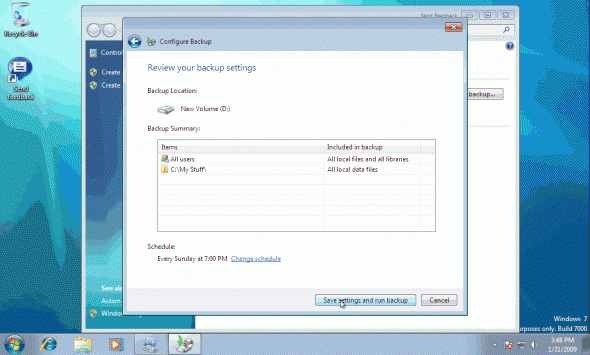
Review your settings, and if done, press on the “Save settings and run backup” button.
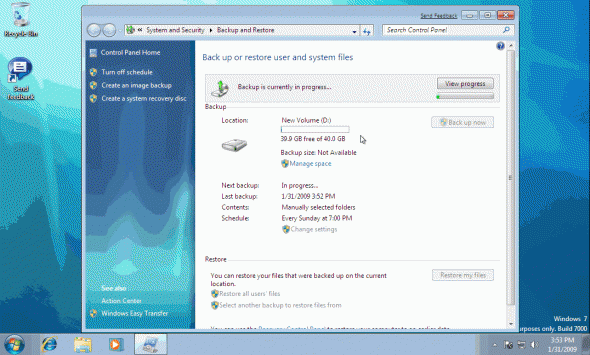
After the backup job is finished, or at any other time in the future, you can press on the “Restore my files” button.


