This article is a complete walkthrough on the steps taken when upgrading a Windows 8.1 installation from Windows 8.
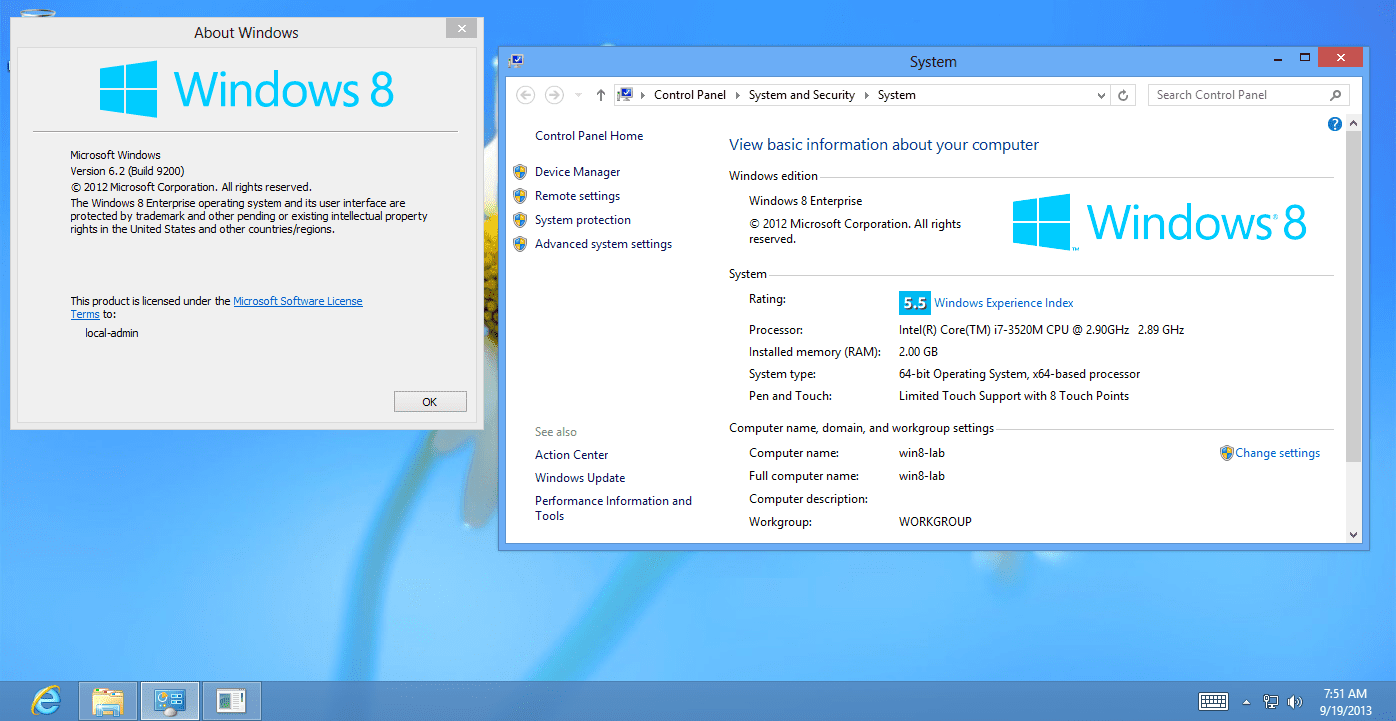
First, we start with a sample demo machine I created for this demonstration. It runs Windows 8 Enterprise edition and it was fully updated prior to the upgrade process.
Laptop notice: If you’re using a laptop, I would strongly suggest that you plug it to a power adapter before you start the upgrade process.
New Features in Windows 8.1
The list of new and upgraded features in Windows 8.1 is beyond the scope of this article. See the following Technet article for a complete list: Windows 8.1 – What’s New, IT Pro Features, Devices, UI.
Reverting to Previous Versions of Windows
Note that once you perform the upgrade, you will not be able to uninstall or revert back to your previous version of Windows. You will need to re-install your computer with the previous OS from a recovery disk or from the original media provided by the manufacturer.
How to Upgrade to Windows 8.1
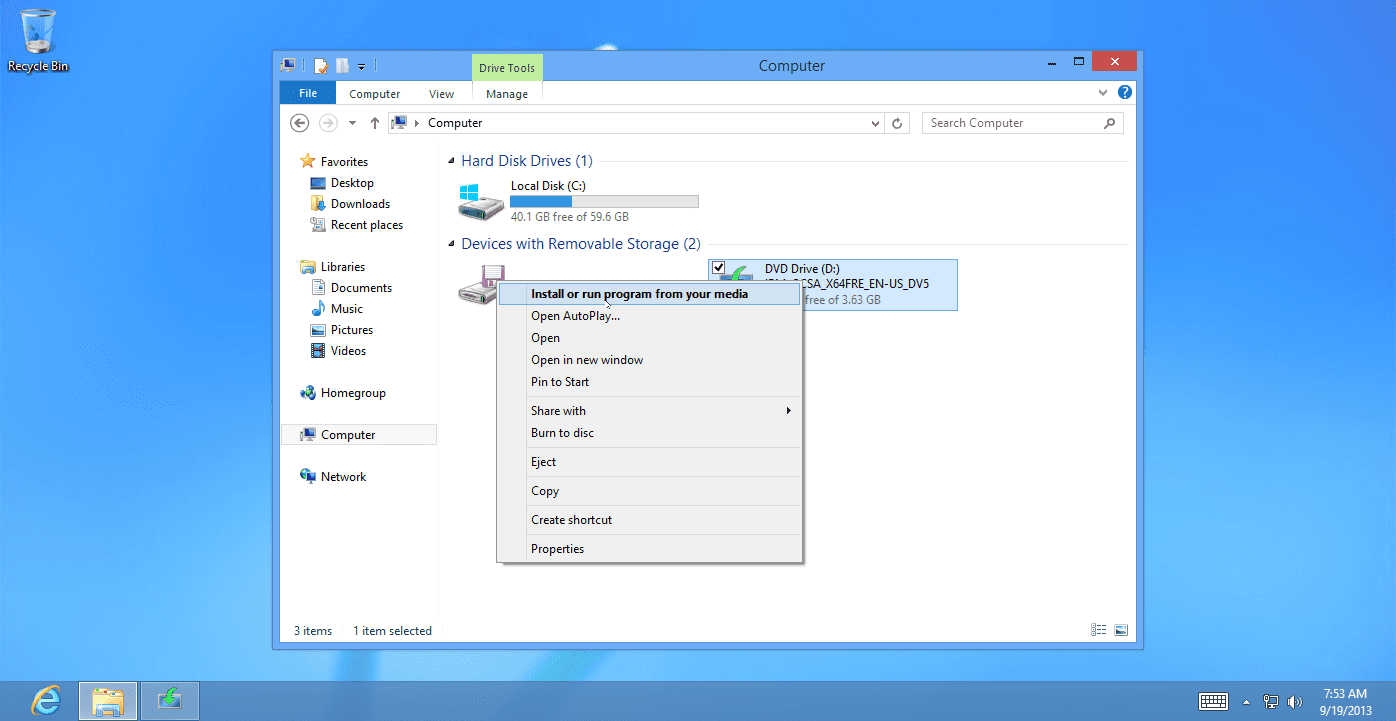
- To get started you need to place the Windows 8.1 media in the DVD drive. If it is an ISO file, mount it and then wait a couple of seconds for autorun to start on its own (or you could start it yourself). The Install Windows dialog box will appear as shown below.
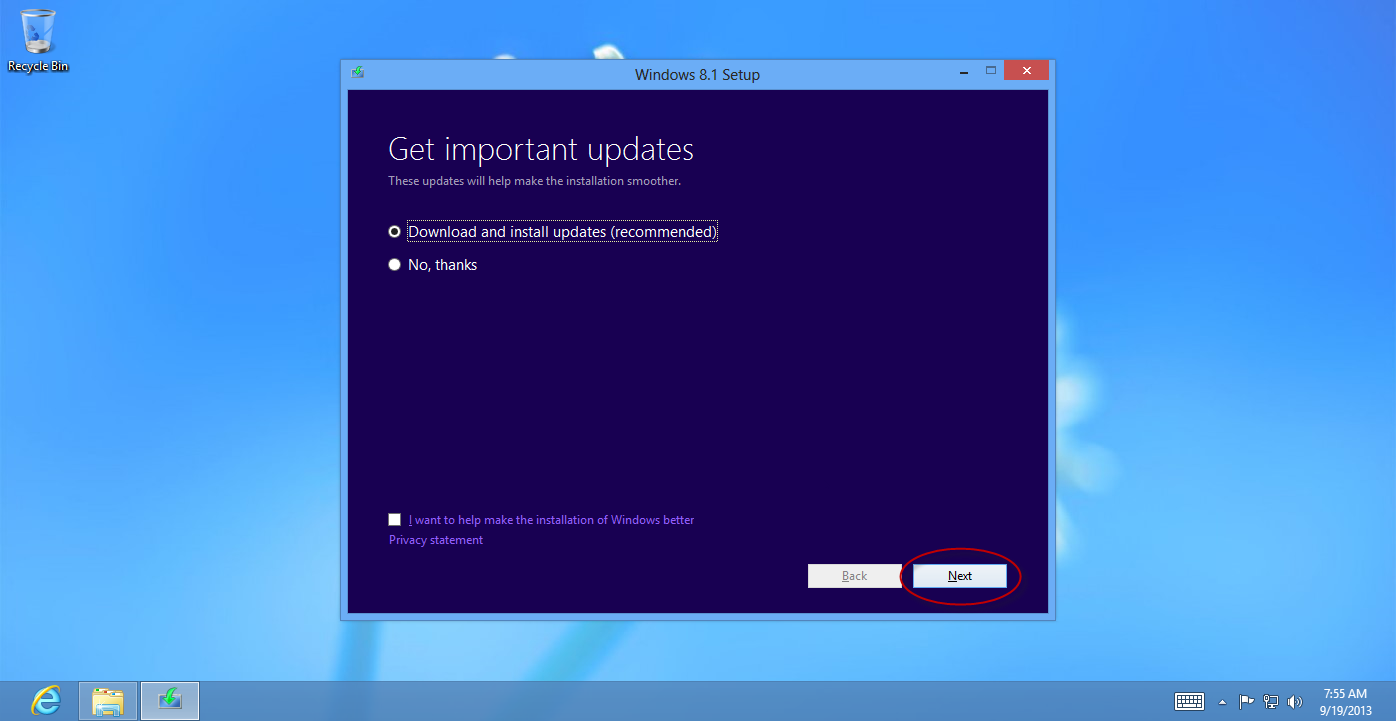
- Next, you will be prompted to perform a Windows Update.
- Next, you will need to enter a valid product ID. If you don’t have one you will not be able to proceed. Note that for the RTM version of Windows 8.1 you cannot use the preview product ID.
- After entering the product ID, accept the EULA.
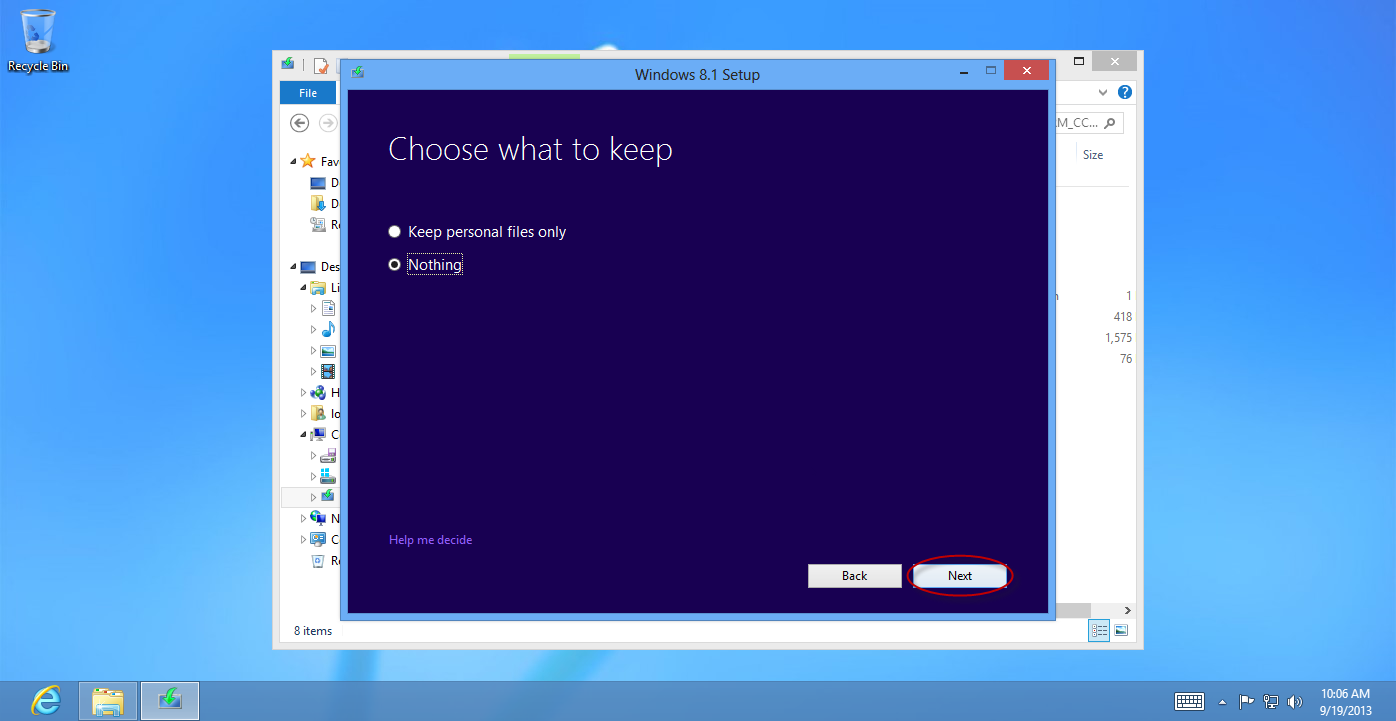
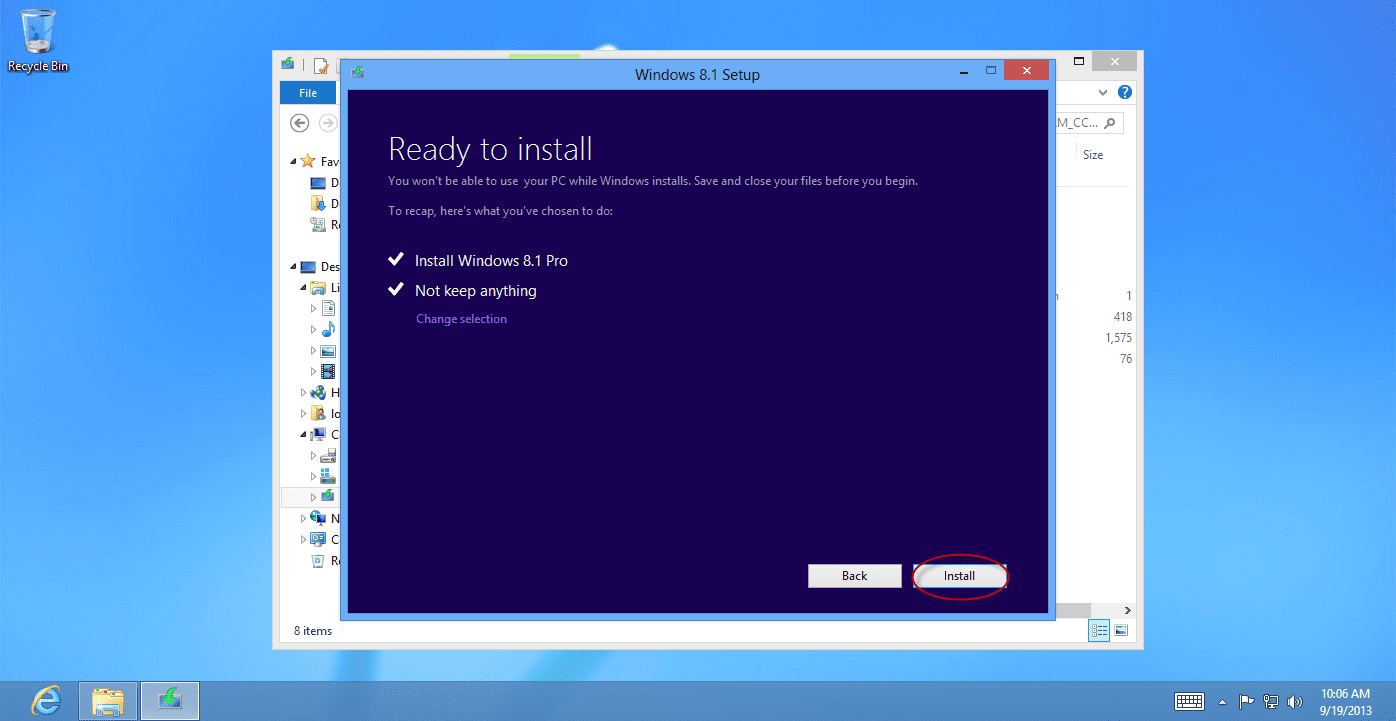
- Now, select what you want to keep from your existing Windows installation. There are several options for you to choose from, depending on your existing configuration.
Remember this is an upgrade process of an existing installation. Obviously you’d want to keep at least some of your files, settings or apps, otherwise you would have chosen a brand new installation, wiping your existing one. So what can be transferred?
During the upgrade process to 8.1 you can keep some of your existing apps and settings. For example:
- Windows settings: This keeps your settings like the desktop wallpaper, your Internet favorites and history, Ease of Access settings, and more.
- Personal files: This keeps any files that are saved in your personal user folder, like the Documents, Pictures, Music, Videos, and Desktop folders. Note that any files that are stored elsewhere may also be kept, if they are located on other drives. I would, however, emphasize the importance of performing a backup prior to the upgrade process, just in case.
- Applications: This keeps the apps that were already installed on your computer, and will allow them to work after the upgrade. As with previous upgrades, Microsoft provided users with an Upgrade Assistant. You need to close Setup to run the Upgrade Assistant, but once you do, it will generate a report of all apps that you currently have on your computer that will work, and those that won’t. More on this in a later article.
In this case I chose to keep nothing.
Note: In this demo I did not get the option to keep my apps, simply because this was a brand new demo virtual machine that had no apps installed besides the default ones.
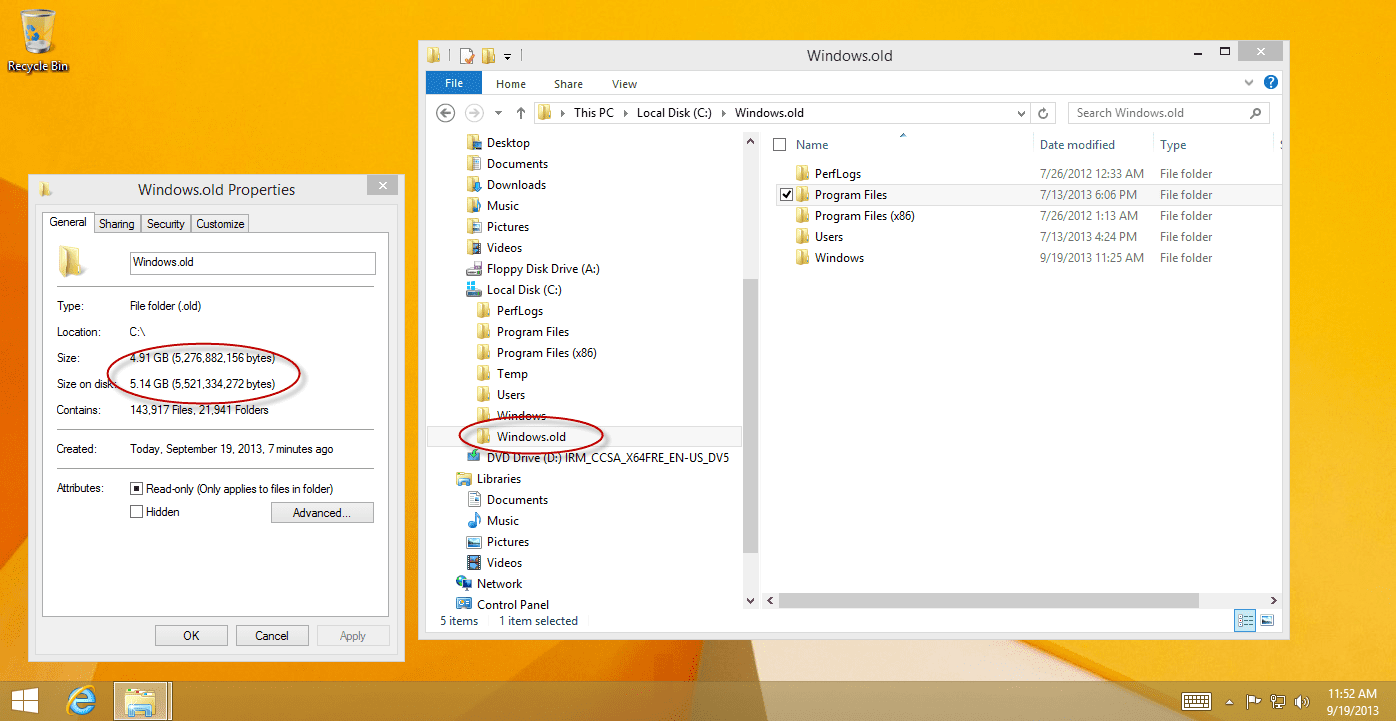
This is most likely the cleanest option, as it deletes everything, including all of your apps, and replaces your current version of Windows with Windows 8.1. However, files and data will not be deleted, and instead they are moved to a new folder called C:\windows.old.
At this point the process begins and runs on full autopilot from the moment you press the button. You can now go and have lunch.
A few reboots and about 20 to 40 minutes later, depending on your computer’s hardware, the upgrade process will complete.
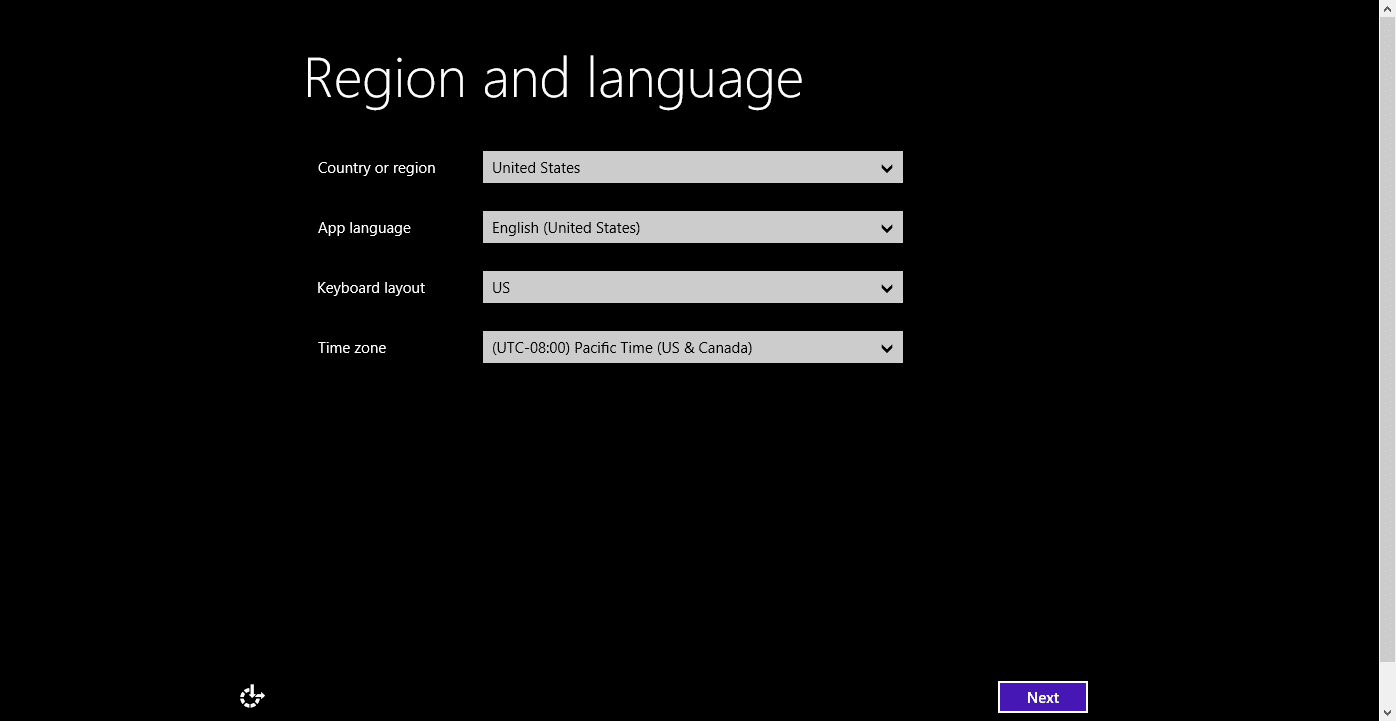
- The next thing you will see is the Region and language window where you can make changes to meet your preferences. Click Next.
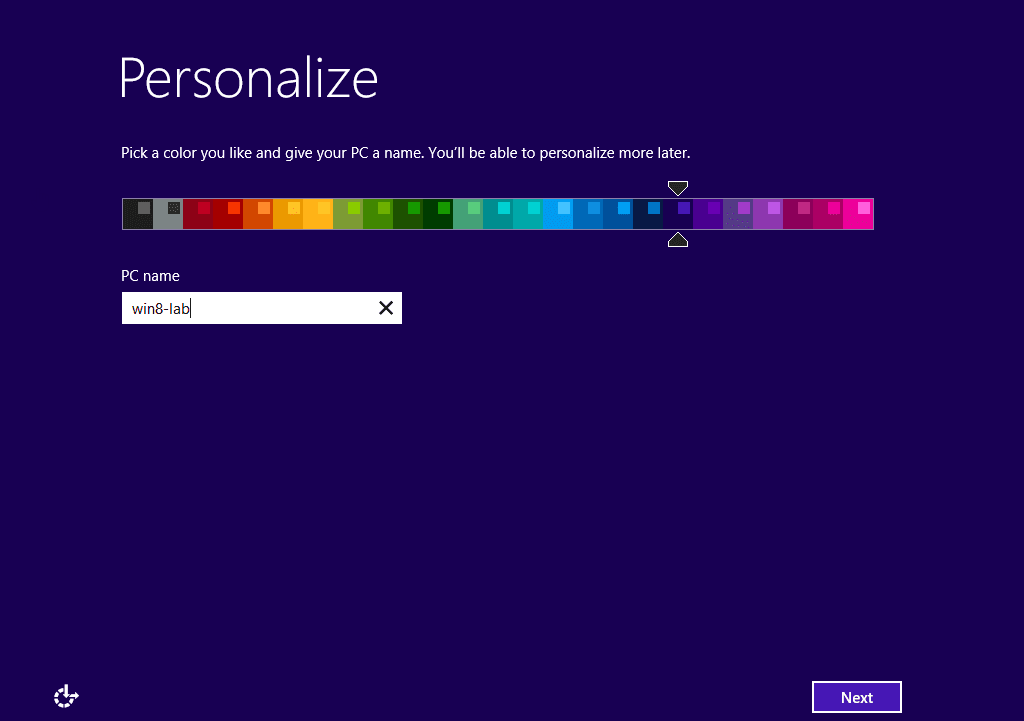
Next you can personalize the color of the display, and – this is very important – set a computer name for the PC. While this can be changed in the future, for now you are actually asked to personalize this, which in my opinion is a good thing.
Note: Since I chose to keep nothing, my old computer name was also removed. If you choose to keep your settings you will not be prompted to set the computer name.
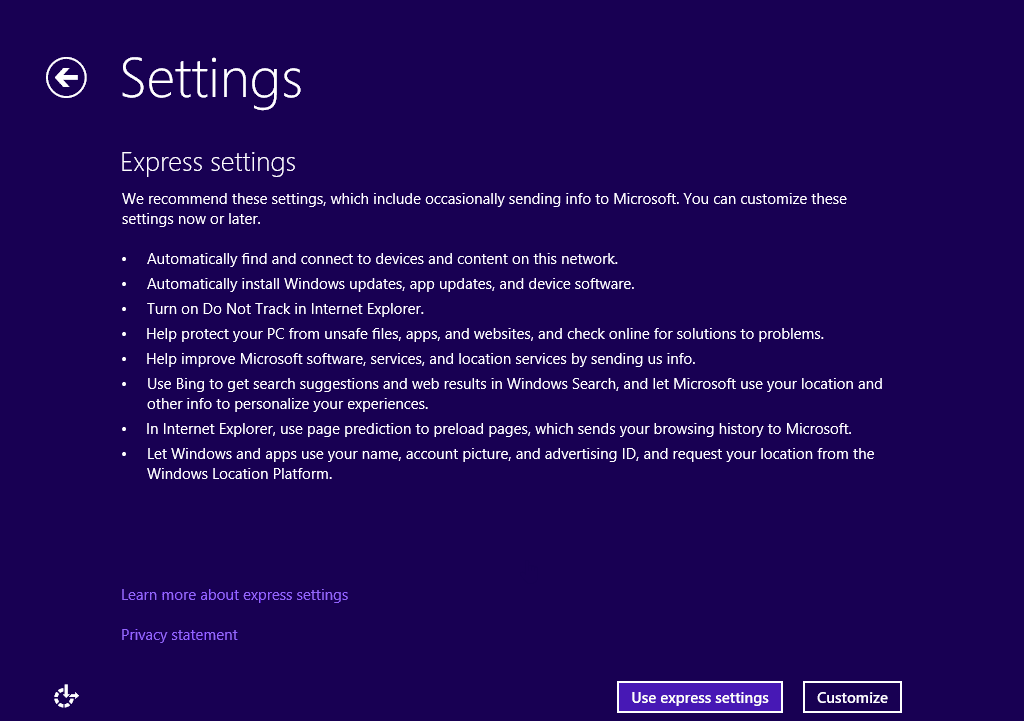
- Next, select the Windows settings. You can choose between the usual Express settings and customizing them the way you want to. I chose Express.
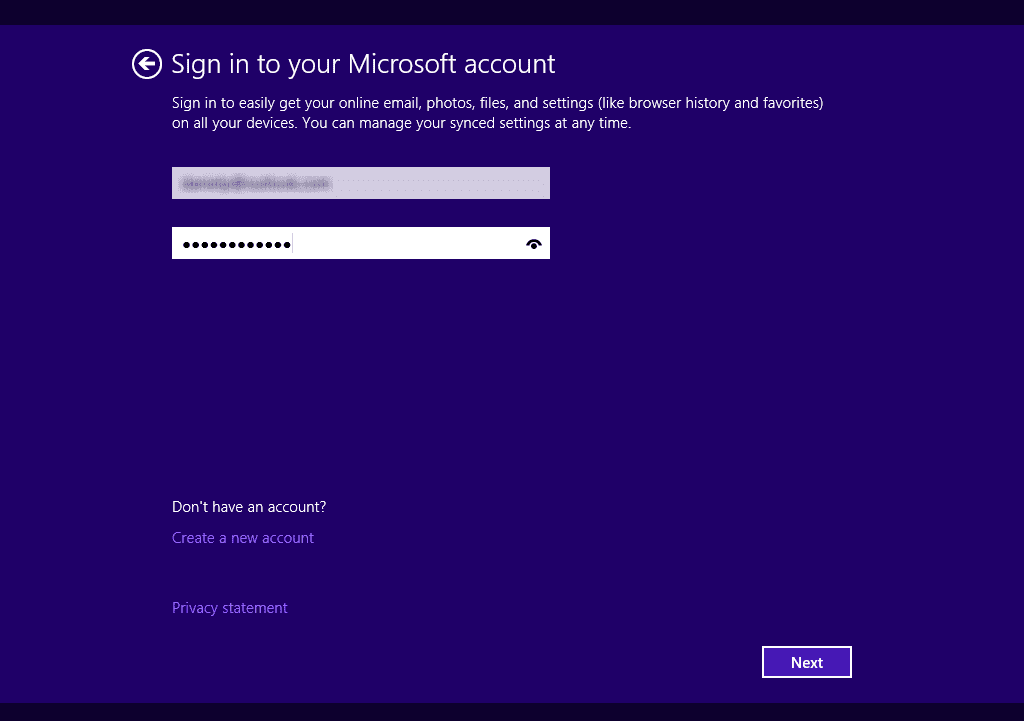
Now we get to the nasty bit: Configuring the Microsoft account for use with windows 8.1. Unlike Windows 8 and 7 before it, in Windows 8.1 you cannot proceed with the installation (or upgrade in this case) without being connected to the Internet. While in today’s world this seems like a logical move from Microsoft, we still need to remember that there are many unconnected environments out there: labs, virtual machines, isolated networks, secure installations, and so on.
In this upgrade demo I was forced to enter my Microsoft account, but in a later demo I conducted where I chose to keep my settings, I was able to bypass this requirement by pressing “I am not <username>.” After doing so, computer signed off and I was taken to the logon screen where I re-logged on with my pre-Windows 8.1 user account, which was NOT a Microsoft account.
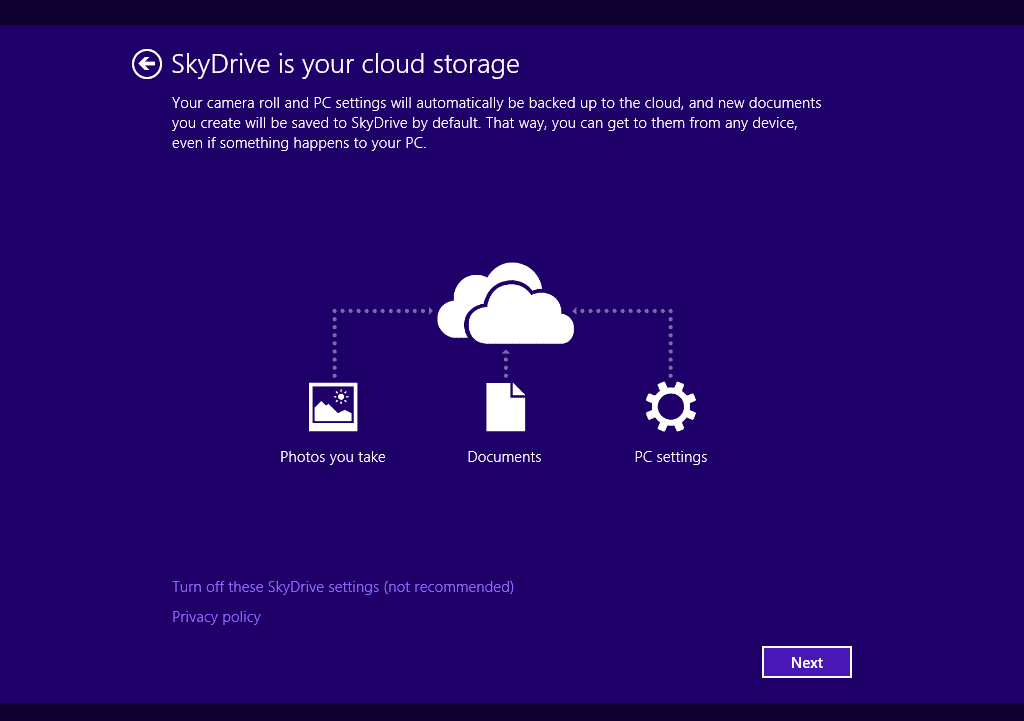
- Next, you can choose to disable the SkyDrive integration. In Windows 8.1, SkyDrive is the default storage location for many documents such as Office documents, but you can disable it, or manually select a different saving path on the local computer.
A few more moments pass, displaying all sorts of encouraging messages… 🙂
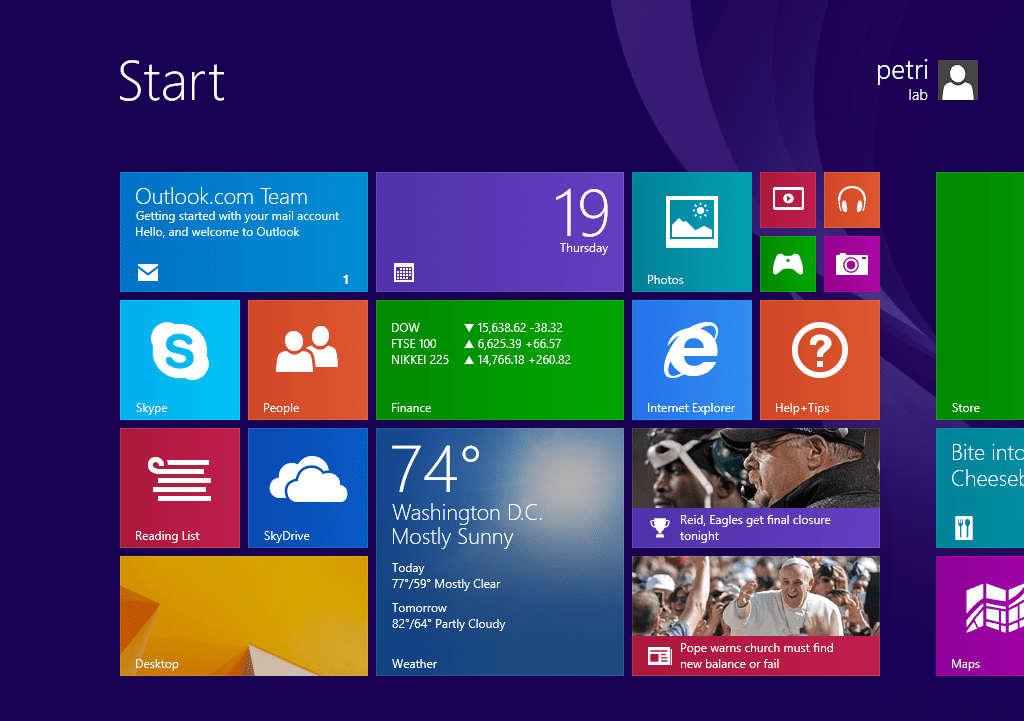
When all is done, you will be presented with the Windows 8.1 Start window.
Note: If you chose to keep your Metro-style apps, it may take some time for all the apps to upgrade themselves to their latest versions. During this time you will not be able to use them.
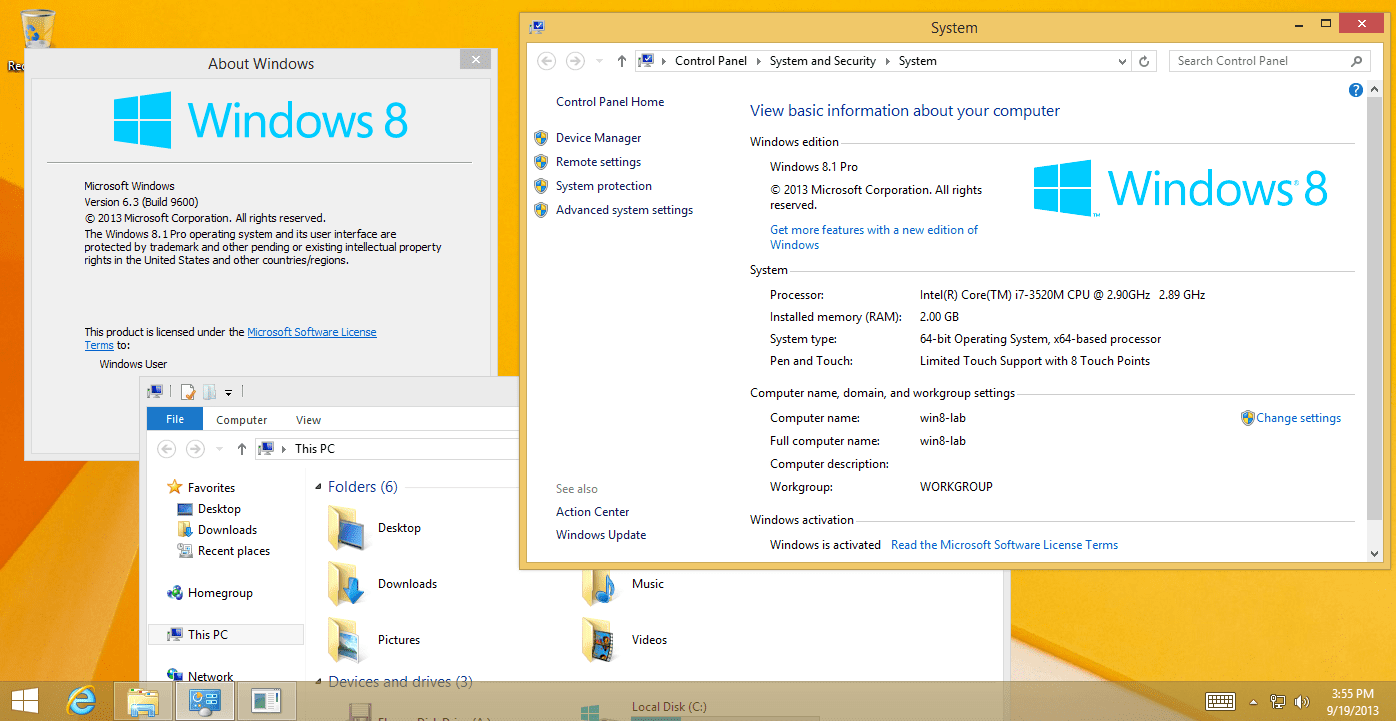
This is the final result! Windows 8.1 is up and running.
- Because I chose to not keep any of my old apps and files, they were all moved to a new folder called C:\windows.old.
- When you are sure you no longer need these files, simply delete the C:\windows.old folder.


