Use System Configuration Tool to Solve Problems
Overview
Any IT Pro can tell you that solving problems is as much as art as it is a science. I don’t think you can ever have enough tools in your admin toolkit. Here’s one that ships with Windows that you may not know about but one which I think can be very useful. This tool has been around for awhile on both client and server platforms. For the sake of this article I’m going to demonstrate using it on Windows 7, but everything should equally apply to your servers.
System Configuration
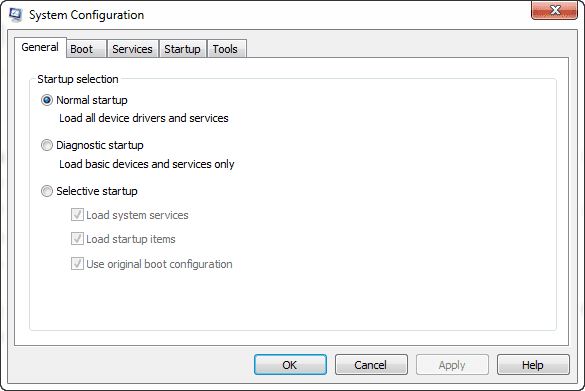
Under Administrative Tools you should find a link to System Configuration. Or, click on the Start orb and search for “system configuration”. You should see something like this when you start it.
Figure 1 System Configuration
One of the first ways to use this is to troubleshoot with a minimal configuration. Select Diagnostic startup and click OK. You’ll be prompted to restart immediately or later. This is not the same thing as a safe boot, although I’ll show you in a moment how to add that option. If you reboot, you may not notice much difference. To return to your standard configuration, run the tool again and select Normal startup. Or take additional steps.
For example, when you select Selective startup you can decide to load other items such as system services or startup items. This is very helpful when trying to narrow down the culprit to a problem.
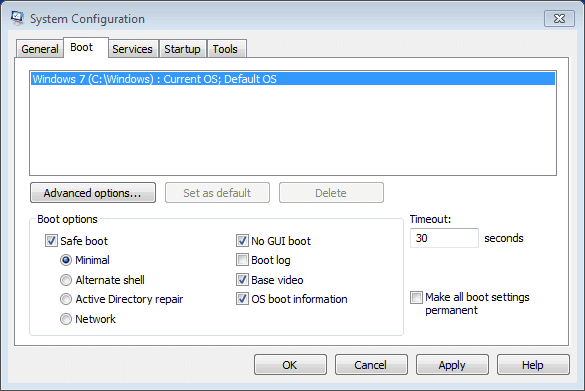
Next, click on the Boot tab. Depending on your boot configuration you might not see anything. If you do, then you can customize your boot options. For example, Figure 2 shows me configuring a minimal safe boot with a few other options. If you select Alternate shell, you’ll get a CMD session and no GUI.
Figure 2 Boot Configuration
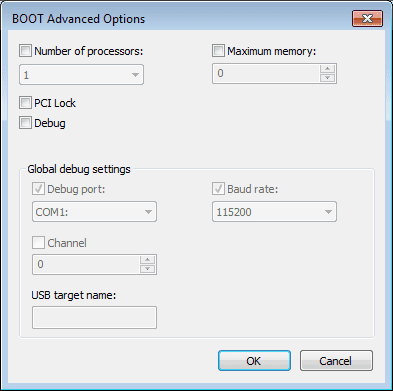
For even more granular control, click on Advanced options and limit the number of processors or RAM.
Figure 3 Boot Advanced Options
After rebooting and troubleshooting, launch System Configuration again to either further tweak or set it back to a normal boot.
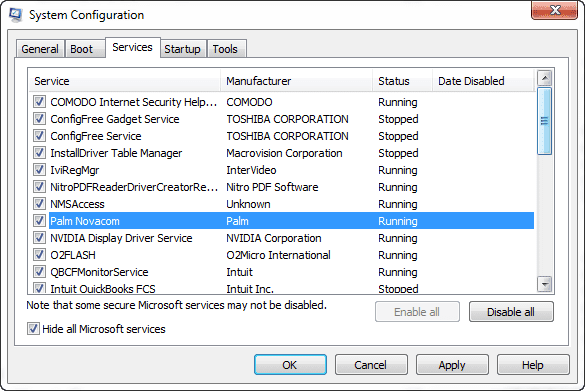
If you suspect a service conflict or problem, click on the Services tab.
Figure 4 Services
This is very similar to the Services management console. However, you can control whether a service will be enabled or not. Checked means it is enabled. I especially like that you can hide Microsoft services. And don’t worry, any service that the operating system needs to boot will still start regardless of what you do here. You could achieve the same results using the Services console, but it’s handy having it here.
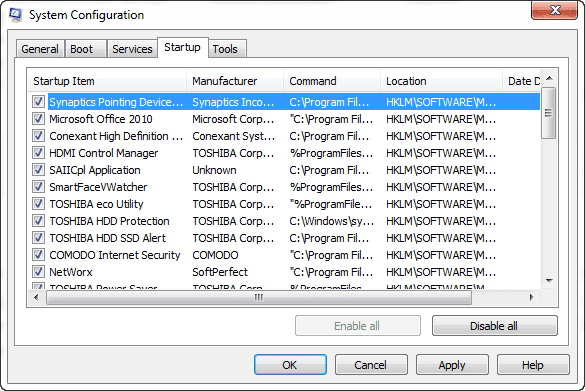
Likewise, the Startup tab shows items pulled from the registry and start menu.
Figure 5 Startup
You could spend time finding these items and fiddling with them. Personally, it is much easier to check and uncheck items you want to enable or disable. As before, after rebooting into your new configuration, don’t forget to launch System Configuration and set things back. If nothing else, this is a handy tool to identify what applications are running at startup.
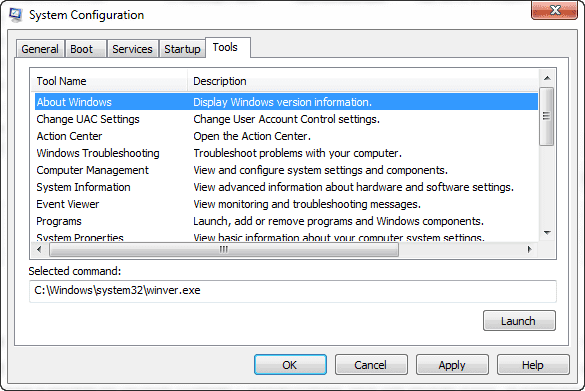
Lastly, the Tools tab puts a number of other utilities and programs right at your fingertips.
Figure 6 Tools
Some of these tools aren’t necessarily the easiest to get to in the first place. Select the tool you want and then click launch. I wish we could edit the command line text, although some commands might have an Advanced Options check box.
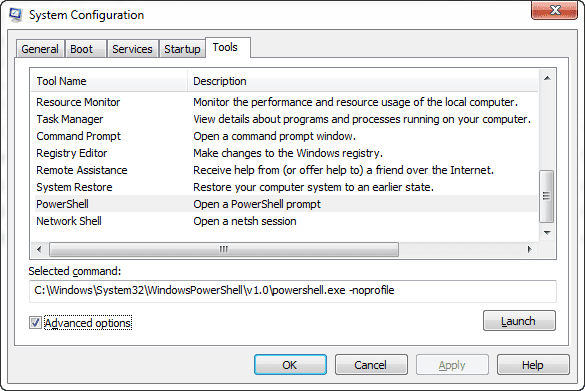
You can’t edit the default programs, but you can add your own! In the same directory as msconfig.exe, which should be the System32 directory, create a text file called mscfgtlc.xml. In this text file you will need xml like this:
<MSCONFIGTOOLS>
<a NAME="PowerShell" PATH="%windir%\System32\WindowsPowerShell\v1.0\powershell.exe" DEFAULT_OPT="" ADV_OPT="-noprofile"
HELP="Open a PowerShell prompt"/>
<b NAME="Network Shell" PATH="%windir%\System32\netsh.exe" DEFAULT_OPT="" ADV_OPT=""
HELP="Open a netsh session"/>
</MSCONFIGTOOLS>
Don’t forget XML tags are case sensitive. Each element starts with a letter. I have items “a” and “b”. The Name is the text that will be displayed as the tool name. Path should be self-explanatory. You can specify a default command or advanced options. I’m adding a PowerShell session with an advanced option to run it with the –NoProfile parameter. I’m also adding the NETSH.EXE to my tool set. Save the file and restart System Configuration. On the Tools tab, you should find your entries at the bottom.
Figure 7 Adding New Tools
You can download my xml file from here. With a little work, you can build a one-stop management and troubleshooting too.
Conclusion
So there you have it! The Windows System Configuration is a simple but effective way troubleshoot and fix issues. Sometimes the best tools are the simplest.


