The hottest thing being talked about in VMware circles these days is VMware virtual SAN, or vSAN. This is the converged storage solution that uses local disks in servers to create a shared storage layer across your hosts. In this post I will walk you through the process of creating a vSAN cluster or enabling on an existing vSphere cluster.
Virtual SAN (vSAN) Requirements
There are a few minimum requirements that need to be met before configuring a vSAN cluster. The following details must be taken into consideration, while the ones in bold are a firm requirement.
- Each host must have one SSD and one spinning disk to create a vSAN cluster.
- A minimum of three hosts must meet the above disk requirements to create a cluster.
- A disk controller that is on vSAN compatibility list, to be officially supported. But this can be built with nearly any controller.
- 1/10GbE network connections. While dedicated 1GbE connections in smaller clusters should work, VMware is recommending at minimum shared 10GbE connections.
- vSphere 5.5 and vCenter 5.5
Install and Configure vSAN
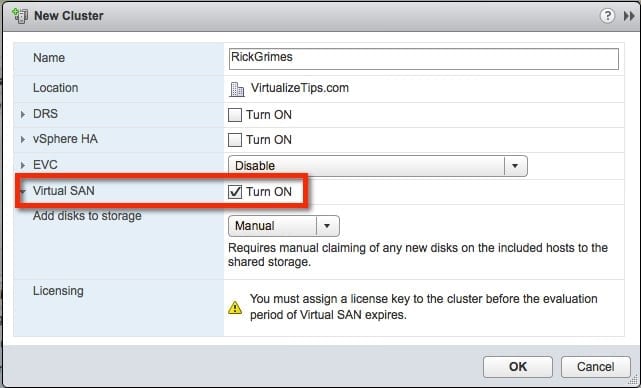
Whether you are creating a new cluster or going to enable vSAN on an existing cluster you will need to look at the cluster settings. The example below shows a field that was not there in previous versions of vSphere.
- You simply need to check the box to Turn on Virtual SAN. The other choice is what method you want for adding disks to the vSAN storage. Do you want to manually add them or let vCenter automatically claim them? I prefer to leave it set to manual at this time. This allows me to control which disks are used for vSAN and which ones might be used for other projects.
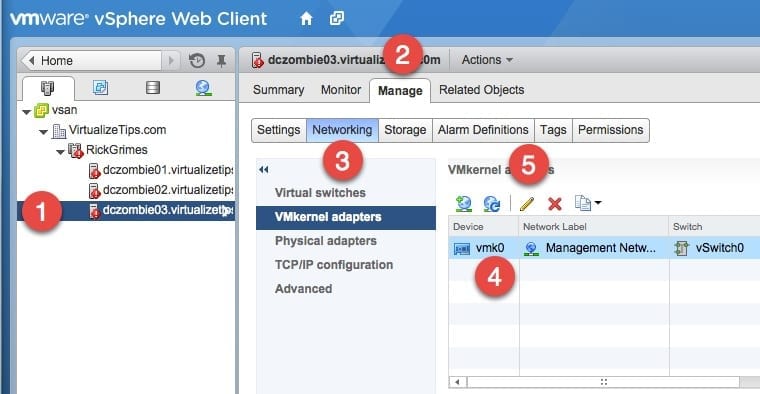
The next step is to configure vSAN communication on the VMkernel adapters on each of the hosts in your vSAN cluster. The image below shows the steps:
- First, select the host that will be updated, then choose the Manage tab and then Networking.
- Select the VMkernel adapter to be updated. In my example, there is just one. After selecting the adapter, click the Pencil button to edit the settings.
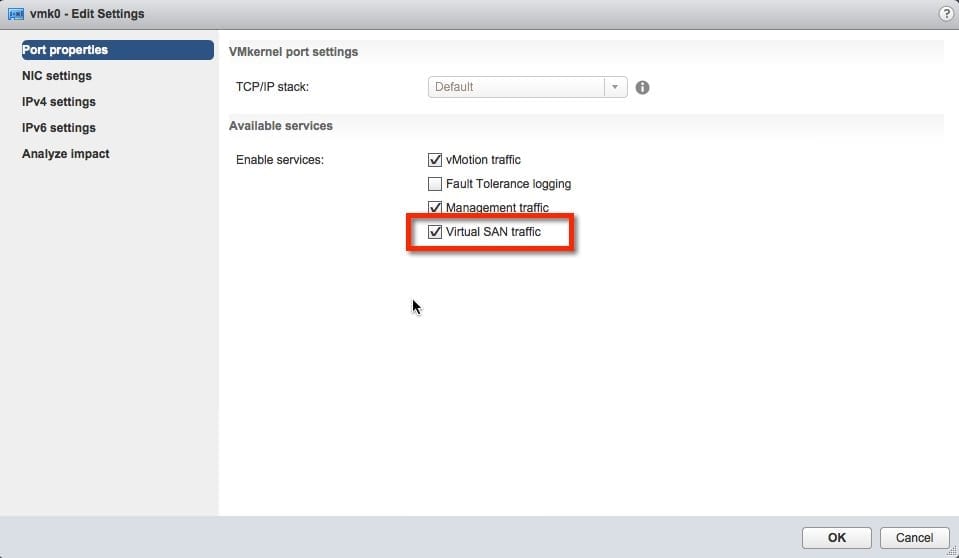
- We now must enable vSAN traffic. As shown in the image below, simply check the box for Virtual SAN traffic. Once you have completed this step on each of the ESXi hosts in your cluster, move to the next step.
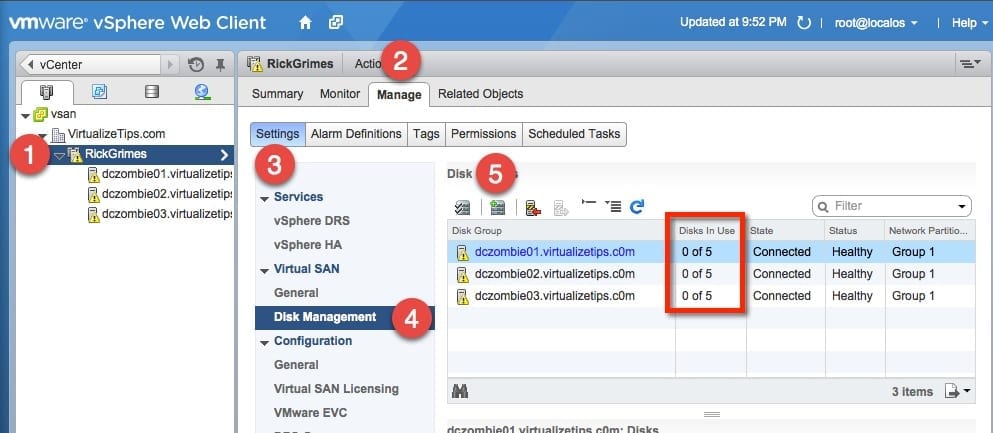
- Its now time to claim the disks and create disk groups on each of the hosts in the cluster. To do this select the cluster that vSAN will be configured on shown as the first step. Then choose the Manage tab, choose Settings and then Disk Management.
- You will now see the hosts in the cluster (I have highlighted the disks in the Data in Use column). This shows that each host has five disks to contribute to the vSAN cluster, of which zero are being used right now. The last step is the Claim the disks.
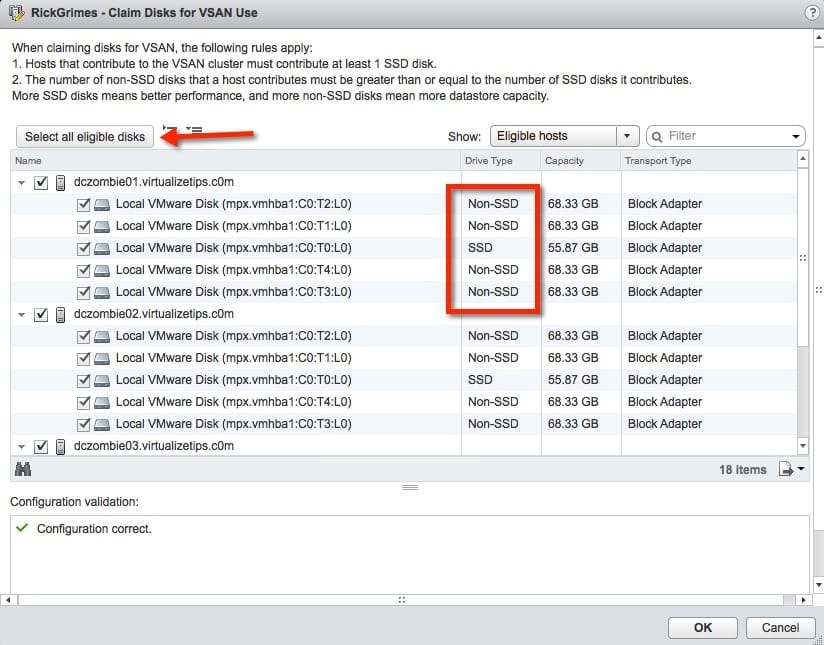
To claim the disks, a window will open and show the hosts that are part of the cluster that have disks available for vSAN. The first item to confirm: Do you see all the disks that you expect for each host? For my lab setup, each of the three hosts should have a single SSD and four regular disks. I have highlighted this on one of the hosts.
- Once I have confirmed that each of my hosts has all the disks available to be claimed, I will click the Select all eligible disks button. If it passes the validation for configuration, it will show in the lower part of the window. Click OK.
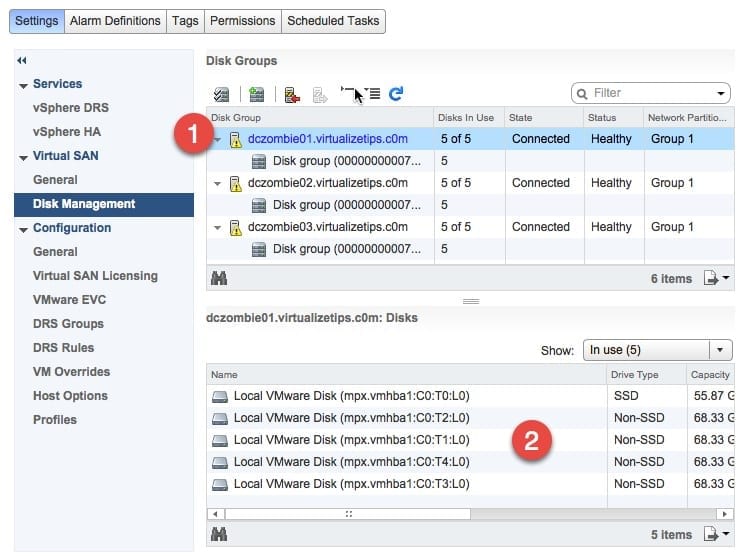
- This brings us back to the Disk Management area. We should now see each of our hosts with a Disk Group for each one. Select one of the hosts and in the lower window it will show the disks that are in the disk group.
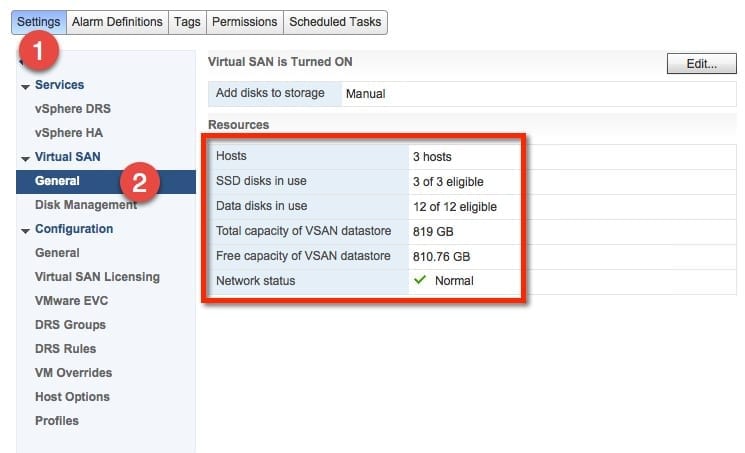
- The base vSAN configuration is complete. We can now click on Settings and then General under the Virtual SAN heading. This will show the resources that are part of the vSAN cluster. For this example, it shows the three hosts and how many/what type of disks. This is a good summary of our build.
The storage is now ready for use. In a separate post I will be covering the setup of specific storage profiles that can be used to adjust the vSAN. These storage profiles can be used to adjust performance and protection rules on a per-VM basis.


