Self-Service Password Resets for OWA users in Microsoft Exchange 2013
This is the second of a two part series on the password change feature in Exchange 2013 Outlook Web App (OWA). The first part of the series, Controlling the Change Password Feature in Exchange 2013 Outlook Web App (OWA), can be found here. The first article outlined how to use the change password feature and how to control access to this feature from within your OWA environment.
The first article was written with the assumption that a mailbox user who successfully logged into their OWA environment wanted to change their password from within that session.
This second article outlines what needs to be configured server-side on Exchange 2013 to allow mailbox users to reset their own expired passwords.
The configuration to allow users to change their expired passwords involves:
- Setting the appropriate registry key on your Exchange 2013 CAS Servers
- Configuring settings within IIS on your Exchange 2013 CAS Servers
- Configuring correct password policy on AD domain level
The following example moves through these three steps in more detail. Imagine a default non-admin mailbox user whose password setting has been configured to “Change password at next logon”. This is the default setting for newly-created users in most organizations. The setting is also valid when a user’s password has expired.
1. Set appropriate registry key on the Exchange 2013 CAS Servers
This registry key is not terribly different from Exchange 2010.
1) Open your Registry Editor (regedit.exe)
2) Browse to the following key:
HKey_Local_MachineSystemCurrentControlSetServicesMS Exchange OWA
3) There should be a REG_DWORD Value String of “ChangeExpiredPasswordEnabled”, and that key has a value of “1”. You can change this key manually. If the key should be active but has a value of zero (0), make sure you set it to “1”.
2. Configure settings in IIS on your Exchange 2013 CAS Servers
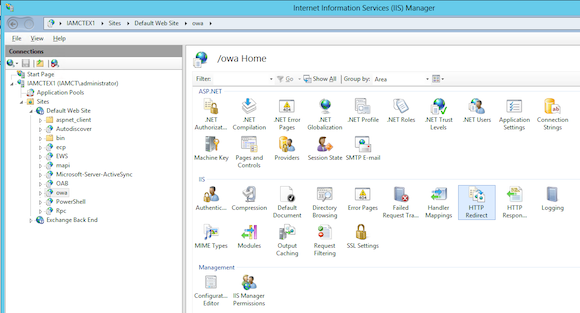
1) On your Exchange 2013 CAS Server(s), open the IIS Admin Console.
2) Browse to Server / Sites / Default Web Site / OWA.
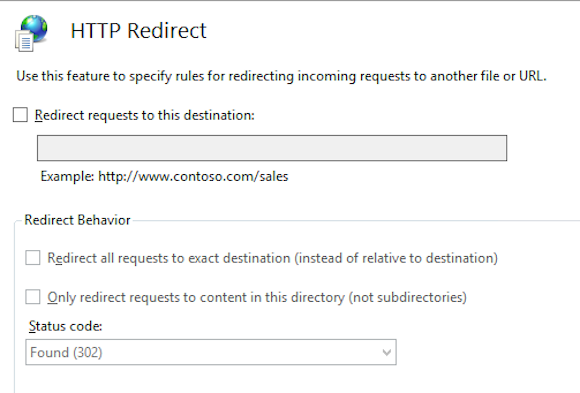
3) Select “HTTP Redirect” and open its properties.
4) Make sure the HTTP redirect checkbox is not checked.
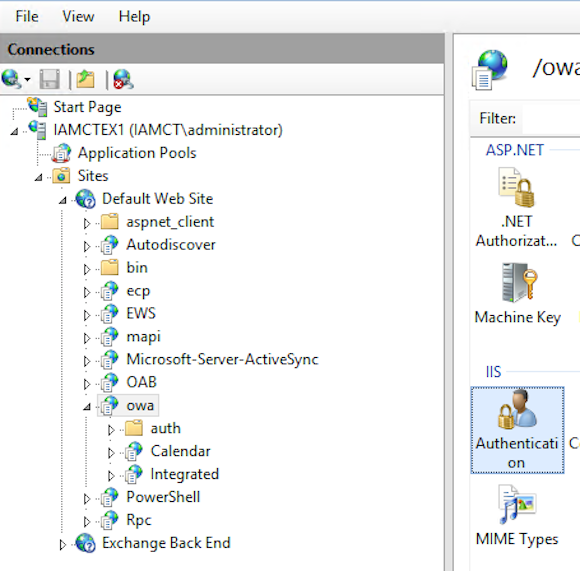
5) Browse to Server / Sites / Default Web Site / OWA.
6) Select “Authentication” and then select Basic Authentication.
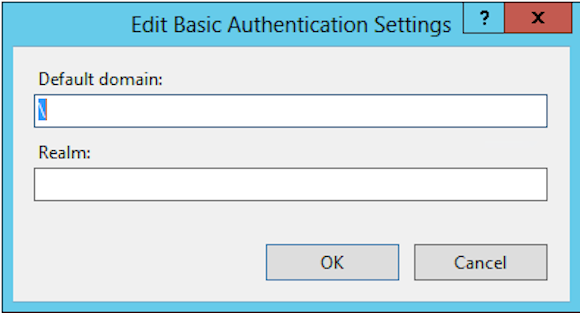
7) Right-click Edit.
8) In the Default Domain field text field, enter a backslash – ““.
9) Save your settings and close the IIS Admin Console.
10) From a command prompt with Admin rights, run “IISReset /noforce” to reset the IIS services. In some scenarios the IISReset will fail, in which case you can try to manually restart the “Worldwide Web Publishing Service”. If you can’t manually restart, execute a reboot of the server as last resort.
3. Configure correct password policy settings at Active Directory domain level
Please note: The following settings are valid in a lab environment and updated to demonstrate the specific scenario where we want OWA to prompt a user to reset his or her password upon logon. In the lab environment this was accomplished by setting “change password at next logon.” In your environment it could be based on password expiration policy. In the lab we set it to a “zero day policy” that forces users to reset their password immediately.
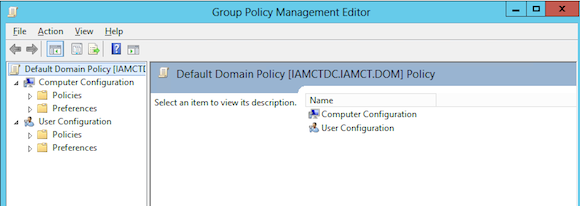
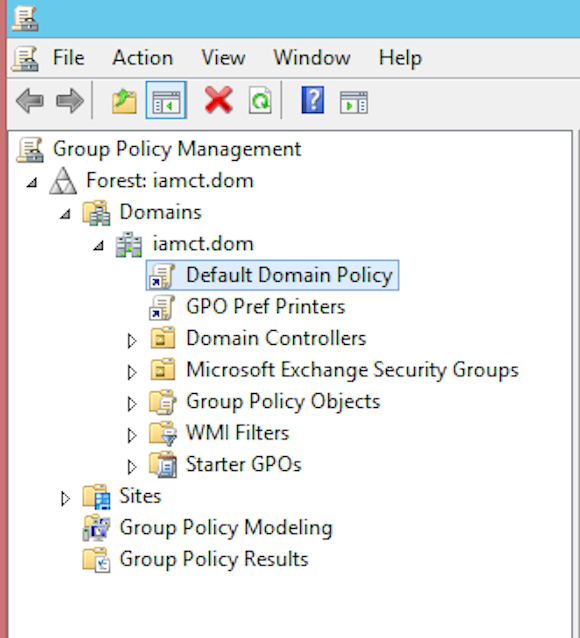
1) From a Domain Controller in your domain (or from an admin workstation with the RSAT tools installed), open the Group Policy Management Editor.
2) Browse to Default domain policy. Right-click and select Edit. (Note: depending on your environment, it could be a best practice to create a specific GPO for the password policy settings)
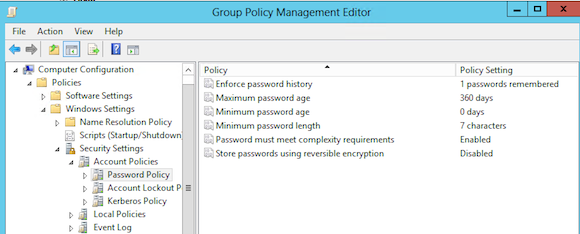
3) Next, browse to Computer Configuration / Policies / Windows Settings / Security Settings / Account Policies / Password Policy.
4) Change the Minimum Password Age to “0”. This setting refers to the number of days a user must have used his password before it can be reset. In the lab environment we set this to zero to make it effective immediately. In your environment this policy setting could be different.
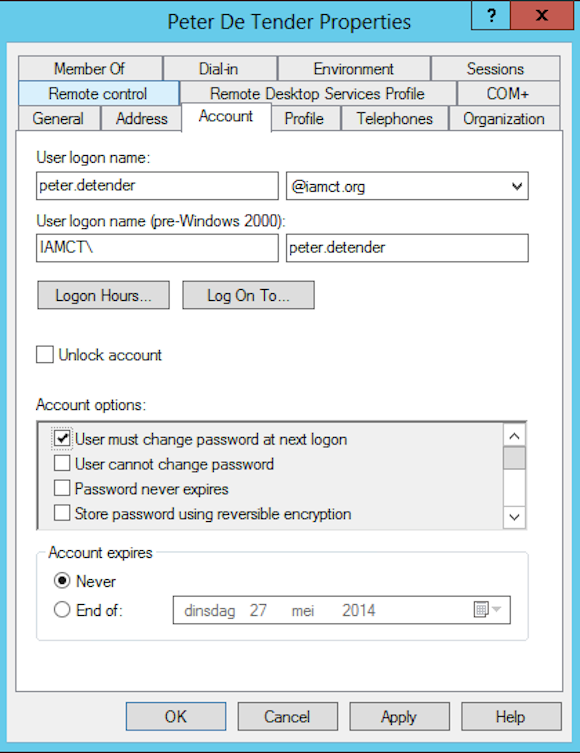
5) Lastly, we will force our demo mailbox user to have his or her password changed. This is done via the Active Directory Users & Computers / user account / properties / User must change password at next logon path.
Please note: Make sure that both the “user cannot change password” and “Password never expires” settings are disabled. Otherwise the change password feature in OWA won’t work.
Final Step: Test the change password feature from within the OWA logon page
1) Open up our OWA logon page by going to https//<servername>/OWA
2) Enter your AD mailbox user credentials.
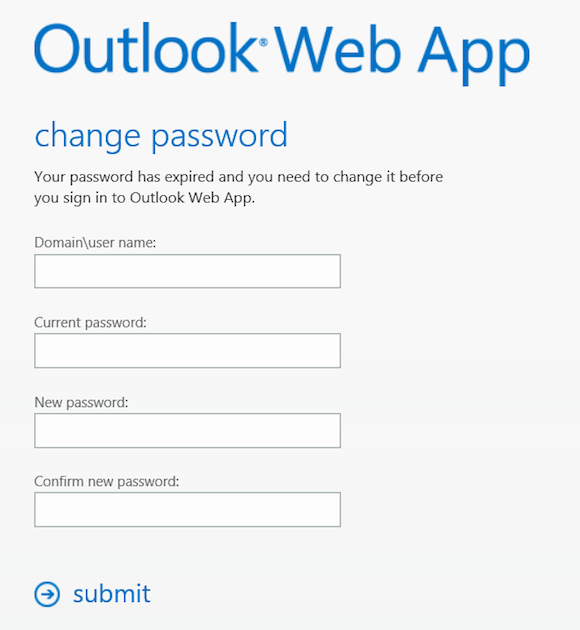
3) You will receive a notification that your password has expired and will be prompted to enter your old/new password.
4) After successfully entering your new credentials, you will be informed you have to re-authenticate using the new credentials. After that, your mailbox user should have logged on to his or her OWA environment successfully.
This concludes our two part series covering how to enable and control the change password feature in Exchange 2013 Outlook Web App. Please feel free to drop the author a note if you like the article or if you have any questions or concerns. Feel free to follow Peter De Tender on Twitter @pdtit.


