Recover Data from a Dead PC with USMT: Installation
Data is what makes a PC so important. We can all agree on that, right? Unfortunately, there are almost countless reasons a PC could become unusable, cutting off a user from the data they’ve spent innumerable hours creating. Motherboard failure, corrupt operating system… it really doesn’t matter. Either way, there will be a stressed-out user begging an IT pro to save their critical information.
Of course, there are many tools to help save user files and settings from a catastrophic PC failure, but many of these tools require significant time and effort. It need not be so! Among Microsoft’s free IT tools is a gem: the User State Migration Tool (USMT).
In this two-part series I’ll show you how to use the User State Migration Tool to preserve all the user settings and files from a hard drive removed from a failed PC. In this first installment I’ll walk you through installing the USMT, hooking up the old PC hard drive to our recovery computer, and building custom XML files so the USMT will know exactly what custom user folders and files to recover. In part two, we’ll work on USMT deployment and migration: bring everything together, run the tools, and get the user up and running on a new PC with their data intact.
Installing the User State Migration Tool
First, here’s a tip: Having an external USB to SATA or USB to IDE adapter greatly simplifies the process of hooking up the old hard drive to your technician computer. It’s not critical, but I highly recommend purchasing one of these $20 to $30 tools if you don’t already have one.
Let’s get going by downloading the Windows Assessment and Deployment Kit (ADK) for Windows 8 install tool. Don’t worry if you’re not running Windows 8 quite yet — you don’t need it for what we’re about to do. The USMT version included in the ADK is version 5.0 and supports pulling the data from XP SP3 and higher machines. While you can pull data from XP SP3 PCs, you’ll only be able to put that data on a Vista version or higher PC. Also keep in mind that you can recover files from a 32-bit OS and restore them to a 64-bit OS, but you cannot do the reverse. Since we’re going over the fine print, I should also mention that you cannot use the USMT to recover user data from a server-based OS.
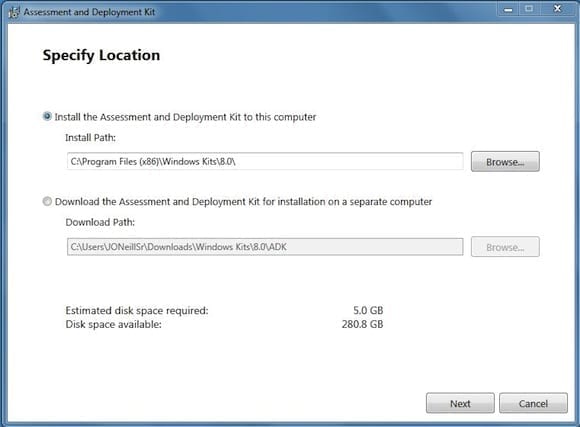
When you run the ADK installation, the first prompt is whether to install locally or download for installation on a different computer. Select Install the Assessment and Deployment Kit to this computer. Leave the location as the default, and click Next.
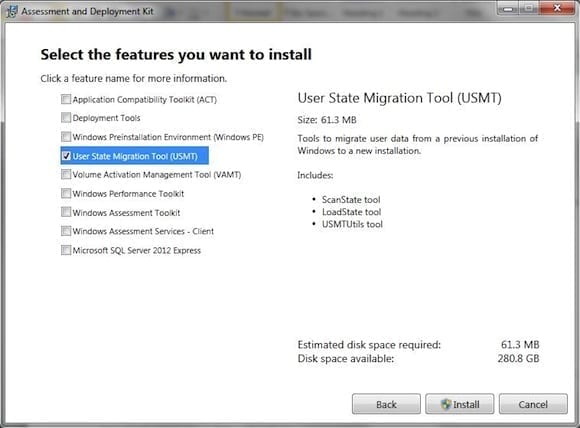
Choose whether or not to join the Customer Experience Improvement Program, then click Next. Click Accept to agree to the licensing terms. After all that you can choose what tools to download and install.
Check the box next to “User State Migration Tool (USMT).” Be sure NO other boxes are checked. Click Install.
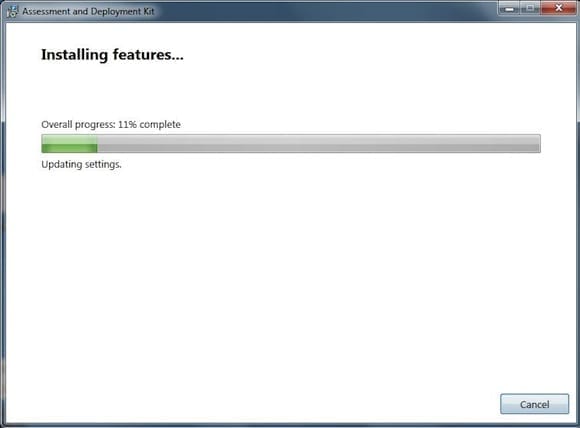
If prompted by UAC, click Yes to allow the installation. The USMT will download and install. Feel free to hum the tune to Jeopardy as you watch the progress bar tick up.
When the ADK install is finished you’ll be welcomed into the fold.
Tip: If you’d prefer not to have big, long file paths in your USMT command line, copy the entire contents of C:\Program Files (x86)\Windows Kits\8.0\Assessment and Deployment Kit\User State Migration Tool\amd64\ to an easier to remember folder path such as C:\USMT\. Do this after installing the ADK, but before you do anything else. Do that now to make the remainder of this walkthrough easier to follow.
Building a Custom XML File
Now the real fun begins. Take the hard drive out of the old dead system. Connect it to your computer using a USB hard drive adapter. Of course, you can also install the hard drive inside the PC, but who wants to go through all that trouble?
Once the drive is connected, open Windows Explorer, find the drive letter of the newly connected drive, and write it down, as you’ll need it in just a bit.
Find the username. If the old system was Windows 7, to find the username for the account on the old PC, just look in the \Users\ folder. The username should be there as a subfolder. For instance, if the old hard drive shows up in Explorer as G: then G:\Users\Michelle is the folder for user Michelle.
Identify any non-standard folders and files you want to take to the new computer. Don’t worry about the My Documents, My Pictures, My Music, and other user folders, as they will be included by default. Focus on folders the user created such as G:\MYFolder or G:\Program Files\SomeAppDataFolder.
Make an include.xml file using the following text. In fact, feel free to copy and paste the text below into Notepad on your PC to keep things fast and easy. Modify the lines to point to the folders identified in the previous step. Eliminate or add lines as necessary so that each of your unique data folders is listed.
<migration urlid=”http://www.microsoft.com/migration/1.0/migxmlext/includefolder”>
<component type=”Documents” context=”System”>
<displayName>Folder Inclusion</displayName>
<role role=”Data”>
<rules>
<include>
<objectSet>
<pattern type=”File”>G:\SomeDataFolder\* [*]</pattern>
<pattern type=”File”>G:\AnotherDataFolder\* [*]</pattern>
</objectSet>
</include>
</rules>
</role>
</component>
</migration>
Save this file as Include.xml in the C:\USMT\ folder on your PC.
Let’s step back and discuss a few more preparation items that can streamline the recovery process. Building an ExcludeDrive.xml file can speed up the process by telling the USMT to not even bother looking at certain drive letters. This isn’t required, but I find it to be a good practice anytime I use the USMT. Feel free to copy the sample ExcludeDrive.xml file below into notepad, modify the lines beginning “<pattern type=” to contain the drive letters to skip on your PC, and save the file to the same location the Include.xml file was saved to.
<migration urlid=”http://www.microsoft.com/migration/1.0/migxmlext/excludedrive”>
<component type=”Documents” context=”System”>
<displayName>Drive Exclusion</displayName>
<role role=”Data”>
<rules>
<unconditionalExclude>
<objectSet>
<pattern type=”File”>D:\*[*]</pattern>
<pattern type=”File”>E:\*[*]</pattern>
<pattern type=”File”>F:\*[*]</pattern>
<pattern type=”File”>Z:\*[*]</pattern>
</objectSet>
</unconditionalExclude>
</rules>
</role>
</component>
</migration>
Tip: Include.xml and ExcludeDrive.xml can be named anything you like. They are custom .xml files as far as the USMT is concerned. Be sure that whatever you name them you use that filename on the command line for the USMT tools.
The USMT includes a couple .xml files that define which components from the old PC are migrated and where to put them on the new PC. MigApp.xml sets up migrating application settings to the new PC while MigUser.xml takes care of migrating user folders, files, and file types. You can modify MigUser.xml if needed, but the included version does a great job in most scenarios. By using the custom Include.xml file, we can get all the user’s custom folders and avoid having to remember exactly what modifications we made to the default files. It’s definitely easier to keep things straight this way.
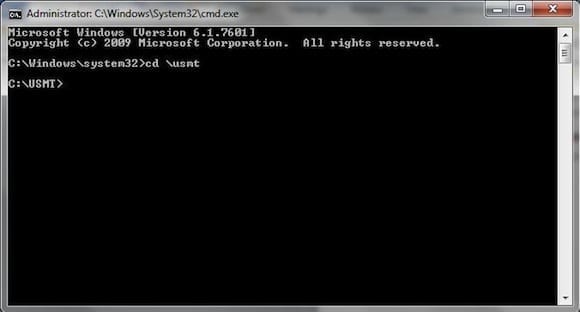
The USMT tool that will collect the data from the old drive is ScanState.exe. It’s a command line tool (even in the Windows 8 era they DO exist) so open an elevated command prompt and switch to the C:\USMT folder.
Now on to figure out the ScanState.exe command line needed. It’s important to remember that the USMT was moved into the C:\USMT\ folder to simplify having to type the big default path over and over. The basic syntax of the ScanState command line is:
scanstate {path to create migration store} /offlineWinDir:{drive letter of hard drive from old PC} /l:C:\USMT\scanstate.log /progress:C:\USMT\scanprogress.log /i:MigApp.xml /i:MigUser.xml /i:C:\USMT\ExcludeDrive.xml /i:C:\USMT\Include.xml /o /v:5
Here’s a tip: When a 64-bit PC is used to run ScanState, the command will be run from the C:\USMT\amd64 subfolder. Otherwise, on a 32-bit system run the command from the C:\USMT\x86 subfolder.
Interested in everything going on with this command line? That’s a great question and one I promise to answer in the next article in this series.


