Lately it seems that iOS devices are almost as ubiquitous as good old PCs. I’d even bet that between all the iPhones, iPads, and iPad Minis, that some people believe these little devices really have killed the PC. Shying away from this debate, I’ll make a slightly less charged statement: No matter how you look at it, some tasks are just easier to do on a PC instead of an iPhone or iPad. Case in point: printing. That is… it used to be a case in point.
Printing Sans AirPrint: the xPrintServer Solution
Sure, iOS has AirPrint. This built-in technology has been around since iOS 4.2, and it has been improving ever since. When the conditions are right, printing from an iOS device through AirPrint couldn’t be simpler. Unfortunately, even with growing printer support, it’s more likely than not conditions won’t be right for AirPrint. First off, sure there are a ton of new AirPrint compatible printers on the market. That’s nice, but what organization or even home user wants to run out and buy a new printer when they have a perfectly good printer (or oodles of them) sitting on his or her desk? What’s the answer?
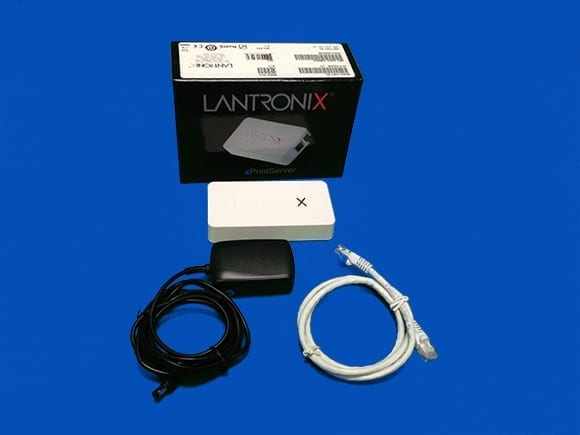
An extremely elegant, simple, and reliable answer to the problem of printing from iOS devices to non-AirPrint printers comes from the brilliant team over at Lantronix: the xPrintServer. This small device, roughly the shape of an iPhone 5 but about three times the thickness, plugs into your network, discovers your older network printers, and turns them into AirPrint printers automatically. I’m not exaggerating — it’s literally that straightforward.
- First, unbox the Lantronix xPrintServer, plug the network cord into the device and switch port, and plug the included power adapter into the device and an outlet.
- Wait one to two minutes while the xPrintServer searches the local subnet for printers. This is key: In order for auto-discovery to work, the printer must be on the same subnet as the xPrintServer. If it isn’t, you’ll just need to add the printer manually, which I’ll describe below.
- Once the xPrintServer has discovered a printer and is ready to print, the “X” on the top of the unit will begin to pulse orange.
- Grab the iOS device, open an email, photo, or document, and tap the action button. Then tap Print.
Print Problem: Can’t Detect a Server
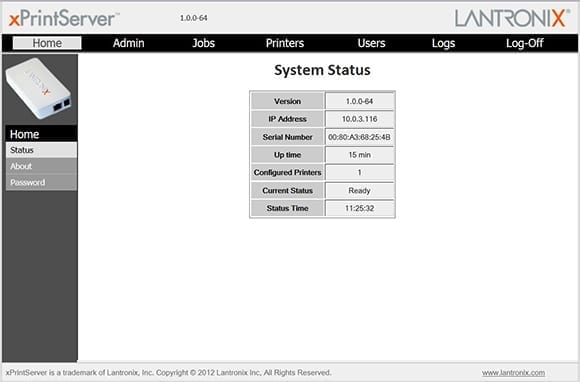
The xPrintServer is amazingly robust. With an onboard supported printer list in the thousands you really can just plug it in and expect it to work. Everything has exceptions so what options are there if the xPrintServer doesn’t detect a printer? This happens frequently if the printer is on one subnet and the xPrintServer another. In my case I have an HP Color LaserJet 2600N with an IP of 10.0.1.180, but my xPrintServer has an IP of 10.0.3.116. Never fear!
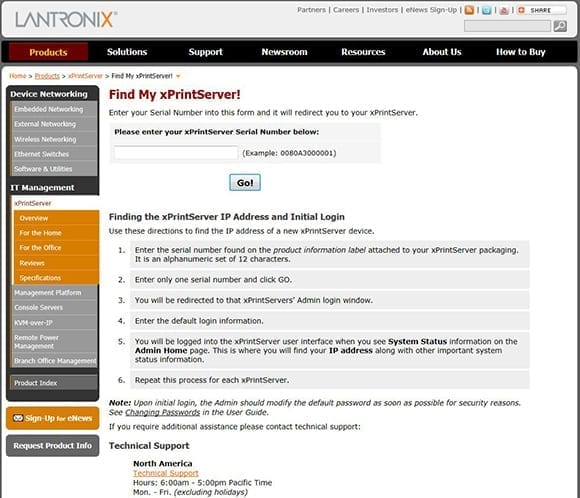
If you do not know the IP address of the xPrintServer navigate to Lantronix’s page to find your xPrintServer and enter the serial number from the outside of the xPrintServer box. The handy little utility will discover the xPrintServer’s IP and either redirect automatically or display the IP.
If the web browser didn’t redirect, entering http://{xPrintServer IP} will take you to the xPrintServer’s admin page. You’ll be prompted to login, at which point enter the case-sensitive credentials of admin for the username and PASS for the password. The xPrintServer’s home page is displayed.
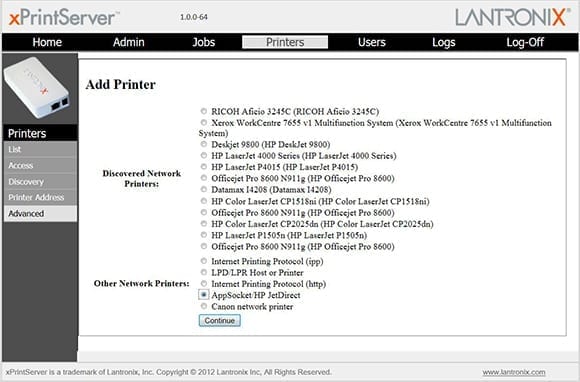
Click Printers along the top toolbar. A new page opens with a list of options on the left side of the screen. Click the Advanced option in the list, then click Manually Add Printer. Since I’m adding an HP printer, I’ll select the App Socket/HP JetDirect radio button. Now click Continue.
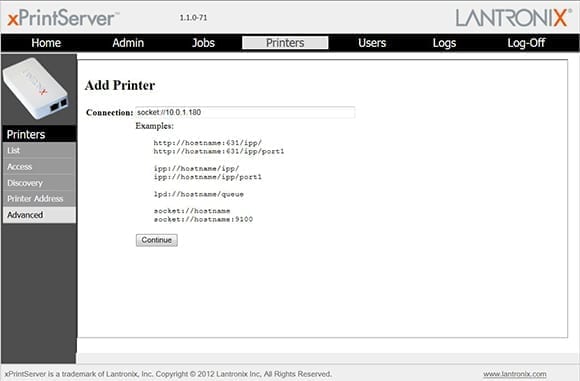
An Add Printer Connection page will be displayed, as shown below. Since App Socket/HP JetDirect was selected, the textbox will be prepopulated with socket. Change this to socket://{IP Address of Printer}. The HP Color LaserJet 2600n I’m configuring has an IP address of 10.0.1.180, so I’ll enter socket://10.0.1.180 and then click Continue.
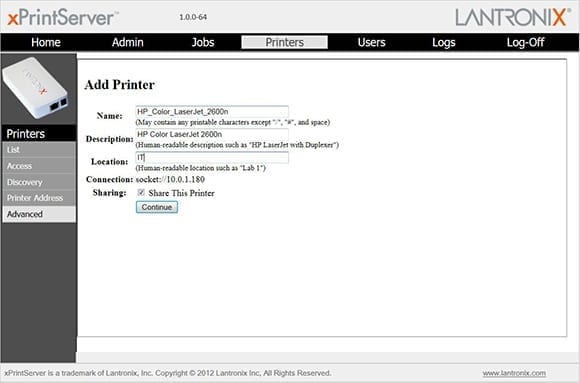
Enter a name the xPrintServer can use for this printer. No spaces are allowed in this name, but it doesn’t really matter since this is only used internally. This name is not displayed on any iOS devices.
Enter a description and location. Feel free to use spaces here, but make sure you enter something easy to understand. This information will be displayed on the iOS devices, so be clear what printer is being selected. Leave the Share This Printer checkbox checked and click Continue.
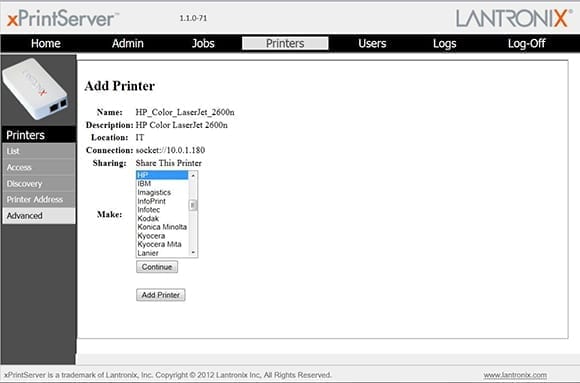
Scroll through the displayed list until the printer make appears. Click it once to highlight, and then click the Continue button.
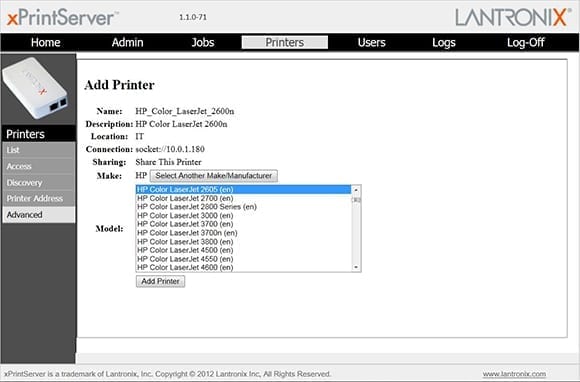
Now find and select the printer model. Click Add Printer.
Depending on the printer model selected, different default options will be displayed. Change any desired options, or, if the defaults are good enough, just go ahead and click Set Default Options. The xPrintServer will confirm that everything is good to go.
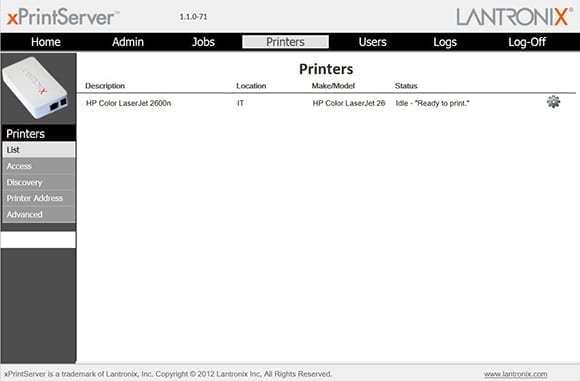
Click Printers in the top toolbar and the printer just added should be listed clear as day.
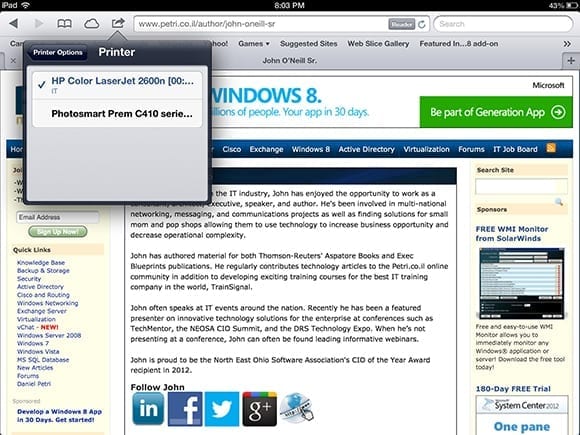
What would a good how-to article be without a test to make sure everything works as intended? So grab an iPad or other iOS device, open Safari, and choose a web page. Then select Action, select Print, then select Printer, and SUCCESS! The HP Color LaserJet 2600n is there ready and waiting for my iPad’s print job!
Printing doesn’t have to be one of those things that are just easier to do on a PC than an iPad. Consider that with technologies such as AirPrint and the xPrintServer in play, the reality maybe exactly the reverse. In any case, if you have printers and iOS devices, check out the xPrintServer from Lantronix. You won’t regret it.


