This post will help you go through a simple but elementary checklist of all the actions that you need to perform prior to installing the Hyper-V role on your Windows Server 2008 R2 machine.
These are the settings and changes that need to be made prior to installing the Hyper-V role on your machine:
- Make the necessary BIOS changes.
- Install Windows Updates
- Change the default Host Name.
- Configure the host’s product key and activate it.
- Change the IP to static addresses.
- Enabled RDP support.
- Join the host to a domain.
- Configure Remote Management.
- Enable remote disk management.
When you’re done, continue to my Installing Hyper-V on Windows Server 2008 R2 article.
1. BIOS changes
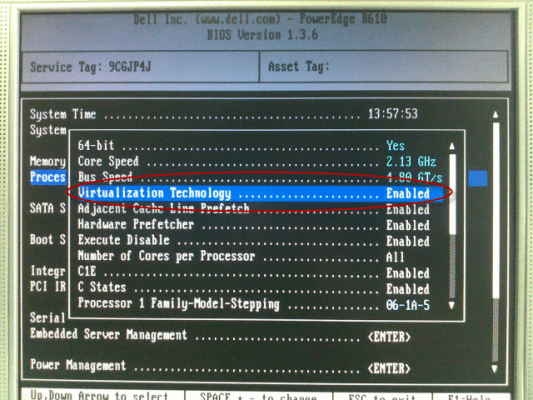
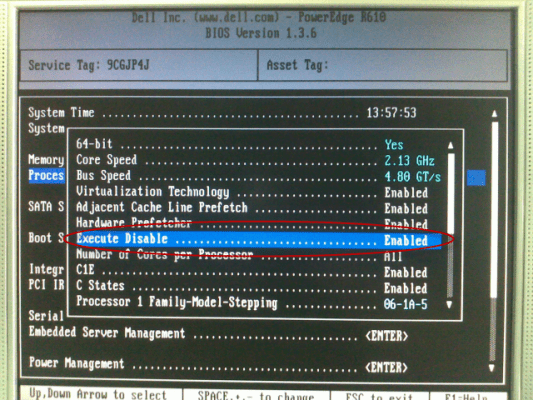
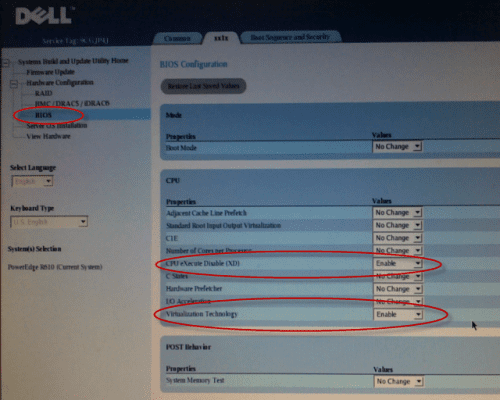
You must enter the BIOS setup of the server and make sure that “Virtualization Technology” and “Execute Disable” are both set to Enabled. In most cases, the required BIOS settings can be found in these BIOS sections (actual names may differ, based upon your server’s BIOS settings):
- Security > Execute Disable (set to On)
- Performance > Virtualization (set to On)
- Performance > VT for Direct I/O Access (set to On)
- Performance > Trusted Execution (set to Off)
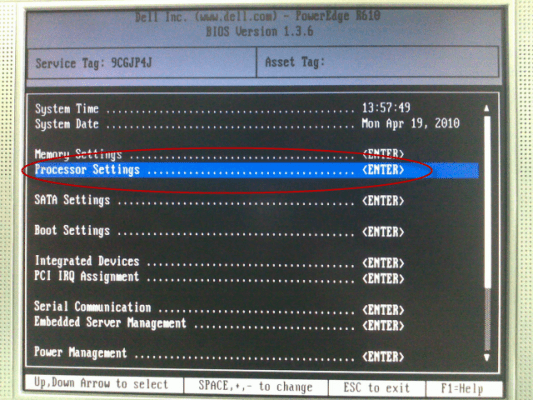
Here are some screenshots of the BIOS settings on a Dell R610 server:
Directly in the server’s BIOS:
Enable Virtualization Technology:
Enable the Execute Disable option:
Or through the Dell setup guide:
Request from my readers: Can you send me pictures of the same BIOS settings on other brands of servers?
With your assistance we will build a bigger image gallery. Please use the Feedback form, or e-mail me directly at “daniel” at “this domain name”. Make sure you send the screenshots in PNG/JPEG format.
2. Install Windows Updates
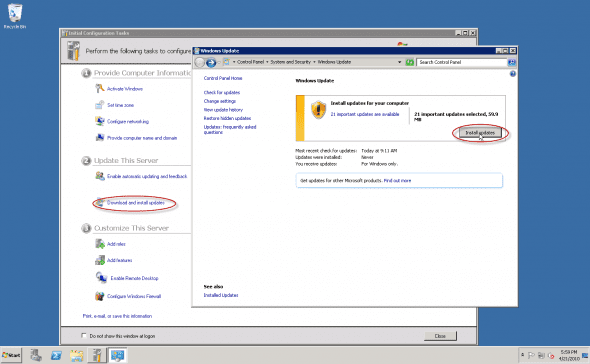
By default, a Windows Server 2008/R2 machine will receive IP address and other settings automatically from a DHCP (if there is one).With these settings, in most cases, it will be possible for you to access the Internet. If that is correct, one of your first tasks would need to be installing all critical Windows Updates. Read my Updating your Hyper-V Hosts article for more info.
This can be done through several methods including the UI and the command line, but in this article I’ll describe the most common method – through the UI.
Use one of the following methods:
Open Server Manager – Click “Configure Updates”.
In Initial Configuration Tasks – Click “Download and install updates”.
On the Start menu – type “Update”, then click “Windows Update”.
You will need to reboot the server once the updates were installed.
3. Host name
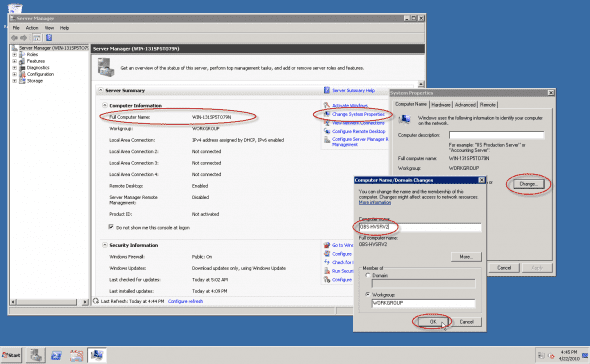
By default, a Windows Server 2008/R2 machine will receive an automatically-generated host name. In most cases, we will want to change this host name to something more meaningful to us.
It is possible to change the host name through several methods including the UI and the command line (the NETDOM command), but in this article I’ll describe the most common method – through the UI.
Use one of the following methods:
Open Server Manager – Click “Change System Properties”.
In Initial Configuration Tasks – Click “Provide computer name and domain”.
On the Computer icon – right-click and select “Properties”, then click “Change Settings”.
Enter a descriptive computer name (try to limit it to 15 characters if possible) and click “Ok”.
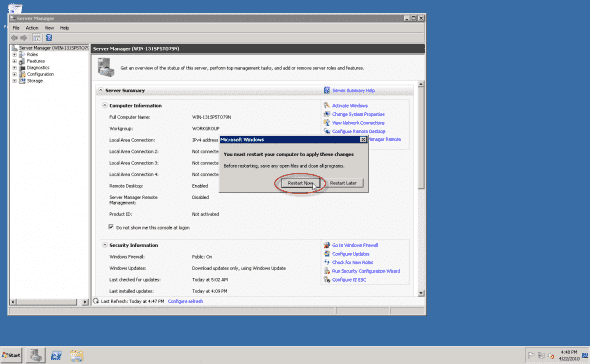
You will need to reboot the machine in order to continue.
4. Product key and activation
Not required if server will be used for a short-period testing, however, in a production environment, you must activate the server.
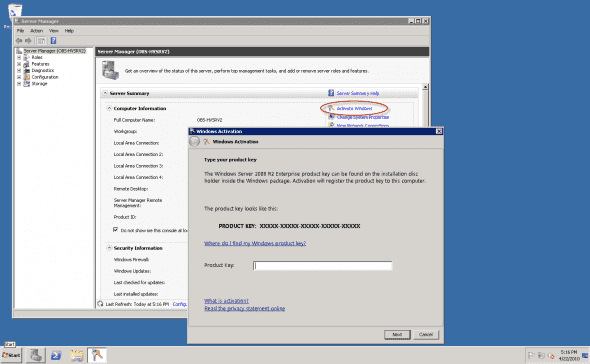
Unlike older OSs, Windows Server 2008 R2 does not ask you for the product key during the setup. You need to provide it after the setup has completed.
To enter the product ID you can use the UI or the command line (using SLMGR.VBS command, which is useful for Server Core and remote installations). I will use the UI in this example.
Use one of the following methods:
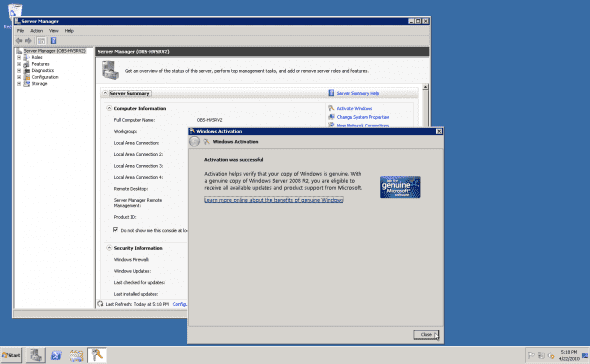
Open Server Manager – Click “Activate Windows”.
In Initial Configuration Tasks – Click “Activate Windows”.
On the Computer icon – right-click and select “Properties”, then click “Activate Windows”.
Enter the correct product key and click on “Next”.
5. Static TCP/IP settings
By default, a Windows Server 2008/R2 machine will receive IP address and other settings automatically. To add the server to a domain and to access it remotely you need to properly configure an IP address, Subnet Mask, Default Gateway and DNS Server IP. These can be configured through DHCP, but since this is a server, you’d probably want to manually configure them.
To do so, you can use the UI or the command line (the NETSH command). I will use the UI in this example.
Use one of the following methods:
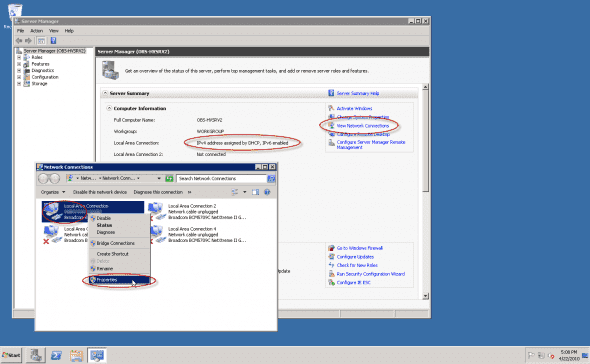
Open Server Manager – Click “View Network Connections”.
In Initial Configuration Tasks – Click “Configure Networking”.
On the tray area – right-click the network icon and select “Open Network and Sharing Center”, then click “Change adapter settings”.
On the Start menu, type “ncpa.cpl” and press “Enter”.
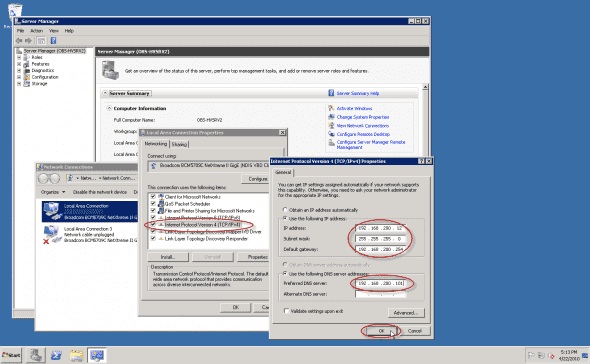
In the Network Connections window, right-click the network adapter(s) that’s connected to the network and select “Properties”.
Click to select “Internet Protocol Version 4 (TCP/IPv4)” and click on “Properties”.
Type in the assigned IP address, Subnet Mask, Default Gateway, and DNS settings.
Note that you will need to make sure you properly configure the host’s DNS settings in order to add it to a domain.
6. Enabled RDP support
Once the server has an IP address it’s most likely you’ll want to continue the configuration work remotely. To do so, we need to enable Remote Desktop.
Use one of the following methods:
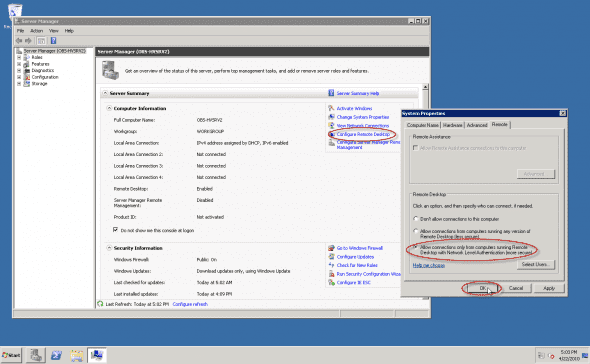
Open Server Manager – Click “Configure Remote Desktop”.
In Initial Configuration Tasks – Click “Enable Remote Desktop”.
On the Computer icon – right-click and select “Properties”, then click “Remote Settings”.
7. Join the host to a domain
Hyper-V hosts are best managed if they’re a member of a domain. Domain membership is also required for other tasks that you might want to perform in the future (such as SCVMM 2008 R2 installation and others).
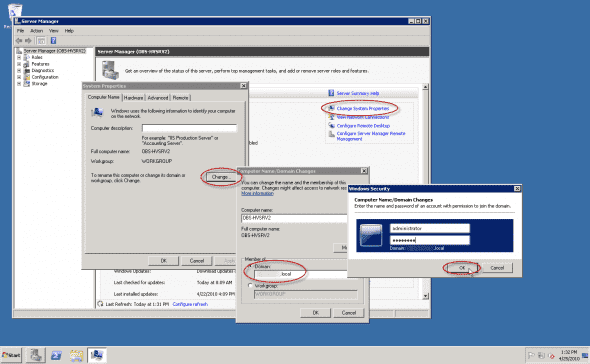
Like name changing, it is possible to add the host to a domain through several methods including the UI and the command line (the NETDOM command), but in this article I’ll describe the most common method – through the UI.
Use one of the following methods:
Open Server Manager – Click “Change System Properties”.
In Initial Configuration Tasks – Click “Provide computer name and domain”.
On the Computer icon – right-click and select “Properties”, then click “Change Settings”.
Enter the domain name and click “Ok”.
You will be asked to type your user name and password for the domain.
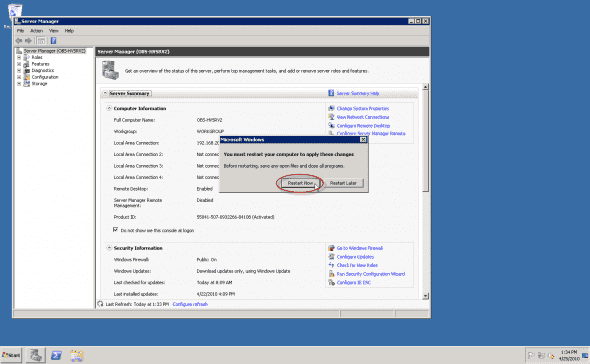
Once you are successfully joined to the domain, you will be prompted to restart your computer. You must restart your computer before the changes take effect.
8. Configure Remote Management
Remote Desktop is ok, but sometimes you do not need a full desktop to make a change or two, and you can use Server Manager or any other type of remote-connection MMC-snap-in (Note that in Windows Server 2008 R2, Server Manager can finally be used remotely).
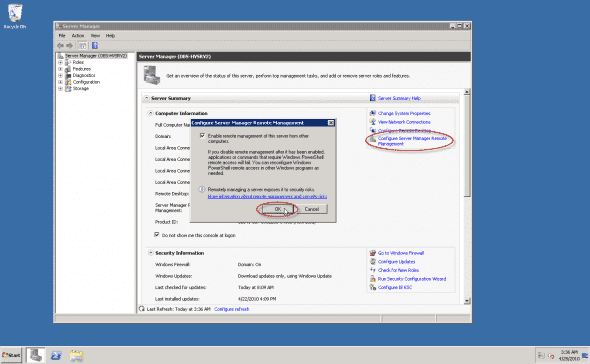
To do so, open Server Manager – Click “Configure Server Manager Remote Management”.
To let this computer to be managed remotely by using Server Manager, select “Enable remote management of this server from other computers”. Click “Ok”.
9. Enable remote disks management
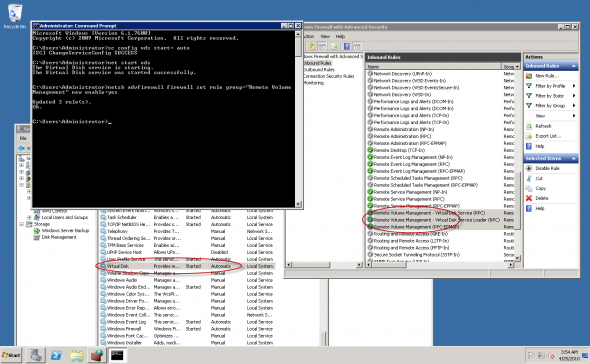
This should be done in order to allow you to remotely connect to the host’s disk subsystem and manage it. In order to connect to the disk subsystem remotely you need to set the Virtual Disk Service (VDS) to Automatic, and start it. Then you need to enable the remote-volume-management firewall exception.
To do so, follow these steps:
Open a Command Prompt window and type the following command:
sc config vds start= auto
Next, type:
net start vds
Next, type the following command to enable the remote-volume-management firewall exceptions:
netsh advfirewall firewall set rule group=”Remote Volume Management” new enable=yes
Very important note: Although this may not seem logical, you MUST also enable the same firewall exceptions on the machine you’re connecting FROM!!! Otherwise, you’ll get a “RPC Service Unavailable” message when you attempt to connect to the server’s disk subsystem remotely.
Additional tasks
Additional tasks may include:
Adding and configuring iSCSI targets, joining the host to a failover cluster, installing various agents and more. These will be covered in an upcoming article. Stay tuned.
When you’re done, continue to my Installing Hyper-V on Windows Server 2008 R2 article.


