Manually moving VMs between Hyper-V hosts means that you need to perform a manual (or scripted) export of each VM you wish to migrate, copy the files to the target Hyper-V host, and then import the VM on that host. This process takes time because it requires you to wait until the exporting process is done before you can copy the VHD and other VM files to the target host. Once copied, you need to manually import the VM, which doesn’t take as much time as the export operation, but still requires time. In addition, the migrated VM will experience a prolonged downtime, due to the fact that it must be shut down on the original host, exported in the shut down state, copied across the network to the target host, then imported and booted.
Note that this article only deals with Hyper-V R2, and not with the RTM version of Hyper-V. Therefore, there may be changes in functionality, and if you’re using the RTM version (isn’t it time to upgrade already?), you may find that some of the options listed here are not available to you.
Considerations before performing the migration
When you want to manually move a virtual machine from one Hyper-V host to another, you must use the “Export” option on the source VM, and then the “Import Virtual Machine” option on the target machine. The are basically 2 things you should do to make this import process go smoothly:
- Make sure the same Virtual Network is defined on the import host. This means it will connect the imported VM to the correct network on the target host. Without doing this, you will receive an error when attempting to import the VM (although this can be ignored, and then fixed by manually setting the network on the VMs’ Settings page).
- Make sure you use processors from the same manufacturer on the source and target hosts. If the CPUs are from the same manufacturer but not from the same type, you may need to use Processor Compatibility. More about this in a future article.
In addition, remember that the export-copy-import procedure will take time. Sometimes, this will take a lot of time, depending on the size of VM and the type of underlying network connection. During all this time, the VM will be turned off and inaccessible to clients.
Exporting the VM
The Import and Export functions are accessible through the Hyper-V Manager. The virtual machine export process itself is actually really simple to perform.
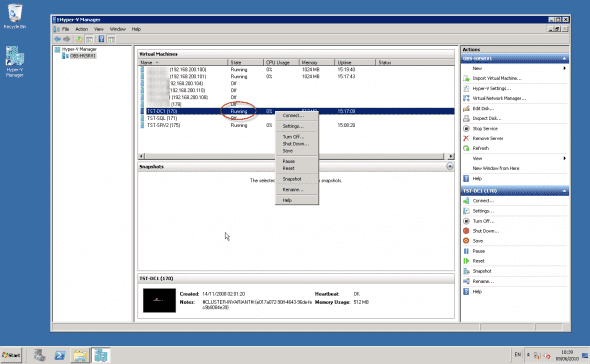
First, make sure the VM is shut down, or save its state. You cannot export a VM unless it’s shut down or in a saved state.
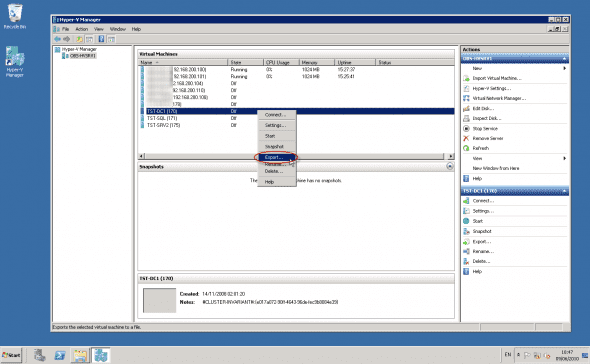
Once the VM is shut down or in a saved state, the “Export” option (or link) will be available.
Simply select the virtual machine from the Hyper-V Manager, and then click on the “Export” option (or link).
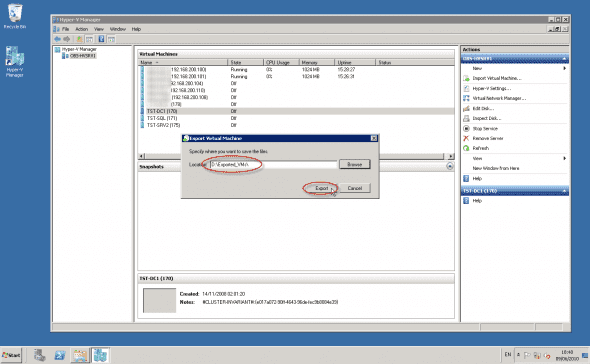
After doing so, Windows will display the Export Virtual Machine dialog box. You will need to point the export directory to the exact location that you want to import from. Note that exporting the VM will NOT alter the existing VM in any way. Its files will not be deleted or moved, and you will still be able to use it if you want to.
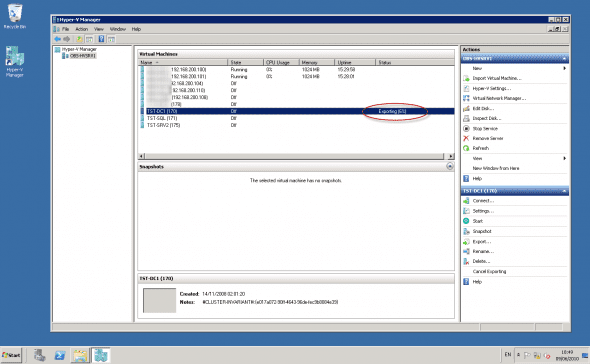
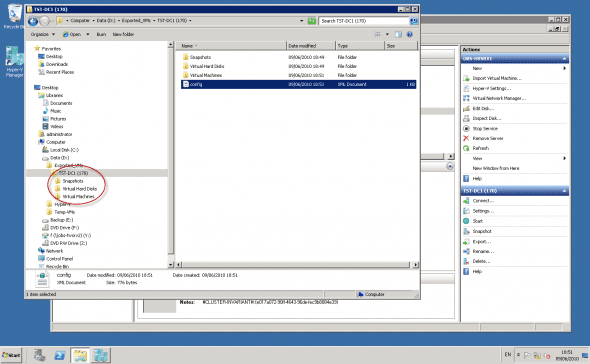
The export process will gather all the VM-specific files into the target folder, creating a folder with the exact name of the VM. BTW, this is a nice way to actually get all these files into one place (snapshots files, VHD files, XML configuration files) instead of having to guess where they are located. (Note: you CAN manually set these file locations during the creation and configuration of the VM if you want to).
Depending on the size of the virtual machine (more specifically the size of the virtual disks), the export process can take a while to complete. Small-sized VMs will take anywhere between 5 to 10 or 15 minutes to export, while the export of large VMs using big VHD files might take considerably longer. Remember, during all this time, the original VM must be turned off, therefore the downtime may be substantial.
Copying the VM to the target host
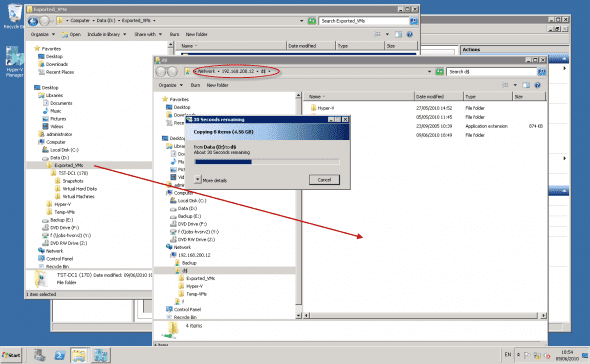
Once the export is done, you’ll have all the files ready in the target folder. Now it’s up to you to move the files contained within that folder to the target virtualization host. This can be done by various methods, from copying them across the network, to grabbing them all on a portable disk and physically moving them to their target host.
Note: When you import the virtual machine, its physical location on the host server becomes permanent. Moving the virtual machine is no longer an option unless you export it again. Therefore it is important to place the VM files on the desired volume before you import it.
Importing the VM
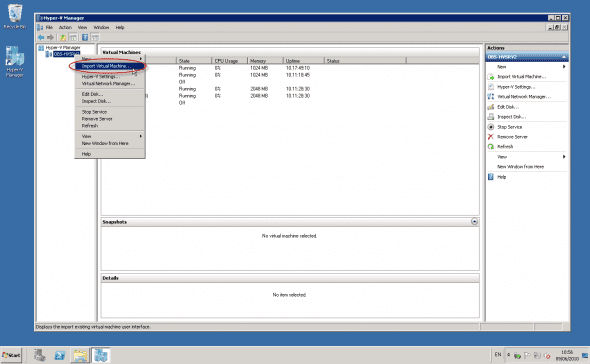
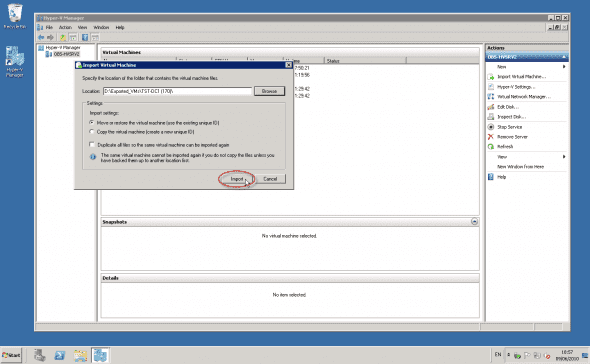
When the copying process is over, you will need to import the VM. Open the Hyper-V Manager and click the Import Virtual Machine link. You should now be prompted to enter the virtual machine’s path.
Note: In Hyper-V RTM, once a VM was imported you could no longer re-import it. This was fixed in R2.
In Hyper-V Manager on the target host, click on the server name and select “Import Virtual Machine”.
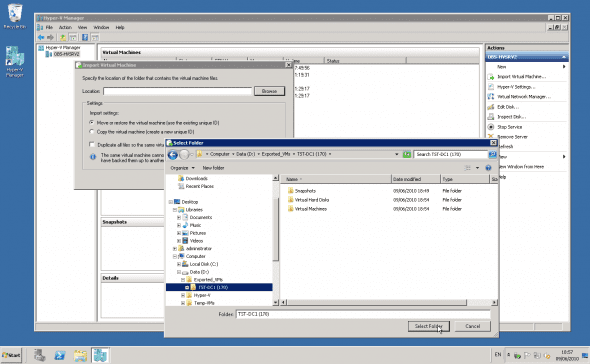
Browse and locate the top parent folder of the copied exported machine.
Once selected, click on the “Import” button for the process to begin.
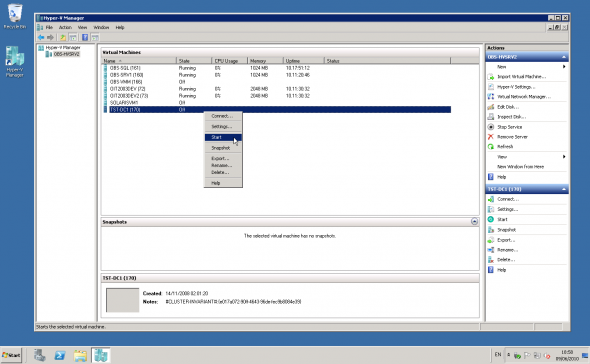
The import will be almost instantaneous, since the files are already on location. It just needs to create the VM configuration based on the data from the exported VM. Once imported, you can start the VM.
Remember to never turn on both VMS – the source and the target, because you might get all sorts of conflicts. Make sure you permanently shut down (and better – remove) the source VM, unless there is reason to keep it (such as creating templates from one VM).
Total downtime for this procedure depends on the size of the VM’s VHD file(s), the speed of the copy operation, and the speed of your manually (or scripted) import operation.


