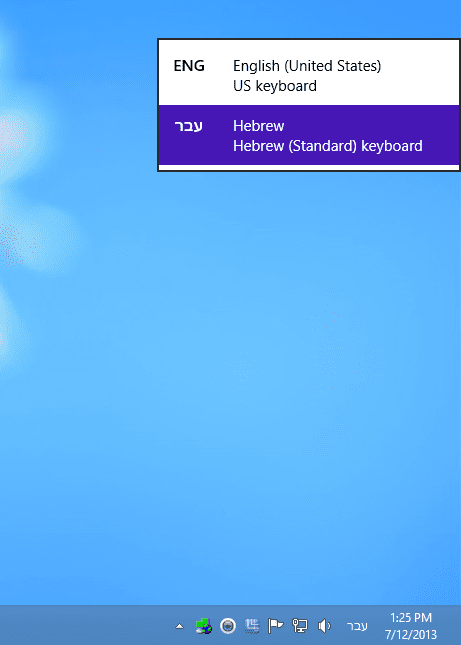
Windows 8, like Windows 7 before it, has the built-in ability to easily install and display Hebrew fonts on your system without the need to install language packs or special localized versions of the OS. Unlike previous Microsoft-based operating systems such as Windows XP and prior, Windows 8 makes the language installation very easy, and it does not even require a reboot to complete the installation. Even when compared to Windows 7, the process of installing Hebrew is much simpler. (Editor’s note: Also check out our article on how to install Hebrew on Windows 7.)
On the downside, unless you customize the image installation (which may be a topic for a future post, if there is demand for it), you will need to repeat this process for each and every additional user that uses that particular computer. It’s not hard to do it, but it will take you several clicks to accomplish. You can choose to install Hebrew language support during the installation of Windows 8, or at any time after the installation is complete.
Option 1: During the Installation Process
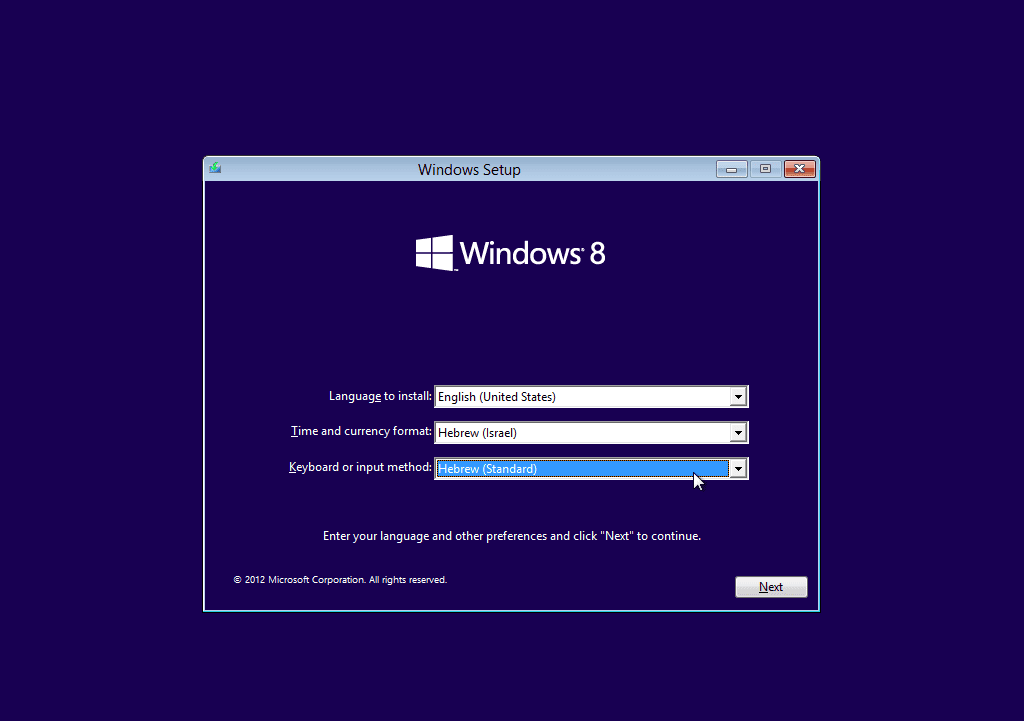
- After booting the computer into the setup process of Windows 8 you will need to wait for the initial Install Windows screen.
- From the Time and Currency Format drop-down list select Hebrew (Israel).
- In the keyboard or input method select Hebrew (Standard).
- Click Next to start your installation.
Option 2: On an Installed Copy of Windows 8
If you already have Windows 8 installed you can add the Hebrew fonts from Control Panel.
Note: Like in Windows Vista and in Windows 7 – and unlike previous Microsoft-based operating systems – you do NOT need to have the installation DVD handy in Windows 8 because all the OS needs to copy is already located on the hard disk.
To reach the language applet in Control Panel you can use two approaches.
Language Applet from the Start Page
- Click on the Windows logo keyboard key or press the Start button if you have one.
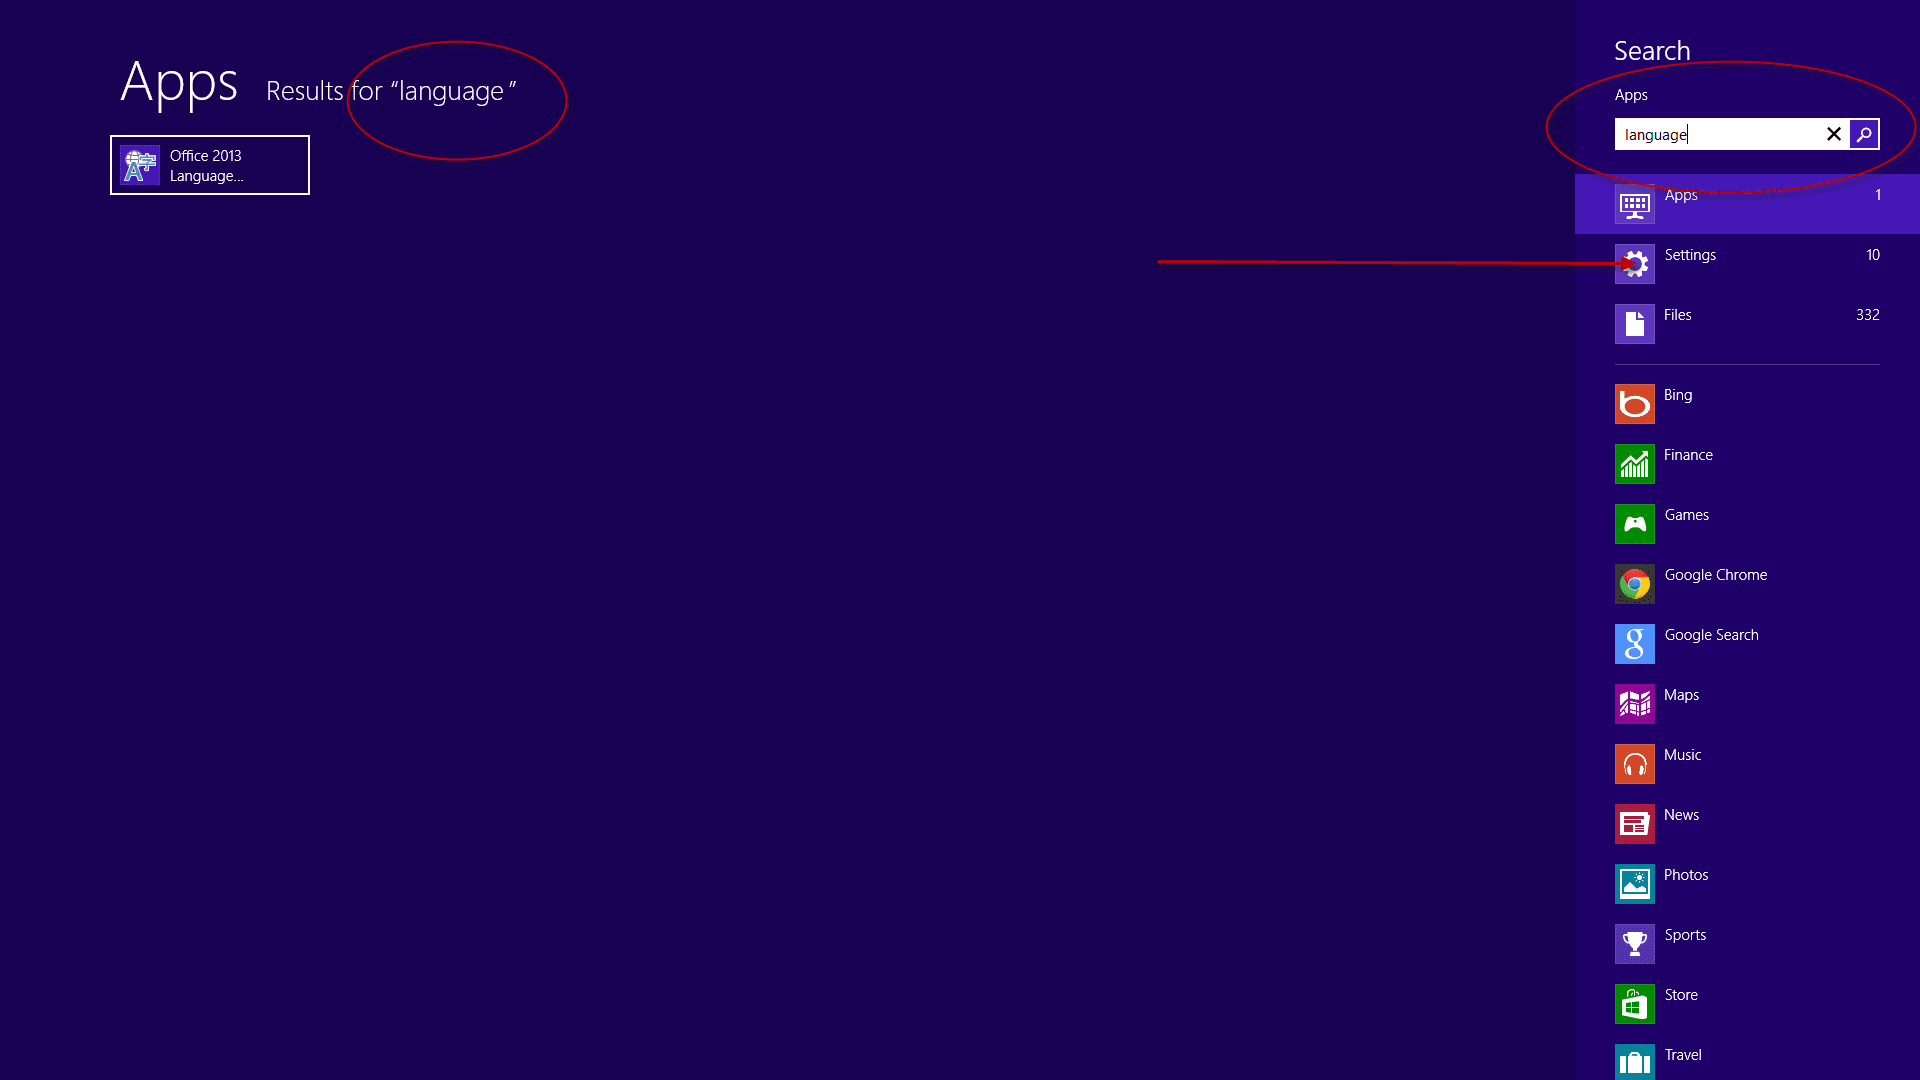
- When the Start screen opens, type language. As you type along, you’ll see that all the tiles disappear, and instead you’ll probably get something like the the image below (or an entirely empty screen if you don’t have Office installed).
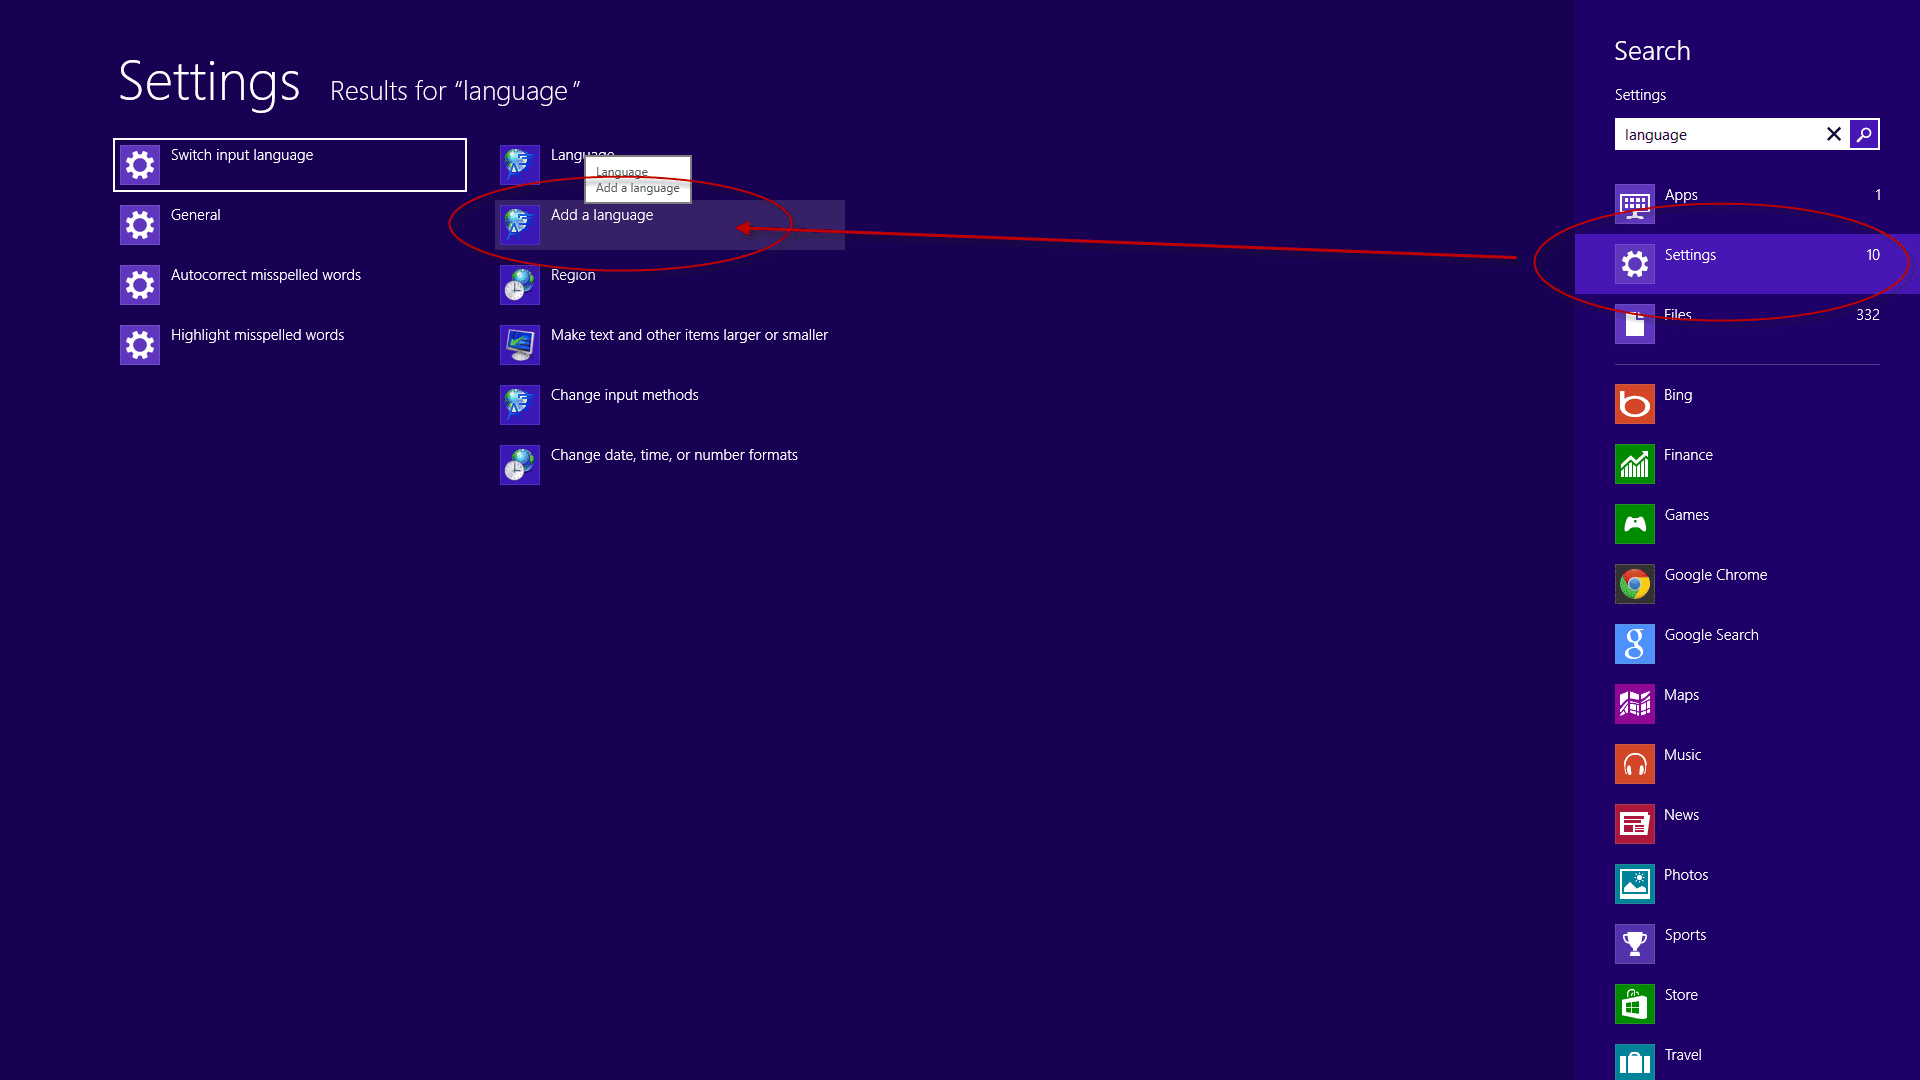
- Note that the Settings area has several apps that fit your search string. Click Settings.
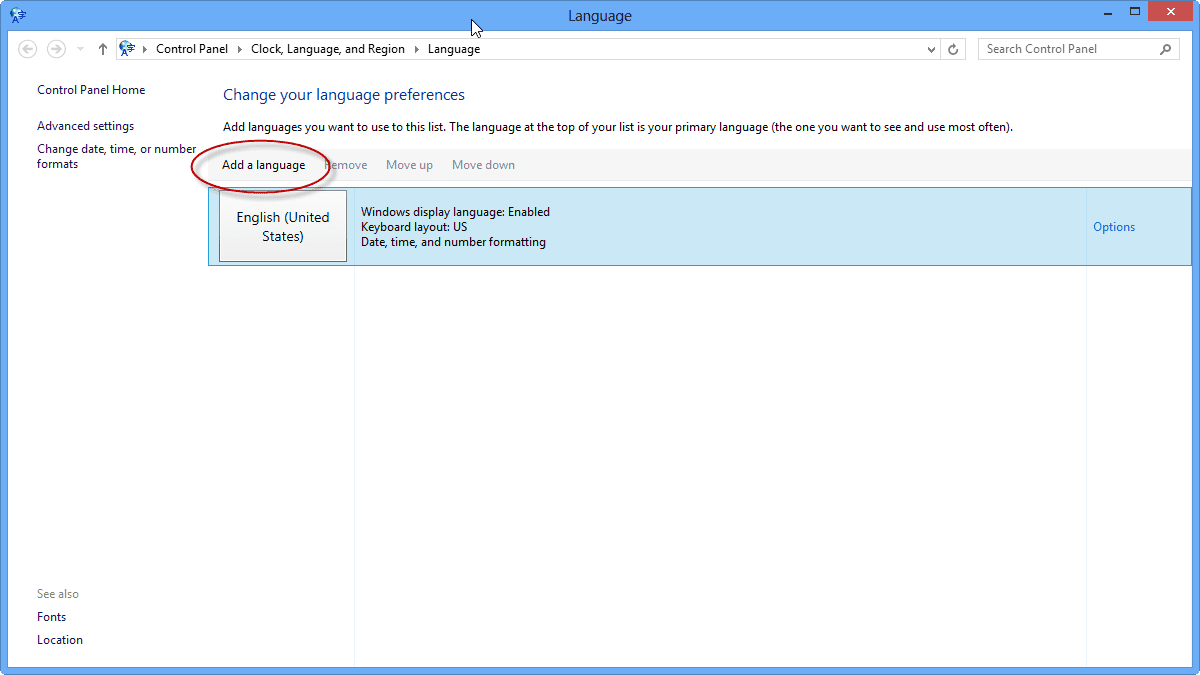
- Click on Add a language. This will start the Language applet.
Language Applet Directly from Control Panel
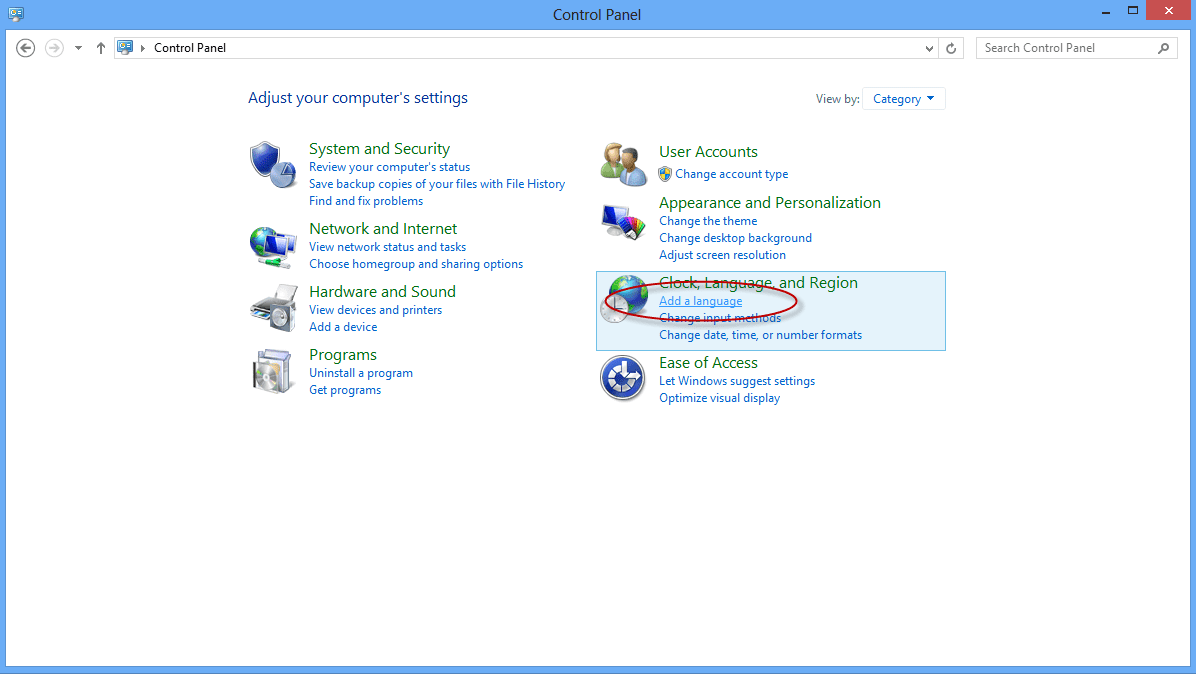
- Click on the Windows logo keyboard key or press the Start button if you have one. Open the Control Panel.
- Click on Add a language.
This will start the Language applet.
- Click on Add a language.
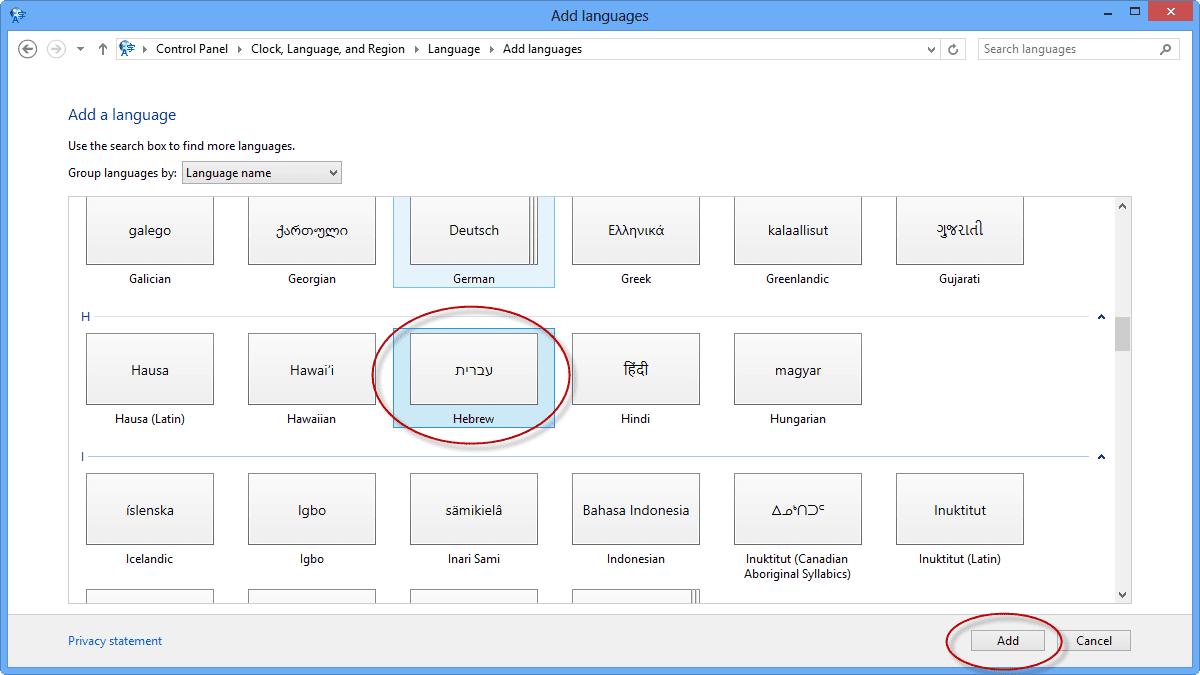
- Now find “עברית” (“Hebrew” in Hebrew). Click on it and then click Add.
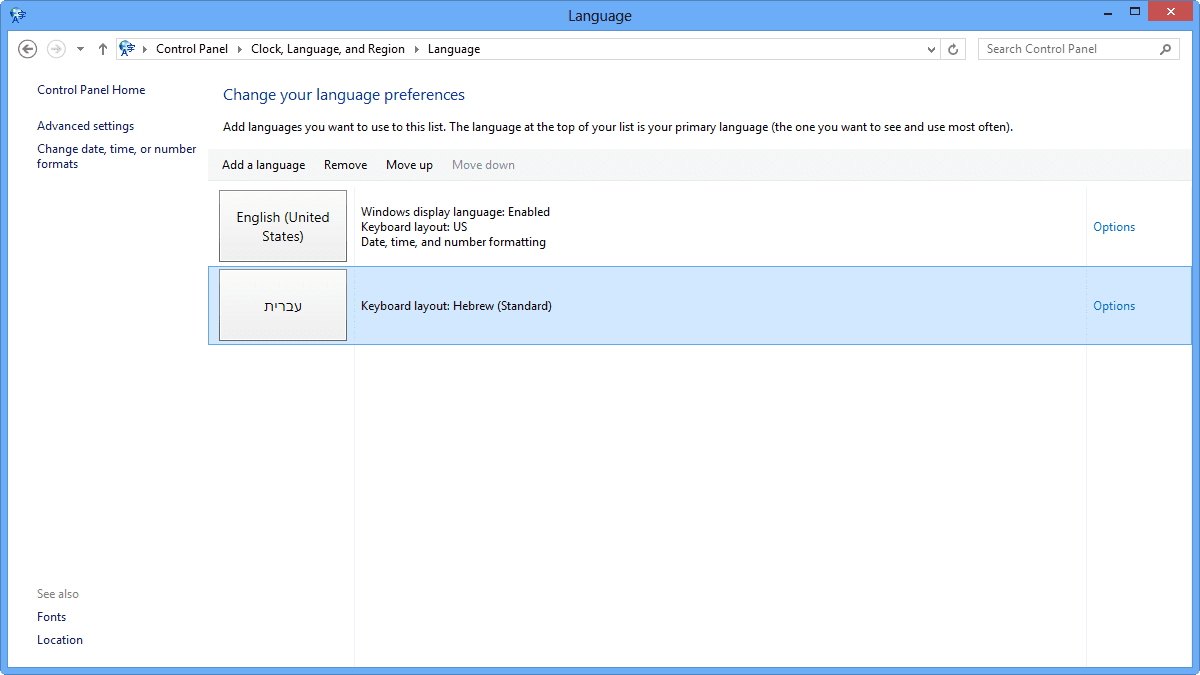
You’ll now have Hebrew in the language preference window. You can move it to the top of the list if you want, but I usually keep it there.
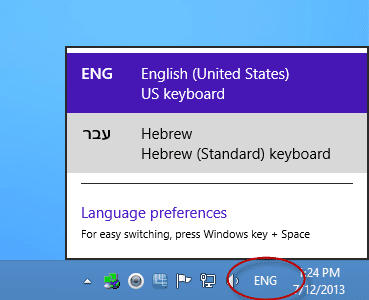
Now you will immediately see the option to select Hebrew as your typing language, and the language icon (previously language bar) will show in the tray area.
- You can select the language from the list either by clicking on it, by using the left- or right-hand side SHIFT+CTRL combo, or by pressing on the WINLOGO+SPACE keys.
Enjoy.


