Installing and Testing Citrix VDI-in-a-Box
Overview
As part of a new free video training on desktop virtualization I am creating for TrainSignal, I finally had the chance to check out a product I have been interested in for some time – VDI-in-a-Box. Citrix recently bought Kaviza whose product they renamed “VDI-in-a-Box”. I have been interested in Kaviza since VMworld 2010 when they won the Best of VMworld awards but I hadn’t had a chance to try the solution until now. I was told that VDI-in-a-Box made implementing VDI / desktop virtualization so easy that anyone could do it. Plus, implementing VDI could be done using free VMware ESXi or free Hyper-V Server AND you didn’t even need a storage area network (although high availability is included). The thought of making desktop virtualization EASY and “the norm” for small and medium size companies around the world really intrigues me so I was excited to try VDI-in-a-Box.
I recorded my complete installation, initial configuration, and testing of VDI-in-a-Box. I used a single vSphere ESXi server and the Windows AD option for authentication (although AD isn’t required). I happen to have a small NAS (Iomega IX4) in my lab and vCenter but those things aren’t required. Here’s the video:
(Instructional video below provides a walkthrough of the steps contained in this article.)
In this article, I’ll show you how to get started with Citrix VDI-in-a-Box. We’ll talk about the installation and configuration procedures and I’ll show you how virtual desktops are deployed and how end users can connect to them and actually use them.
VDI-in-a-Box Installation and Configuration
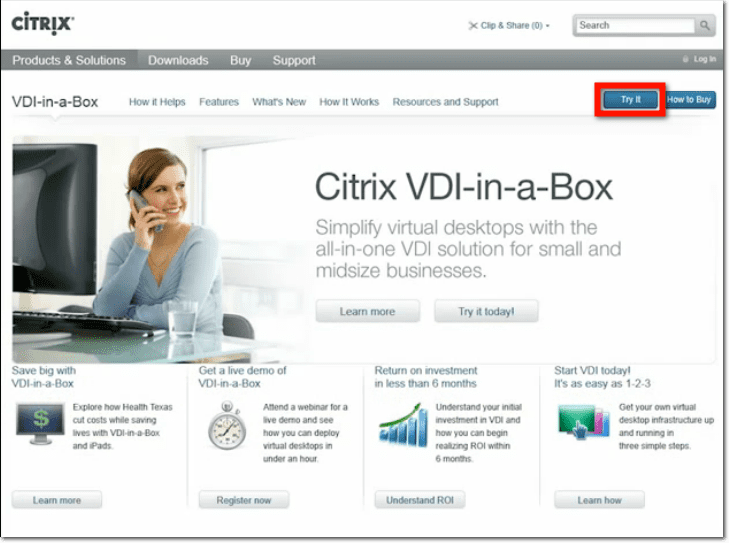
The first thing to do of course, is to download the installation file. Go to Citrix.com > Products and Solutions > Desktop Virtualization > VDI-in-a-Box, and then click the Try it button.
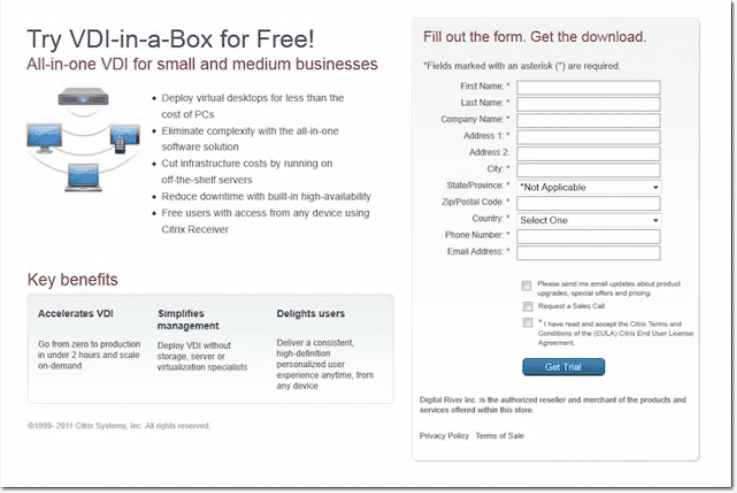
Next, you’ll be asked to fill out a form.
You’ll then receive an email which will allow you to start downloading one of three versions of the product. Basically, there’s one version for each of the supported hypervisors:
- Microsoft Hyper-V
- VMware vSphere
- Citrix XenServer
When we tried this out, we downloaded the appropriate zip file for VMware vSphere because we had prepared a VMware ESXi hypervisor for this activity. Therefore, the interface you’ll be seeing in the succeeding discussion will be from the vSphere environment.
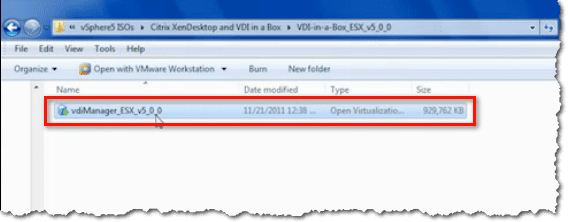
After extracting, you’ll end up with an OVF (open virtualization format) virtual appliance which you can import into VMware vSphere.
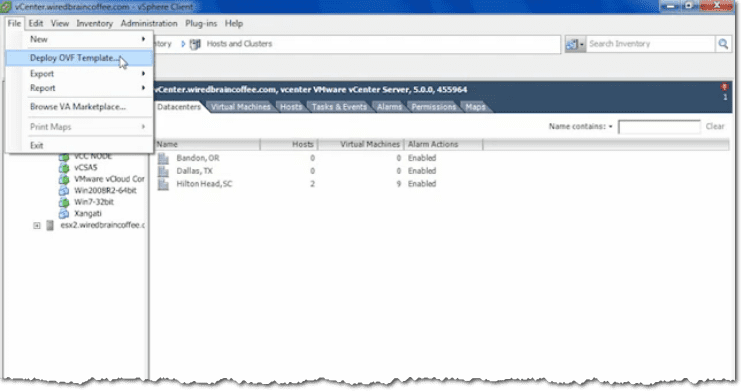
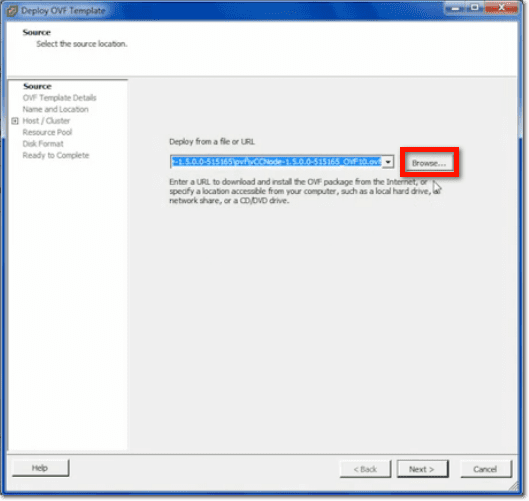
To import, go to your vSphere Client and navigate to File > Deploy OVF Template.
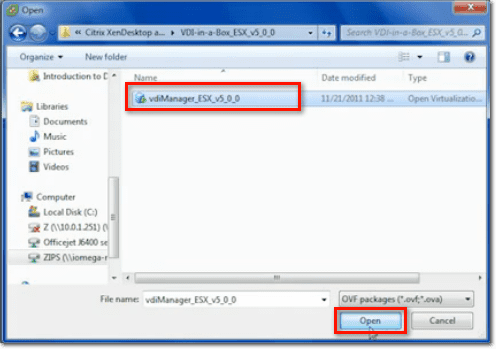
When the next window launches and you’re asked to select the source location, browse to the folder where you stored the OVF file, select the file, and click Open.
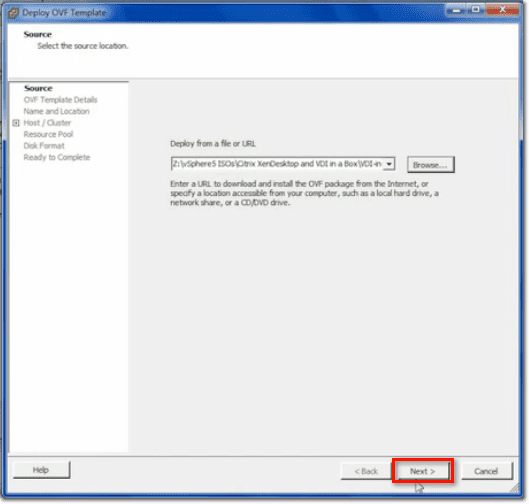
When that window closes, click Next.
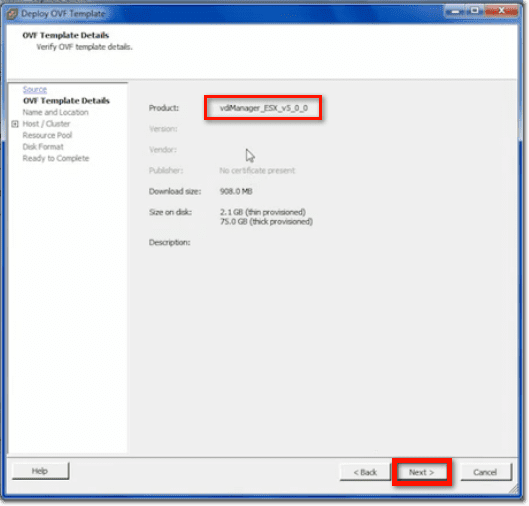
The system should then display the VDI Manager for ESX. Click Next.
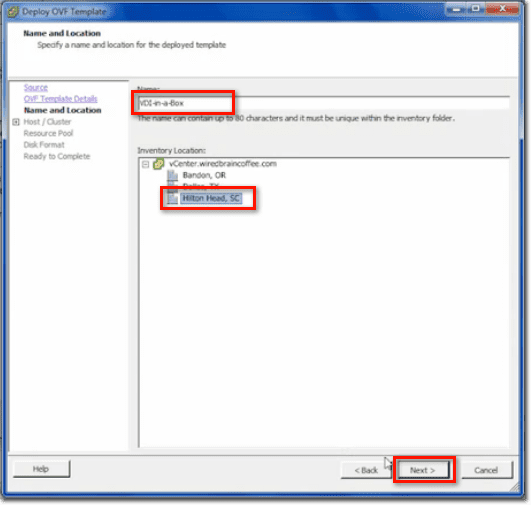
Specify a name for the deployed template. Also, select the datacenter where you would like to place it on.
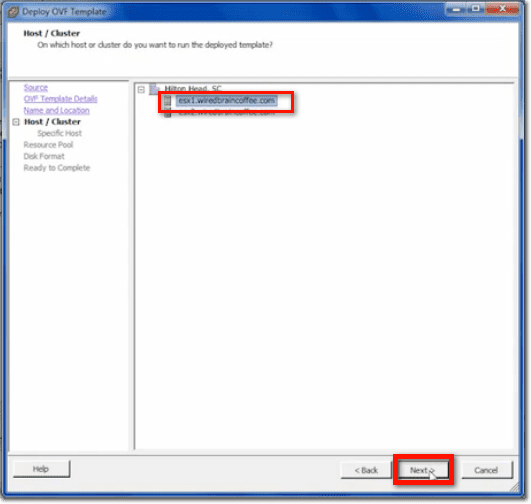
Next, select the specific host or cluster on which you would like the deployed template to run on.
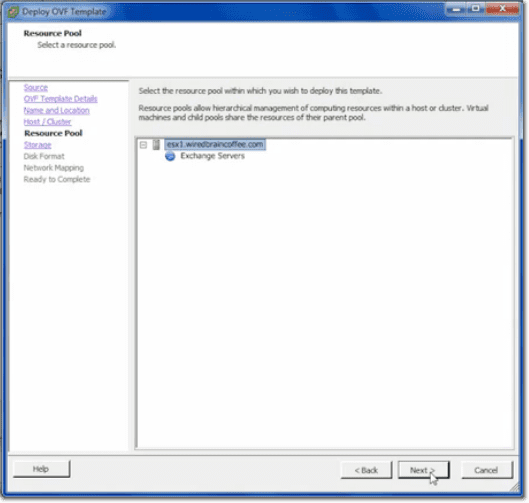
Select a resource pool.
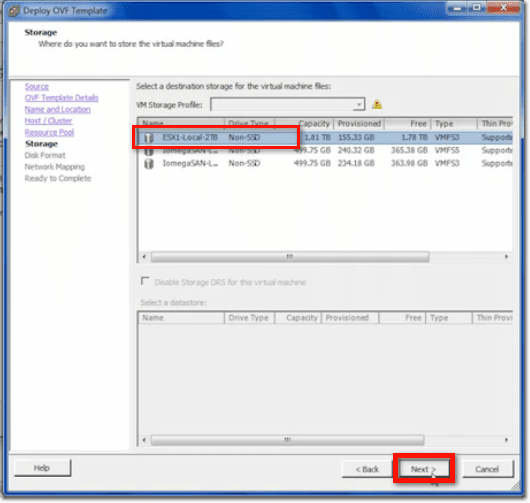
Select a destination storage.
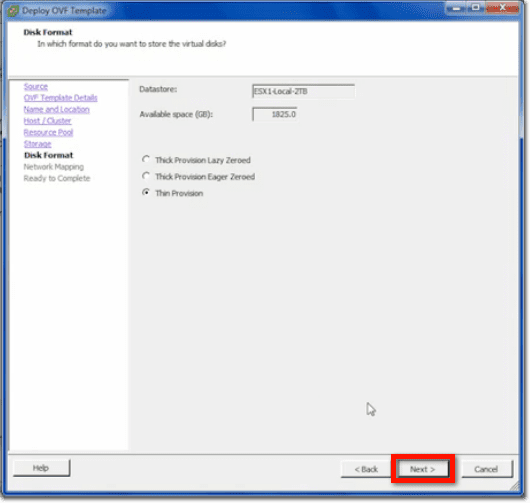
Select which type of format you would like to store the virtual machine disks in.
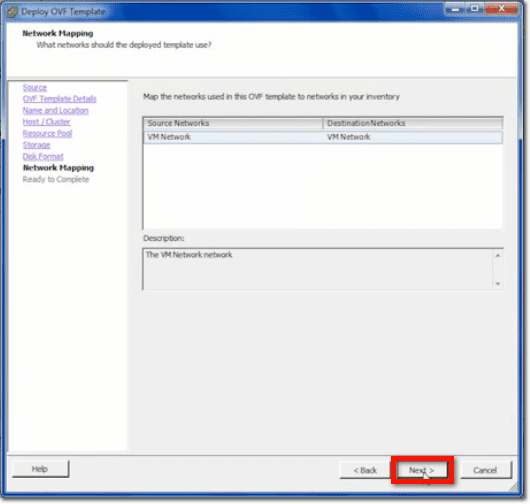
Click Next to allow it to connect to the default network.
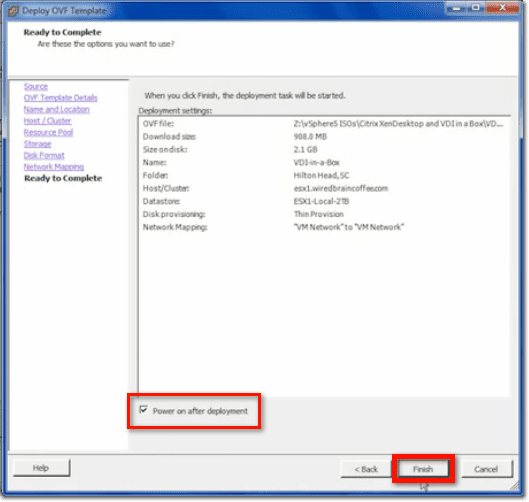
Review the deployment settings. If you see that everything’s alright, click the Power on after deployment check box, and then click Finish.
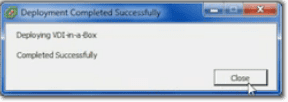
The deployment process might take a few minutes. Once it’s done, just click the Close button.
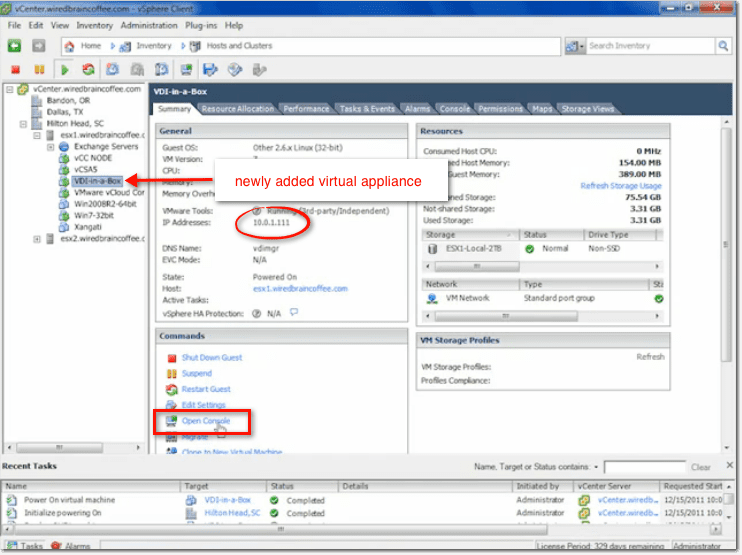
You’ll then see your newly added virtual appliance. Select it to view all of its settings. In the General panel of the Summary tab, you’ll find an IP address. Take note of that.
Now, go to the Commands panel and click Open Console.
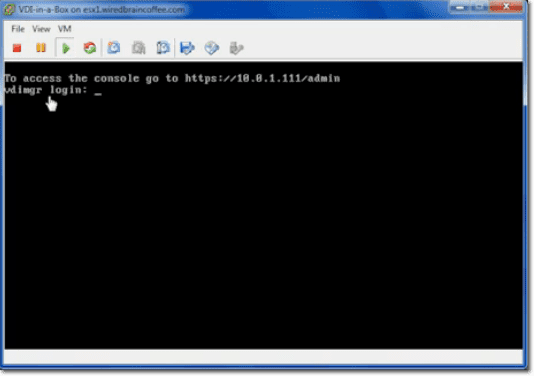
There you’ll find instructions on how to access the console. Notice that it has the same IP address I asked you to take note of earlier.
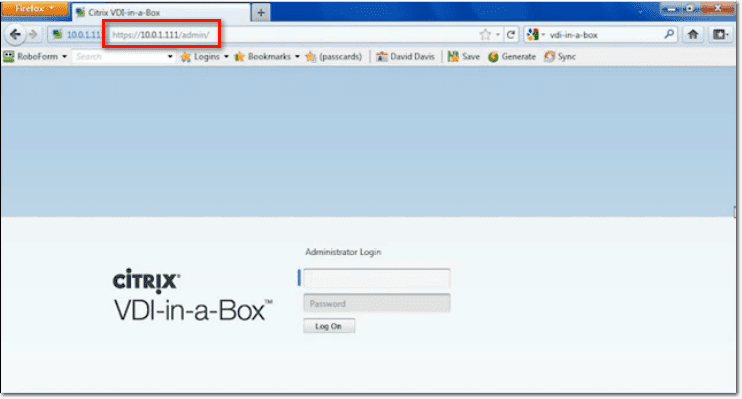
Open your Web browser and enter the URL shown on that last screenshot. You should then be prompted to enter some login credentials. The default login credentials are vdiadmin for the username and kaviza for the password.
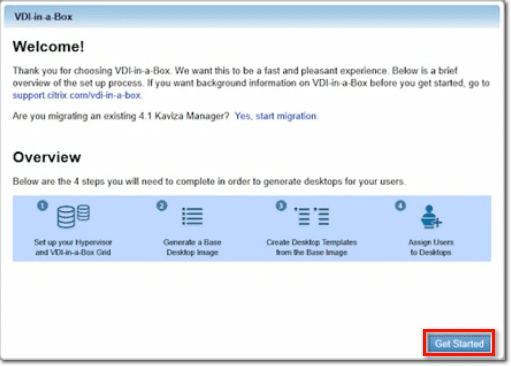
If you’re able to log in successfully, the first thing you’ll see is the Welcome screen. It will show you a brief overview of the set up process. After reading the steps, click Get Started.
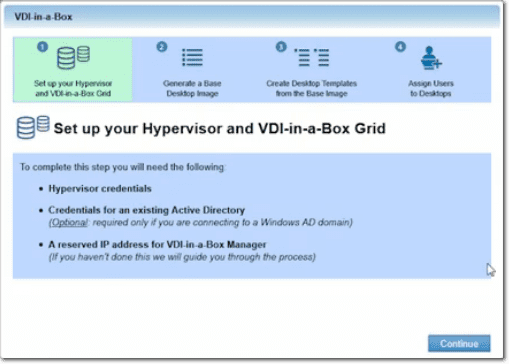
There are four general steps involved in the setup process:
- Setting up your hypervisor and VDI-in-a-box grid
- Generating a base desktop image
- Creating desktop templates from the base image
- Assigning users to desktops
Setting up a Hypervisor and VDI-in-a-Box Grid
As shown from the screenshot below, this step requires the following:
- Hypervisor credentials
- Credentials for an existing Active Directory (if you’re using AD)
- A reserved IP address for VDI-in-a-Box Manager
Click Continue to proceed.
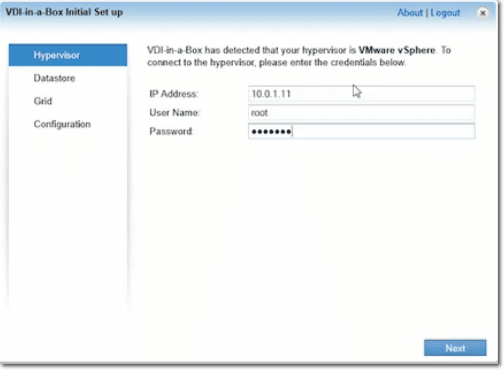
Enter the IP address and root login credentials for the host that the VDI-in-a-Box virtual machine is running on. Click Next when done.
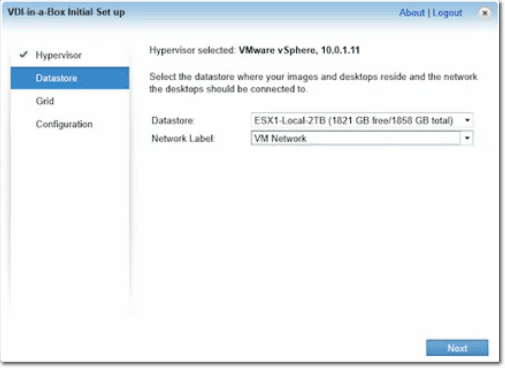
Once you connect successfully, select a Datastore and a Network Label from the two drop-down lists, then click Next.
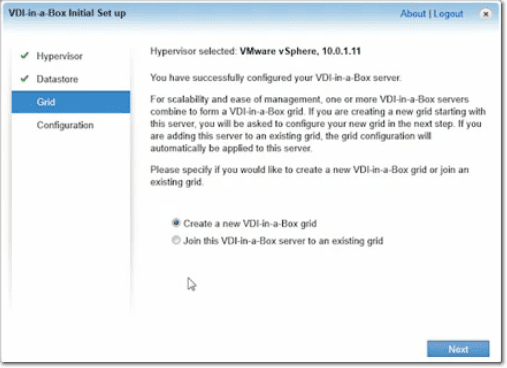
In the next screen, you’ll be asked to choose whether you want to create a new VDI-in-a-Box grid or to join this VDI-in-a-Box server to an existing grid. Since what we have is a fresh install, we will choose the first option and then click Next.
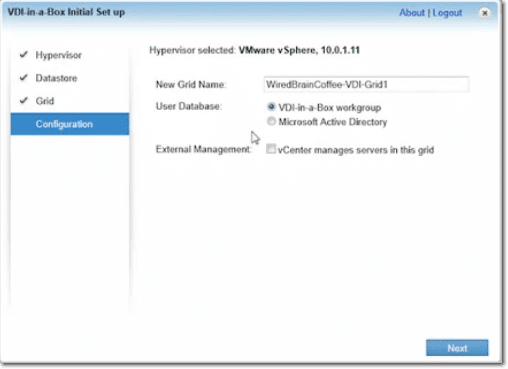
Give that new grid a name and then select a user database. There are two options for that user database: VDI-in-a-Box workgroup or Microsoft Active Directory.
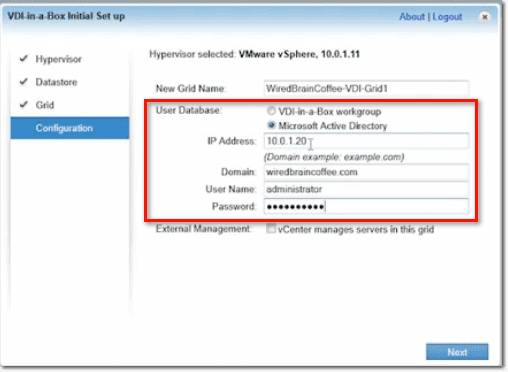
Additional fields will have to be filled out if you choose Microsoft Active Directory. You’ll need to enter the IP address of your Domain Controller/DNS Server, the domain name, and the corresponding administrative login credentials.
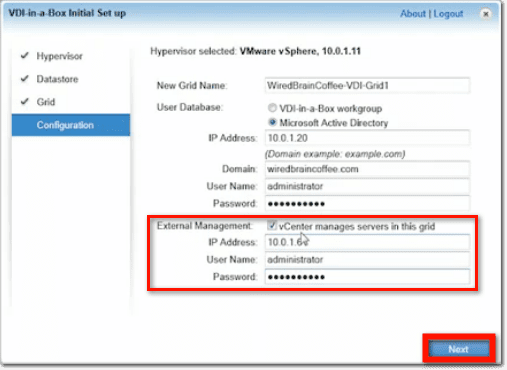
If you have vCenter, click the check box labeled vCenter manages servers in this grid and then fill in the additional fields as well. When you’re done filling everything in, click Next.
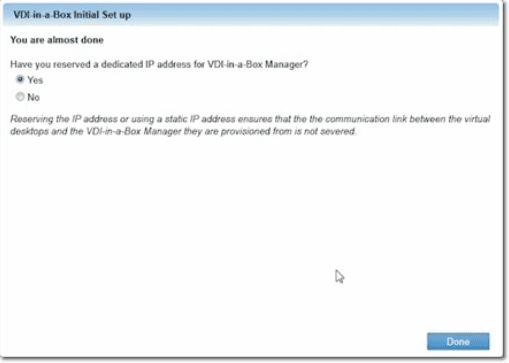
You’re almost done. At this point, the system will ask if you have reserved a dedicated IP address for VDI-in-a-Box Manager. Basically, it just wants to know if you are going to use a static IP or a dynamic IP. Choose the appropriate option and click Done.
Generating a Base Desktop Image
The next step is to generate a base desktop image. The base desktop image is the brand new virtual machine you’re going to create and on which you’re going to install an operating system, applications, and so forth.
Later on, the virtual machines of all other virtual desktops that connect will be cloned from that base image. Basically, a new template will be created from that, and then every time a user connects, he’ll get his own virtual machine based on that image.
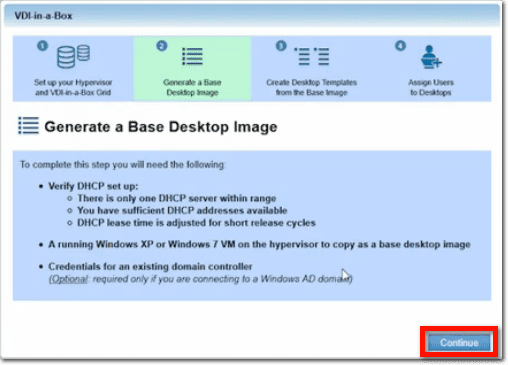
To complete this step, you will need to verify whether the DHCP set up has:
- Only one DHCP server within range
- Sufficient DHCP addresses available
- A DHCP lease time that is adjusted for short release cycles
You will also need a running Windows XP or Windows 7 VM on the hypervisor to copy as a base desktop image.
Finally, if you are connecting to a Windows AD domain, you will need credentials for an existing domain controller.
Click Continue to proceed.
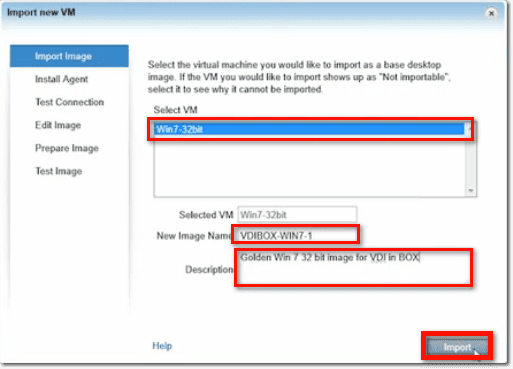
Assuming you already have an existing virtual machine which you can import as a base desktop image, you should be able to see it on the list on that screen. Select it, give it a name, and put in a description. When you’re done, click the Import button.
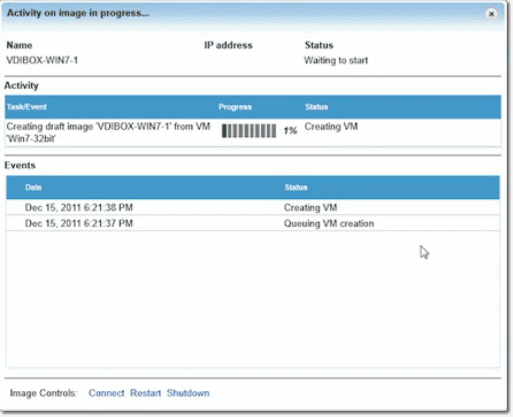
The creation process of your new VDI-in-a-box virtual will then begin.
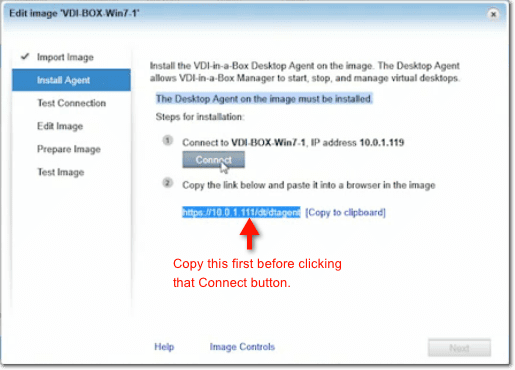
After a few minutes, your virtual machine will have been cloned, and you will then be ready to install the desktop agent on the virtual machine. The desktop agent is just a little application that runs on every virtual machine in the desktop virtual infrastructure. It allows the virtual machines to communicate their statuses back to the connection broker.
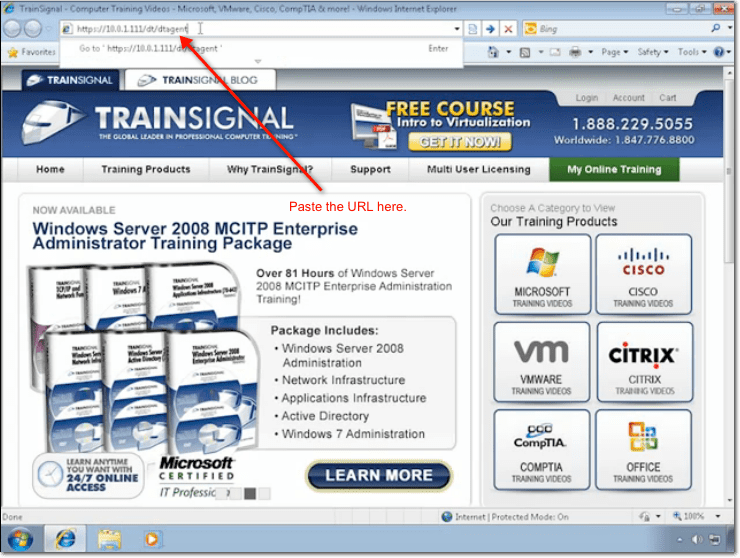
To install, you should connect to the image by clicking on the Connect button. Once you’re there, you’re supposed to paste a specified URL into that image’s browser. The URL should be visible from the current screen, so copy it first into the clipboard before connecting.
After you click the Connect button, you’ll find yourself in the virtual machine desktop. Launch the Web browser and paste the URL you copied earlier.
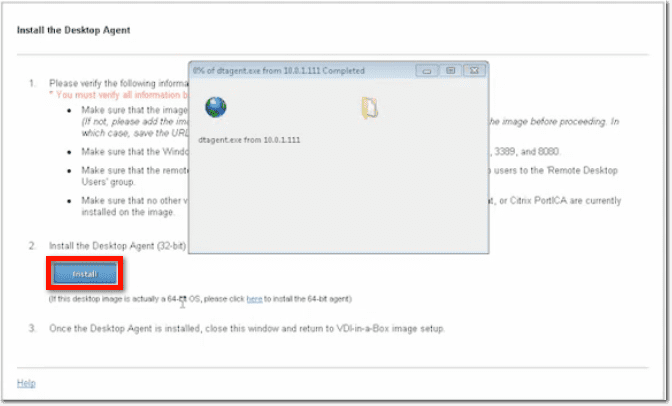
You’re then supposed to verify the following before proceeding:
- The image is a member of the correct domain or workgroup. If it isn’t, you need to add the image to the correct domain/workgroup. Once you do that, you will be asked to reboot the image before proceeding, so save the URL of this page.
- Windows firewall or an anti-virus is not blocking TCP ports 1494, 2598, 3389, and 8080.
- Remote desktop access is enabled for the desktop users. This can be achieved by adding the desktop users to the Remote Desktop Users’ group.
- No other versions of Citrix VDI-in-a-Box Desktop Agent, Citrix Virtual Desktop Agent, or Citrix Port ICA are currently installed on the image.
After verifying all that, click the Install button and follow the instructions on the screen.
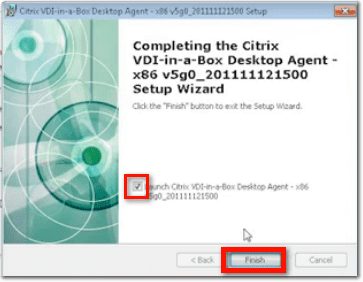
As soon as the installation process completes, click the checkbox that says Launch Citrix VDI-in-a-Box Desktop Agent and then click Finish.
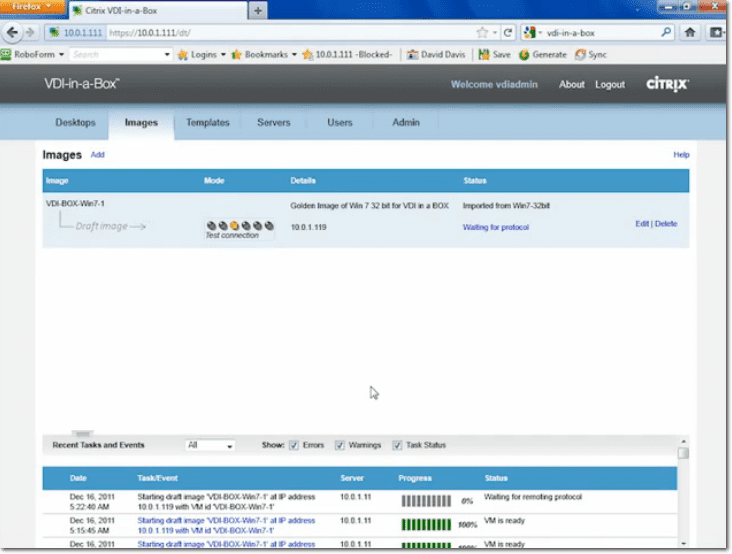
You will then be automatically logged out of the Remote Desktop connection and brought back to the administrative console. A connection to the newly created virtual desktop will then be initiated.
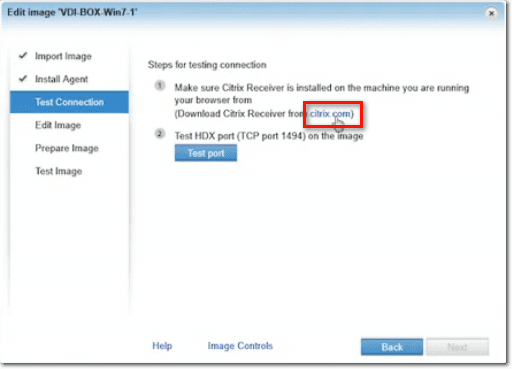
With your agent successfully installed, the next step would be to download and install the Citrix Receiver. You will need it in testing the desktop you just created. Click the link for downloading the Citrix Receiver.
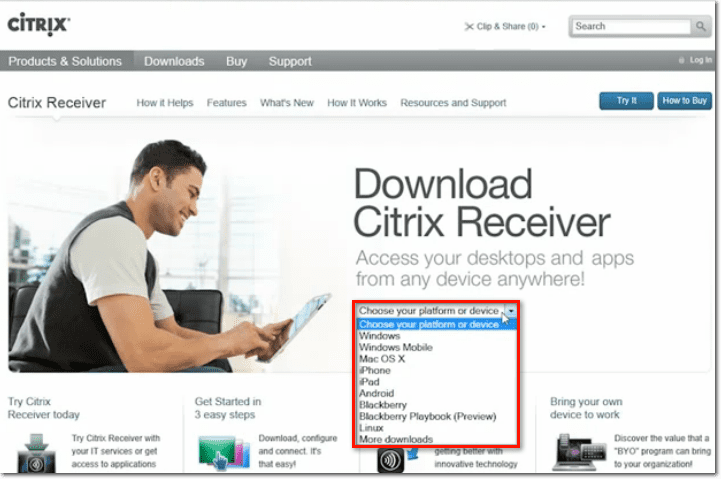
Once you’re on the Citrix website, select the platform you’ll be working on.
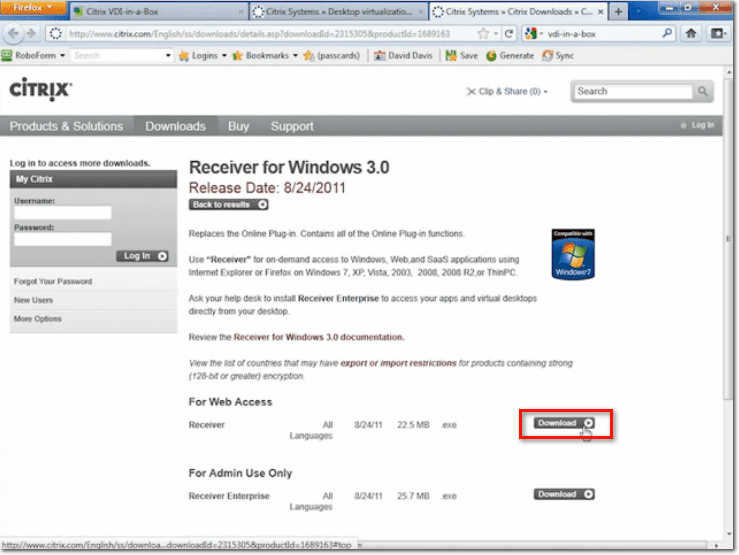
For example, since we selected Windows, we’re brought to its corresponding download page. Click the Download link for the Receiver for Web Access.
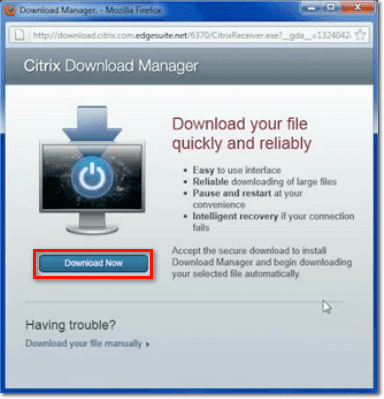
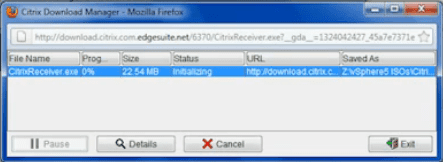
That will launch the Citrix Download Manager. Click the Download Now button.
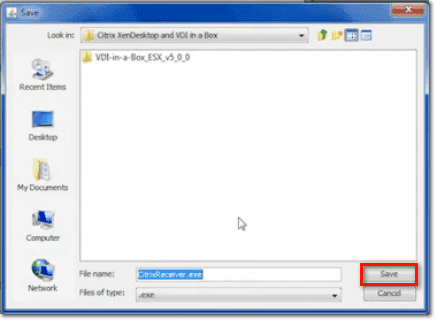
Specify a location for the downloaded .exe file (or simply accept the default) and then click Save.
The Download Manager will then take care of downloading and installing the file.
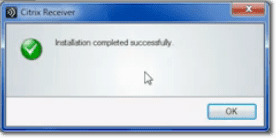
When the installation completes, click OK.
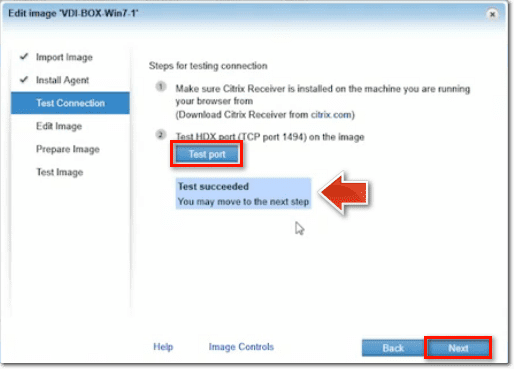
That’s all there is to it for this part. You can now go back to the window you were on earlier. Click Test port to test the HDX port. If you get a notice saying the test succeeded, you may proceed to the next step by clicking the Next button.
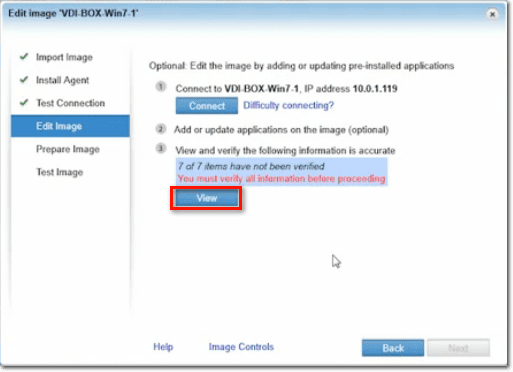
Now that you have a working virtual machine, you can make that the golden image for all your end users to connect to. In other words, your end users’ desktops will be cloned off of this image. So, not only will you want the operating system to be ready to go, you’ll also want applications installed on the image as well.
Although adding applications is marked as an optional step, it no longer will be once you start working in a production environment. In such an environment, you will want to install commonly used apps like MS Office, QuickBooks, and all the other applications your end users use on a regular basis.
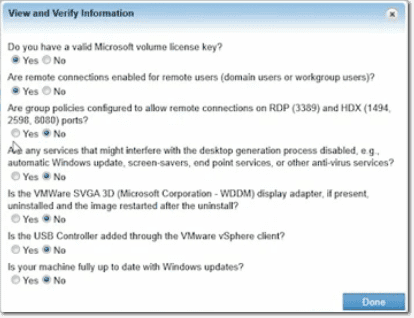
One thing that you really need to do in this step is to verify the accuracy of certain information. To view all the information that requires your verification, click the View button.
In a real world production environment, you would like to make sure the answer to all those questions outlined below is Yes. Assuming you’ve already verified each of the items mentioned above, click Done.
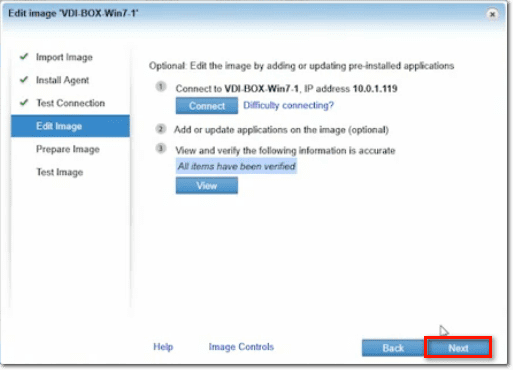
Once you’re back to the Edit Image screen, click Next.
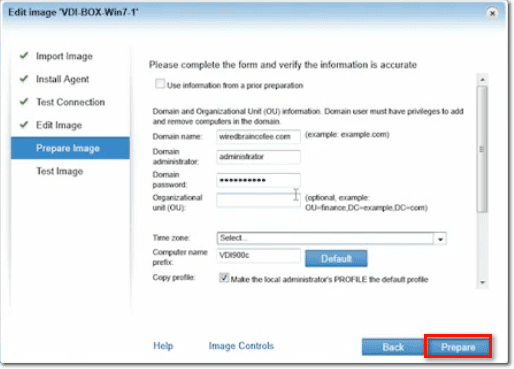
Preparing the image simply entails filling up the form shown on this screen. You’ll need to enter information such as: the domain name, domain administrator name, domain admin password, the Organization Unit (optional), the time zone, a computer name prefix, and so on (scroll down to see the other items).
When you’re done filling that up, click the Prepare button.
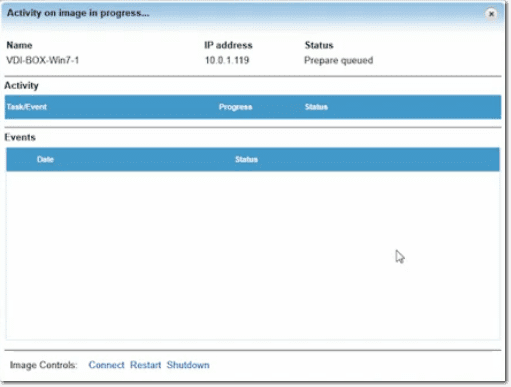
The image preparation process will then begin.
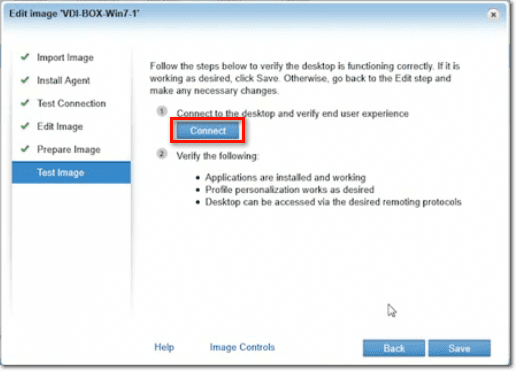
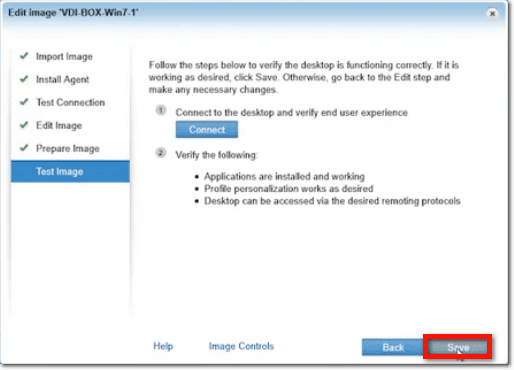
Once the desktop image is already prepared, the next step is to test it and see whether it is functioning correctly. Click Connect to connect to the desktop and start testing.
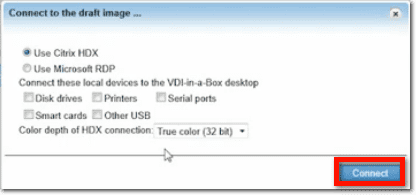
Select a suitable connection method. For example, in our case, we chose Citrix HDX. Click Connect.
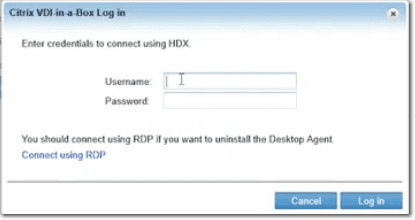
Put in your login credentials and click Log in.
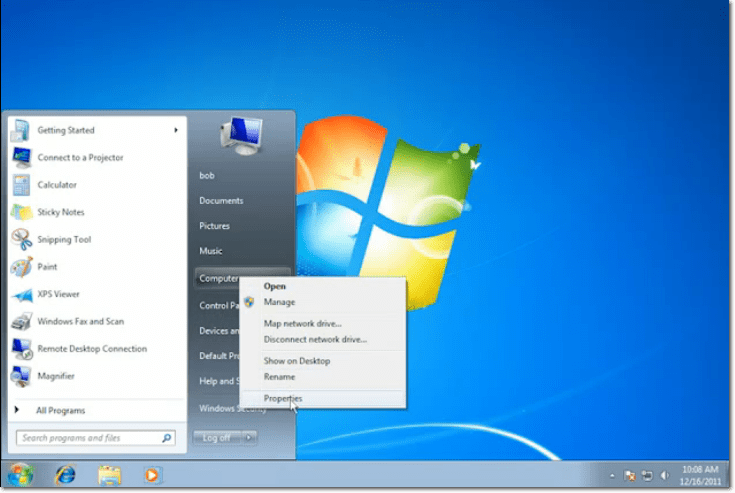
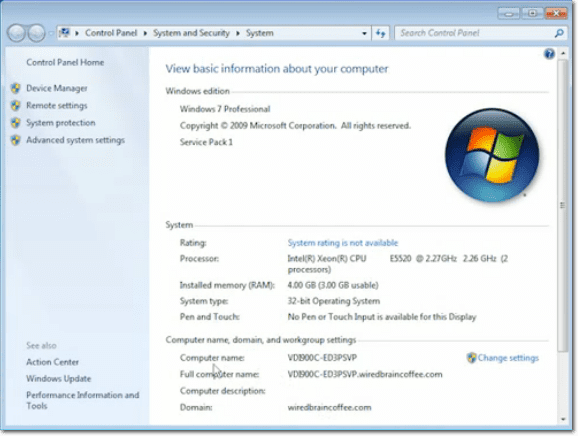
Once inside the virtual desktop, you might want to check out some basic information. For instance, you might want to check out the desktop’s CPU, RAM, OS version, and so on. You can go to the Start menu button, right-click Computer, and then select Properties to view those.
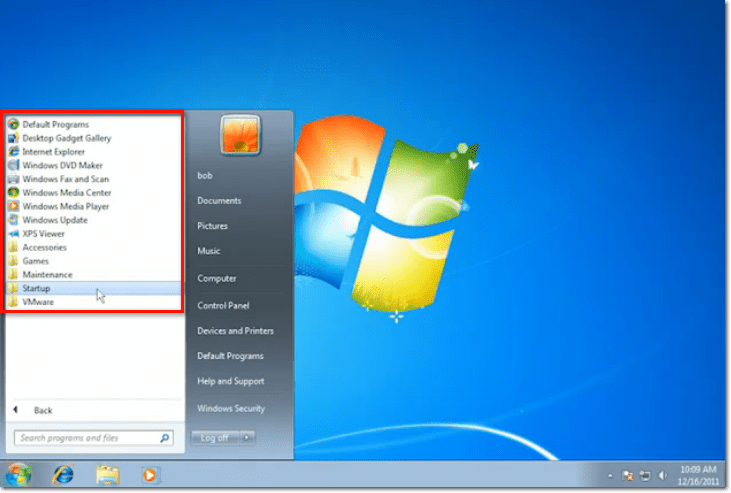
Another place to look at is the Start > Programs menu. See whether the applications you wanted installed are actually there.
Basically, you want to inspect and try out everything that has to do with the end user experience. Make sure everything that you’d like your end users to do on their desktop can actually be done.
If you see no problems, you can go back to the VDI-in-a-Box administrative console and click the Save button.
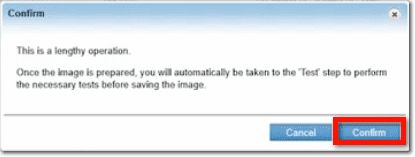
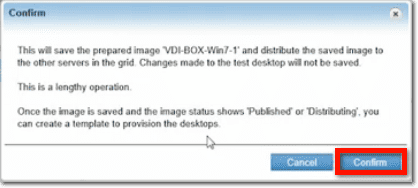
Click the Confirm button. Note that if you have more than one server in your grid (e.g. for high availability and scalability) this image will be distributed to all those servers.
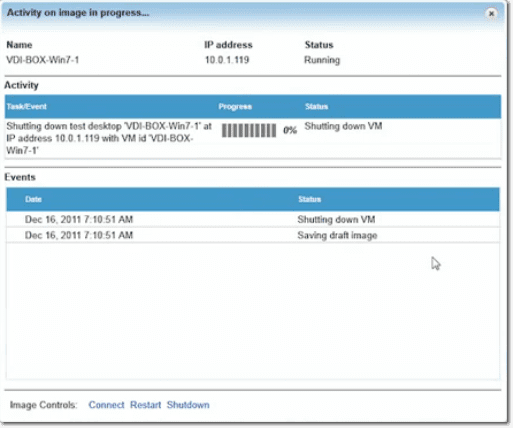
At this juncture, the system will start shutting down the VM and then get it ready for end users to connect.
With that, you will have completed all the steps for generating a base desktop image. You’re now ready to create desktop templates from it.
Creating Desktop Templates from the Base Image
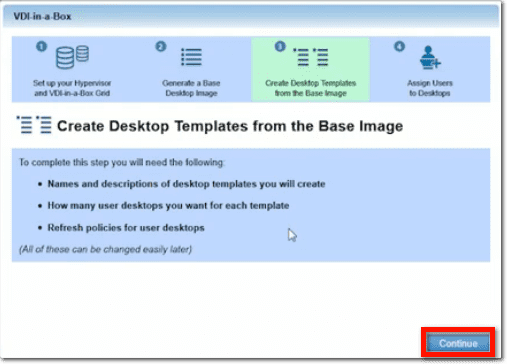
This step entails coming up with names and descriptions for the desktop templates you create, specifying the number of user desktops you want for each template, and refreshing policies for user desktops. Click Continue to proceed.
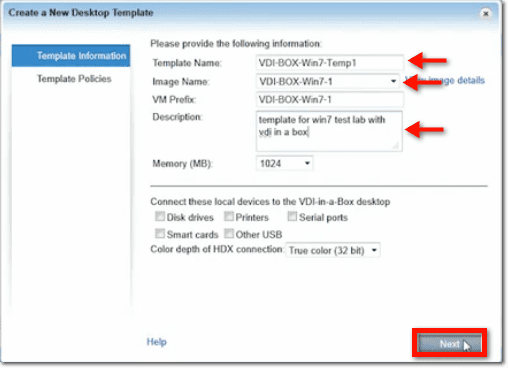
In the succeeding screen, enter the name you want this template to have. Next, select the image you created earlier from the drop-down list. Enter an appropriate description and then leave everything else to their defaults. Click Next.
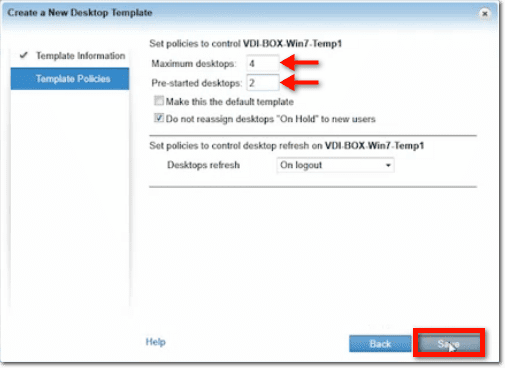
Specify the maximum number of desktops you want for this template. Also specify the number of pre-started desktops before clicking Save.
Assuming everything goes smoothly, you should receive a notification declaring that the template was saved successfully. Click Close.
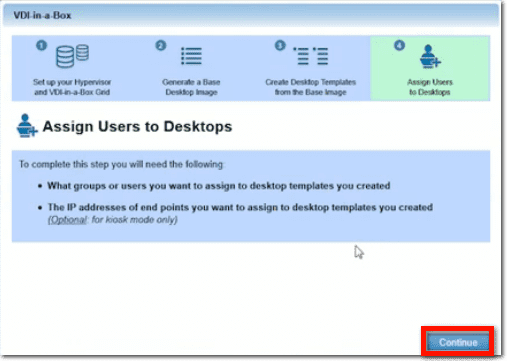
That now brings us to our last set of steps, and that is to assign users to the desktops. Click Continue.
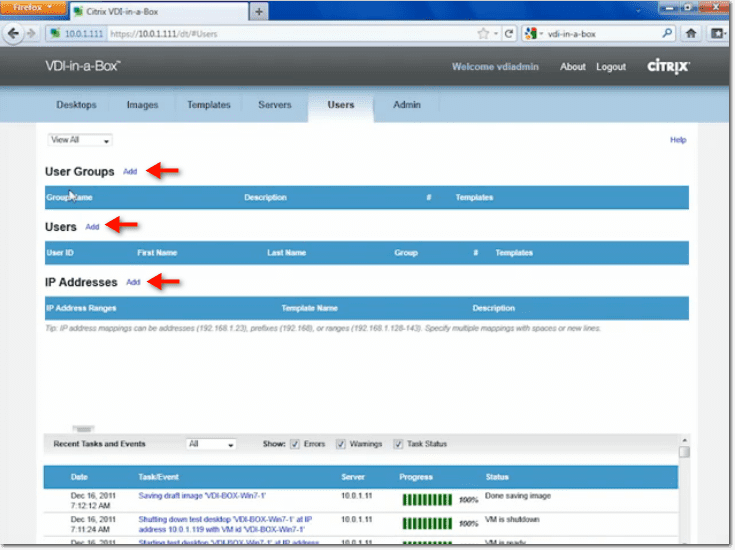
Here, you can define users, user groups, or IP addresses that can access specific templates of a base image. To define a user, user group, or IP address, just click their respective Add link.
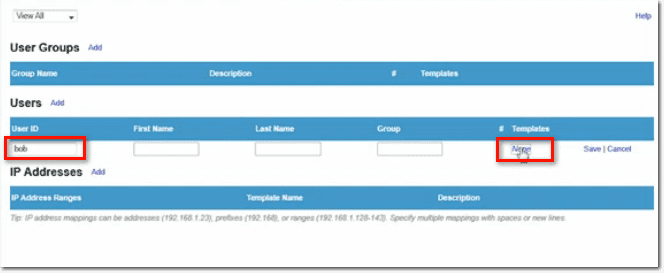
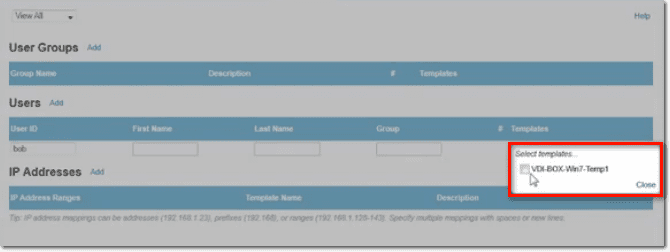
You’ll then be asked to enter an Active Directory ID and then select a specific template that it can access.
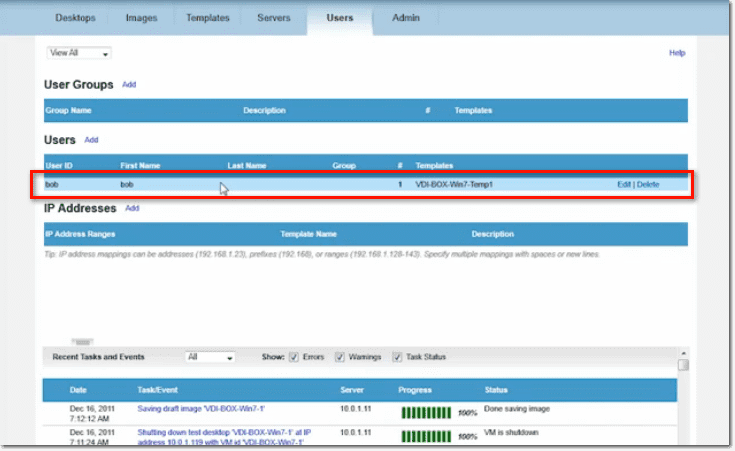
Here’s a newly added user.
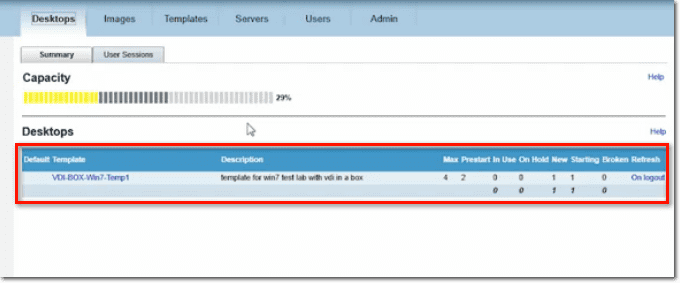
After defining users, user groups, and/or IP addresses, go to the Desktops tab to see whether you’re all set to test this out on a real end user using your newly cloned template.
At the top of that page, you’ll see some relevant information regarding the Capacity of the grid. Here’s what the colored bars mean:
- Green bars (not visible on the screenshot) – capacity of desktops in use and on hold
- Yellow bars – desktops that are still new, starting, or on-hold
- Dark gray bars – potential consumption of the grid resources by the maximum configured desktops
- Light gray bars – unused capacity of the entire grid
Below that, in the section named Desktops, you’ll find information regarding the default template such as the maximum number of desktops to be generated (Max), the number of desktops that will be pre-started and ready for connection at any point in time (Prestart), the number currently being used (In Use), the number preserved for subsequent use (On Hold), and so on.
At this point, you should be able to test things out. There are multiple ways of doing this, but here’s one way.
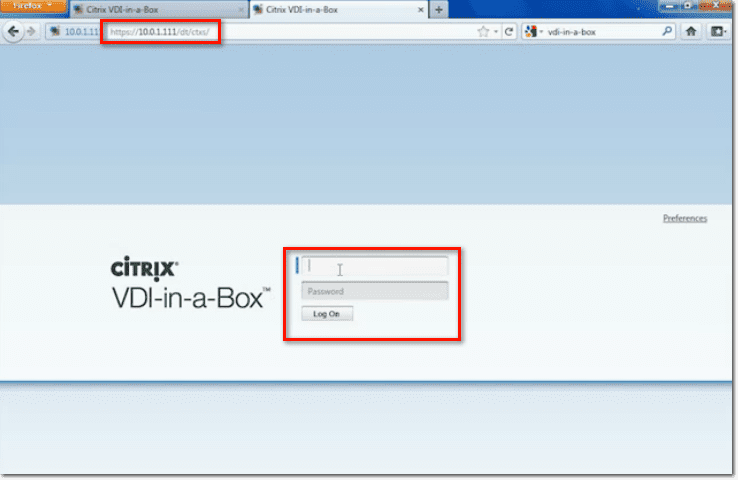
If you’re an end user who wants to connect to your designated VDI-in-a-Box virtual desktop, you can point your Web browser to the IP address of the VDI-in-a-Box server, enter your login credentials and log on.
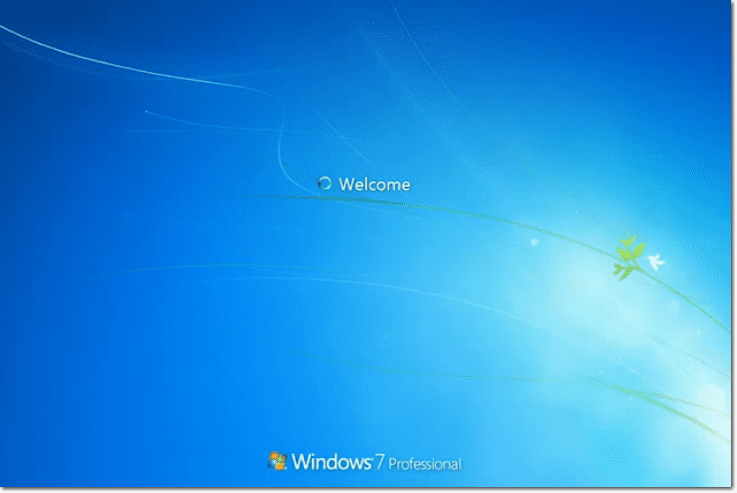
Your designated desktop will then load and you’ll be automatically logged in using your Active Directory username and password.
You can then go on and do what you normally do on a regular desktop.
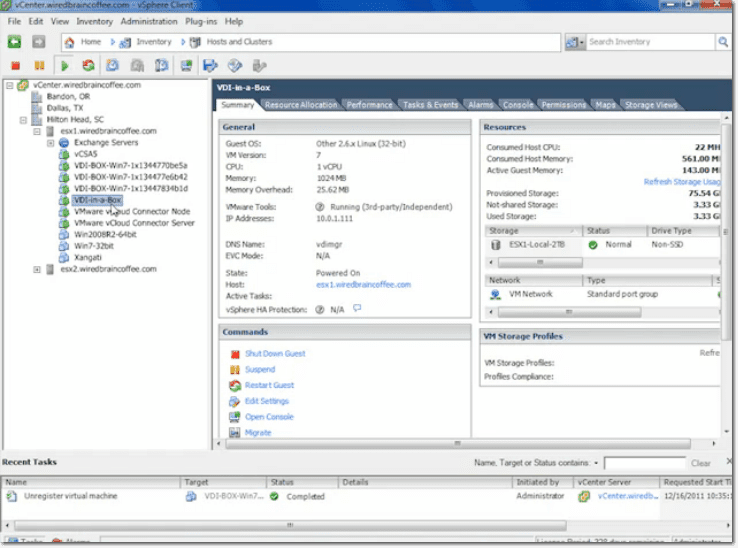
Before we end, let’s go to the vSphere Client and see the virtual machines that were created courtesy of VDI-in-a-Box. In our screenshot below, you can see the original VDI-in-a-Box virtual machine as well as the Windows 7 virtual machines that were created off of it.
Conclusion
The connection to my virtual desktop and the performance was fast, wasn’t it? I was impressed with VDI-in-a-Box. I am awaiting a price quote now. My only recommendation for Citrix is to put pricing online instead of making you request a quote.
I suggest that you try out VDI-in-a-Box for yourself using the free 30 day eval. I think you’ll see that it can make desktop virtualization super-easy!


