In a previous article we introduced you to the concept of VMware vApp. Using our sample vApp, we created an environment with two servers, a web server and a database server. By using the vSphere wizard, after right clicking on a host and selecting New vApp, creating our vApp was simple. We were able to add machines by simply dragging them into the vApp using the vSphere Web Client.
Using VMware vApps
Now, let’s take a look at some additional things we can do now that we have a vApp. We are going to take a look at exporting and importing a vApp, as well as cloning a vApp. These features allow us to provide an easily deployable, consistent environment. Exporting and importing a vApp is different than using traditional virtual machine templates because it uses the Open Virtualization Format (OVF) rather than a VM template file. VMware provides many of its products, such as the vCenter Server Appliance, the vCenter Orchestrator Appliance, the vSphere Management Assistant, and vCloud Automation Center to name a few. Providing an OVF template is a simple way to provide software.
The OVF standard was developed by the DMTF (Distributed Management Task Force) as a standard for packaging and distributing virtual machines. This generic standard is supported on multiple hypervisors and has been embraced by VMware for use in standard vSphere and vCloud deployments.
By exporting the vApp to OVF, you have created a portable version of the application that can be moved between vSphere and vCloud environment. In addition, you have an offline copy of your application, in case something happens to your original instance. OVFs can easily be put on file shares and replicated in case of a disaster and can be easily re-deployed in case something breaks from development and testing efforts.
Exporting a vApp
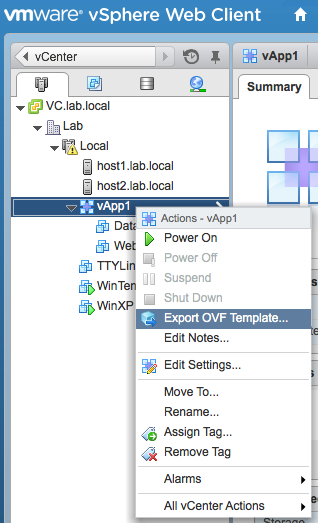
1. Using the web client, we locate the vApp that we want to export and right-click the vApp and select Export OVF Template…:
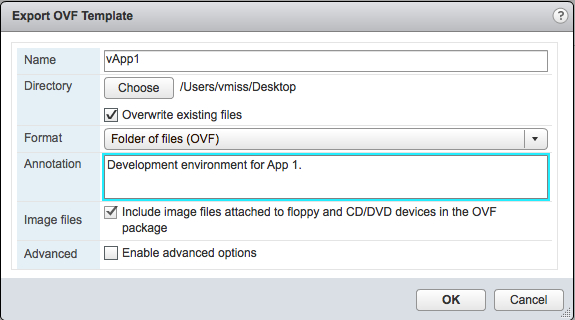
2. The export wizard will ask us to name our OVF, choose the directory we are exporting it to on our local machine, and add an annotation. The annotation field can be helpful to note if you are exporting a specific version or environment of your vApp.
3. After clicking OK, we will see our vApp exporting in recent tasks.
Cloning a vApp
You may also find that cloning your vApp is the simplest solution if you just want to create multiple instances in the same environment. This is as easy as cloning a traditional virtual machine in your environment as you will see here.
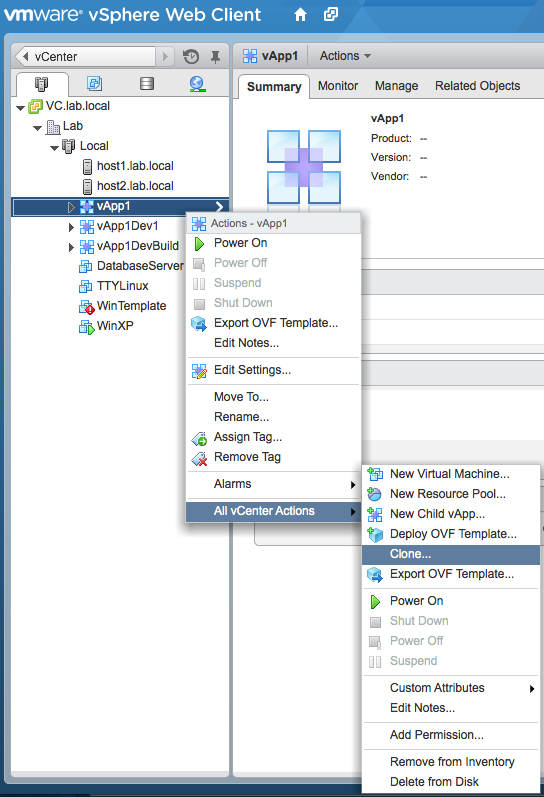
1. In the vSphere Web Client, right-click on your vApp and select Clone vApp from All vCenter Options.
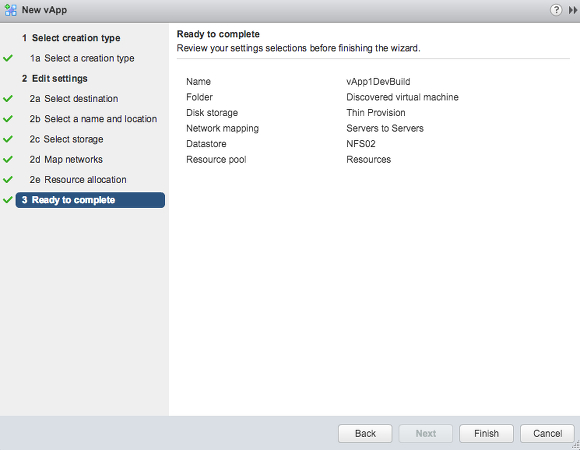
2. This next screen should be very familiar. It is the same screen we saw in Part 1, except now we are selecting the clone as an existing vApp option instead of the Create a new vApp option. Once we click Next, we can follow the same process as we did before. Through this process, we’ll have the opportunity to name our clone, select what storage we place our vApp on, map our networks, and change resource allocation. Now, we’re ready to finish our clone and have a brand new vApp environment.
Importing a vApp
Now that we know how to export our vApp objects, let’s look at how to import a new vApp. The wizard-driven import process is simple to use, and you would use any time you wanted to deploy an OVF in your vSphere environment. First, you can start by right clicking on a host, and selecting Deploy OVF Template… One of the great features of the vSphere Web Client is the ability to do almost anything you want, from wherever you want. For example, you could also right click on a vApp, VM, or cluster, and deploy the OVF from there, as you can see in the screen shot above from the cloning process.
You can deploy an OVF file from the Internet, your computer locally, from a network share, or an optical drive. In this case, we are going to select an OVF from our local hard drive.
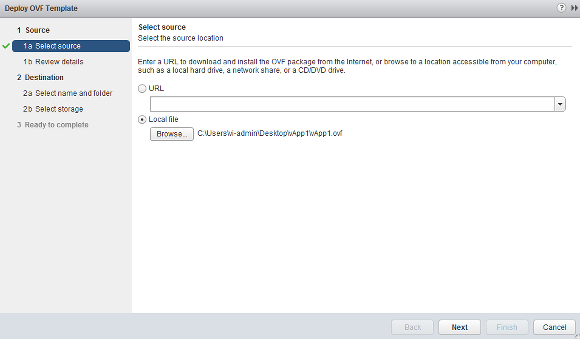
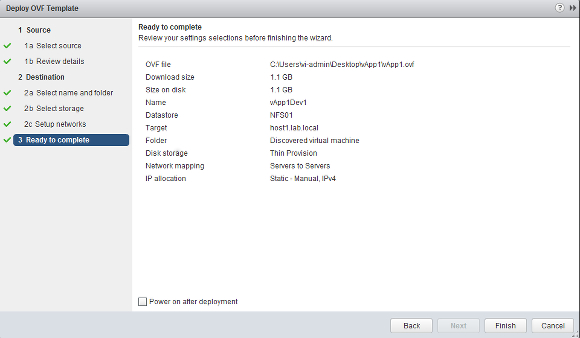
After we select where we will deploy the OVF from, we will configure options just like we did when we were creating or cloning our vApp. The only difference is that we will not be able to edit our CPU or Memory allocations while deploying the OVF. Once the vApp is deployed, we can modify these options as needed.
Removing Virtual Machines from a vApp
One administrative task we may have to perform is removing a virtual machine from a vApp. We may decide to replace a virtual machine with a newer version or split a vApp into multiple instances. Either way, removing a virtual machine from the vApp is as simple as adding it. We can simply drag the machine out of the vApp and back to the regular inventory. The vApp will be updated automatically and the resource allocations, boot sequence and all other properties are dynamically adjusted.
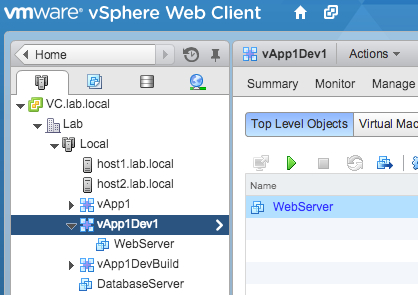
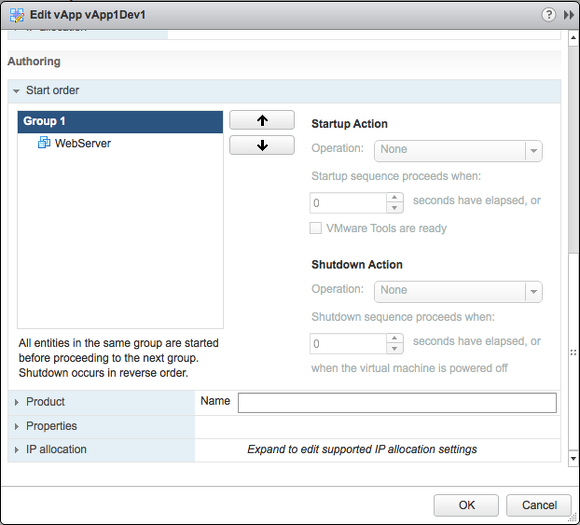
As you can see, the DatabaseServer has been removed from the vApp1Dev1 vApp, leaving the WebServer behind. The DatabaseServer can now be managed like any other virtual machine in vCenter. If we check the settings of the vApp, we no longer see the DatabaseServer, and it has been removed from the Start order.
Removing a vApp is as simple as right clicking on it and selecting Remove From Inventory from All vCenter Actions, just like how you would remove a virtual machine from inventory. As long as the OVF is available, it can be re-imported at any time.
The Advantage of using VMware vApps
As we’ve seen here, managing a vApp is not very different than managing a traditional virtual machine. The common administrative tasks are simple, but the advantage here is that vApps have more features and functionality for multi-node applications.
With the move toward cloud-based methods of deploying and managing infrastructure, it is important for VMware administrators to understand how vApps work and when it is appropriate to use them. vApps provide a great method to make your virtual applications easily portable. There are even more features available, and as with most VMware technologies, you can also use PowerCLI scripting to manage your vApps.
Give vApps a try, and you, too can see how simple and powerful they can be.


