How to Manage Remote Connections in mRemoteNG
Most system administrators need to connect to many different systems, often in a variety of ways. There are several tools out there that offer this ability, but one of the more popular tools available is that of mRemoteNG. Originally a fork of mRemote, mRemoteNG adds many new features to mRemote.
Features
To support the many different types of connections and configurations, there are a myriad of options and tools available to you in mRemoteNG.
Connection Grouping
Using folders, connections can be grouped in a variety of ways. Conveniently, mRemoteNG lets a user set configuration options at the folder level and then define the inheritance on a single connection. With many different connections, this greatly simplifies the work necessary to configure many different connections at once.
Protocols Supported
The following protocols are supported within a connection configuration.
- RDP (Remote Desktop/Terminal Server)
- VNC (Virtual Network Computing)
- ICA (Citrix Independent Computing Architecture)
- SSH (Secure Shell)
- Using a custom Putty implementation named PuttyNG
- Telnet
- HTTP/HTTPS
- rlogin
- Raw Socket Connections
Security
There are a few very useful security features available. Since connections are often very important to save and manage securely, not only can you ask for a password before opening any given connection, the entire configuration can be encrypted in a variety of methods.
Using mRemoteNG
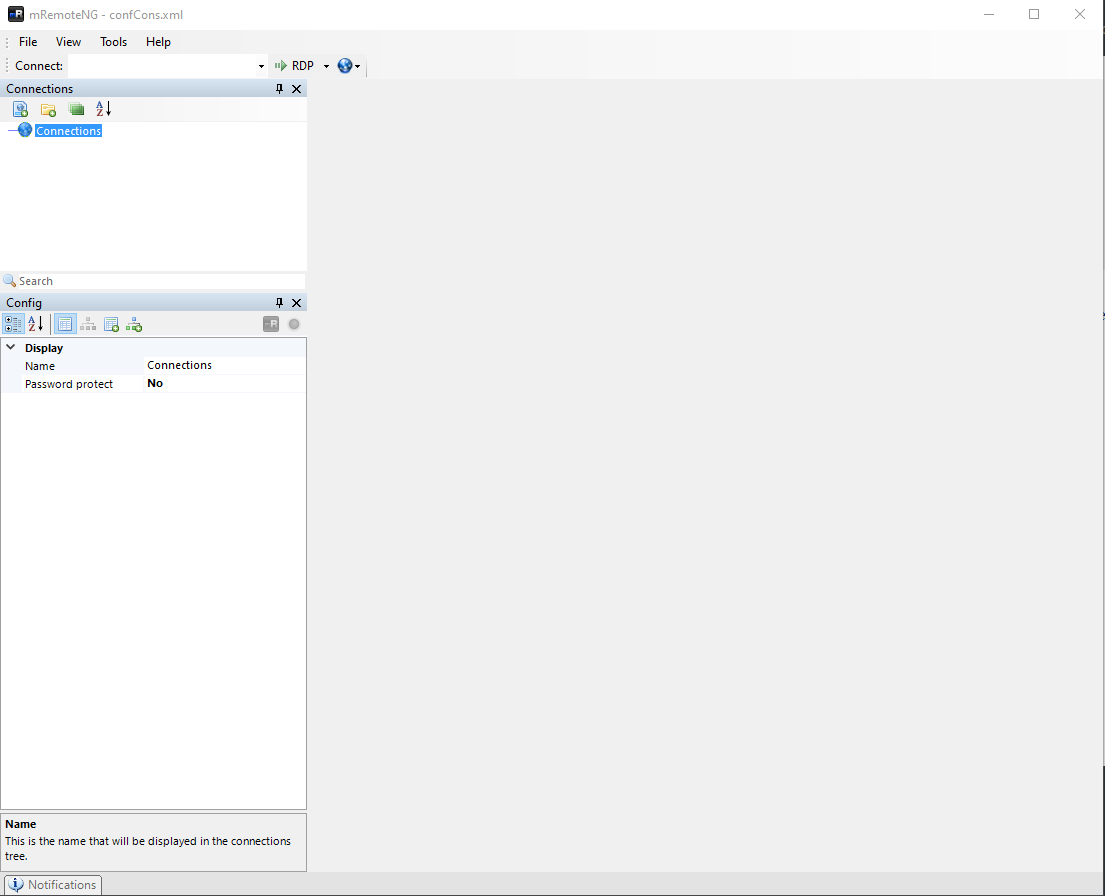
On first startup, the mRemoteNG screen will be very plain. To get started, it is simply a matter of creating a new connection. To do this, you can either right-click on Connections or click the new connection icon.
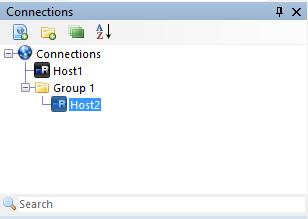
In this case, we are creating a new RDP connection for testing named Host1. Often, the defaults for a given connection will be enough, but there is some basic information needed. Notably, the Connection configuration section is necessary to know where and how to connect to a given system.
- Hostname/IP – NetBIOS, Fully Qualified Domain Name (FQDN), or IP Address of the system to connect to
- Username – The username allowed for a remote connection
- Password – Optionally, put in the password or skip this to prompt when connecting
- Domain – Optionally, add the domain, which is necessary for RDP domain connections
You may not want to put in a password in the case that the file was not encrypted and/or acquired by a bad actor. This would act as an additional layer of protection at the expense of convenience.
Folders
Using folders, you are able to group connections in a variety of ways. It is up to you to determine how best to group your connections, but using inheritance you have multiple ways to make this work.
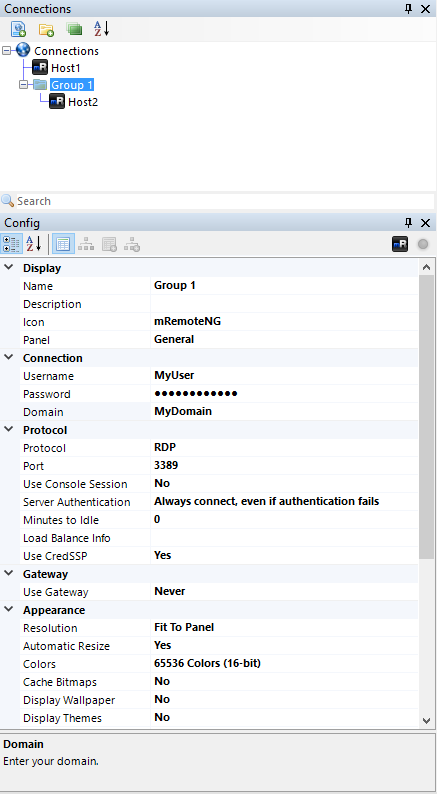
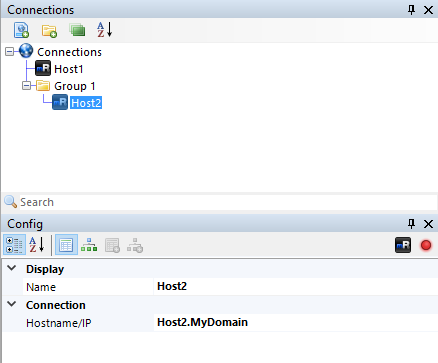
In the example seen above, we have created a Group 1 folder with a new Host2 connection underneath. Of course we may decide that instead of defining all of the options for each connection, it would be preferable to do this at the folder level and inherit the options down. To do this, we would click on the folder and then define just the unique connection information per connection.
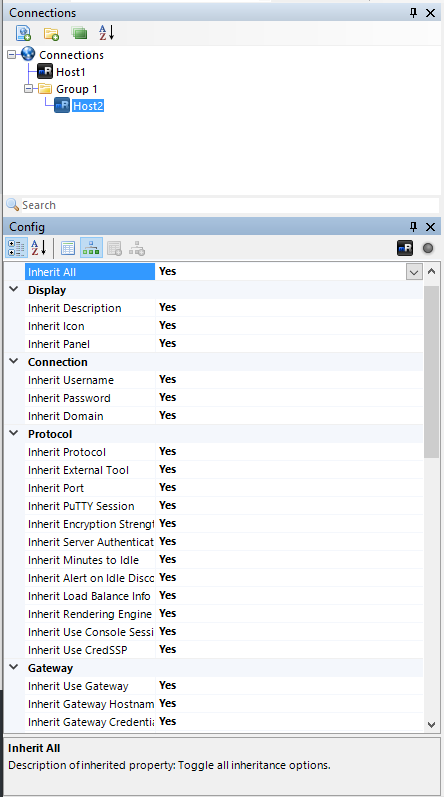
In the above screenshot, we have defined MyUser, a password, and MyDomain in the Connection configuration section. By default, when adding a new connection underneath the folder, the connection information will not be inherited down. Click on the inheritance button as seen below and choose Inherit All and set Yes.
By doing this, you can see below that the only options to configure available to us is the Name and the Hostname/IP.
Other Connection Protocols
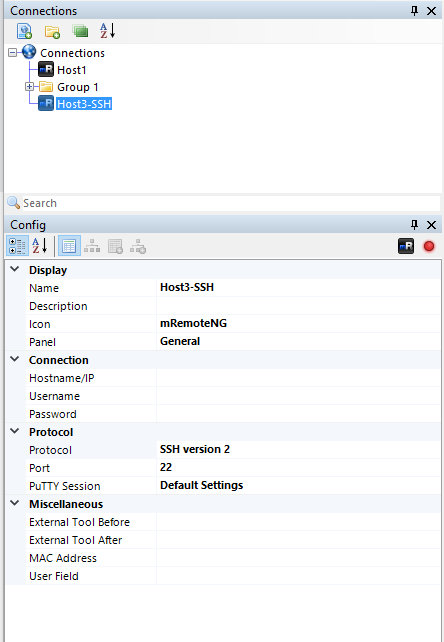
Of course, the above example only illustrates that of RDP. There are many other options, and the second most common is most likely SSH. In the example below, I have created a new connection, Host3-SSH and selected SSH version 2 for the Protocol type.
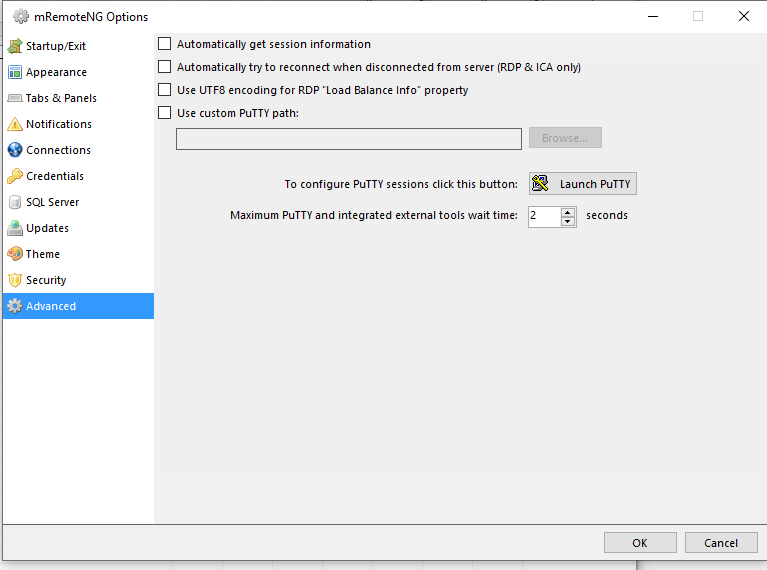
You will note that there are not many options here, and that it uses PuTTY to make the connection. By default, there is just a single default putty session setup. To configure PuTTY to work with your connections, you may need to modify the default setup. To do this, launch Options, and choose the Advanced section. There you will find the Launch PuTTY option.
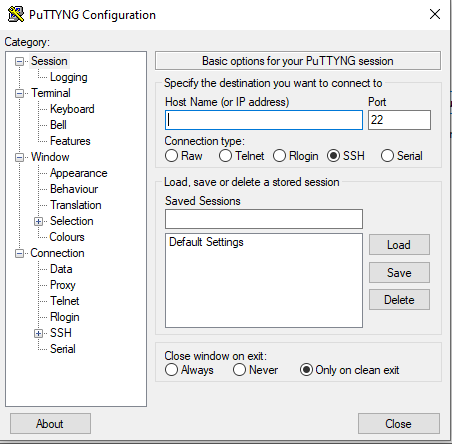
After clicking on this, you will be presented with the default PuTTYNG configuration screen. Make note that there is a Default Settings session. This is what is reflected in the Protocol configuration section. You may create multiple sessions and choose between them there.
After making all of the configurations required, you only need to populate the necessary Hostname/IP, Username, and Password information fields.
Additional Tools
There are a handful of additional tools that mRemoteNG includes that may be useful. There are three to note that are located on the Tools menu.
- SSH File Transfer
- External Tools
- Port Scan
SSH File Transfer
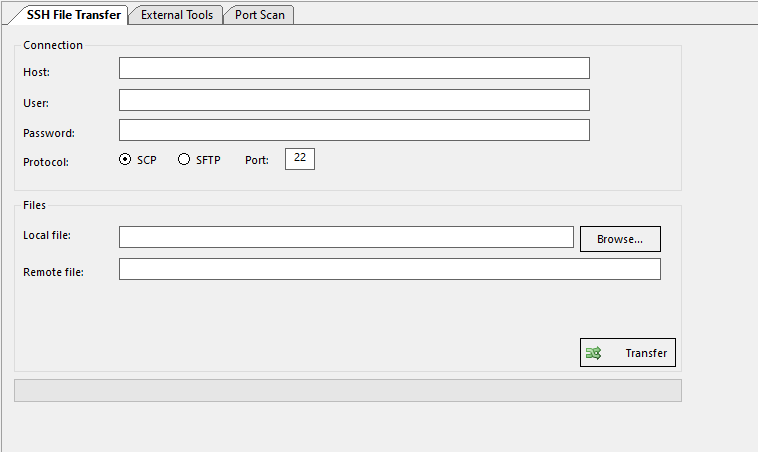
Using the SSH File Transfer tool, you can quickly send a file to a remote system using either SCP or SFTP. This is very handy when working with SSH connections as many times working with a local file is and transferring that file is easier than attempting to do the same remotely.
External Tools
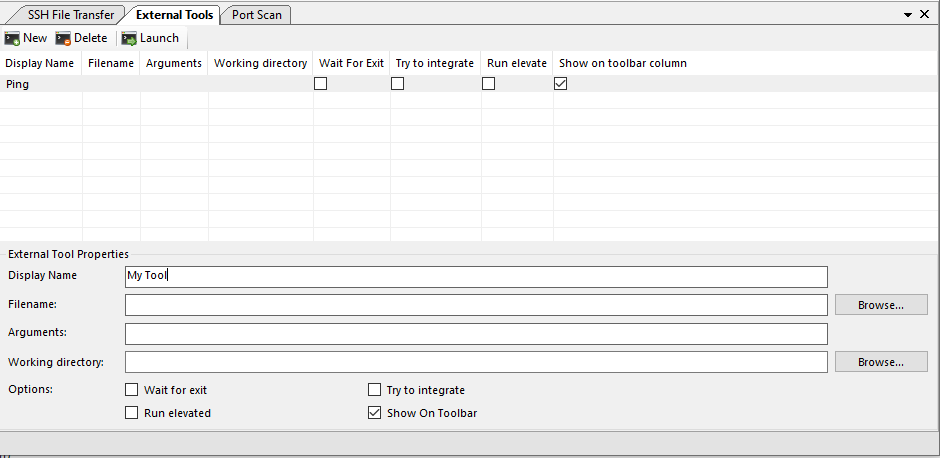
mRemoteNG allows you to define a number of extra tools that can be run before and/or after a session or on-demand as needed. There are a couple of options available to you:
- Wait for exit
- Run elevated
- Try to integrate
- Show on Toolbar
Port Scan
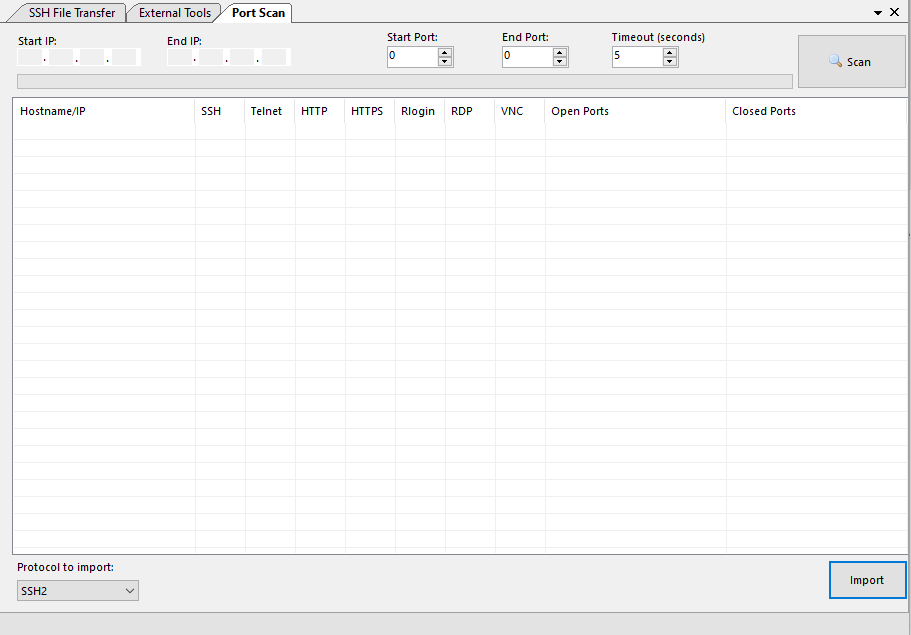
Finally, the last useful tool covered here is the Port Scan tool. Finding the available connections to connect to on a local network can be time-consuming. This is not as useful with remote servers, but on a local network, this can make fast work of discovering all necessary resources.
Conclusion
With the many different connections needed by a System Administrator, especially with the advent of cloud systems, mRemoteNG makes managing these connections extremely easy. With encryption and password protection options, mRemoteNG makes protecting those important connections easy as well.


