How to Edit Linux Files Remotely in Windows Using Visual Studio Code
Visual Studio Code (VS Code) is a lightweight code editor for Windows, Linux, and MacOS. It has grown in popularity among developers and system administrators because it is fast, extensible, free, easy to use, and cross platform. The job of system administrator has changed a lot over the past few years, and what with the rise of Infrastructure-as-Code, it is likely that you will need a good code editor to create and debug scripts and templates.
Like all code editors, VS Code works with local files by default. But it can also be used to edit files and run code on remote servers. Using PowerShell, it is easy to edit and run code on remote Windows servers, and I’ll cover that in a separate article. But as is almost always the case, doing the same in Linux is more complicated.
Regardless of the platform, the ability to edit files remotely is useful because it allows you to work from a single management PC and saves you constantly needing to switch between different environments. But it is especially useful for Linux because using the built-in text editors can be cumbersome.
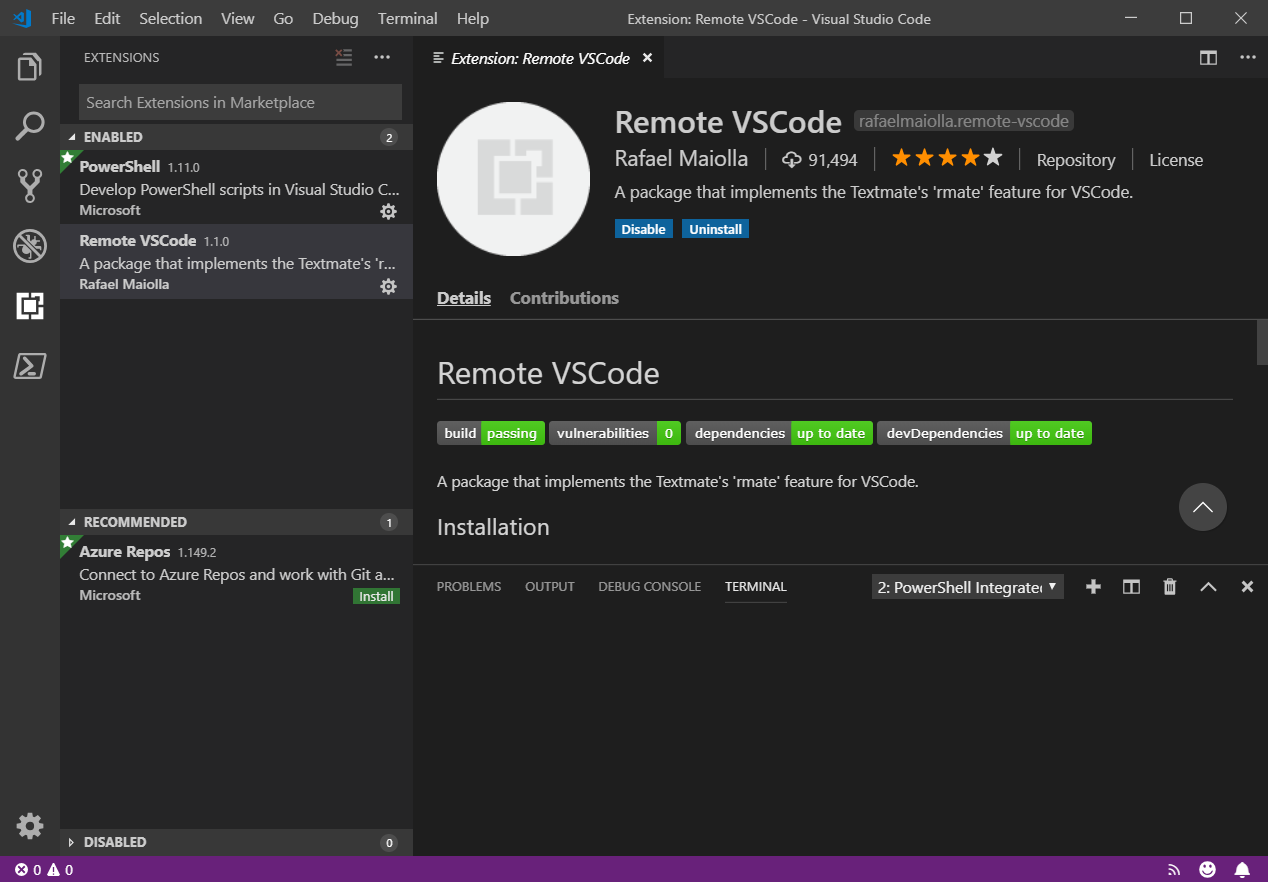
Install Remote VSCode Extension
In this article, I have VS Code installed in Windows 10 version 1809 and will attempt to edit a file running in Ubuntu 18.04. The instructions here should work with VS Code running on Linux as well, but I haven’t tested it. The first step is to install the Remote VSCode extension in Visual Studio Code.
- Open VS Code.
- Click CTRL+SHIFT+X to open the extensions pane.
- In the EXTENSIONS pane, type Remote VSCode into the search box at the top.
- Click Remote VSCode in the list of results.
- On the right of the VS Code window, click Install.

Install Rmate in the Linux VM
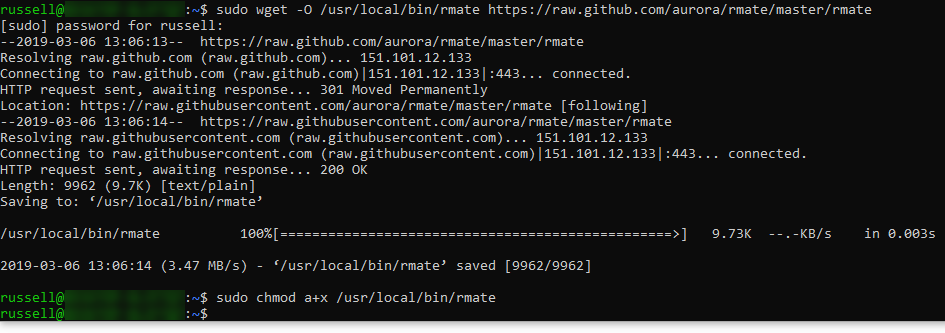
The steps below should be completed on the remote Linux device. It will need to have a connection to the Internet. Start by downloading the rmate binaries using wget. Let’s use sudo interactive mode to run all commands with root privilege. Log in to your Linux device with an account that has root permissions. Type sudo -i at the command prompt and enter your password when prompted. Now you can download the rmate binaries and copy them to the local disk.
wget -O /usr/local/bin/rmate https://raw.github.com/aurora/rmate/master/rmate
Change the permissions on the binaries using chmod:
chmod a+x /usr/local/bin/rmate

Install SSH in the Linux VM
Secure Shell (SSH) isn’t installed in Ubuntu by default, so you’ll need to install and configure it. Install OpenSSH using the two commands below:
sudo apt install openssh-client
sudo apt install openssh-server
Now configure SSH to accept passwords by editing the sshd_config file.
vi /etc/ssh/sshd_config
- Using the up and down arrows, move the cursor to the PasswordAuthentication line of the text file and set it to yes like shown in the picture below.
- Before you can edit the file, you will need to press ‘i’ to enter Insert mode. When you’ve finished editing, press ESC.
- Now type :wq! and press ENTER to save the changes to disk. W is for write, q is for quit, and ! is for force.

For the changes to effect, you need to restart the SSH service. Note that here you should type ssh after the service command and not sshd.
service ssh restart
Test that SSH is working by running the command below, replacing russell with your Linux username. This command connects to the local Linux device using SSH.
ssh localhost -l russell
When prompted, enter the password for the username included in the ssh command above. If you get a successful connection, you should see some output like that in the screenshot below.

Type exit and press ENTER to quit the SSH session.
Make Sure Windows 10 has an SSH Client Installed
Starting in the Windows 10 April 2018 Update, SSH is out of beta and should be installed by default. To check you have SSH, type ssh and press ENTER in the terminal window in VS Code. If SSH is installed on your Windows PC, you should see some output in the terminal window showing you how to use SSH.

Start the rmate Server in VS Code
Before you can connect from VS Code to your remote Linux device, you need to start the rmate server.
- Press F1 to open the command palette in VS Code.
- In the command palette box, type Remote: Start Server and press ENTER.
- You should see the server starting icon turning in the bottom left corner of the VS Code window.

Connect to the Linux VM using SSH
Now we need to make a connection to rmate in Linux over SSH. In the terminal window of VS Code, type the code below, replacing 192.168.76.113 with the IP address of your remote Linux VM, and russell with the username you want to connect with. You’ll be prompted to enter the Linux user’s password and if you successfully authenticate, the command prompt will change to indicate you are connected remotely to the Linux VM.
ssh -R 52698:localhost:52698 192.168.76.113 -l russell
Open a Remote File
All that is left to do is open a file remotely. Let’s open the sshd_config file that we edited earlier. It’s a protected read-only file, so we’ll need to use sudo and add the -f switch to the rmate command to force it to open the file. Both sudo and -f are optional.
sudo rmate -f /etc/ssh/sshd_config

The file should now open in a tab in VS Code. You can edit and save the file like you would any other file in VS Code.


