How to Create And Connect to an AWS RDS MySQL Database

In this guide, we’ll explain how to create and connect to an AWS RDS MySQL database. Amazon RDS is a service that lets you easily set up and configure relationship databases with various types of database instances in the Amazon Web Services cloud.
With Amazon’s relational database service, you don’t have to manage databases on-premises. There’s no need to manage servers, operating systems, software, and install databases. Amazon handles all the installation and management tasks for you.
If you want to deploy MySQL databases in the cloud, Amazon RDS is a scalable solution that lets you do that in minutes. It’s free to try and you’ll only need to pay for what you use.
How to create an AWS RDS MySQL database
Before we get started with the creation of our MySQL RDS instance, here’s what you’ll need to use:
- An AWS account to use the AWS RDS service.
- A MySQL client to connect to our MySQL database in the AWS cloud. For this tutorial, we’ll be using MySQL Workbench.
- A Windows PC where we’ll install MySQL Workbench.
Setting up your AWS account
Let’s kick off this tutorial by setting up the AWS account required to create our RDS instance. If you already have an AWS account, you can just skip to the next section.
Creating an AWS account is pretty straightforward. Here are the steps that you need to follow:
- Navigate to the Amazon Web Services website.
- Click on the Create an AWS Account button. If you’re already signed into AWS, you can just click on Sign in to the Console.

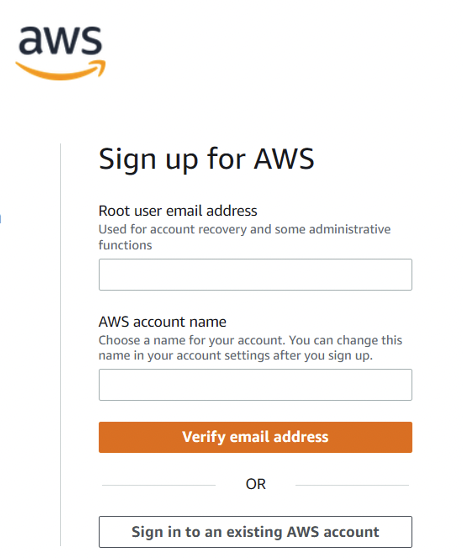
- In the Root user email address field, enter your email address.
- Choose your AWS account name.
- Click on Verify email address. An AWS verification email will be sent to you. Once your email address is verified, you’ll be able to log in to the AWS console.
Creating a MySQL RDS instance
Now that you have your AWS account set up and ready to use, let’s create our MySQL RDS instance. Here’s how to proceed:
- Sign in to the AWS Management Console with your AWS account.
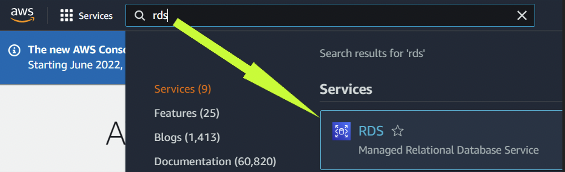
- Type “RDS” in the search box and select the RDS service. This will bring you to the Amazon RDS service main page.
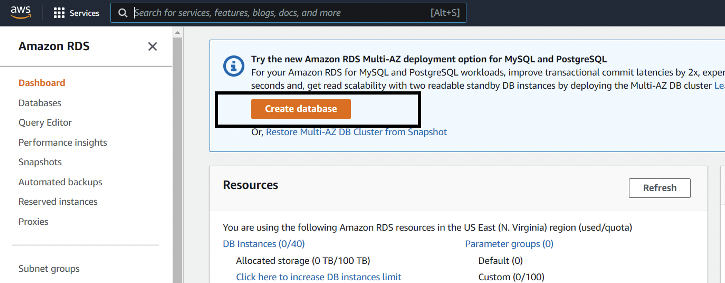
- On the Amazon RDS service page, click on Databases, then click on the Create database button on the right.
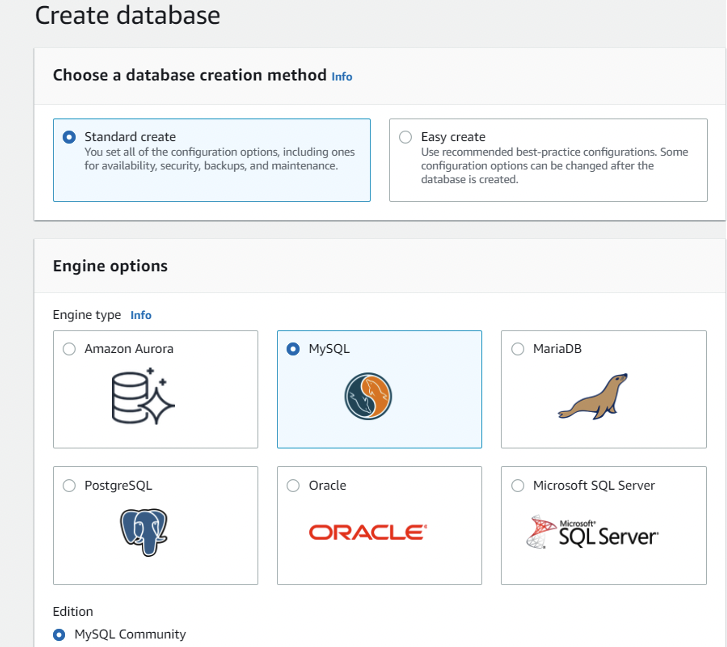
- Choose the ‘Standard create’ database creation method, which will let you choose all configuration options for your AWS RDS instance.
- Select MySQL (Community Edition) as the Engine type.
- Choose the Dev/Test template.
- Select Single DB Instance as the deployment option.

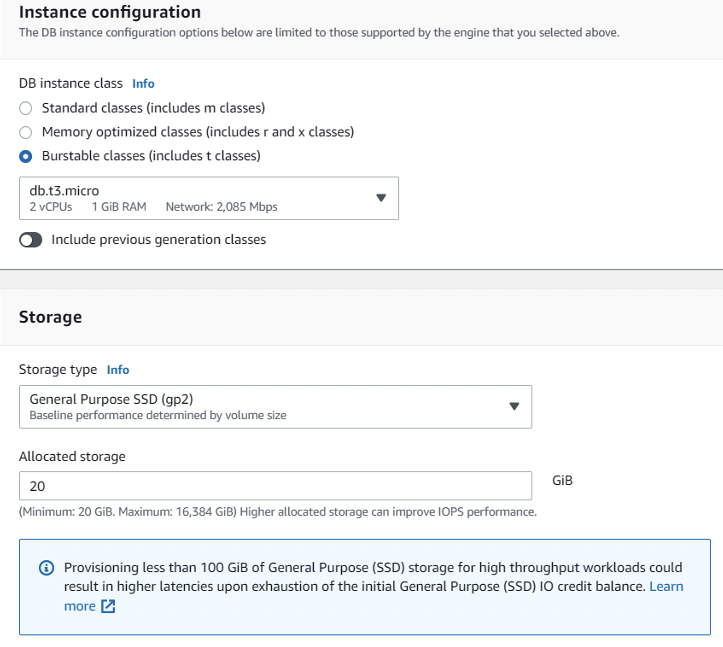
- Next, we’ll choose ‘Burstable classes‘ for the DB instance class.
- In the Instance configuration section, select db.t3.micro. This provides a baseline performance level, with the ability to burst to full CPU usage.
- You can leave the ‘include previous generation classes’ option unchecked.
- For Storage, we choose 20 GiB (Gibibyte) of allocated SSD storage.
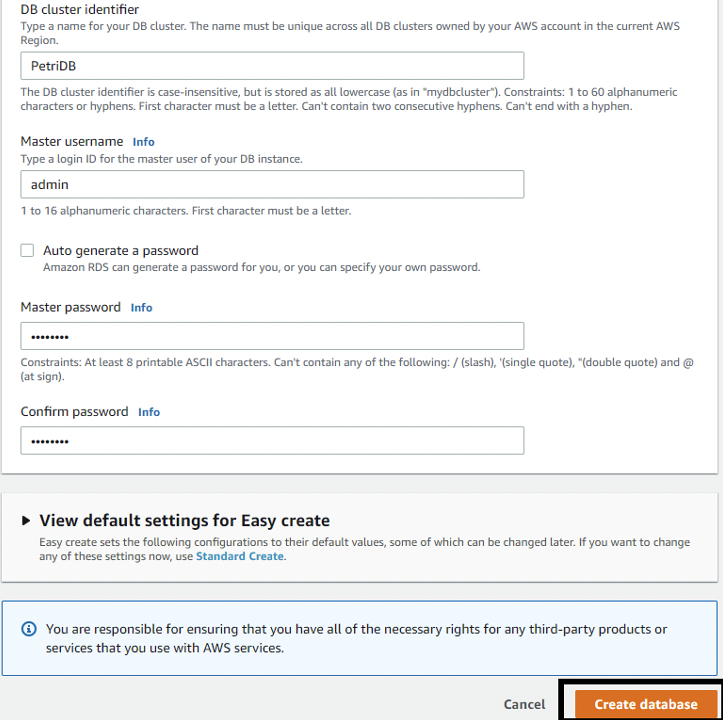
- Choose a DB Cluster identifier or leave the default name. Here, we choose “PetriDB.”
- For the Master username, enter a name for the master user or leave the default name.
- Next, provide the master password and confirm it.
- For the Public Access of Database option, choose Yes.
- Finally, click on the Create database button to create your first RDS database in the AWS cloud.
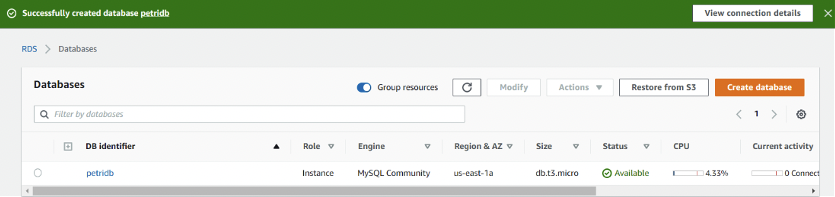
- After clicking on Create database, you’ll need to wait a few minutes before your database appears in the list.
AWS MySQL pricing
With Amazon RDS, you can choose between different instance types optimized for specific use cases. You only pay for what you use, and costs will depend on whether you’re using On-Demand or Reserved instances.
- With On-Demand DB instances, you pay for computing capacity by the hour, and you can choose between Single-AZ and Multi-AZ deployments.
- With Reserved instances, you can get a discount by reserving a DB instance for a one or three-year term. However, Reserved instances prices don’t include storage or I/O costs.
You can use the AWS pricing calculator to get an estimation of your Amazon RDS costs for deploying your MySQL database.
How to connect to AWS RDS MySQL
You’ve just successfully created your MySQL Database instance with Amazon RDS resources. Now, the next step is to download an SQL client to connect to the database so that you can start working with it.
Downloading an SQL client
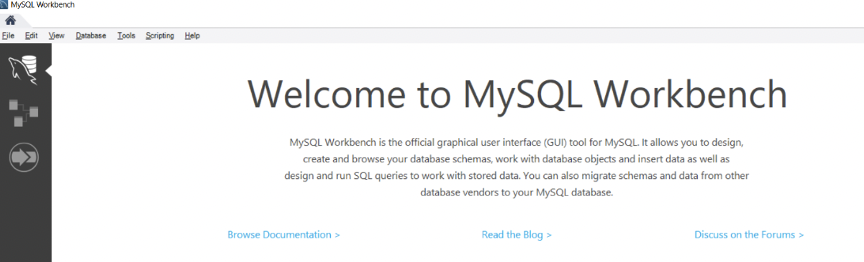
There are multiple SQL clients available on the market. One of the most widely used is MySQL Workbench, which we’ll be using for this guide.
You can install MySQL Workbench on your Windows PC by following these steps:
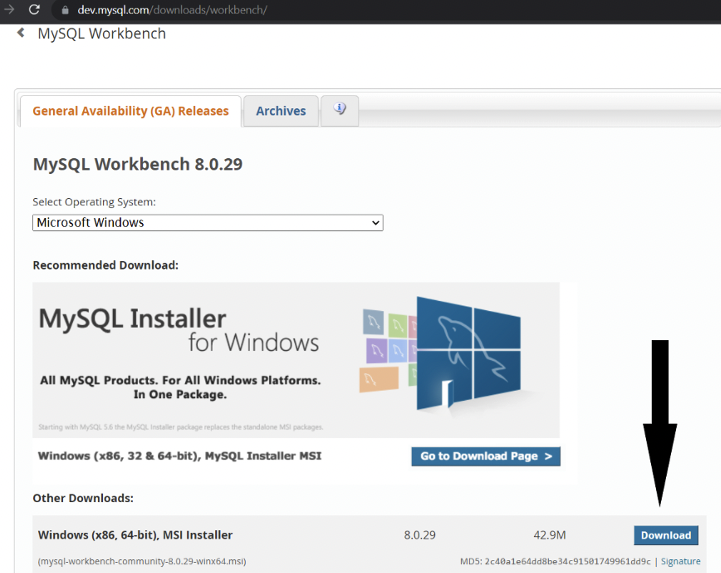
- Open the download page for MySQL Workbench and click on the Download button.
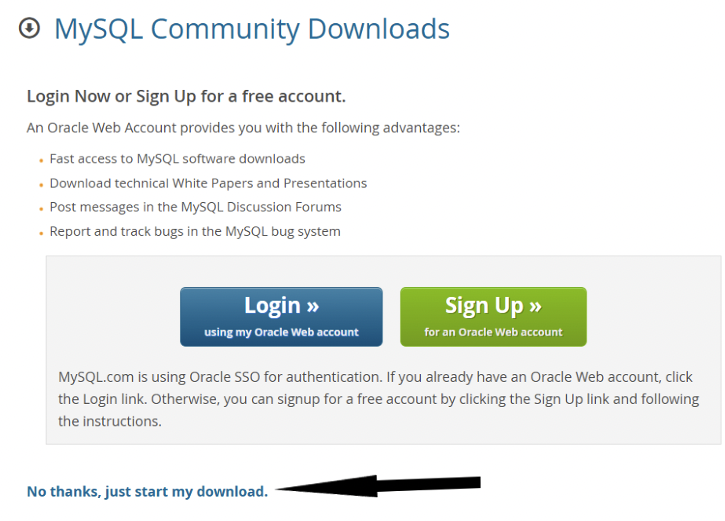
- You’ll be greeted with another screen where you can log in with an Oracle Web account. However, you can just skip this step by clicking on ‘No thanks, just start my download’.
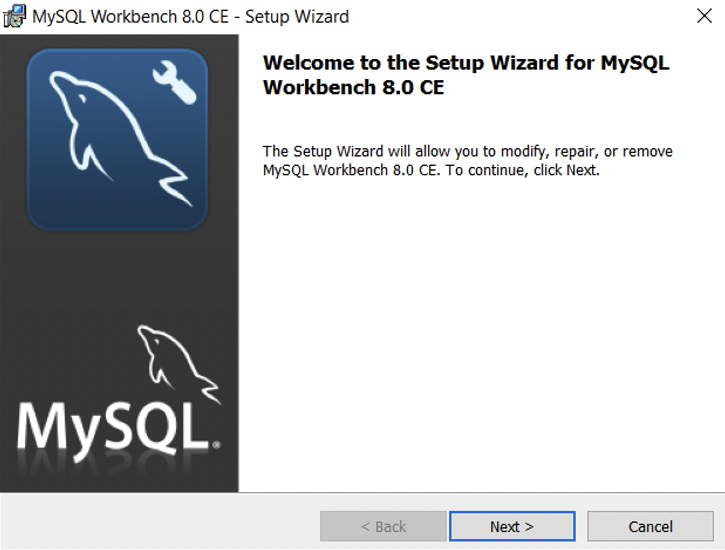
- After downloading the installer for MySQL workbench, open it and click on Next.
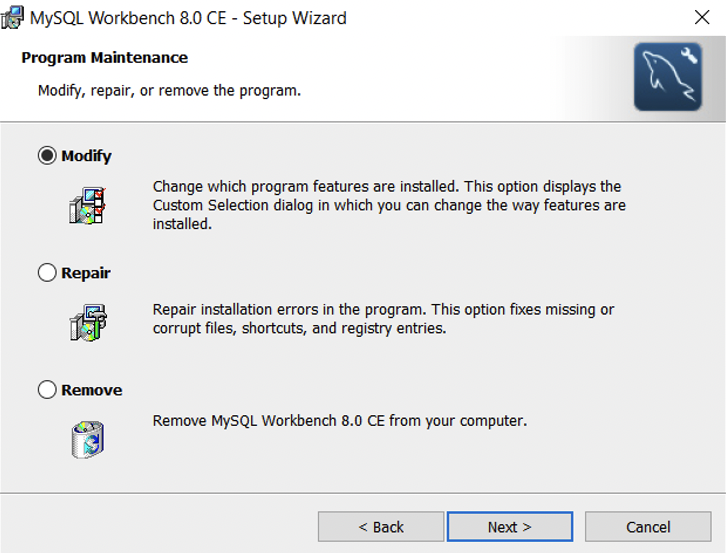
- On the following screen, choose Modify to actually install the software, then click on Next.
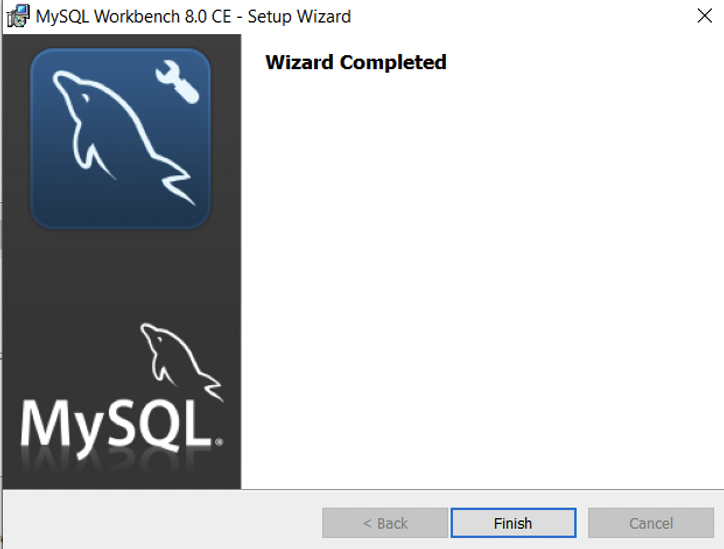
- Finally, click on Finish once the installation of MySQL Workbench has been completed.
You’re now ready to use MySQL Workbench and work with your database. We’ll explain how to connect the app to our MySQL database on Amazon RDS in the next section.
Connecting to the AWS RDS database with your SQL client
Here, we’re going to connect MySQL Workbench to our database created with Amazon RDS. Here’s how to proceed:
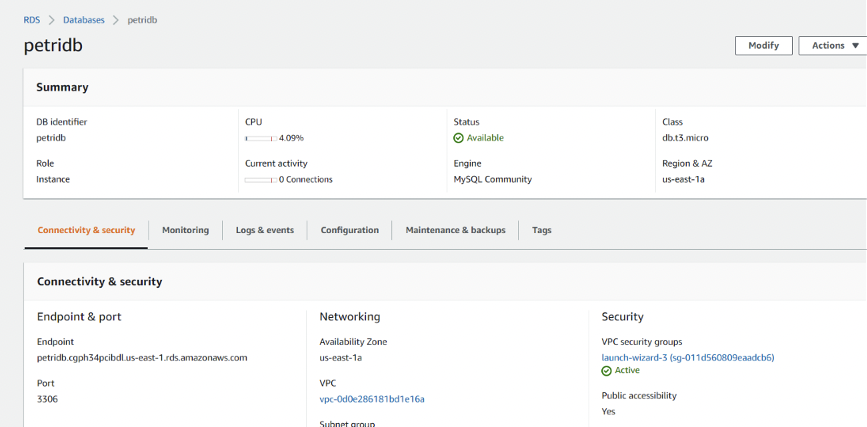
- Navigate to the AWS RDS page and select the database you created (petridb). In the Connectivity & Security section, copy the information about the endpoint and port, you’ll need it later.
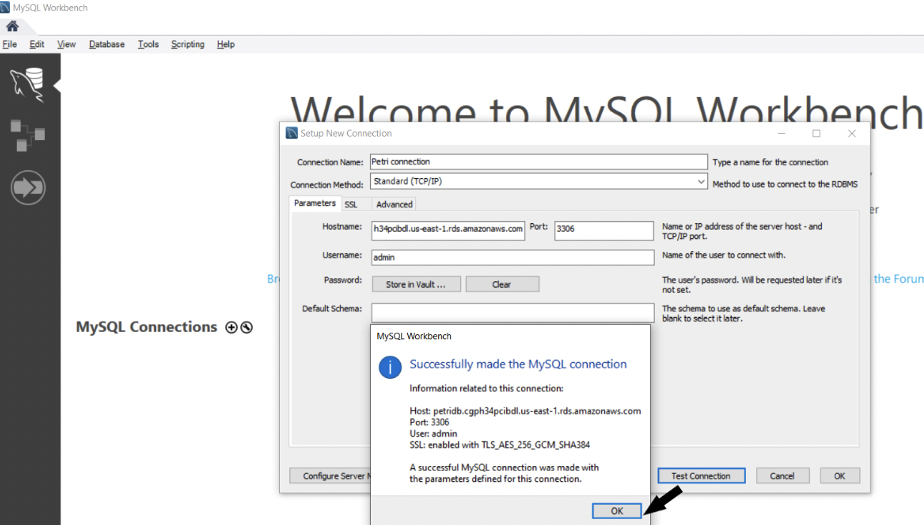
- Now, switch back to MySQL Workbench. Enter a Connection Name and choose Standard (TCP/IP) as the connection method.
- Next, fill in the hostname and port fields with the endpoint & port data for your AWS RDS database.
- Finally, click on Test Connection. As you can see below, the MySQL connection is successfully made.
You’re now ready to use MySQL Workbench to work with your MySQL database on AWS RDS. However, exploring what you can do with your database is out of the scope of this article.
Managing your MySQL RDS instance in AWS
We’ve detailed how to create a MySQL database in AWS RDS and how to connect to it with an SQL client. If you need to manage your database, though, you’ll need to do that on the AWS website.
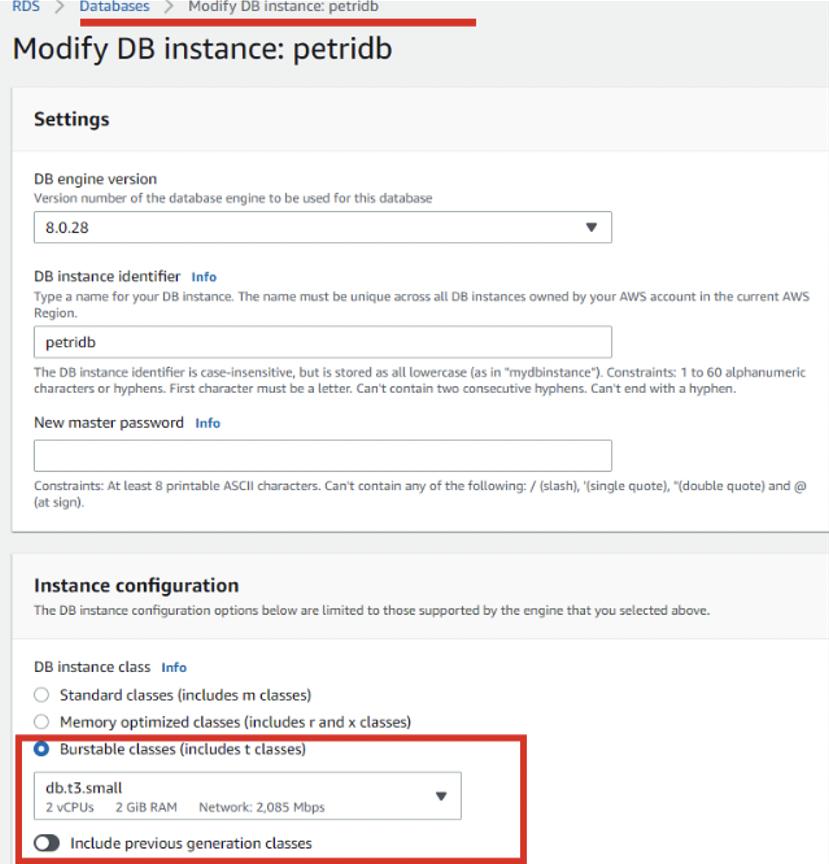
Modifying the RDS instance size
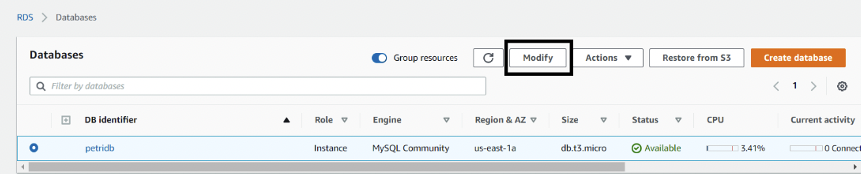
The modification of database instances on the AWS cloud is a pretty straightforward process. If you need to change the size of your RDS instance, open the list of databases, select the one you want to edit in the list, then click Modify.
Here, we’ll change the database instance type to db.t3.small.
You can either schedule this modification on the next scheduled maintenance window or apply it now. Here, we’ll choose Apply immediately and then click Modify DB Instance.
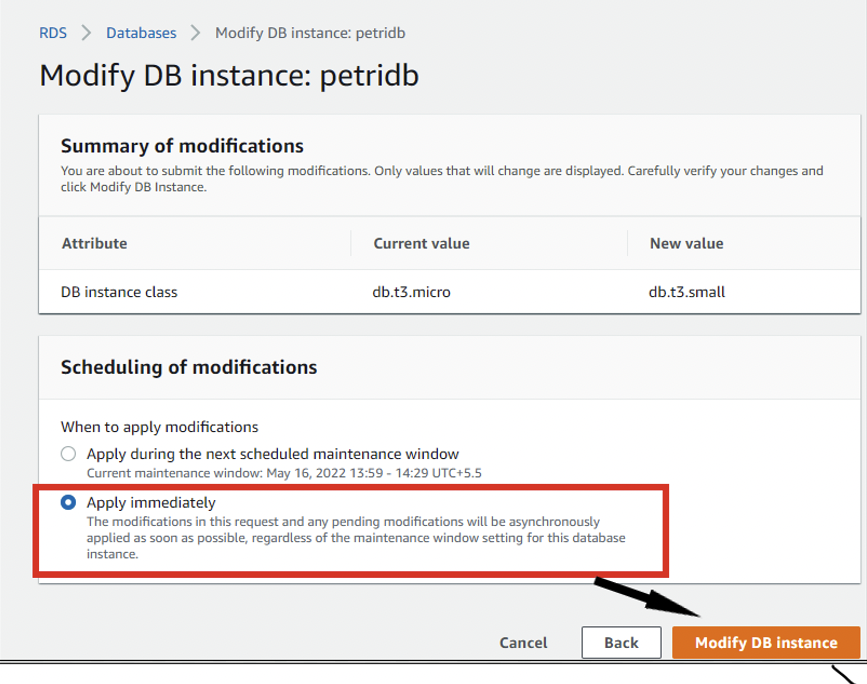
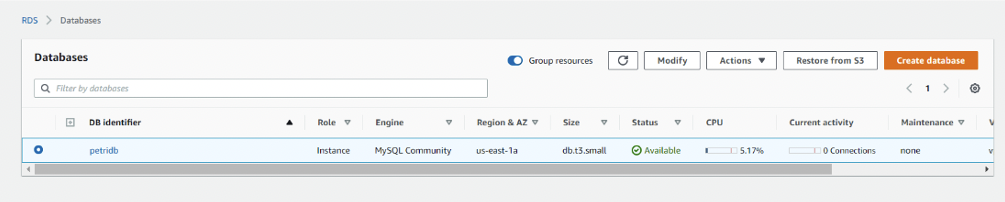
You’ll notice in the list of databases that our petridb database is being modified. After a few minutes, the database instance type will change from db.t3.micro to db.t3.small.
Creating an RDS snapshot
It is very important to keep backups for all the AWS services you use. Databases you create on AWS RDS are no exception.
Here, we have the option to create snapshots (similar to backups) for our MySQL database. Here’s how to do it:
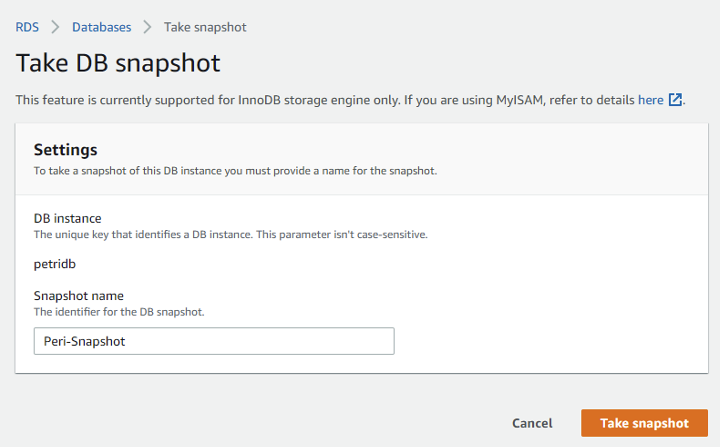
- After selecting petridb in the list of databases, click on the Actions drop-down menu on the top of the page, then click Take snapshot.
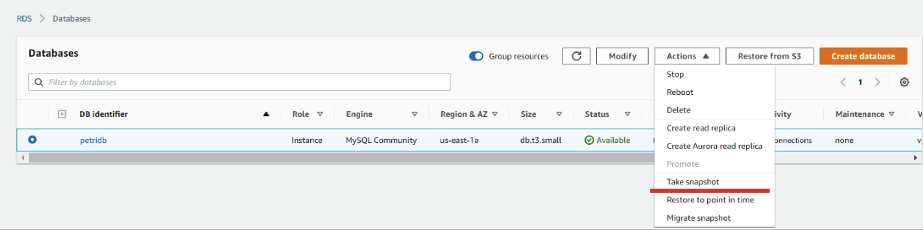
- Next, enter the name of your snapshot (we’ll use ‘Petri-Snapshot’ here) and click Take snapshot.
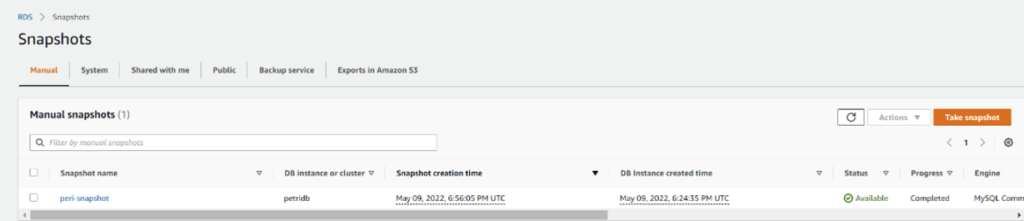
- If you open the Snapshots page on the Amazon RDS website, you should see that your snapshot has been created successfully.
Deleting your RDS database instance
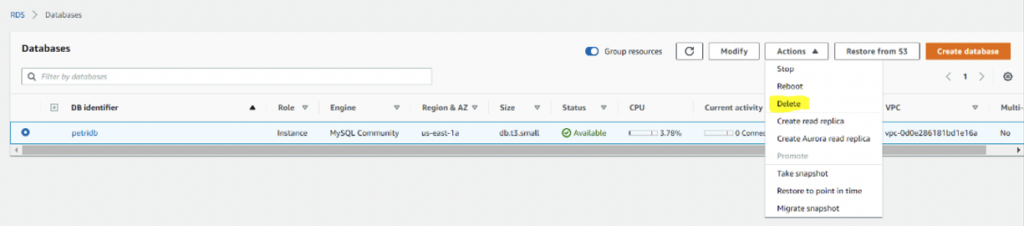
In the final section of this tutorial, I’ll show you how to delete a database instance created with Amazon RDS. To get started, select the database you want to delete in the list, then click on Delete from the Actions dropdown menu.
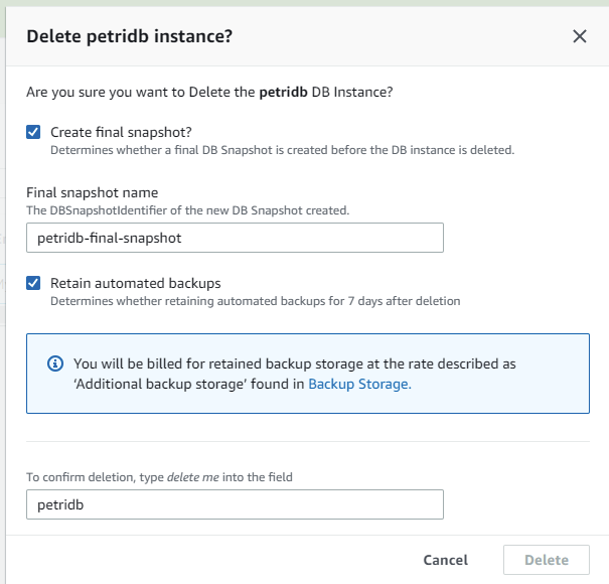
Here, you’ll have the option to create a final snapshot of your database and choose its name (we’ll use ‘petridb-final-snapshot’). There’s also a Retain automatic backups option if you want to keep automated backups for 7 days after deletion.
Once you’re ready, type “delete me” into the field at the bottom and click Delete.
Conclusion
In this article, we learned how to create a MySQL database with an AWS RDS instance. We also learned how to connect to the database using the MySQL Workbench client, and how to manage MySQL RDS instances in AWS.

Sagar is a DevOps consultant and the founder of automateinfra.com. Sagar brings DevOps technology expertise to Petri.com, writing about Terraform, AWS Cloud, Microsoft Azure, Ansible, Kubernetes, Docker, Jenkins, Linux, and Windows.