A Handy, Free Tool for Easy USB Disk Ejection
When using a portable USB disk drive, you probably know that you always need to use the “Safely Remove Hardware” tray icon before unplugging it from the computer. Not only is this true for portable USB disks, but it is also true for other types of mass storage devices, such as portable MP3 players, cameras, and so on. Although Windows tries to protect that data on the portable disk, if you unplug the USB device while data is being written to it, then this can result in data corruption.
Safely Ejecting a USB Device in Windows
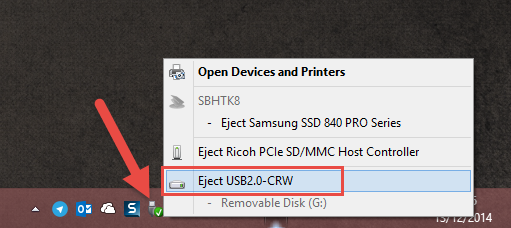
To safely eject the device, left-click or right-click the “Safely remove hardware and eject media” tray icon, and click to select the relevant portable USB disk you want to eject. In previous versions of Windows, there was a difference between regular left-click and right-click, but you don’t need to do that anymore in Windows 7 or 8.
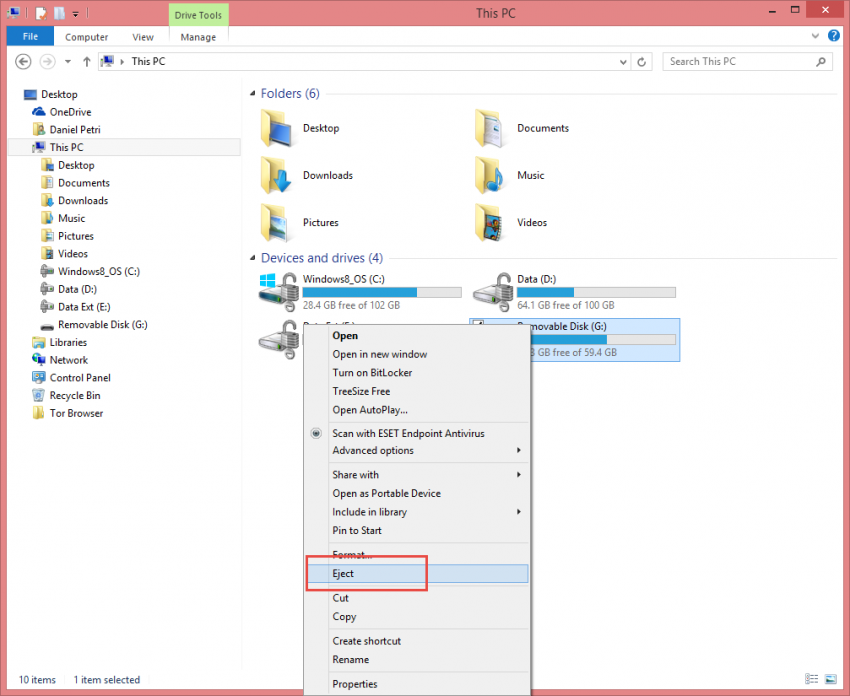
If you prefer to use Windows Explorer to eject the device, right-click it and select “Eject.”
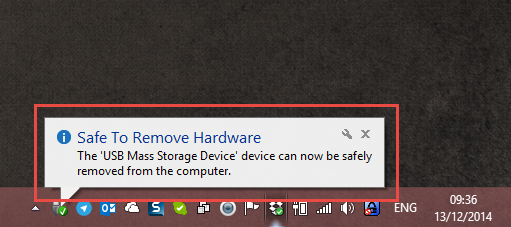
Windows will tell you when it’s safe to remove the device, eliminating any changes of data corruption.
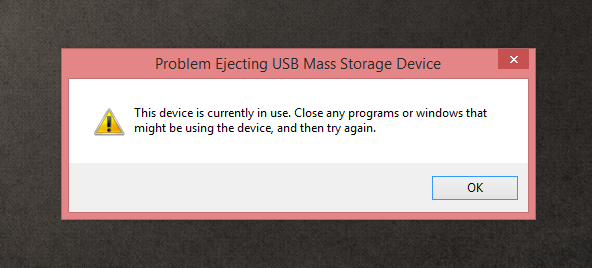
Sometimes a USB disk may still be required by a program that’s running, where Windows places a lock on one of the files on the disk. This can happen even when the USB disk doesn’t appear to be in use. When you attempt to securely remove or eject the portable USB disk, Windows displays an error message on the screen to alert you that the device cannot be ejected because it is currently in use.
When this error appears, assuming you do not want to shut down the entire computer to eject the disk, you may want to identify processes that might be using the USB device. Once those processes are stopped, attempting to eject the disk a second time usually works.
If you cannot determine what application currently uses the portable USB disk, then you can use Device Manager to manually and temporarily disable it. The problem with this method is that you need to disable all USB Mass Storage Devices in the list because Device Manager doesn’t identify which device is what. All portable USB disks will be listed as USB Mass Storage Device, so you need to disable all of them just to eject one.
Using Dev Eject for USB Device Ejection
Dev Eject is a small freeware program that is designed for easy management and removal for portable USB disks from your computer. One useful feature is that lets us see the processes that are currently using the portable USB drive, which is preventing you from safely removing it.
Less than 500 kilobytes in size, Dev Eject is a small tool and is quickly installed. Although the installation UI isn’t that fancy, it does allow you to install the tool for use on your user account or for all users on the computer.
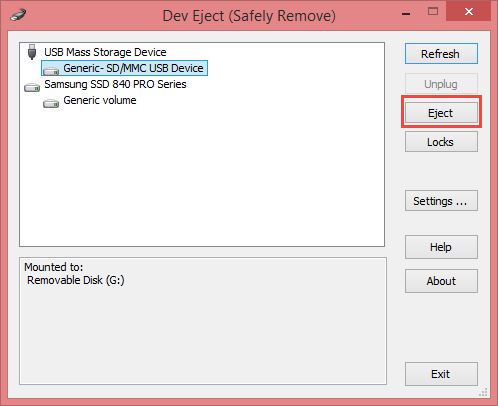
When you start Dev Eject, it will list all the currently connected portable USB devices, which also includes SATA drives. When you click on an individual device from the list, you can either Unplug or Eject it.
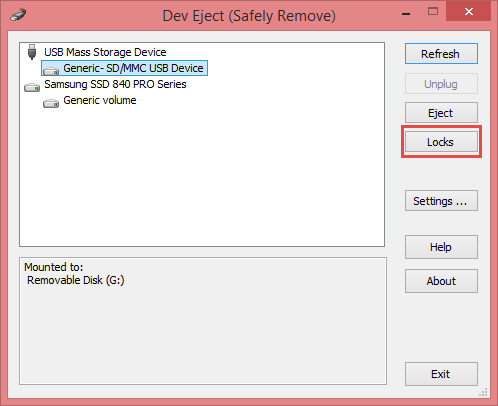
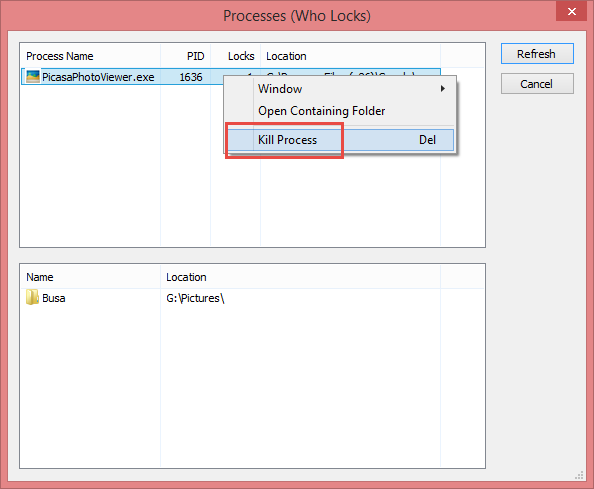
If the device has any locks on it, you can click the lock button, which displays a list of all the processes that are currently using that drive. Once you get the list of processes, then you can easily close the ones that are preventing the removal of the disk and safely eject it.
Dev Eject also had the possibility of expelling USB hubs, recognizing them as simple USB keys, allowing you to remove them as you would with a simple portable USB drive.
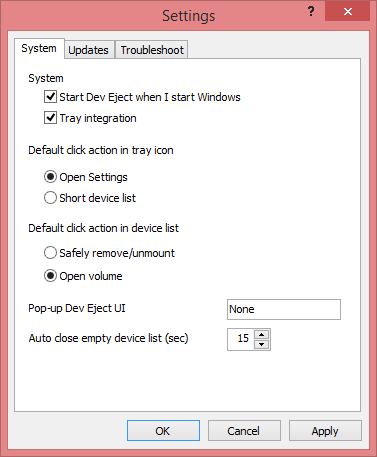
Under Settings, you can enable Dev Eject to automatically start at system startup. You can also add tray integration, specify click actions, auto update and troubleshooting options.
Dev Eject works on Windows XP, Vista, Windows 7, and Windows 8, both on 32 and 64-bit systems and is completely free.


