Creating Azure VMs with Premium Storage

In this post, I’ll show you how to create an Azure virtual machine that uses Azure’s Premium Storage. In previous posts, I provided an overview of shared-SSD storage, along with instructions on how to create a new premium storage account. Let’s put that knowledge to use to create virtual machines with really fast storage.
Azure Virtual Machine Series
Two of the Azure virtual machines series can take advantage of premium storage accounts at this time:
- DS-Series: The unique feature of the DS-Series, based on the D-Series, virtual machine is that it uses host-local SSD storage for the temporary (D:) drive. This fast drive is primarily used for paging, but it also offers a fast location for caching, such as a SQL Server tempdb database.
- GS-Series: The GS-Series, based on the G-Series, is similar to the DS-Series, but the unique feature is that these virtual machines offer unusually large amounts of memory, up to 448 GB RAM at this time.
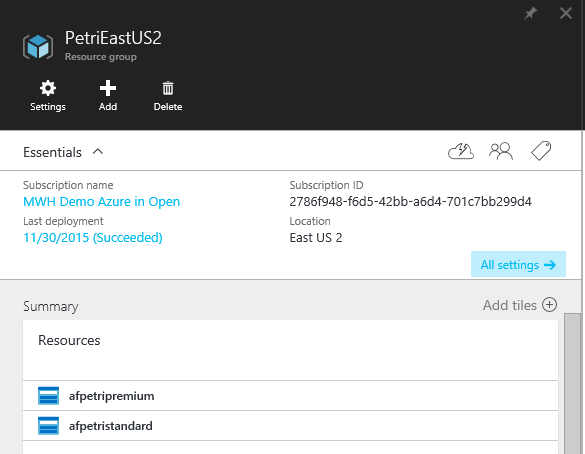
Note that Premium Storage, D-Series and G-Series virtual machines are not available in all regions. You will need availability of the virtual machine and Premium Storage to be able to deploy virtual machines with SSD-based storage. I used the East US2 region for the Premium Storage labs in this post in an Azure resource group called PetriEastUS2.
When you deploy a DS- or GS-Series virtual machine, you can choose to place OS and data disks onto a mixture of standard or premium storage accounts.
- OS disks: A typical OS disk does not need to be fast. But some applications will benefit from fast loading of processes.
- Data disks: Some applications will benefit greatly by storing data on SSD, but not everything needs such fast storage. Think about the good ol’ days of designing a physical SQL Server deployment. We used RAID10 for the log disks and RAID5 for the data disks. Maybe and this depends on your application, your log files would benefit from fast IOPS on a small SSD drive, and the database would be fine on a large capacity HDD drive?
Deploying A Virtual Machine
You should use the Azure Preview Portal when working with Premium Storage. Click New, search for Windows Server, select Windows Server 2012 R2 Datacenter (or whatever OS you need), choose Classic, and click Create.
In this example, I’m creating a DS-Series virtual machine with:
- OS disk on Standard Storage
- Data disk on Premium Storage
- Data disk on Standard Storage
This configuration will mimic the classic design of a SQL Server machine, with costs and performance being optimized for the nature of the data stored in each data disk.
I expanded Pricing Tier, clicked View All, and selected DS1 for my desired virtual machine spec. Under Optional Configuration, I expanded Storage Account, and selected a standard storage account that I previously created. At this point, we are only configuring the storage of the OS disk; the matter of data disks will be dealt with later.

After the VM is created, I can open up the settings, click Disks, and select Attach New; this allows you to add data disks to a virtual machine.
A blade called Attach New Disk appears; select Storage Container and Choose Storage Account to place this new data disk onto either the premium or standard storage account of your choosing — I selected Premium Storage. You will need to create a container by selecting Choose Container to store the virtual hard disk in. If this is a previously unused storage account, then create a container called vhds to keep things consistent.
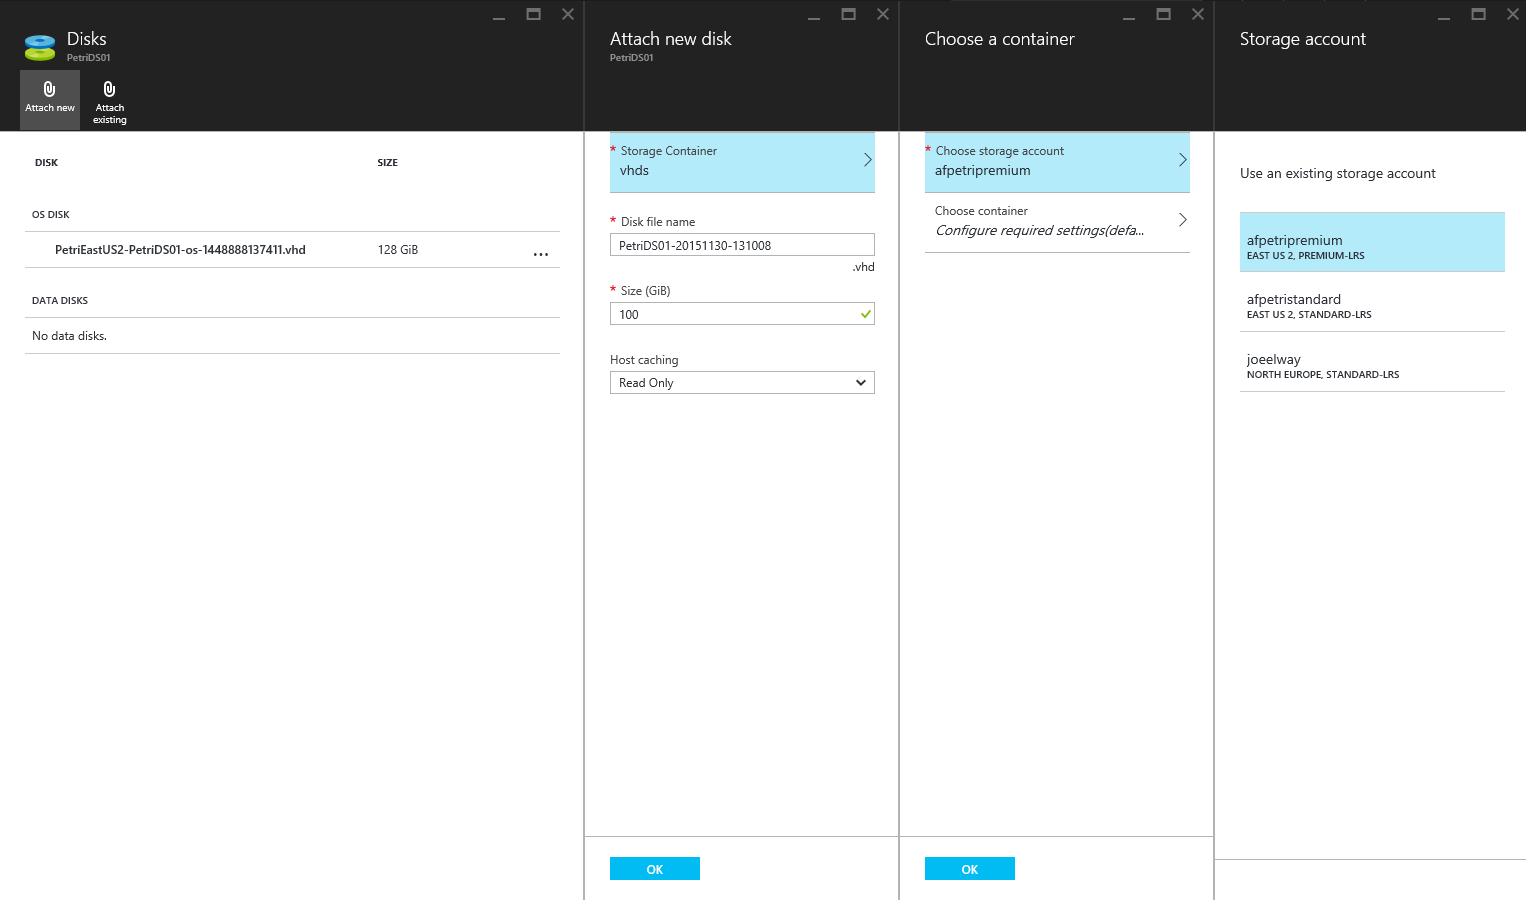
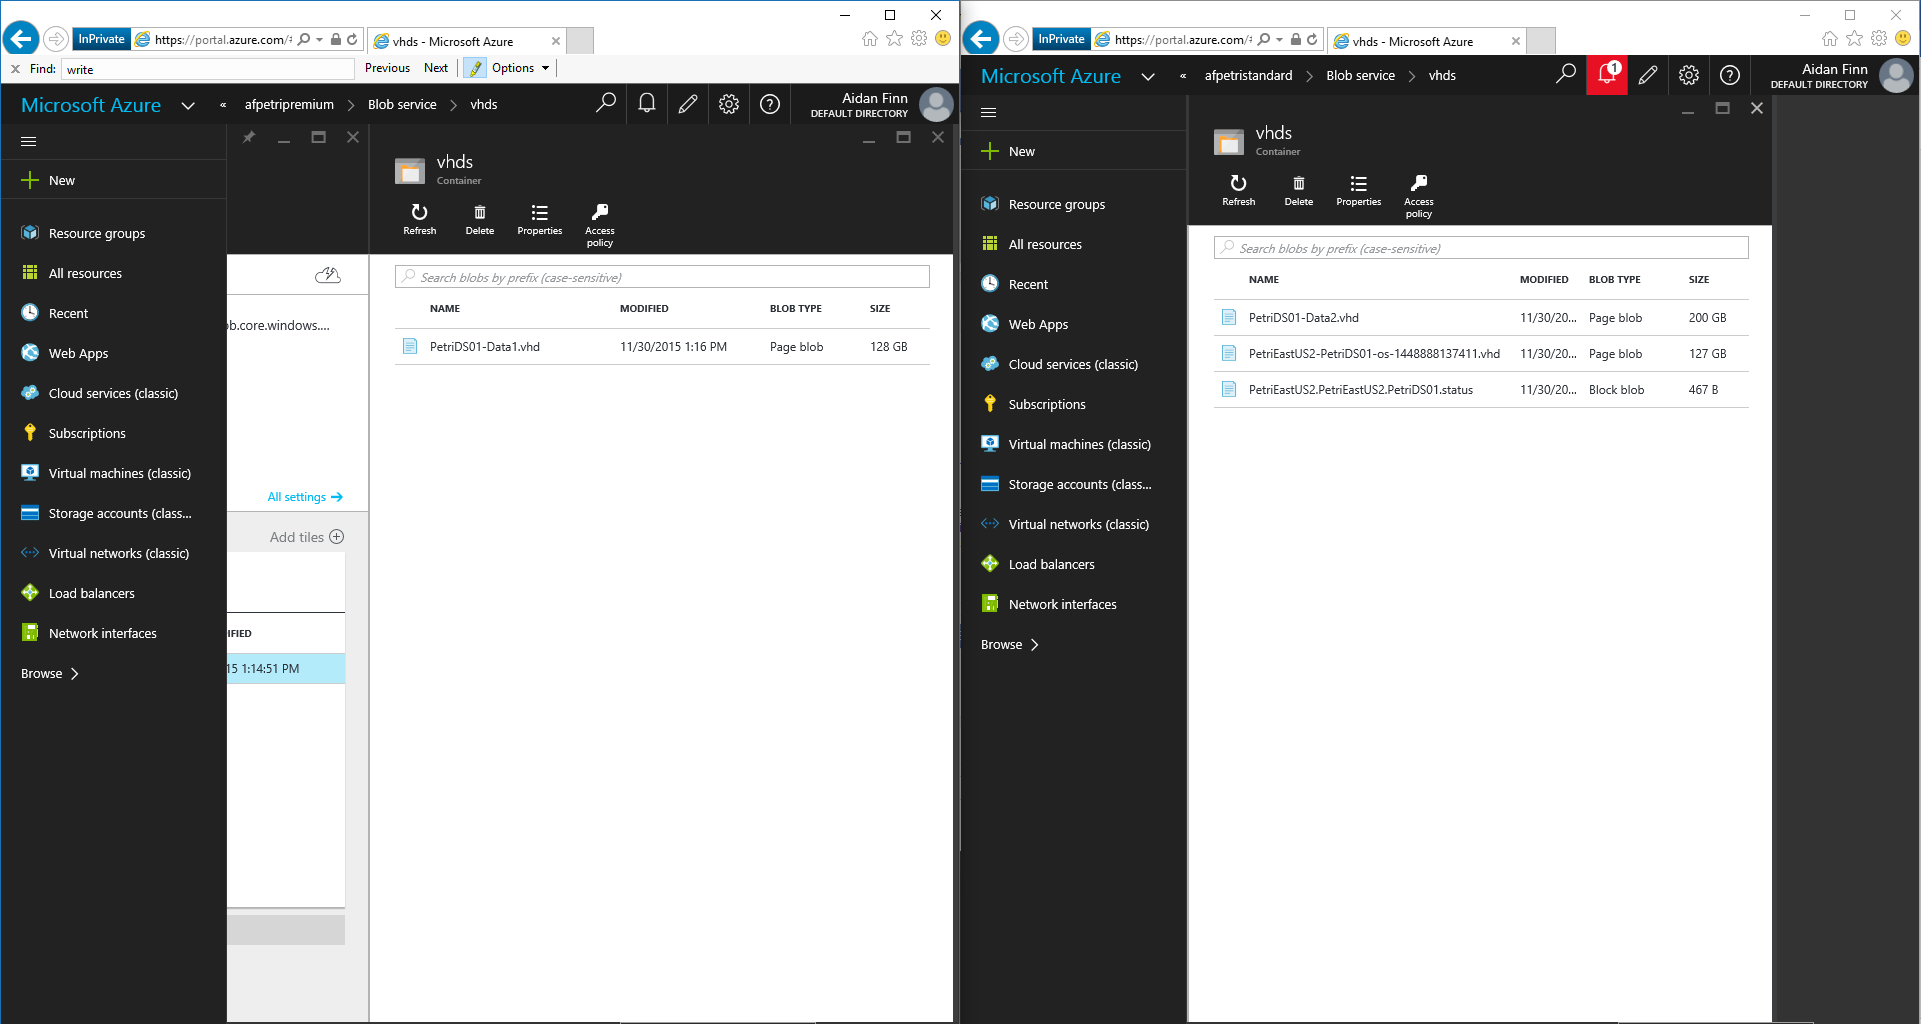
I can click Attach New again, and this time create a data disk on a standard storage account. Once all of the disks are created, I can browse the storage accounts and observe that there are two disks on Standard Storage (OS and data) and one disk on Premium Storage (data).
I can now log into the virtual machine, launch Disk Management, initialize the disks, and format them. Now, I can start using these data disks for optimum placement, performance, and costs.

Aidan Finn, Microsoft Most Valuable Professional (MVP), has been working in IT since 1996. He has worked as a consultant and administrator for the likes of Innofactor Norway, Amdahl DMR, Fujitsu, Barclays and Hypo Real Estate Bank International where...

