In this quick tutorial, we’ll show how sysprep and ImageX can be used to capture a custom system image of Windows 7 with applications.
Before undertaking, also check out our introductory article on using ImageX for file-based image deployments.
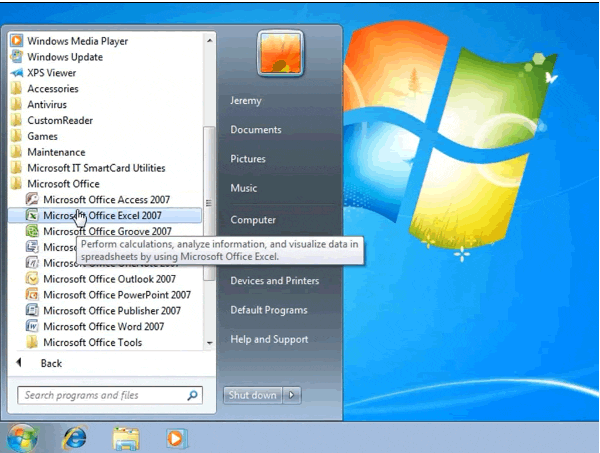
We’ll begin by showing that this desktop has already been configured with custom applications including MS office and an antivirus application.
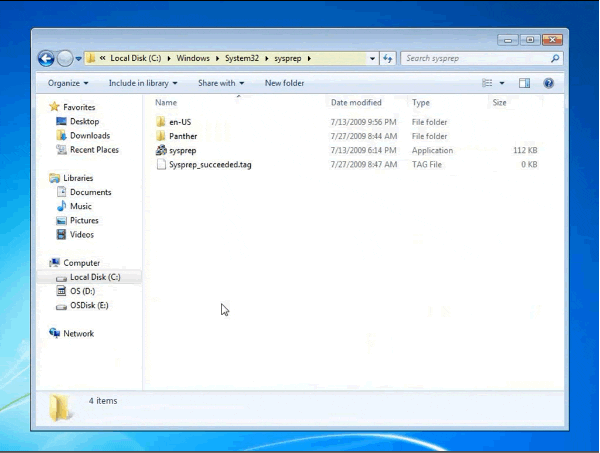
Once the system is prepared with the applications the configurations we want, we navigate to C:\Windows\System32\sysprep and then open the sysprep tool.
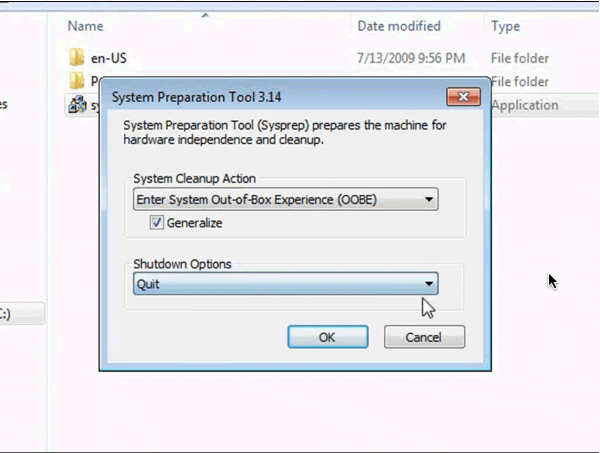
Select ‘Enter System Out of Box Experience’ select the ‘Generalize’ option and then select ‘Quit’.
This process will generalize the Windows installation and allow you to capture a system image of this computer so that it can be installed on other computers.
When sysprep is finished, shutdown the computer.
Now the system image is ready to be captured. We can perform this task from another system partition or from within Windows preinstallation environment.
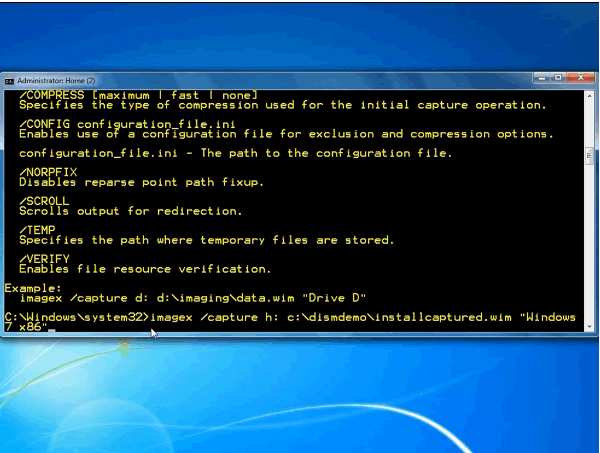
ImageX command line help will assist us by providing the right command line syntax to capture our previously sysprepped installation.
Capture the image with the imagex /capture command (learn about more ImageX command-line options here) – example below:
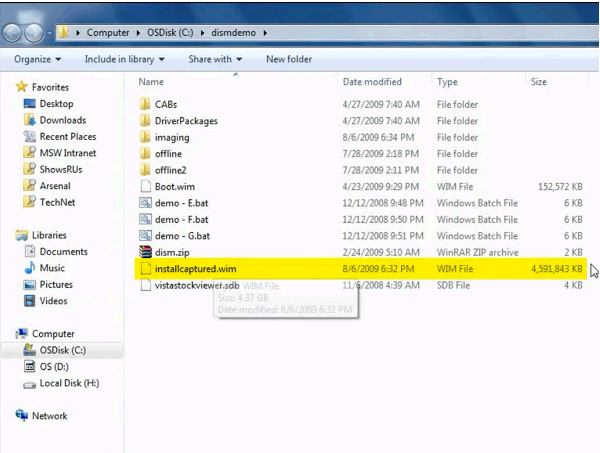
imagex /capture h: c:\dismdemo\installcaptured.wim "Windows 7 x86"
That’s it! We’ve now captured a file based .wim image that can be re deployed on multiple hardware types.
To view this process from end-to-end, check out the video below:
[mediaplayer src=’http://download.microsoft.com/download/8/8/4/8845F6BF-99F9-490E-853F-AD0B3F31406F/Preparing_an_Image_Using_Sysprep_ImageX.wmv’ width=300 height=225]


