Creating a Partition During Windows 7 Installation
During the installation of Windows 7, you must choose a partition on which to install the operating system. Reading Microsoft’s recommendations, you must make this partition at least 16GB in size. However, this is a minimal size and should not be used as the recommended size. As you know by now, the system partition (meaning the partition on which the operating system is installed on) is a place that just begs for more space as time goes by. Hotfixes, Patches, Service Packs, installed applications such as Microsoft Office and many others – all consume a lot of space on that partition. The more it is used, the more space will be consumed by these apps.
That is why it is strongly recommended to properly configure the partition’s size. While it is possible to extend this partition (if un-used space is available on the hard disk – read my “Extending the System Partition in Windows 7” article), it is best to plan in advance. As a rule of thumb, I personally give that partition at least 40 GB of space, and when using more than one hard disk on the computer, I give it as much as 100 GB. Just in case.
Anyway, while it is possible to extend that partition later, even after installation of the OS, it is best to plan accordingly and create the right partition size during the installation process. Read my article on how to install Windows 7 for more information.
Starting a Windows 7 installation, after passing the first initial screens, you will get to the screen where you are asked which type of installation you want to perform.

At that point you will need to click on “Custom (advanced)”, as this is a fresh installation of Windows 7.
The next screen will ask you where you want to install the system, meaning on what partition.
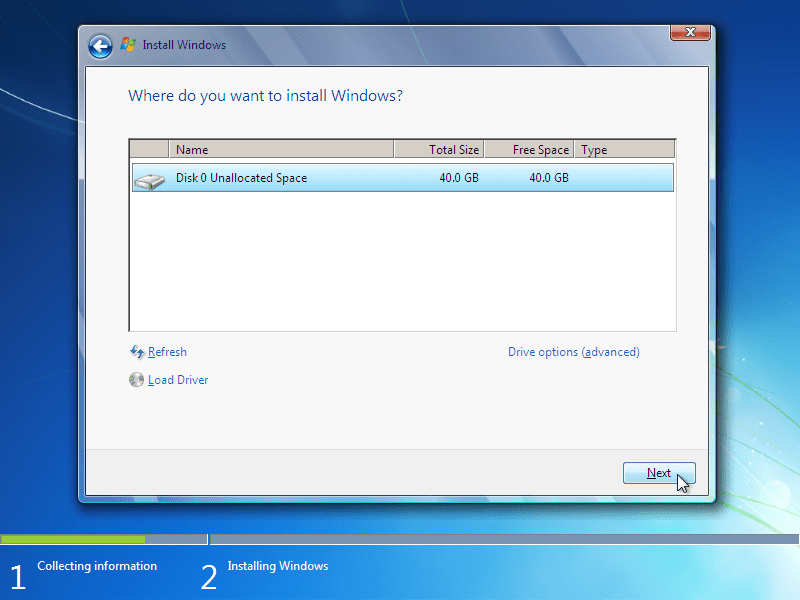
At that point, you need to decide on one of the two options:
- Install Windows on the entire available disk space
- Create a partition on the hard disk, and install Windows on that partition
If you pick option #1, then you simply click “Next” and get done with it. The setup program will create a partition on the entire hard disk and format it with the NTFS file system. It will then install Windows on that partition.

However, if you pick option #2 you can then create the partition exactly as you want it.
Click on “Drive options (advanced)”. The screen will change and show you several new buttons:
New – to create a new partition.
Delete – to delete a specific partition – all data on that partition will be deleted!
Format – to format a specific partition – all data on that partition will be deleted!
Extend – to extend a partition beyond the barrier of the physical disk, and to span the partition on more than one physical disk. This is useful when you run out of space on that physical hard disk, and have brought in a new physical hard disk that you wish to use. However, unlike using that new disk as a totally new partition by itself, this disk (or part of it) becomes a part of a partition located on the first disk. While useful in some cases, this scenario might cause fault tolerance issues, because this extended partition is NOT fault tolerant, and if something happens to one physical disk, all the data on that extended partition becomes unavailable, and data loss can occur.

To create a new partition click “New”. In the “Size” box, enter the size for the new partition. When done, click “Apply”.

The setup program will let you know that it will create an additional partition on that drive. That partition will be, by default, hidden, and contain the necessary files to boot the computer. This partition will consume 100 MB of disk space.
Note: Actually, even if you do not manually create the partition by using this procedure Windows will still create this partition. However, since you did manually create the partition, Windows will tell you that another partition will also be created.

You can now see the partition you’ve created, and the hidden boot partition. In most cases, the partition on which Windows will be installed is partition number 2.
Press “Format” to format the new partition.

You’ll be warned that all data will be deleted. That should pose no issue because the partition was just created, and it is blank.

Installation will now commence as usual.
Fact is that there’s another way to manipulate partitions during the Windows installation. This is done by using the DISKPART command. This command is very useful for creating, extending, expanding, shrinking and performing other tasks on partitions and disks. To get to it you need to press SHIFT + F10 while the setup program is running.
A command prompt window will open. In it, type
diskpart
An interactive command will be displayed.

You can use /? to get to the DISKPART help.

Remember that you can always resize the system partition, but there’s no substitution to a proper planning in advance!

Renowned as the creator of the acclaimed Petri IT Knowledgebase back in 1999 Daniel Petri has become a distinguished figure in the IT realm, recognized for delivering reliable, expertise-driven content. This website - www.petri.com - not only embodie...