Create a Virtual Machine in the Azure Cloud
In today’s Ask the Admin, I’ll show you how to quickly provision a virtual machine (VM) in the Azure cloud.
Virtual machines can be provisioned in the cloud in much the same way as on a local VMware or Hyper-V server. The only difference is that you don’t have any real control over the host operating system or hypervisor, and configuration must be done through the cloud OS. The easiest way to provision a simple VM is to use a readymade template.
To provision and connect to a VM in Azure, more than just the VM is required. For instance, a storage account, network interface, and IP address must also be provisioned. But Azure Resource Manager (ARM) makes the process easy, using Resource Groups to manage the cloud apps holistically.
There are several ways to provision VMs using ARM. Today I’ll show you how to use a JSON template that’s available on GitHub and is free to use, but it’s also possible to provision VMs using ARM PowerShell or the management portal. For more information on using ARM PowerShell to provision VMs, see Deploy VMs Using Azure Resource Manager and PowerShell and Deploy VMs Using Azure Resource Manager on the Petri IT Knowledgebase.
Provision a VM in Azure
Before you can provision a VM in the Azure cloud, if you don’t already have a subscription, sign up for a free trial here.
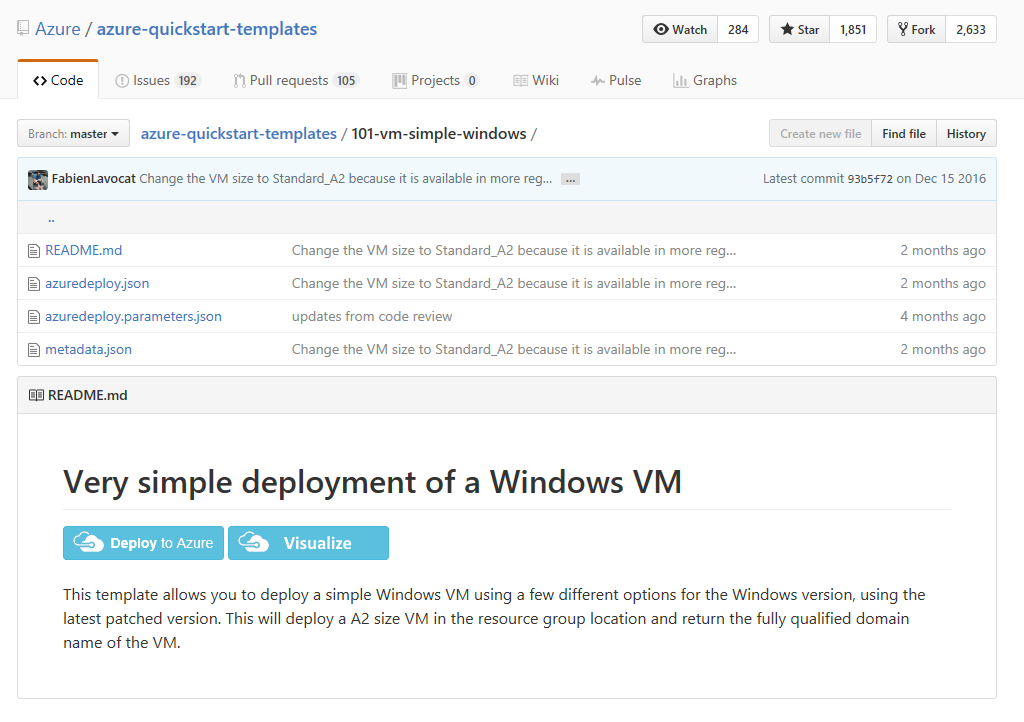
- Open the Simple Windows VM template here in GitHub.
- In the GitHub window, scroll down and click Deploy to Azure.
Note that the template deploys an A2 size VM. For more information on VM sizes, see Microsoft’s website here.
- The Azure management portal will open. Enter your Microsoft account credentials if you are not already logged into Azure.

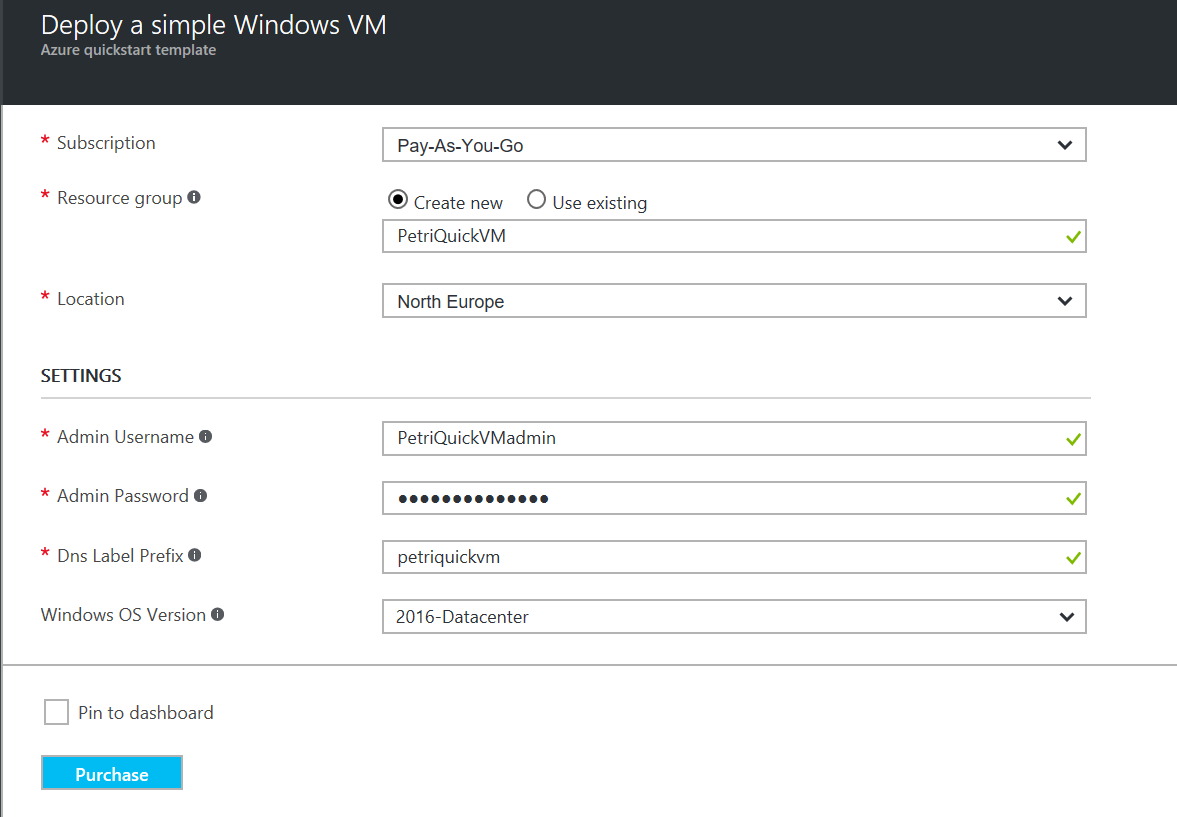
- On the Deploy a simple Windows VM template page, select a subscription from the drop-down menu.
- Make sure Create new is selected to the right of Resource group.
- Enter a name for a new Resource Group in the box below. A green tick will appear in the right of the box if the name you’ve entered is available for use.
- Select a Location in which to place the resources from the drop-down menu.
- In the SETTINGS section, enter a username in the Admin Username box for the VM’s administrator account.
- Enter a password for the administrator account in the Admin Password box. A green tick will appear to the right of the box Admin Password box if the password meets Azure’s complexity requirements.

- In the Dns Label Prefix box, enter a DNS name that you will use to connect to the VM over the Internet. In this example, I will simply use the Resource Group name in lowercase. A green tick will appear in the box if the name is available to use.
- Select the Windows Server edition you want to install in the VM from the Windows OS Version drop-down menu.
- Under TERMS AND CONDITIONS, check I agree to the terms and conditions stated above.
- Click Purchase.
Azure will validate the information you provided, and if successful, you’ll get a notification to say that the deployment has started in the notification center in the top right of the management portal. It might take some time for the deployment to complete. You can check the status of the deployment in the notification center.
Connect to the VM using Remote Desktop
Once the deployment has completed, you can connect to the VM remotely using Remote Desktop Connection on your PC.
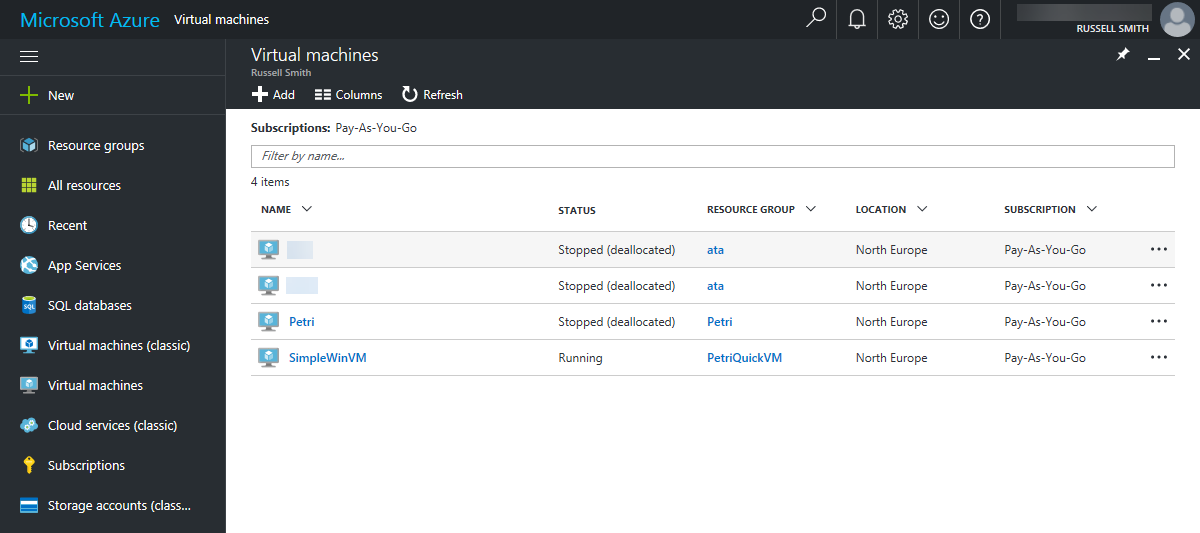
- In the Azure management portal, click Virtual machines in the list of options on the far left. If you can’t see the options, click the hamburger icon in the top left corner of the portal.
- The template deploys a VM called SimpleWinVM. You should see it in the list of VMs on the right.

- Click the three dots (…) at the far right of the entry for SimpleWinVM, and select Connect from the menu.
- Click Save in the browser to download the .rdp file that provides Remote Desktop Connection with the information it needs to connect to the VM.
- Open the file once it’s downloaded and then click Connect in the Remote Desktop Connection dialog box.
From this menu, you can also stop, start, and delete the virtual machine.
- Click More choices, and then Use a different account to enter the admin username and password for the VM that you created in the instructions above.
- Click OK.
- Click Yes to connect to the VM, even though Remote Desktop Connection can’t verify its identity.
- A Remote Desktop window will now open with access to the remote server.
In this article, I showed you a quick and easy way to create a VM in the Azure cloud and how to connect to it using Remote Desktop Connection.


