How to Create a Terraform Module
Learn about Terraform and how it can be used to automate infrastructure management.

Terraform is a platform used for provisioning, deploying, and managing various resources and services across public clouds (AWS, Google Cloud Platform, or Microsoft Azure), private clouds, network infrastructures, and more. It allows cloud architects and developers to manage external resources by using the code defined in Terraform configuration files.
In this article, I’ll explain everything you need to know about how Terraform configuration files and modules work.
What is a Terraform module?
Terraform modules are collections of configuration files (such as main.tf) in a directory. They help organize configurations into logical components that can be reused.
A main directory can contain multiple modules (for AWS S3, EC2, and EKS), each with its own configuration files (main.tf, variables.tf, output.tf, and Readme.md).
How Terraform modules work
You can create your own modules or import them from a public or private registry. A module block is used to call a child module. Examples:
module "public_registry" {
   source = "./app" // Source 1
}

source = "hashicorp/consul/aws" // Source 2
source = "app.terraform.io/example-corp/k8s-cluster/azurerm" // Source 3
source = "[email protected]:hashicorp/example.git" // Source 4
source = "https://aws.com/module.zip" // Source 5
source = "s3::https://s3-us-west-1.amazonaws.com/terraform-modules/vpc.zip" // Source 6
Root and child modules
Modules can be used individually, but you can also link them with a root module, which calls child modules. Example:
module "Calling AWS S3" {
   source = "./AWS S3"
}
module "Calling AWS EC2" {
   source = "./AWS EC2"
}
module "Calling AWS EKS" {
   source = "./AWS EKS"
}
Root modules vs. child modules
Each Terraform workspace has a root directory with configuration files called the root module.
Modules set up via module blocks are child modules. When you apply a configuration, the root module calls its child modules and Terraform manages their resources as part of your workspace.
As infrastructures grow, modules simplify code management by keeping it organized and reusable.
What’s the difference between Terraform resource blocks and modules?
A resource block is used to define the resources you want to manage. These resources can include one or more infrastructure objects such as virtual machines, virtual networks, DNS records, etc.
Resource blocks are declared with the syntax below:
resource <block-type> "<block-label>" {
   <identifier> = <expression> # Arguments or Attributes of a resource block.
}
Terraform modules contains various resource blocks and can call other child modules as well. They contain all the code to manage various services in one go.
When an IT infrastructure grows, it becomes more complex and difficult to manage, especially when you have to deal with multiple configuration files. However, Terraform modules are designed to streamline the code management process for developers.
How to create a Terraform module
Example: creating an AWS EC2 instance.
Installing Terraform on Linux
- Log in to an Amazon EC2 Linux instance via SSH (e.g., PuTTY).
- Create a practice directory:
mkdir ~/terraform-ec2-practice
cd ~/terraform-ec2-practice
- Install required utilities:
sudo yum install -y yum-utils shadow-utils
- Add Terraform’s repository:
sudo yum-config-manager --add-repo https://rpm.releases.hashicorp.com/AmazonLinux/hashicorp.repo
- Update and install Terraform:
sudo yum -y update
sudo yum -y install terraform
terraform --version
Defining your main configuration file
- Create your main.tf file
touch main.tf
- Paste this code defining multiple AWS instances with for_each and other meta arguments.
resource "aws_instance" "web" {
for_each =  {
   "instance1" = {
      instance_type = "t2.micro"
      ami           =    "ami-0f3c9c466bb525749"
   }
   "instance2" = {
      instance_type =  "t2.nano"
      ami           =    "ami-0f3c9c466bb525749"
   }

   "instance3" = {
      instance_type = "t2.micro"
      ami           = "ami-0f3c9c466bb525749"
   }
   "instance4" = {
      instance_type = "t2.nano"
      ami           =    "ami-0f3c9c466bb525749"

   }
}

  ami           = each.value.ami
  instance_type = each.value.instance_type
  tags = {
    Name = each.key
  }
}

data "aws_availability_zones" "az" {
  state = "available"
}

data "aws_region" "current” {}

data "aws_caller_identity" "current" {}

locals {
  name_tag_val = join("-[data.aws_caller_identity.current.account_id, data.aws_availability_zones.az.id])
  tags         = { Name = local.name_tag_val }
}

resource "aws_instance" "web1" {
  count =        var.create
  ami           = var.ami
  instance_type = var.instance_type
  tags = merge(local.tags,var.tags)
  timeouts {
    create = lookup(var.timeouts, "create", null)
    update = lookup(var.timeouts, "update", null)
    delete = lookup(var.timeouts, "delete", null)
  }
}
The code above contains different resource blocks where we define the resources to create. The syntax of each resource block is as follows:
resource <block-type> "<block-label>" {
   <identifier> = <expression> # Arguments or Attributes of a resource block.
}
In the first resource block, we are creating the AWS EC2 instance. That’s why we’re using ‘aws_instance’ as the block type, followed by the block label ‘web’ (a label can be anything).
Next, ‘for_each’ is a meta argument, which is a special argument that gets additional configuration options for Terraform resource blocks and modules. It can be used to create multiple items with different configurations.
Here we’re using this meta argument to create four different instances (instance1,instance2,instance3,instance4) with the following configurations:
- Instance1 will be created with the “t2.micro” instance type and with the AMI (Amazon Machine Image) as “ami-0f3c9c466bb525749.” The Amazon Machine Image is a template that has all the software and packages required to launch the instance. Different AMIs are used to launch different instances, and AMIs are also region-specific.
- Instance2 will be created with the “t2.nano” instance type and with ami as “ami-0f3c9c466bb525749”
- Instance3 will be created with the “t2.micro” instance type and with ami as “ami-0f3c9c466bb525749”
- Instance4 will be created with the “t2.nano” instance type and with ami as “ami-0f3c9c466bb525749”
All four instances within the ‘for_each’ meta argument are a map of objects containing two attributes, ‘instance_type’ and ‘ami’.
Here’s an explainer for some other resource blocks in the code:
- The ‘data’ block is used to retrieve AWS resource values such as instance_type directly from the AWS infrastructure and use them in our configuration.
- There are two code blocks named ‘aws_availability_zones’ and ‘aws_region’ which are used to find the availability zones and current account ID.
Another important block is ‘locals’, which is where we join the current region and availability zone, and assign them to the variables tags. We define this variable once so that it can be used in multiple places without any code repetition. We’re also using the following attributes:
- ‘Count’ is a meta argument that allows you to create multiple variables based on count.
- ‘timeouts’ are used to set time parameters on a resource, such as the time taken for launching, updating or deleting a resource.
- We also defined lookup functions, which find the value from a given map using its keys. So, within the timeouts block ‘create’, ‘update’, and ‘delete’ attribute contains lookup functions that finds the timeout value from a variable timeouts and if it is unable to retrieve the value, it assigns it a null.
- Similarly, the update and delete functions uses a lookup function to find the values of a timeout, otherwise they assign a null value.
Defining your variable configuration file for your Terraform module
We’ll now create another a variable configuration file named variables.tf in the ~/terraform-ec2-practice directory. We’re once again using the touch command to do that:
touch variables.tfPaste this code defining ami, instance_type, tags, create, and timeouts.
variable "ami" {
   type = string
   default = "ami"
}variable "instance_type" {
   type = string
   default = "t2.micro"
}variable "tags" {
   type = map(string)
   default = {
      "Name" = "env"
   }
}

variable "create" {
  description = "Whether to create an instance"
  type        = bool
  default     = true
}

variable "timeouts" {
  description = "Define maximum timeout for creating, updating, and deleting EC2 instance resources"
  type        = map(string)
  default     = {
    create = "20m"
    update = "20m"
    delete = "10m"
   }
}
The variables.tf file contains all the variables that we have already used in the main.tf configuration file:
- The variable ‘ami’ is a string, and it’s used to define what kind of instance we would like to launch. If we don’t explicitly provide a value for this variable in another file, we can also declare it within the variable using the default attribute.
- ‘instance_type’ is another string variable that’s used to define the size of an instance. The default value of here is t2.micro.
- The variable ‘tags’ is another string variable. We usually use tags to identify resources based on costs for using other AWS services.
- The variable ‘create’, which describes whether we create an instance or not, is of Boolean type, which means it accepts either “True” or “False” as a value.
- Lastly, the variable ‘timeouts’ is of type map (string) type. This means that it contains a mapping of multiple keys with values which are strings.
Defining your output configuration file
Again, you can create the outputs.tf file using the touch command in the ~/terraform-ec2-practice directory and copy and paste the code below in it:
touch output.tfPaste this code defining outputs for id, arn, public_ip, and private_ip.
output "id" {
  description = "The ID of the instance"
  value       = try(aws_instance.web[0].id, "")
}


output "arn" {
  description = "The ARN of the instance"
  value       = try(aws_instance.web[0].arn, "")
}


output "public_ip" {
  description = "The public IP address assigned to the instance"
  value       = try(aws_instance.web[0].public_ip, "")
}


output "private_ip" {
  description = "The private IP address assigned to the instance."
  value       = try(aws_instance.web[0].private_ip, "")
}
The code will produce four outputs:
- The first output gives the id of the instance. The try function here checks the condition and returns the result of the first one that doesn’t produce any error. Here, ‘aws_instance.web[0]’ specifies the first index and id of the first instance. If there are no more instances to be created, the “” null value will be considered, which means that no id is required in the output.
- The second output will give the “arn” of all the instances, and if no instance is required to be provisioned, then the output is not generated as the value it will pick will be null. “arn” is used to identify AWS resources, and each resource in AWS has a unique arn number.
- Similarly, the last two output blocks will generate the public IP and private IP addresses of all the instances. If no instance is required to be provisioned, then the output is not generated as the value it will pick will be null.
Defining your provider configuration file for your Terraform module
Before we can run any Terraform commands, we need to configure a provider configuration file. Here, we will define AWS as the provider so that Terraform can connect with the AWS cloud using APIs.
touch provider.tfPaste AWS provider configuration:
terraform {
  required_providers {
    aws = {
      source  = "hashicorp/aws"
      version = "4.57.0"
    }
  }
}


provider "aws" {
  region = "us-east-2"
}
Running your Terraform module
Now, we’re ready to run Terraform commands to deploy the AWS EC2 instances that we defined in main.tf file. To do that, we will use three commands in a specific sequence:
- terraform init
- terraform plan
- terraform apply
To run these commands, make sure that you are already in the ~/terraform-ec2-practice directory.
terraform init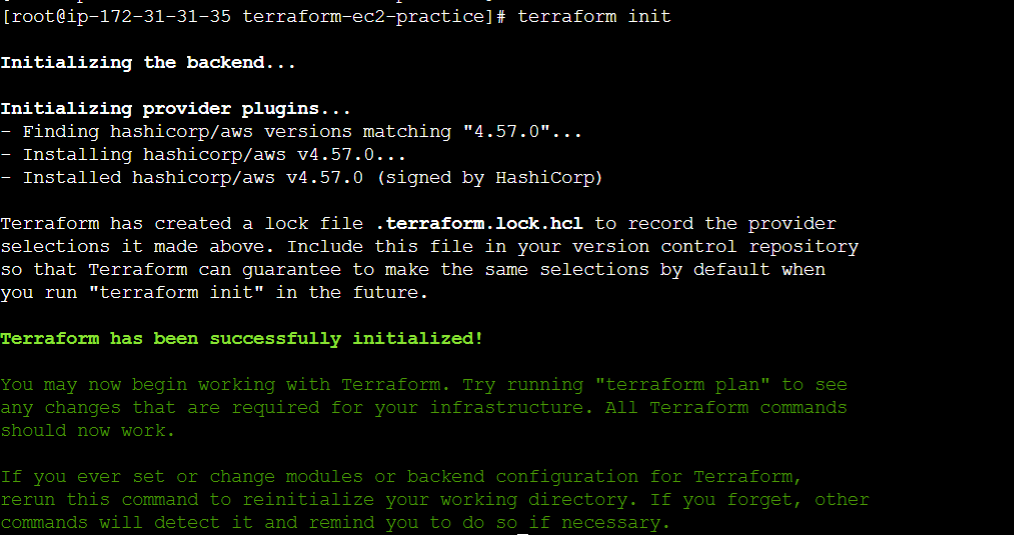
Next, run the terraform plan command. It will show you all the resources that will be deployed in the AWS Cloud.
terraform plan
Finally, run the terraform apply command in the current working directory. The actual deployment of resource will take place in the AWS Cloud.
terraform apply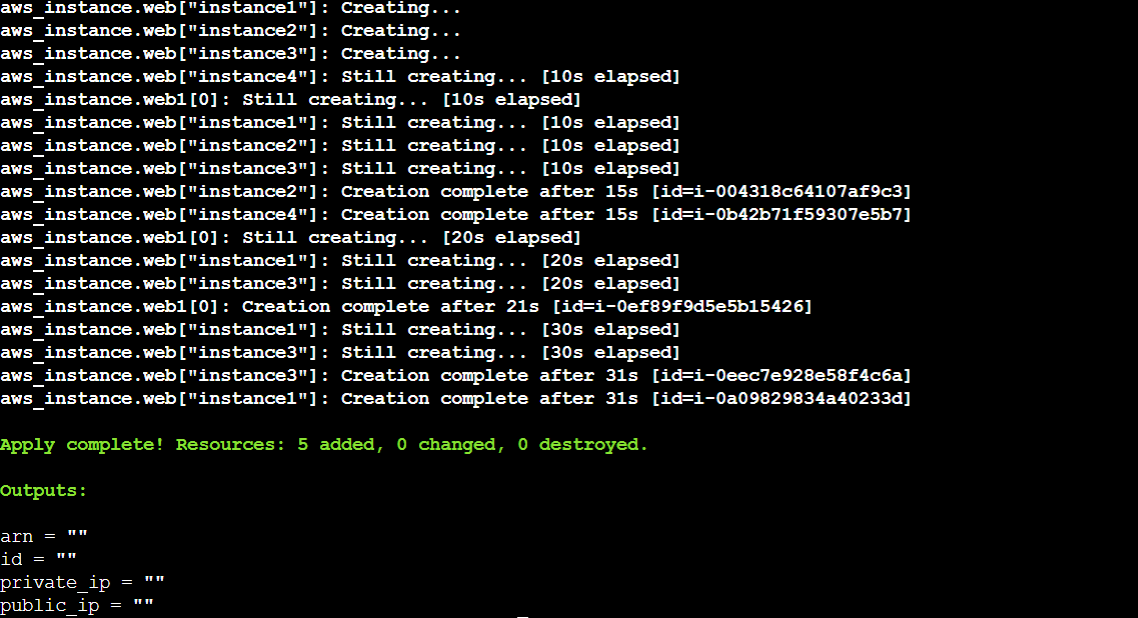
Testing your code in AWS Console
Check the AWS EC2 dashboard to verify the instances.

Conclusion
In this article, I gave you an overview of Terraform, explained its main components, and walked you through creating configuration files to deploy AWS EC2 instances. Terraform makes managing cloud and on-premises resources more efficient, and its reusability and modularity provide significant advantages.

Sagar is a DevOps consultant and the founder of automateinfra.com. Sagar brings DevOps technology expertise to Petri.com, writing about Terraform, AWS Cloud, Microsoft Azure, Ansible, Kubernetes, Docker, Jenkins, Linux, and Windows.