The management of user profiles is an important function in any virtual End User Computing (EUC) deployment. Without managing and capturing user profiles, the user’s experience cannot be persisted across different services or upon recovering from a disaster. Today I’ll give a walkthrough of the basic setup of the VMware View persona management feature.
VMware View Persona Management: Group Policy
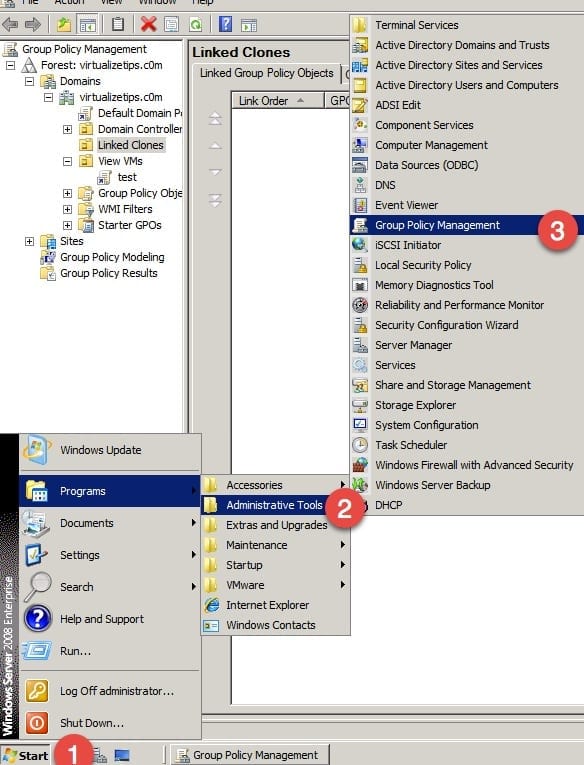
To get things started, you will need to log onto a computer or server on which you can edit Group Policy for the domain that you will be managing. For my example, I am using one of the AD servers. Use the Group Policy Management application as shown below.
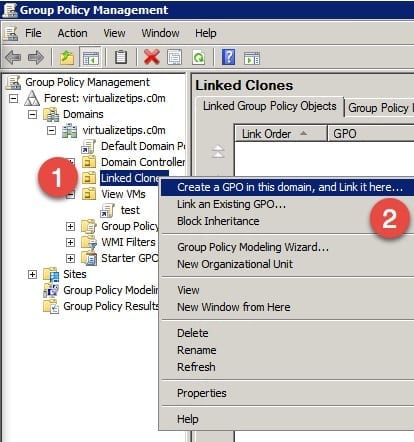
If you do not already have a GPO to modify, you will need to create a new one. You may also need to create a new OU for the virtual desktops to exist within to manage the GPOs for them. For the sake of this walkthrough, I used an existing folder and right-clicked Create a GPO.
Configure VMware View Persona Management
After the test policy was created, I can now begin configuring View persona management. I have chosen to edit the policy that was created in the previous step.
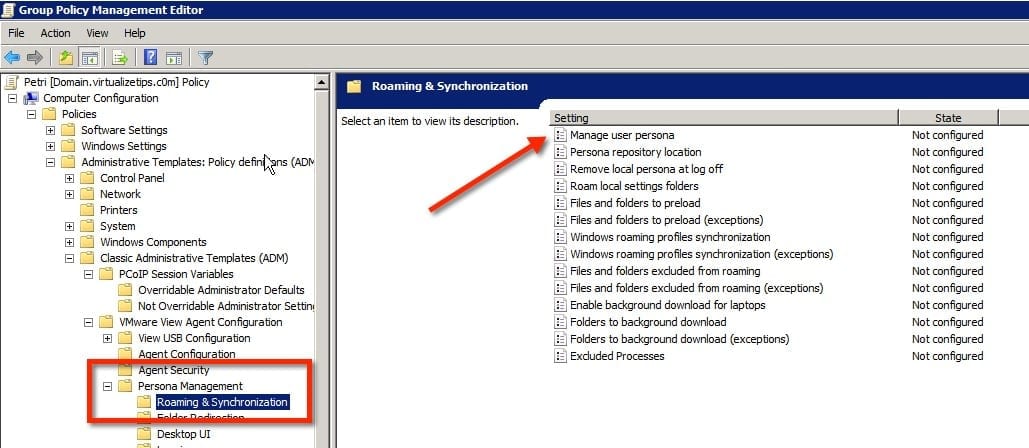
- Expand the computer polices you can locate the folder for Persona Management, as shown below. Look through the items in the right window and find the Manage user persona selection and edit it.
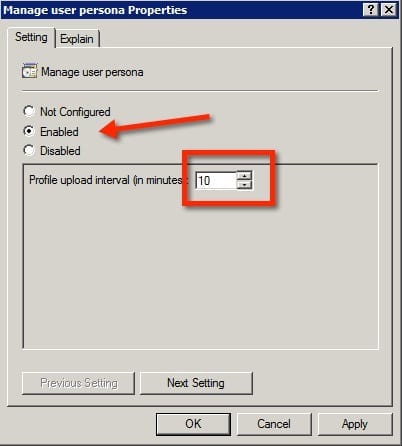
- When editing the policy, Enable the feature. The only other value to that can be changed is the upload interval, this is the number of minutes between synchronizations of the users profile. You might need to increase or decrease the interval, depending on your requirements
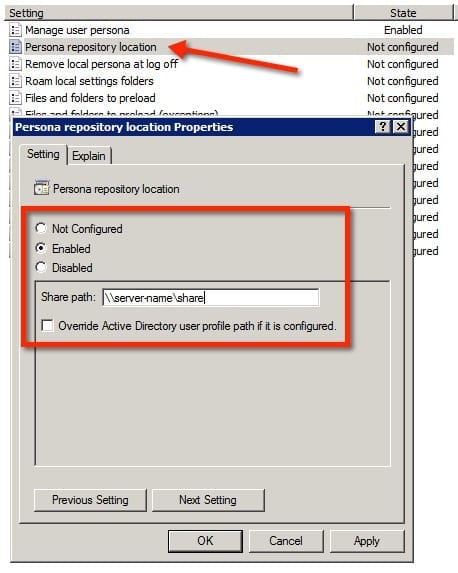
- The next item that must be edited to start managing user profiles is the location to store user profiles. You must edit the Persona repository location item. Choose to Enable the feature, then enter the path to the CIFS share in which they will be stored.
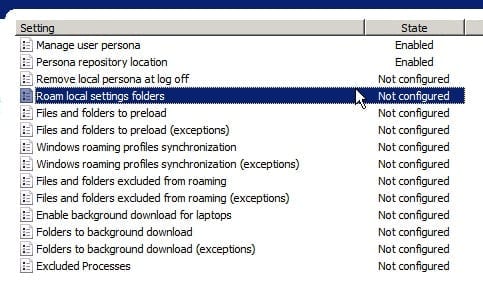
In its simplest form, View Persona Management would used for setting up and capturing user profiles. There are still a number of other features that you may need to adjust. These other options allow features for use of Windows roaming profiles, or the options could be used to control what folders are synchronized in the background and which ones are exempt. The image below shows the other options that I did not cover in this post.
Admins are able to setup View Persona Management for both virtual desktops and physical computers. This allows for user profiles to be managed in either environment. I have commonly seen customers use persona management to capture the profiles on physical computers to help in the migration to virtual desktops.


