Cisco USB Console Connection Setup
Most laptops and tablets haven’t come with old-school DB9 serial ports for years. For those of us supporting Cisco network infrastructure this meant using a clunky USB to serial adapter on our PC so we could connect to the console port on our Cisco gear. Cisco finally got with the program and began releasing new equipment with a USB console port to go along with the older RJ45 one.
All that’s needed now for connection to the console is a USB A to Mini-B cable and the Cisco USB Console Driver. If you don’t have the latter, don’t worry! I’m going to show you how to download, setup, and test the driver on a Windows 8.1-based PC right now! (Note: These steps are still applicable for Windows 10 and Windows 11 as well.)
Download and install a Cisco USB console connection
To begin setting up a Cisco USB console in Windows, login using a Cisco.com account. If you don’t already have an account, click ‘Create a new account’ button and walk through the sign-up process. Since I already have an account, I’ll go ahead and log on by entering my user name and password and then clicking the Log in button.
There are about a dozen different routes to get to the download page for the CISCO USB Console Driver. Cisco has one of the most in-depth websites I’ve ever come across. It’s also one of the most frustrating at times. I’m all about easy, so just browse to their Cisco USB Console software download site and you can grab it from there. Don’t worry that it indicates the driver is for a Catalyst 3560X-24P-S switch.
The same driver works for other Cisco devices with USB console support. As you can see in the image below, on the left side, I’ve expanded Latest Releases and highlighted the latest release version.
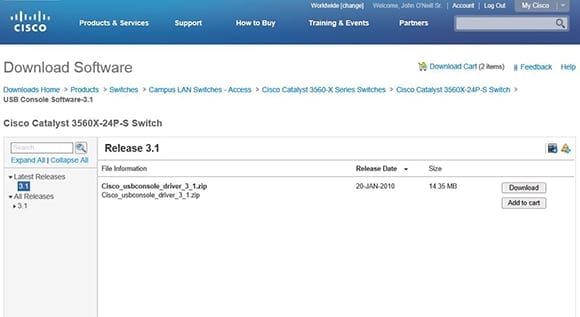
- To the right of the driver filename click the Download button. Click Accept License Agreement when prompted.
- Towards the bottom of the screen a file download option screen will appear. Options include Open, Save, and Cancel. Click the downward pointing triangle and click Save As from the menu that pops up. A Save As dialog will pop allowing you to browse to the folder where you want the downloaded file saved. In this case, I chose to save the file to my Desktop for simplicity.
- Click the Save button once the location is selected.

Once prompted that the download has completed, go ahead and close the web browser. As in many cases, the downloaded file is a compressed .zip archive. Since I’m running Windows 8.1 Enterprise Preview, I have .zip support built-in to the operating system. (Windows 10 and Windows 11 also include native support for .zip archives.) If you aren’t using an OS with built-in .zip archive support use a utility such as WinZip or WinRAR to extract the contents of the archive.
- I’ll right-click the filename on my desktop and then click Extract All from the context-sensitive menu that appears. The Extract Compressed (Zipped) Folders wizard runs, allowing me to select a folder to extract the contents of the .zip file into.
- I’ll select a Cisco USB Driver folder on my desktop, make sure the checkbox next to Show extracted files when complete is checked, and then I’ll click the Extract button.
- In a relative jiffy, the files will be extracted from the archive and an Explorer window will open displaying a number of folders containing the USB drivers for different operating systems. I’m running a 64-bit Windows OS so I’ll double-click the Windows_64 folder. Right-click the setup(x64).exe file, click Run as administrator, and get this show on the road! (This step remains the same on Windows 10 and Windows 11 for 64-bit versions.)

- When prompted by User Account Control, click Yes to allow setup(x64).exe to run and make changes to the computer. One might think the whole right-click and select Run as administrator would have indicated this, but I guess Microsoft really wants to be sure that you’re sure. (The UAC prompt also appears in Windows 10 and Windows 11 when installing unsigned or vendor-provided drivers.)

Are you sure? No, really, really sure??
- The CiscoVirtualCom(x64) InstallShield Wizard will fire up. Once it does, click Next, then click Install. On most computers it takes only a few moments to completely install. Click Finish.
- Because of the nature of the driver install, i.e. adding virtual com ports and all that, the installer will prompt that a system restart is required. Click Yes to restart immediately and keep the progress train a-rolling. (A restart may also be required on Windows 10 and Windows 11, depending on system configuration and driver signing settings.)
- Depending on your client OS configuration, the virtual com port may not install until you actually connect a USB cable between your PC and the USB console port on a running piece of Cisco gear. That’s exactly the case for my Windows 8.1 Preview PC, so I’ll go ahead and connect a USB cable from it to a shiny new Cisco 2960S switch.
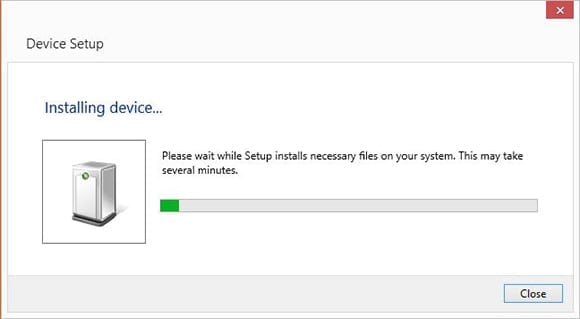
- The Installing Device window will appear. Let Windows do its thing and wait until the drivers are finished being configured and the Installing Device window disappears. (This automatic device setup behavior is consistent in Windows 10 and Windows 11.)
- I’ll open Device Manager by simply typing the words on the Windows 8.1 Start Screen. The Search Charm opens and I’ll click Device Manager in the displayed list. I could also open it by right-clicking the Start Button on the Desktop or using the Win-X Menu. (In Windows 10 and Windows 11, you can access Device Manager by right-clicking the Start button and selecting “Device Manager.”)
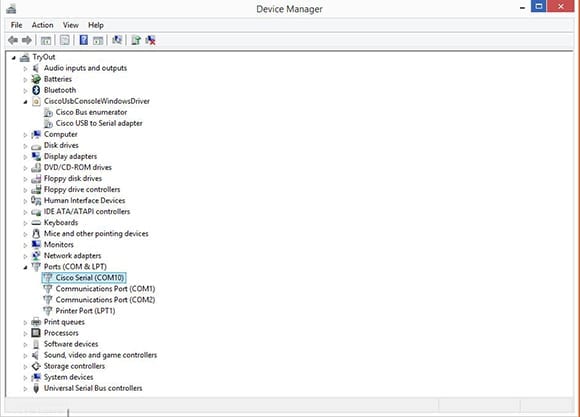
- In Device Manager a new hardware category, CiscoUsbConsoleWindowsDriver, is displayed. It has two components: the Cisco Bus enumerator and the Cisco USB to Serial adapter. Expanding the Ports hardware category shows a new Cisco Serial port. In my case the new port is using COM10, but you’ll need to note the port used on your PC. (The COM port assignment process and naming conventions remain the same in Windows 10 and Windows 11.)
- Close Device Manager and open your favorite terminal emulator program. I use the excellent free and open-source PuTTY program. Since it’s only around 500kb, it’s super fast to download and run. We’ll use it to connect to the Cisco USB console.
- Once PuTTY is open I’ll change the connection type to Serial, the serial line to COM10, and then click Open.

- Putty will open a console connection to your Cisco equipment over USB. If a black screen is staring back at you just tap the Enter key and you’ll see a prompt from the device.

The driver is ready when you are, but if you connect the USB cable to a piece of equipment and your terminal emulator doesn’t work check Device Manager to verify the Cisco Serial Port isn’t using a different COM port. If it is, simply change the terminal emulator to use the new setting.
Now I have a brand spanking new 2960S switch waiting to be configured. I don’t want to let it – or the customer – down, so I better sign off and get to work!
FAQs
How often should I update my Cisco USB console driver for optimal performance?
It’s recommended to check for Cisco USB console driver updates every 3-6 months to ensure compatibility with new hardware and operating system updates. The latest versions of the Cisco USB console driver often include bug fixes and performance improvements.
Can I use the Cisco USB console driver on multiple devices simultaneously?
The Cisco USB console driver supports multiple device connections, but each device requires a separate USB port and unique COM port assignment. You’ll need to configure the driver settings individually for each connected device.
What troubleshooting steps should I take if my Cisco USB console driver stops working?
First, uninstall and reinstall the Cisco USB console driver, then check device manager for port conflicts, verify USB cable integrity, and ensure your Windows OS is compatible with the current driver version. If issues persist, try using a different USB port.
Does the Cisco USB console driver work with virtualized environments?
The Cisco USB console driver is compatible with most virtualization platforms, including VMware and VirtualBox, but requires proper USB passthrough configuration. Some advanced features might be limited in virtualized environments.
What are the bandwidth limitations of the Cisco USB console driver connection?
The Cisco USB console driver typically supports data transfer rates up to 115,200 baud, which is more than sufficient for console management tasks. Higher speeds may be available depending on your specific Cisco hardware model and driver version.
Related articles
- What is 5G and Why is it Better Than 4G LTE? (Security Included)
- How /30 and /32 Bit IP Subnet Masks Can Help You With Cisco Networking