


Use Microsoft Azure Backup with Recovery Services
In a recent article I reviewed the ability to backup Windows client devices to Microsoft Azure using Online Backup. In this post, I will show you how to implement backup using Recovery Services.
Microsoft Online Backup Supported Scenarios
Microsoft’s online backup solution supports three versions of the client operating system:
- Windows 8.1
- Windows 8
- Windows 7
Any computer that you wish to protect must have .NET Framework 4.5 and PowerShell installed, and you must use version 2.0.8694.0 or later of the protection agent.
You cannot protect the system state of a computer with this tool. You may only backup and restore files and folders on client devices.
Microsoft Azure Backup Vault
Azure Online Backup sends backup data directly to Azure where the data is stored in a backup vault. The vault is pretty simple to create. Before you do that you must decide if:
- You will have one backup vault per protected machine: An Azure subscription supports up to 25 vaults.
- You will have multiple protected machines per backup vault: A vault can contain backup data for up to 50 machines.
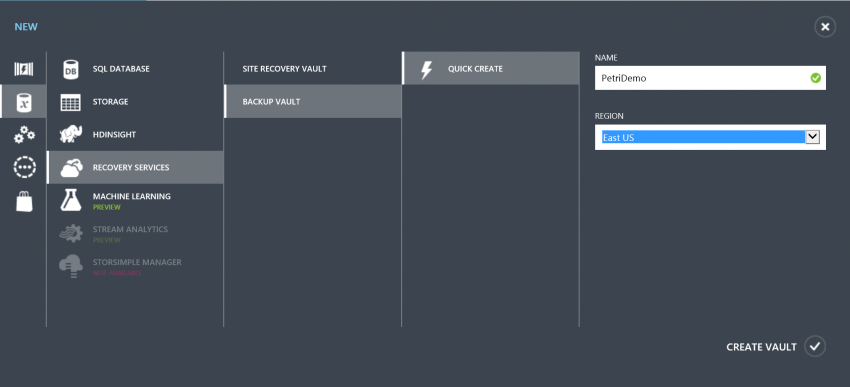
Log into the Azure management portal, navigate to Recovery Services, click New > Data Services > Recovery Services > Backup Vault > Quick Create. Enter a unique name for the new backup vault and select the Azure region where you want the data to be stored. It will take Azure a couple of minutes to provision the new vault.
Installing the Agent
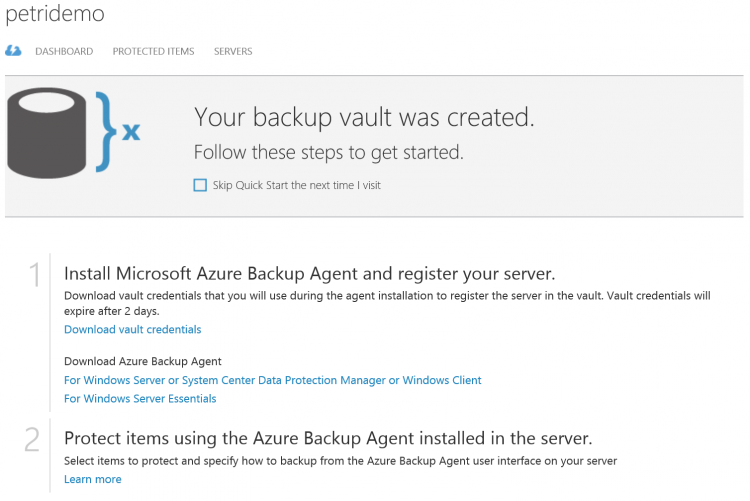
Stay in Azure for a couple of minutes. Browse into the new backup vault, and you’ll find yourself in the Quick Start screen, where you can configure your client backup. There are two steps for configuration:
- Download the vault credentials: This is an identifier that you download and securely deploy to PCs that you want to backup. You will need this small text file to register any PCs with this backup vault. Once a PC is registered, you don’t need the file anymore on that PC. The file is valid for two days. After this time, the key will expire and you will have to download the file again to register any further machines with this vault. When you click this link, a file is generated by Azure, and a download popup will appear a few seconds later.
- Download and install the Azure Backup Agent: Click the link for Windows Server, System Center, and Windows Client. This is a 35 MB download, so you might opt to keep a copy if you are going to enable backup on multiple machines. Note that you will probably need to download and update this program in the future.
Securely copy the credentials and the MARSAgentInstaller.EXE setup program to the PC that you want to backup. Run MARSAgentInstaller.
The first screen in the install wizard will ask you where to install the program. The second setup screen allows you to configure a proxy with options for custom proxy settings and a username and password. The setup program will also download and install any missing pre-requisites. It doesn’t take long for the installer to complete the setup. When completed, you will be prompted to register the computer and create a scheduled backup.
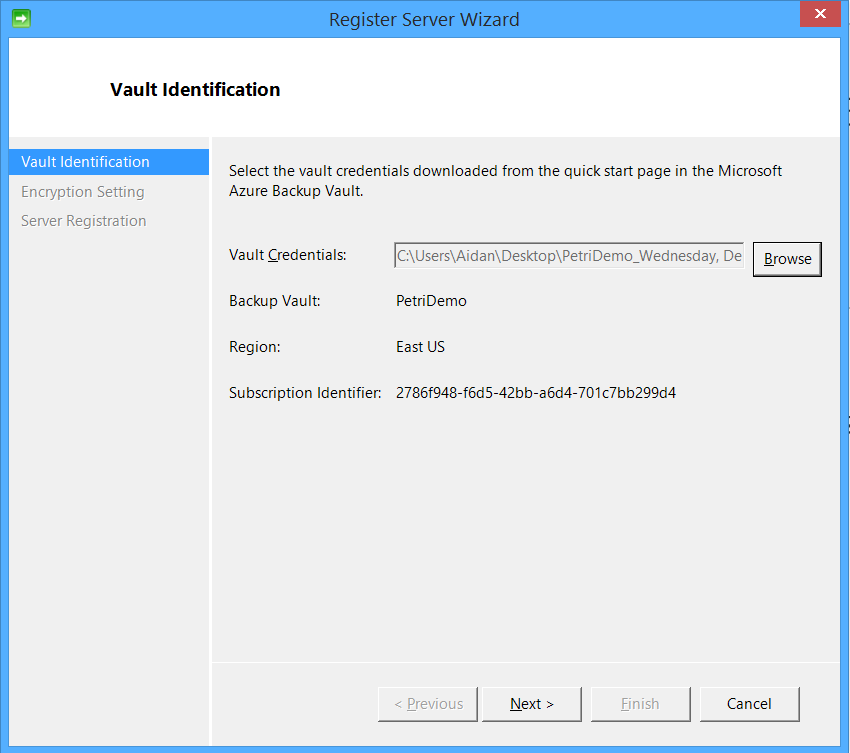
The Register Your Server (yes, it says ‘Server’) will ask you to locate the previously downloaded credentials for the backup vault. Browse to and select the file, and the registration wizard will validate the secure connection to Azure.
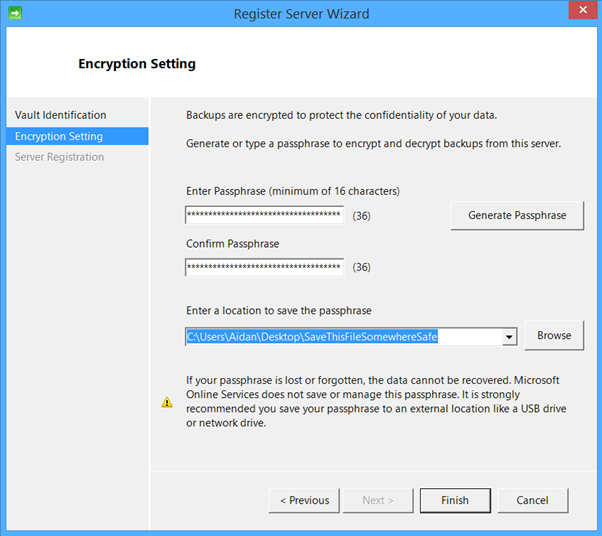
Online Backup will encrypt any data on your PC before it is sent to Azure. The passphrase that is used for this encryption must be generated. You can enter something yourself, or you can use the Generate Passphrase button to get a nice long and complicated string. You should save this string somewhere safe. Note that Microsoft never has a copy of this file. Microsoft can never restore your data. You will need this passphrase to restore this data, so don’t save this file on the same location as the data you are protecting!
Configuring a Backup Job
Launch the Microsoft Azure Recovery Services Agent, labelled as Microsoft Azure Backup in the Start Menu or Start Screen. A console that is similar to Windows Server Backup will appear. It is here that you will configure your backup job, and it is here that you will restore files. Click Schedule Backup to create a new backup job.
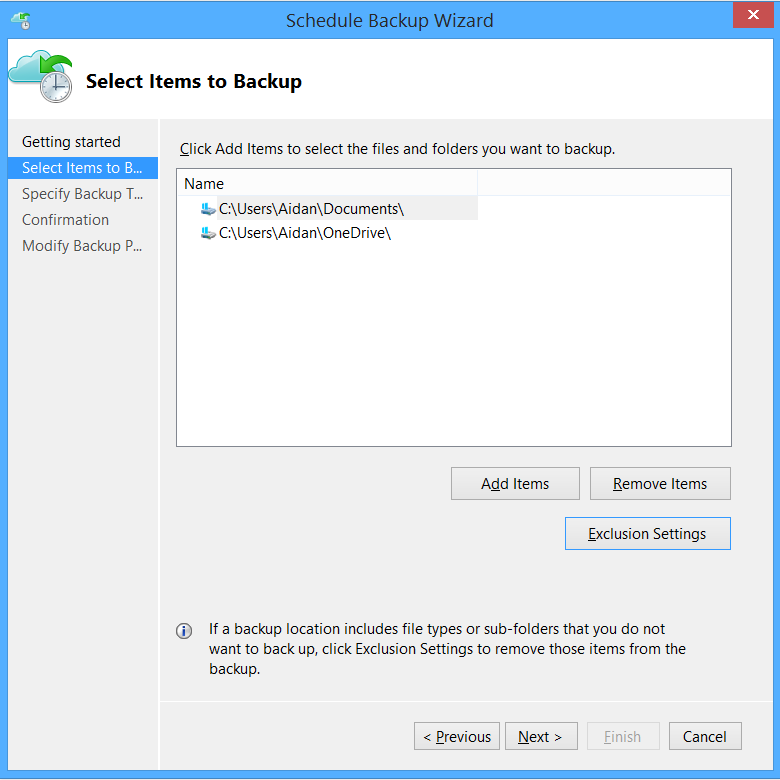
In Select Items to Backup you can add files and folders that you want to protect. Note that this can include synchronized OneDrive files and folders. You can also set file type exclusions.
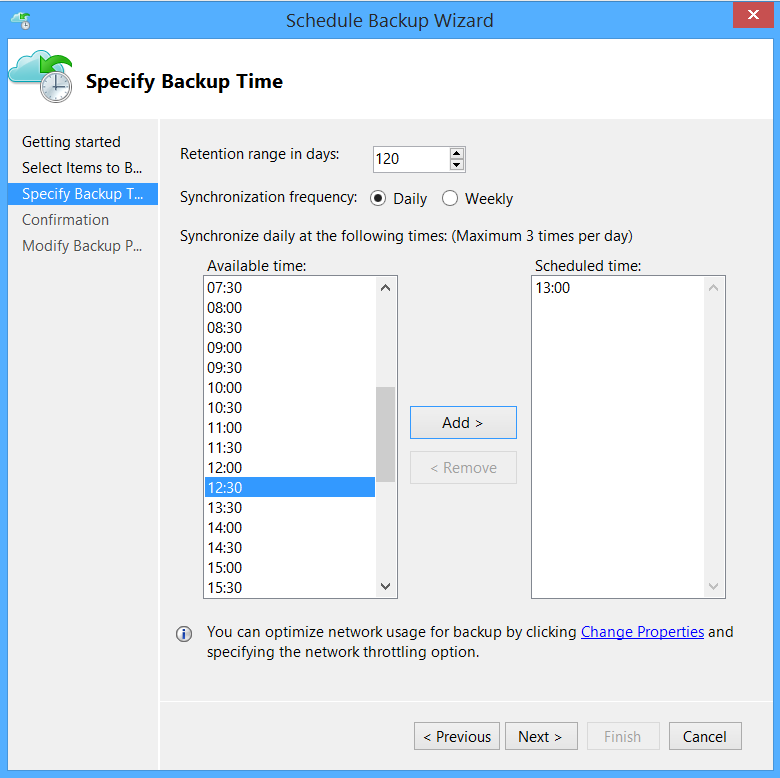
You can set the schedule and retention policy of your backup in the Specify Backup Time screen. Azure currently supports up to 120 recovery points — think of these as 120 backups — which is enough data to restore files from backup jobs over the last 120 days. The more data you retain, the more space you consume in the backup vault, and the more the service will cost.
If you backup three times per day, then you can retain up to 40 days of data (3 jobs per day x 40 days = 120 recovery points). If you do a backup every four weeks, then you can retain over nine years of data (28 days x 120 recovery points = 3360 days).
My tip: If you are going to do a local backup to a USB drive, then arrange the USB backup not to clash with the online backup.
And that’s it, the backup will run at the appointed schedule.
If you click Change Retention Range, then you can:
- Modify the backup selection or schedule.
- Stop the backup job while retaining data.
- Stop the backup job and erase all data.
Restoring Files with Microsoft Azure Backup
Restoring files and folders is easy. Click Recover Data and a wizard starts up. You can recover data from a backup vault for the currently registered computer or another computer, assuming that you have the valid vault credentials.
You can select from any retained recovery point and then search for or specify specific files or folders. When you do decide to restore something, you can restore it:
- to the original location
- an alternative location
- create copies so you retain the original file
- overwrite existing files
- do not overwrite existing files
- by default the permissions of the original item will be restored
Azure Online Backup is pretty simple, and if you’ve used it to protect a server, then the protecting a client will be a familiar process.