I recently wrote an article about my Windows 8 experiences, with an overview of some cool features in this new version of the Windows client OS. As a follow-up, I thought it would be interesting to explain how one could deploy Windows 8 in a business environment. In this first article of a two-part series, we’ll look at setup and configuration of the Microsoft Deployment Toolkit 2012 prior to Windows 8 deployment.
In the second article I’ll cover the actual Windows 8 deployment and installation using MDT2012, including booting the machine with the bootable USB stick.
3 Ways to Deploy Windows 8
But before we begin, let’s cover some basics. In short, there are three possible ways for Windows 8 deployment:
- Manual deployment
- Semi-automated deployment, aka Light Touch Installation or LTI
- Fully-automated deployment, aka Zero Touch Installation or ZTI
Manual Deployment: A manual deployment is something that could happen in homes and really small-to-medium business environments. This approach involves taking a backup of the data, reinstalling the PC by starting a manual setup of Windows 8 (DVD, ISO, etc.), and restoring the user data. This is rather time-consuming, and I personally think it is a bit outdated. Even so, this is still a very good solution for all PC environments with less than ten machines.
Light Touch Installation (LTI): Light Touch Installation means you will use a semi-automated approach for Windows 8 deployment. In short, this involves using a deployment tool, creating an image, and reproducing/deploying the same image to multiple clients by booting from a deployment medium (typically a bootable USB-stick).
• Within the Microsoft tool portfolio, this is achieved by MDT 2012, the Microsoft Deployment Toolkit. This is a FREE tool as well.
Zero Touch Installation (ZTI): By using a Zero Touch deployment mechanism, you basically give the option to the end-user to (re)deploy the machine completely by himself or herself. In short, this starts with the configuration of the deployment tool, creating an image, and automatically (read: network PXE boot-based) deploying the image to the clients.
• This is achieved within the Microsoft solutions portfolio by using System Center Configuration Manager (2007 R3 or 2012 if Windows 8-specific). This tool requires a license for the SCCM servers and a client access license for each device/user as well.
All right! Now you have a clear understanding of the different ways of deploying, we will dive deeper into the LTI approach, using MDT 2012.
What is the Microsoft Deployment Toolkit 2012 (MDT 2012)?
As per the MDT 2012 download site, MDT 2012 is the newest version of the Microsoft Deployment Toolkit (MDT), a Solution Accelerator for operating system and application deployment. MDT 2012 Update 1 supports deployment of Windows 8, Windows 7, Office 2010 and 365, Windows Server 2012, and Windows Server 2008 R2, in addition to deployment of Windows Vista, Windows Server 2008, Windows Server 2003, and Windows XP.
The first step after the download is the initial installation. The screenshots below will guide you through this step.
If this is your first deployment, I suggest you also include the documents option — this will integrate the full documentation and getting-started wizard into the MDT tool itself.
Once the MDT installation is finished, you have to start up the Deployment Workbench console.
The first thing to do here is define a deployment share. The deployment share is the location on the MDT-machine where we will store our deployment images, packages, etc. This is AD-integrated, meaning you can configure NTFS-domain rights to allow and/or block access to this folder.
Before actually having the possibility to create the share, the MDT tool needs some additional plug-ins, more specifically the Windows Assessment and Deployment Kit (Windows ADK).
Simply click the link above to download the ADK. After this download is finished, click to launch its installation. Before we launch into the next step, let’s take a closer look at some of the components of ADK.
MDT 2012 and Windows ADK
Without going too much in detail here about the different components of ADK, I’ll give a brief description here of the most important ones.
Application Compatibility Toolkit: This is an intelligent inventory tool, which allows you to deploy an agent to all machines in the network, inventory them on hardware and software compatibility with Windows 7 and Windows 8. There a sync with a global Microsoft database to get the best and most up-to-date result. It is advised to run this tool a few weeks before the actual Windows 8 deployment, in order to detect possible compatibility issues.
Windows Preinstallation Environment: This allows for the creation of bootable media for actual deployment (bootable DVD, USB stick, etc.)
User State Migration Tool: This component is used for migration of the “user state,” that being the user’s local settings in his profile. You have the option to include the User State Migration Tool in the deployment process, which allows for a backup of the user settings that can be restored after your Windows 8 deployment is finished.
VAMT – Volume Activation Tool: This tool gives you the possibility to perform automatic activation of Windows installs, Office, and more.
Windows 8 Deployment: Create a Deployment Share
Once the Windows ADK installation is complete, open up the Deployment Workbench again. Then create the Deployment Share by right-clicking on the topic, as shown below.
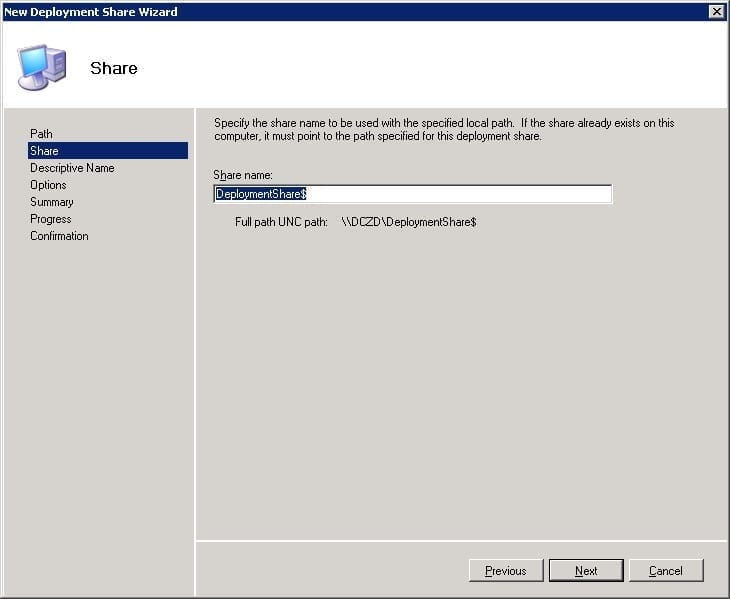
Next, choose the location where you want the deployment share to be created and give it a descriptive sharename, as you can see in the image below.
Depending on your deployment scenario, mark or unmark the specific options you need.
At this stage, the deployment share is created, which gives us an additional menu tree underneath with multiple options for the actual deployment.
The Applications topic gives the possibility to create/modify/deploy applications by using MSI packages.
As we want to deploy a Windows 8 OS image, we select the option “Operating Systems.”
Once we start the OS wizard, we have to distinguish between three options. As you can see in the image below, “Full set” refers to an effective Windows Image Media (wim) file. This can only be the Windows 8 OS, but it could also be a sysprepped image from an existing machine.
Next, we define the source for the image file (in this specific scenario, the most easy deployment – a Windows 8 Enterprise edition – for which I’m using the original ISO file of Windows 8 Enterprise edition).
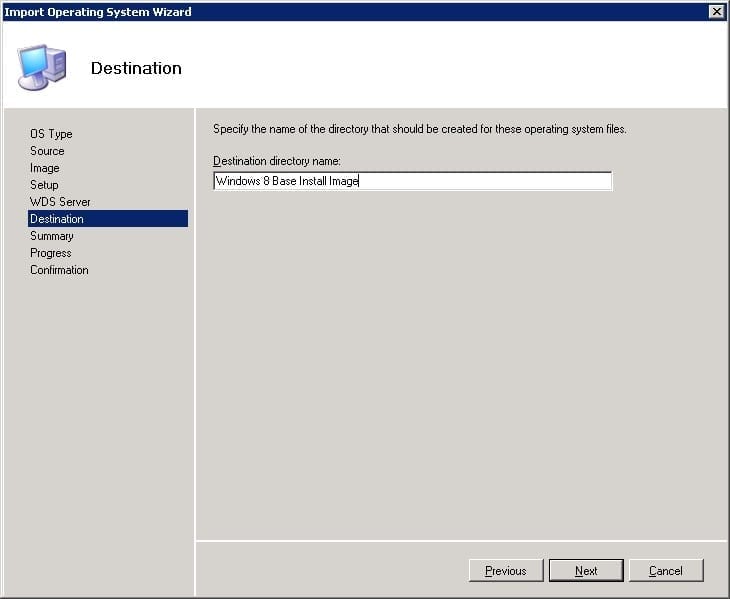
Give a descriptive name for the Destination Directory
The ISO file content is being copied over to the Deployment Share / Operating System / <your original image file here>. For example, some of you who are familiar with Windows file structure from the Windows 8 DVD will recognize immediately that this folder contains all the files from the DVD itself.
Check out our past article for more information on how to create a deployment share.
Windows 8 Deployment: Task Sequences
If you’ve followed the previous steps, you should have successfully configured the deployment share and created a first (basic) OS image. In the next step, we are going to talk about task sequences.
A task sequence is, as the name implies, a series of tasks that will be executed during the overall Windows 8 deployment process. There are already multiple pre-configured task sequences; in this scenario, we go for the easiest and less time-consuming task sequence, the basic client rollout.
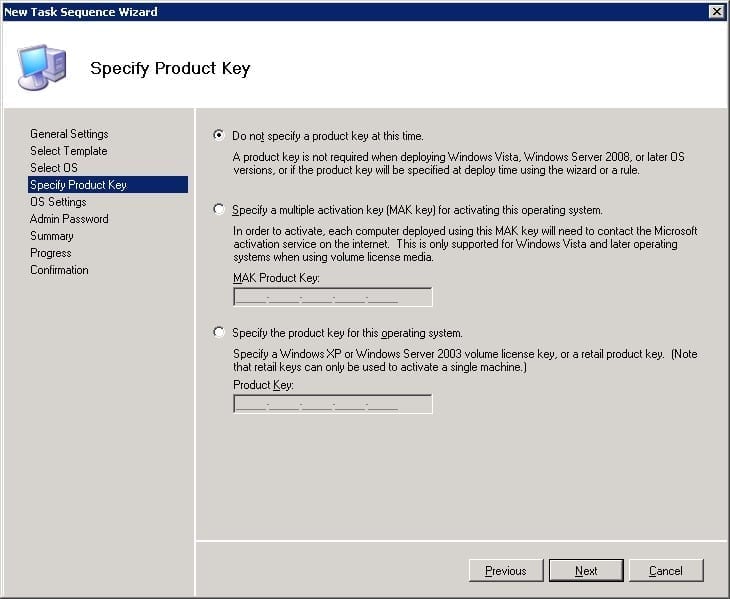
In this part of the wizard, we have the option to either enter a MAK product key, enter a product key manually, or not enter any product key at all.
Next, we specify the local admin password on the computer.
Now we have our Image File ready, followed by a deployment task. It’s about time we go to the last steps to close the actual deployment preparations.
Rick-click on the Deployment Share topic and choose Update. The toolkit will execute the final steps in the deployment wizard.
In this step, the Windows 8 PE boot image is being created. This is mainly an ISO file that is being mounted
Once the PE-bootable USB stick is finished, I can verify the contents of the LTI boot image in the respective Boot Folder under the Deployment Share.
This concludes the MDT 2012 setup and configuration one should do before starting the actual deployment of the (Windows 8) OS image. I’ll cover deployment in part 2 of this article, which will be posted here on the Petri IT Knowledgebase in the next day or so.


