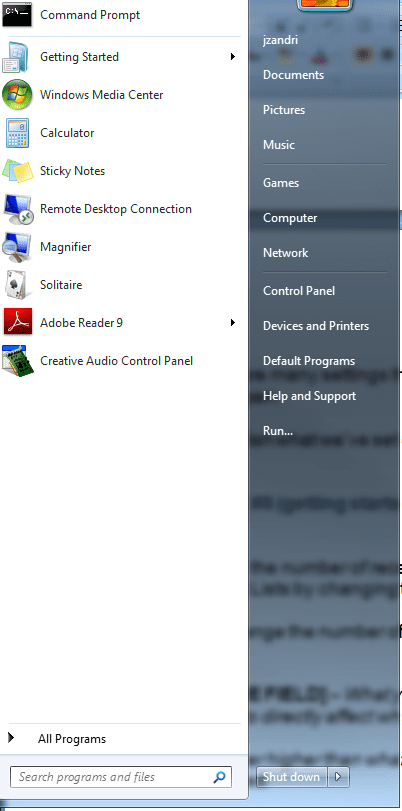
As of today, Windows 7 has been officially released and while there are some subtle changes to the Graphical User Interface (GUI) from Vista it is a pretty big departure from what many people are used to seeing under Windows XP Professional or Home Editions.
Despite the inroads Windows Vista may have made into some homes and businesses, Windows XP is still the most widely used operating system so these changes are going to be a bit more of a change for most people.
This article will take a brief look the Windows 7 Start Menu and some of the changes in the basic functions of it and how you can perform some customizations for personalization and ease of use.
How is the Windows 7 Start Menu Different from Vista and XP
The Start Menu has a bit of a different look from what the average Windows XP user is used to working with.
Accessing it is still done pretty much the same ways as it was in the past – you’d either hit the Windows “pearl” (the replacement name for START – sometimes referred to as the Windows Logo) or the Windows Logo key on the keyboard to bring it up.
[NOTES FROM THE FIELD] – The Start Menu is normally at the bottom of the screen; I always move it from that default location to the top of the screen on all my systems.
This is just a personal preference of mine and I’ve done this as far back as Windows 95. To me it just seems more logical – all of the menus I use in software, in web browsers, etc are across the top and the Windows Taskbar and Toolbars are all at the bottom by default.
Before getting into some of the things you can do with Windows 7 Start Menu I thought I’d walk through what you see in the default view of the Start Menu and some of the ways you can customize what you see in there.
What’s new with Recently Opened Programs?
There are a number of different areas in the Start Menu to get to know.
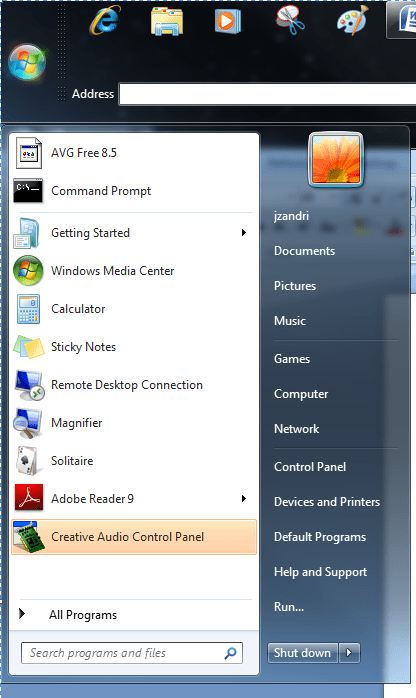
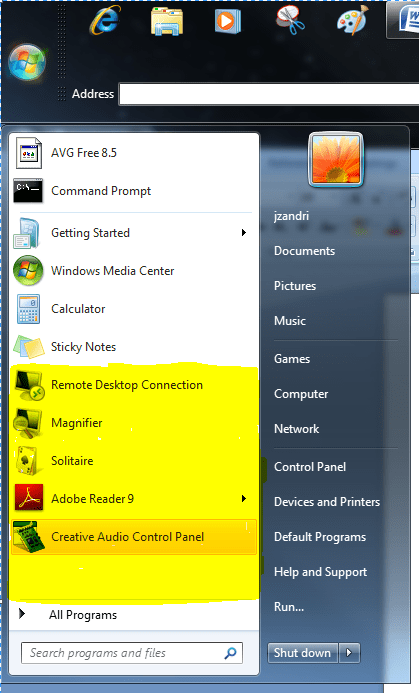
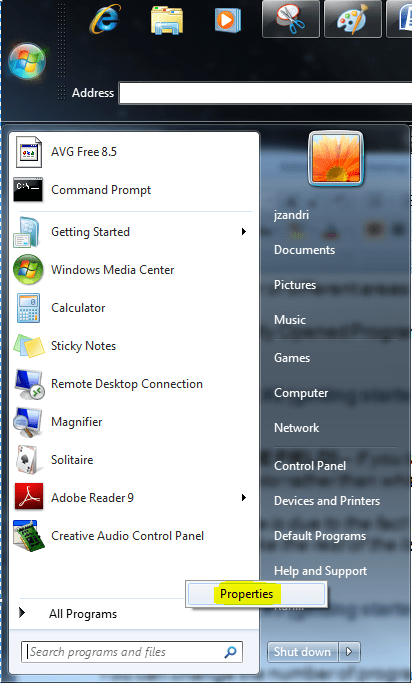
There is the Recently Opened Programs area as shown below.
[NOTES FROM THE FIELD] – If you take a look back at Image 1 you’ll notice the Creative Audio Control Panel is a peach color rather than white in the Recently Opened Programs area.
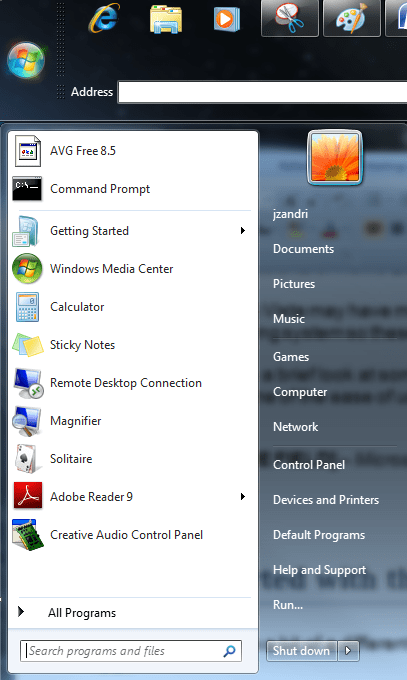
This color difference is due to the fact that this is a newly installed program; once you access the program it will turn to white like the rest of the listed programs as shown below.
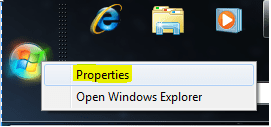
You can change the number of programs you see in the Recently Opened Programs area by either right clicking the Windows pearl and selecting PROPERTIES or by opening the Start Menu up and right clicking an open space and choosing PROPERTIES.
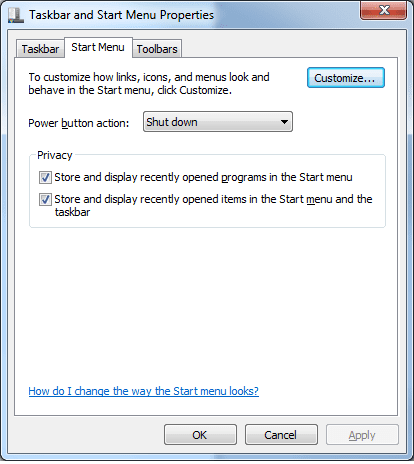
Once the Taskbar and properties page is open you’ll see that you are already on the Start Menu tab by default.
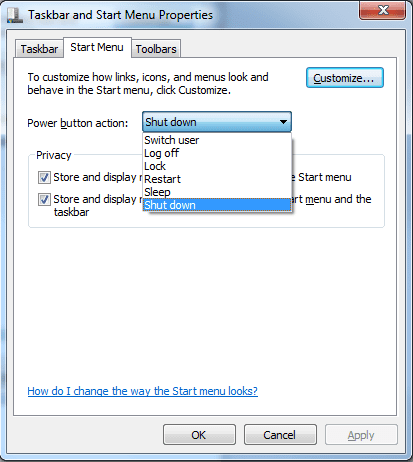
Right from here if you needed to, you could make changes to the default power button action from the drop down menu if you wanted the action to be something other than “Shut Down.”
The additional available options for this system I am working from include Switch User, Log off, Lock, Restart, and Sleep as shown below.
[NOTES FROM THE FIELD] – What you have for available options here may differ depending on your system settings, whether your machine has the Sleep option enabled, which version of the operating system you are running (I am running Ultimate Edition), whether or not your system is a domain member and so on.
The default page of the Start Menu tab also allows you to make adjustments to the privacy settings with respect to the recently opened programs that are shown in the Start Menu and the Taskbar.
In order to actually change what we see in the Recently Opened Programs area we’d need to select CUSTOMIZE to continue.
Tweaking the Recently Opening Programs for your use
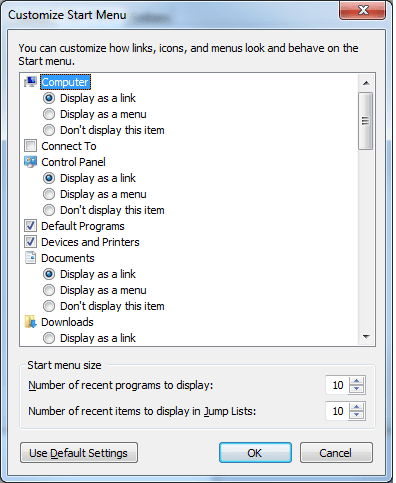
You’ll notice there are many settings that you can make changes to from the Customize Start Menu window once it is open.
In order to accomplish what we’ve set out to do we’ll just focus on those customizable options.
We can adjust both the number of recent programs to display as well as the number of recent items to display in the Jump Lists by changing the numbers in the Start Menu size section.
This will directly change the number of Recently Opened Programs shown to whatever we set it to.
[NOTES FROM THE FIELD] – What you have for available viewing space as set by your monitor resolution is going to directly affect what you can see in the Recently Opened Programs view.
If you set the number higher than what can actually be view the system will let you know that all items may not be displayed.
I could not set this limit higher than 30 on my system.
By changing the setting from 10 to 20 you can see that there is now additional white space for new programs that I launch to fill in the area
Once enough programs have been opened the list area would be fully populated and older programs would cycle off.
In Summary…
In this article, we learned about how the Windows 7 Start Menu is different from Vista and XP and we took a look at what’s new with Recently Opened Programs as well as learning how to Tweak the Recently Opening Programs for your use
Thanks for reading my article covering Getting started with Windows 7 Start Menu! I always welcome your feedback on this article or suggestions of other article topics you would like to see!
Thanks for reading!


