In my efforts to continue to try and increase awareness of the VMware vCenter Server Appliance (vCSA), I wanted to write about another part of the setup process. There are still a few steps before you are fully production ready even after you deploy the vCSA and are managing your hosts. One of the steps is to upload the Microsoft sysprep files for OS customization.
When deploying a virtual machine from template you will need sysprep files for the older operating systems. The sysprep process allows for the guest OS to be customized to your specification. This will allow for the newly deployed VM to receive a unique name and a new GUID.
Versions That Need Sysprep
The good news is that most of the modern versions of Windows no longer need sysprep files. This function has been incorporated into the operating system for the last couple of versions of Windows by Microsoft. The follow lists show which versions do and don’t need sysprep files to be uploaded.
DO need Sysprep files:
- Windows Server 2000
- Windows Server 2003
- Windows Server 2003R2
- Windows XP
DO NOT need Sysprep files:
- Windows Vista
- Windows Server 2008
- Windows Server 2008R2
- Windows 7
- Windows 8
- Windows Server 2012
- Windows Server 2012R2
How to Upload Sysprep Files
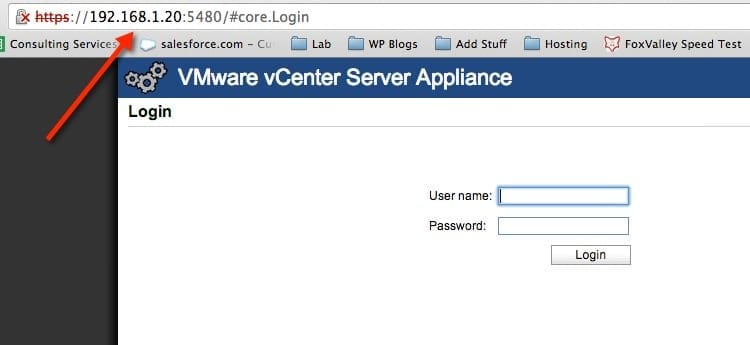
Once you have deployed the vCenter Server Appliance you can log into the management console. Go to the following link to reach the appliance management page (https://ip-of-your-vCSA:5480). In case you have not yet logged in yet, the default credentials for the vCSA are user:root and password:vmware.
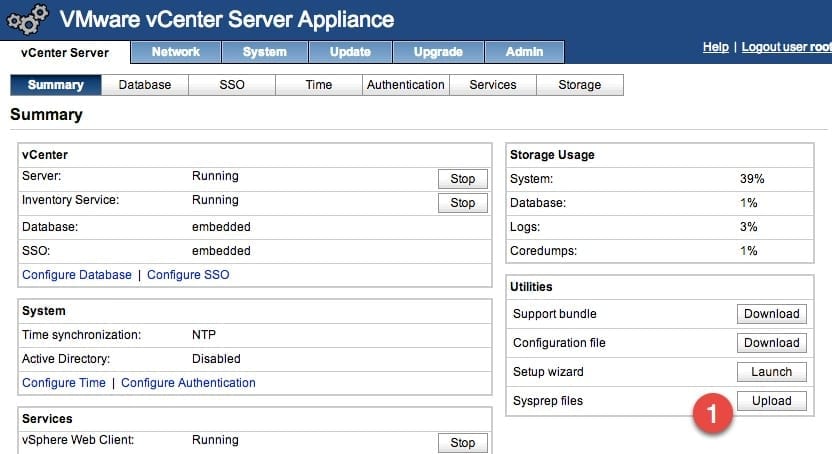
- Now that you are logged into the vCSA management console you are ready to upload the sysprep files. Click on the Upload button for Sysprep files in the Utilities section.
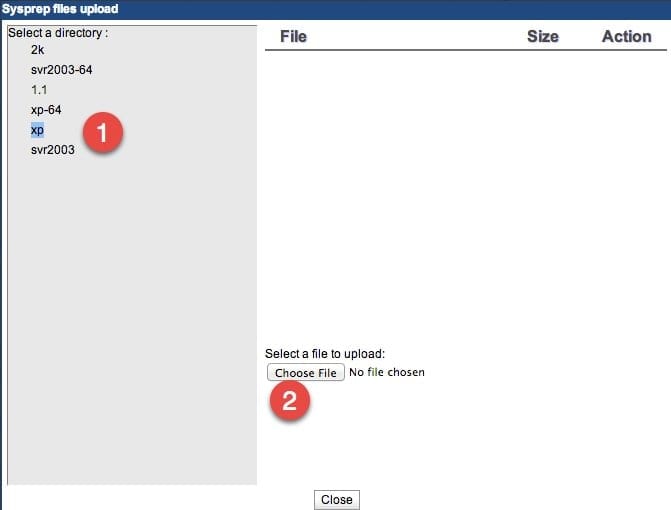
This process will launch a window that will look like the one in the image below. This will allow you to upload the different sysprep files that are needed in your environment. You do not have to upload them for all operating systems, just the ones you plan to use.
- First select the OS directory for the sysprep file that you are uploading. Then click Choose File to browse to the folder on your computer to which you saved the downloads.
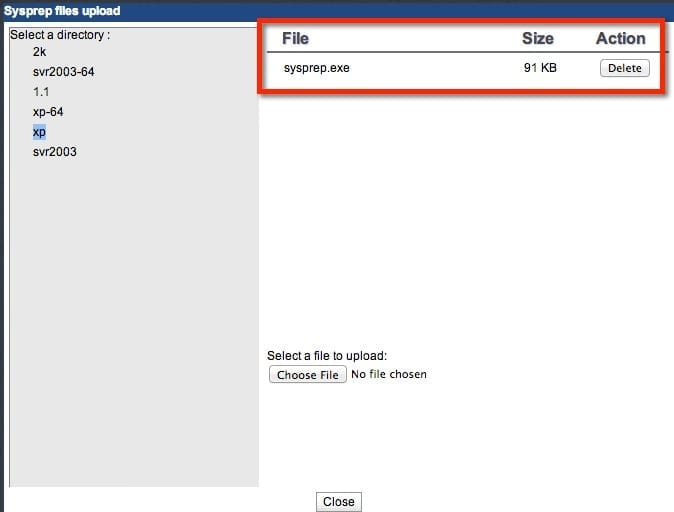
- Once the file is uploaded you will get a confirmation like the one shown below. By clicking on the OS selection from the left you can confirm if the files are uploaded. Repeat these steps for each OS version that you will need sysprep files.
Where to Download Sysprep Files
To accomplish these tasks you will need to download the sysprep files. You can fire up Google, Yahoo, or whatever search engine you’re using these days and try to track them down. Or VMware has a handy little Knowledgebase article that has the sysprep file locations all in one place.


