In the first part of this article series, I explained what it takes to install Microsoft Deployment Toolkit (MDT) 2013, create a deployment share, and configure the deployment steps for Windows 8.1. In this second article I’ll focus on how to create the offline USB media from within MDT, and provide some details on which USB device to use for different deployment scenarios.
Required Tools
On top of the components from part one of the article, you need a USB device (preferably a stick, although a USB disk might also do the trick). Now this is rather important to decide what deployment approach you will use, as that will define what USB stick you can or cannot use.
- If you want to deploy a fresh Windows 8.1 from the ISO image, and maybe extend your deployment task sequence to install a series of applications once the OS is installed, any FAT32-formatted USB drive with 8gb or more will do. As the default install.wim file is below 4Gb in size, it can be saved on a FAT32 partition.
- If, however, you are first creating your Windows 8.1 reference machine, taking a sysprepped image from this machine, you will not be able to use a typical USB drive, as that one is limited to files of 4Gb max in size (a custom fresh Windows 8.1 including Office 2013 and latest Windows updates results in an image file of 6,4Gb). In that case, you need to create a multiple-partition USB stick. The best ones to use here are the Windows To Go-certified USB devices. See this Microsoft article for an overview of supported WTG sticks.
Create Offline Media from Within Microsoft Deployment Toolkit (MDT) 2013
The first step involves configuring the MDT 2013 deployment share we’ve been working with in part one of this article for offline media.
Step 1: Create offline media
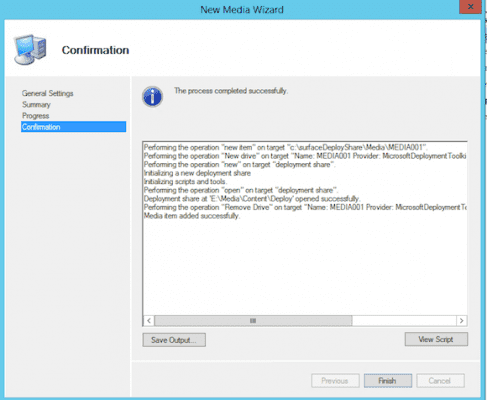
- From within the deployment share, choose Advanced Configuration / Media / New Media.
- Enter a location where you will store your deployment files. (Note: This is not your USB drive but a temporary folder on your deployment server).
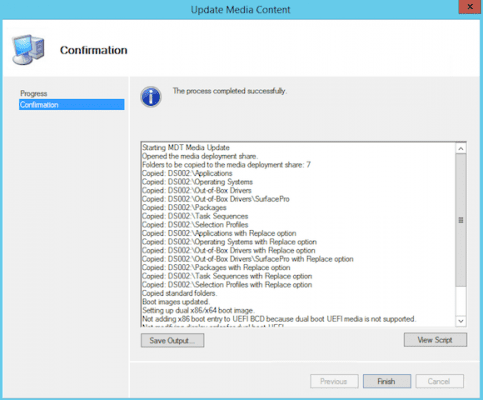
- Select your new media folder / Update Media Content.
- This will copy the source files from the configured deployment share to the just selected media folder.
Create Bootable FAT32 USB Device
In this section I’ll walk you through the steps to create a bootable FAT32 USB Device, assuming your Windows image file is not larger than 4Gb in size. To verify, browse to your earlier created deployment Media folder / Content / Deploy / Operating Systems / <your operating system> / sources / install.wim (in case of default Win 8.1 ISO file as source, this file is 3.4Gb in size.
- Start command prompt as admin.
- Type DISKPART, and press Enter.
- At the Diskpart> prompt, type the following commands, each on a separate line, followed by Enter.
- list disk
- select disk XX (where XX is the drive letter from your USB volume)
- clean
- create partition primary
- select partition 1
- active
- format FS=FAT32
- assign
- exit
Next, you need to make this USB device bootable. From within the same admin command prompt, browse to your Windows 8.1 ISO image (or mount the ISO if needed) boot subfolder, and type the following command: Bootsect /nt60 XX: (where XX is the drive letter form your USB volume).
In the final step, copy over all files and folders in the Media-folder to the root of the USB device.
Reboot Surface Pro from the USB
Boot up your Surface Pro from this USB drive, by holding down the volume button while pressing the power button. Once the Surface boot logo is showing up, it should start booting form the USB device. You can release the volume down button at that time.
Follow the MDT client deployment wizard to get your Windows 8.1 image installed on the Surface Pro.
Create Multi-Partition USB Boot Device
In the scenario of having a larger WIM-file, you need to use a multi-partioned USB drive. A smaller partition will become the boot partition (2-4Gb should sufface), where a larger partition will be formatted as NTFS.
Again, it is best to use a Windows-To-Go certified USB stick for this or a USB drive. What’s important is that when the USB device is attached, the volumes should be recognized as a “fixed disk” in Disk Manager. Otherwise, this approach won’t work.
Most of the steps are identical to the one from creating a FAT32-drive.
- Start command prompt as admin
- Type DISKPART, and press enter
- At the Diskpart> prompt, type the following commands, each on a separate line, followed by Enter.
- list disk
- select disk XX (where XX is the drive letter from your USB volume)
- clean
- create partition primary size=4096
- assign
- active
- format FS=FAT32 quick label=”boot”
- create partition primary
- assign
- format FS=NTFS quick label=”Image”
- exit
Next, copy the contents from the Media folder on the deployment server to your USB partitions as follows:
- Copy <media source folder>\content\boot folder to the root of the FAT32-partition, in a similar folder named “boot.”
- Copy <media source folder>\content\efi folder to the root of the FAT32-partition, in a similar folder named “efi.”
- Copy <media source folder>\content\autorun.inf, bootmgr, bootmgr.efi files to the root of the FAT32-partition.
- Create a folder named ‘deploy’ in the root of the FAT32-partition. Copy the contents from <media source folder>\deploy\boot into this directory in a similar directory named “boot.”
- Create a folder named ‘deploy’ in the root of the NTFS-partition. Copy all contents from <media source folder>\deploy into this directory.
- Boot up your Surface Pro from this USB drive, by holding down the volume button while pressing the power button. Once the Surface boot logo is showing up, it should start booting form the USB device. You can release the volume down button at that time.
- Follow the MDT client deployment wizard to get your Windows 8.1 image installed on the Surface Pro.


