Installing the DNS Server Role on Windows Server 2012
The Domain Name System (DNS) protocol has long been the foundation of a useable network (and Internet) experience. With the introduction of Microsoft’s Active Directory (AD) the use of DNS became even more important. This article take a look at how to install the DNS Server role in Windows Server 2012 Standard edition.
(Editor’s note: Got R2? No problem! Take a look at our previous article, “Installing the DNS Server Role on Windows Server 2008 R2.”
How to Install the DNS Server Role in Windows Server 2012
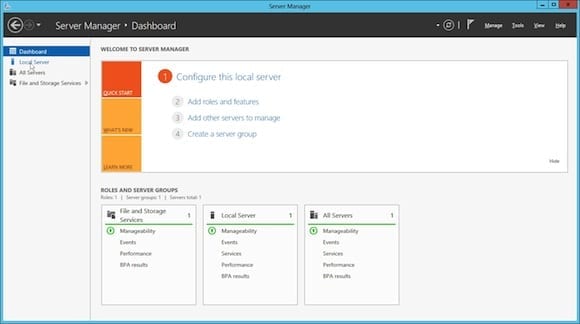
Like with Window Server 2008 R2, the installation of a DNS server of Window Server 2012 involves the addition of the DNS Server role. There are two different main ways to start the Add Roles wizard. The first is shown below in Figure 1; it utilizes the Quick Start menu from the Dashboard.

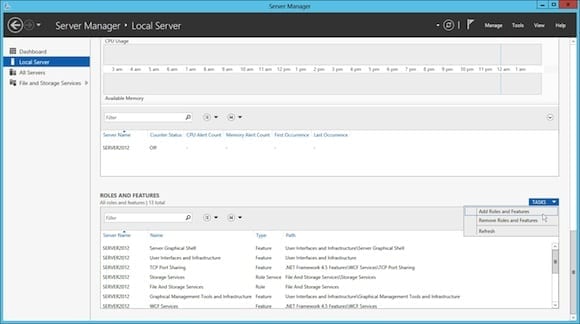
- The other option is available under the specific server being managed; in this case, select the Local Server option shown in the left pane.
- The selection of the Local Server will bring up a properties window as shown below. Scroll down in this window until the Roles and Features box is shown. Click on Tasks then click Add Roles and Features to begin server role installation.
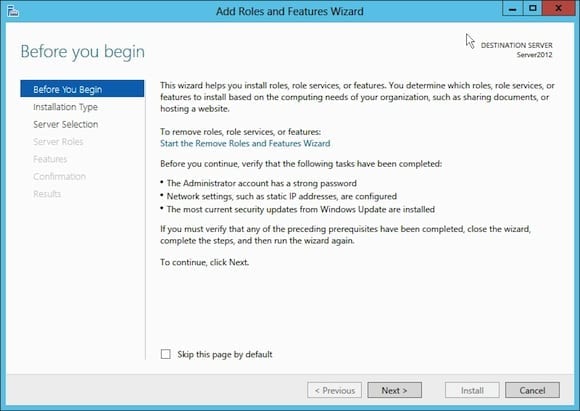
- Regardless of which path is taken, the window shown below will be the result. Skim through the text shown and select Next.
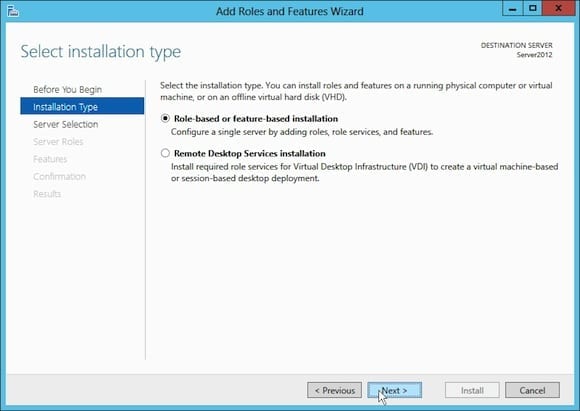
- The next window will ask for the installation type; in this case the role will be installed on a single server (local). Select this option and select Next.
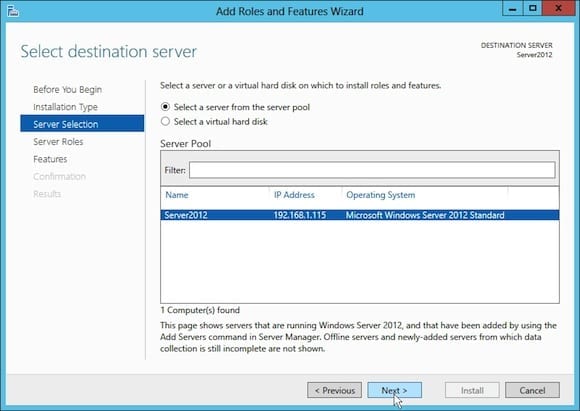
- The next window will then ask for the destination’s server (the one where the DNS Server role will be added). Select the destination server and select Next.
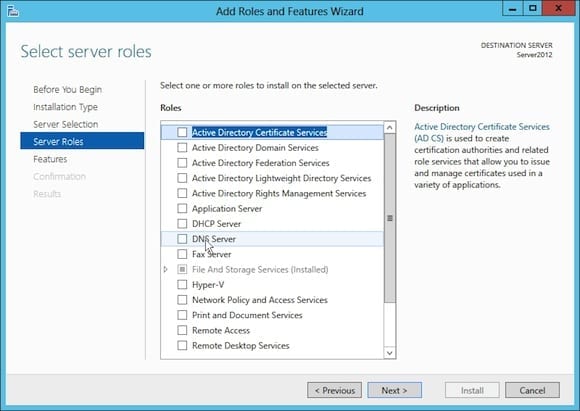
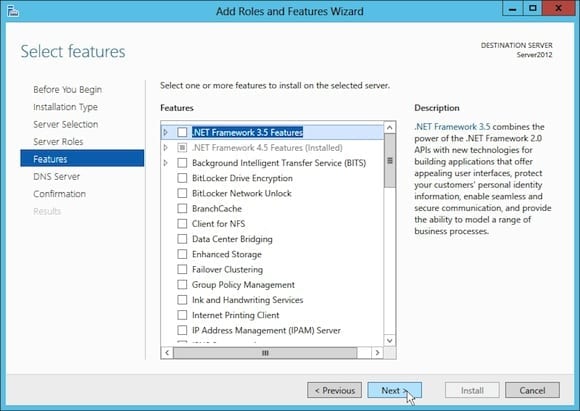
- The next window (as shown below in Figure 7) will be where the DNS Server role will be selected.
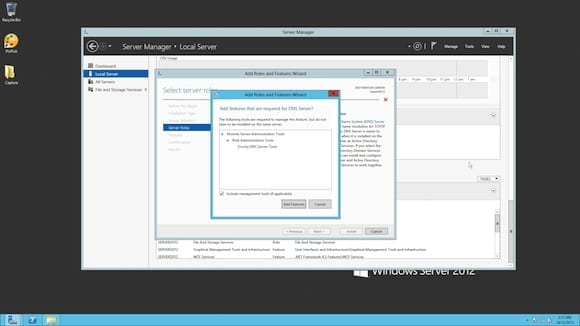
Once it is selected it will bring up an additional window asking whether the DNS management tools should also be installed on the same server. For the purposes of this article they will be installed on the same server, but there is no requirement for local management.
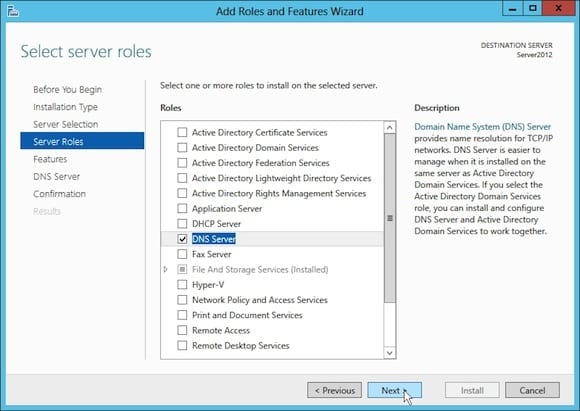
- Once the window is handled it will come back to the Server Roles selection window again with the DNS Server role selected (as seen below). Since only the DNS Server role is being installed at this time, select Next.
- The next window will prompt if there are any additional features that should be installed. Since the DNS Management tools have already been selected and there are no additional features needed, select Next.
- Now you’ll be given some information on DNS and how it can and is used with Windows Active Directory (AD). Skim over this and once complete select Next.
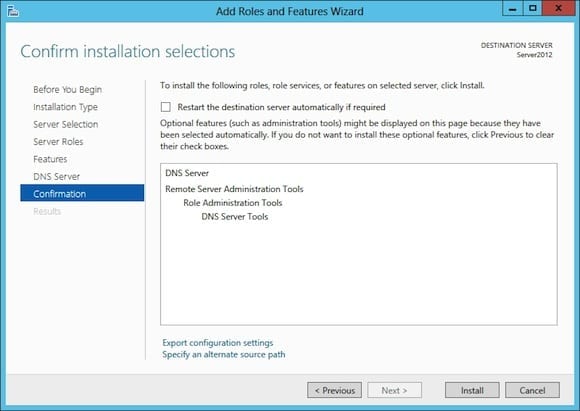
- The next window (as shown below) will confirm the roles and features that will be added to the selected server. If everything looks correct, select Install.
- At this point the installation will begin. Once the installation is complete the window confirms success (or failure). Now select Close.
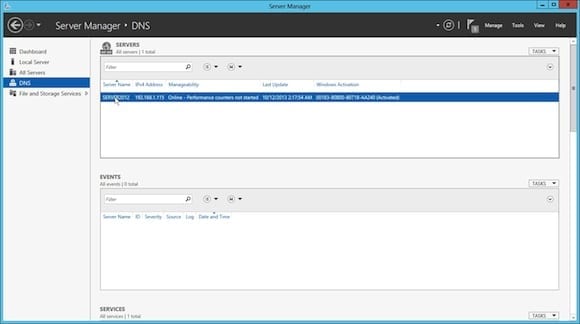
- With a successful installation, the DNS option will be added to the left pane of the Server Manager (as shown below in Figure 15). To manage DNS select DNS from the left pane.

- The next window will show the DNS server that are currently available for management; in this case, there is only one available.
- Right-click on the server shown to bring up a menu of available actions available. Select DNS Manager.
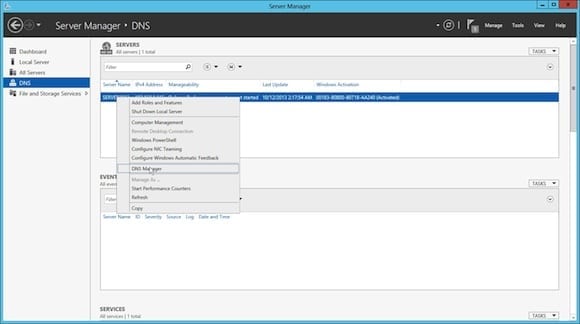
- This will launch the DNS Manager. This should look familiar to those experienced with DNS Manager in earlier version of Windows Server.

The installation of the DNS Server role in Windows Server 2012 has a few additional steps over its successors, but it remains intuitive to most junior-level and above engineers. From the DNS Manager the specific records required for the specific network can be added. Or, if AD is deployed, some records will be automatically added.