


Understanding PowerShell and Scheduled Task Management
- Blog
- PowerShell
- Post
Many tasks within Windows are managed by the Windows Task Scheduler. This versatile task scheduling system, akin to cron in Linux, is used by both core Windows processes and by user programs alike. Instead of using the GUI to configure each aspect of a scheduled task, PowerShell has the ability to define a task configuration for creation, modification, and removal of scheduled tasks.
In this article, we explore both the creation and removal of a scheduled task running a PowerShell script.
Setting up PowerShell for Scheduled Task Management
Windows contains a built-in PowerShell module designed specifically for task management. These cmdlets work in Windows PowerShell, which also includes both PowerShell Core (6.x) and PowerShell 7. The module itself is named ScheduledTasks and can be imported, or automatically so, by calling on one of its commands.
Import-Module -Name 'ScheduledTasks'
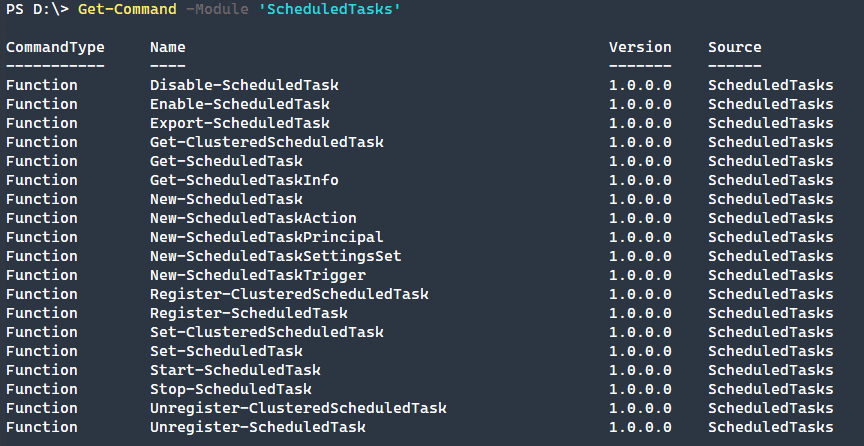
There are several commands which cover virtually all of the needed functionality to interact and control scheduled tasks.
Get-Command -Module 'ScheduledTasks'
Creating a New Scheduled Task
Say we have a PowerShell script that we want to run on a regular basis. We want the task to do the following.
- Execute a PowerShell 7 Script
- Run the account as the System account using the highest level
- Run every day at 3 am starting the following day
- Stop running if over 30 minutes
The cmdlet [New-ScheduledTask](<https://docs.microsoft.com/en-us/powershell/module/scheduledtasks/new-scheduledtask?view=win10-ps>) creates the scheduled task object that is then registered using the [Register-ScheduledTask](<https://docs.microsoft.com/en-us/powershell/module/scheduledtasks/register-scheduledtask?view=win10-ps>) cmdlet. To create the new scheduled task, we must first define four components.
- Trigger:
[New-ScheduledTaskTrigger](<https://docs.microsoft.com/en-us/powershell/module/scheduledtasks/new-scheduledtasktrigger?view=win10-ps>) - Action:
[New-ScheduledTaskAction](<https://docs.microsoft.com/en-us/powershell/module/scheduledtasks/new-scheduledtaskaction?view=win10-ps>) - Principal (Account):
[New-ScheduledTaskPrincipal](<https://docs.microsoft.com/en-us/powershell/module/scheduledtasks/new-scheduledtaskprincipal?view=win10-ps>) - Settings:
[New-ScheduledTaskSettingsSet](<https://docs.microsoft.com/en-us/powershell/module/scheduledtasks/new-scheduledtasksettingsset?view=win10-ps>)
Scheduled Task Trigger
In our example, we want to define a trigger that will run every hour but starting the day after the current date. We are using the At parameter to define both time and date. By defining the date, as well as the time, we are giving the scheduled task a StartBoundary that will move the day forward by one.
$Params = @{
"Daily" = $True
"At" = (Get-Date '3 AM').AddDays(1)
}
$Trigger = New-ScheduledTaskTrigger @Params
Scheduled Task Action
Next, we need to define our action settings. This is what will happen when the trigger is initiated. This trigger will cause a PowerShell script to run. In the example below, we are passing in the -File parameter to a PowerShell 7 executable.
$Params = @{
"Execute" = "C:\\Program Files\\PowerShell\\7\\pwsh.exe"
"Argument" = '-File "C:\\Scripts\\PSScript.ps1"'
}
$Action = New-ScheduledTaskAction @Params
Scheduled Task Principal
To define the account that the task will run under, we need to define what Windows Security Principal will be used. Using the Highest level means that the scheduled task will properly elevate through user account control (UAC).
$Params = @{
"UserID" = "NT AUTHORITY\\SYSTEM"
"LogonType" = 'ServiceAccount'
"RunLevel" = 'Highest'
}
$Principal = New-ScheduledTaskPrincipal @Params
Scheduled Task Settings
There are a lot of settings available within the scheduled task settings set. In this example, we are going to set a few that make the most sense for this particular task.
ExecutionTimeLimit– Set an upper time limit of the task to be only 30 minutes total before stopping.AllowStartIfOnBatteries– If this is a laptop, allow the task to start if the laptop is currently running on battery power.DontStopIfGoingOnBatteries– Correspondingly, don’t stop the task if the laptop is unplugged from AC power.RestartCount– The maximum number of times the script can automatically restart if an error occurs.RestartInterval– The time in-between each restart interval.
$Params = @{
"ExecutionTimeLimit" = (New-TimeSpan -Minutes 30)
"AllowStartIfOnBatteries" = $True
"DontStopIfGoingOnBatteries" = $True
"RestartCount" = 2
"RestartInterval" = (New-TimeSpan -Minutes 5)
}
$Settings = New-ScheduledTaskSettingsSet @Params
Creating and Registering the Scheduled Task
Now that all of the necessary components have been defined we can combine all of them into the task definition and then register this new task with the Windows Task Scheduler.
$Params = @{
"Action" = $Action
"Principal" = $Principal
"Trigger" = $Trigger
"Setting" = $Settings
}
$Task = New-ScheduledTask @Params
$Task | Register-ScheduledTask -TaskName 'PSScript'
You will most likely need to run this as an Administrator.

Creating and registering the Scheduled Task
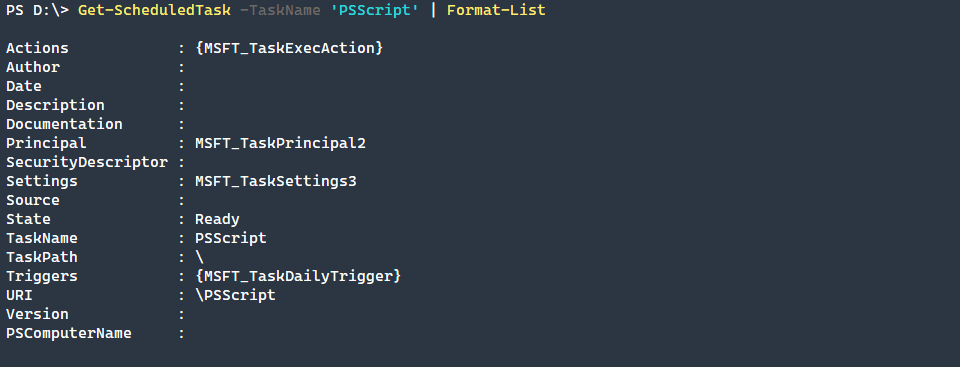
The resulting output will be if the task was properly scheduled, which we can then verify by using PowerShell to confirm that the task exists.
Get-ScheduledTask -TaskName 'PSScript' | Format-List
Enabling and Disabling a Scheduled Task
Perhaps we find that while we are modifying the underlying PowerShell script, we would prefer that the task is disabled to avoid any issues. This is very easy to do, and it’s generally recommended that you get the task object itself and pipe into the [Disable-ScheduledTask](<https://docs.microsoft.com/en-us/powershell/module/scheduledtasks/disable-scheduledtask?view=win10-ps>) cmdlet. This helps to verify that the task object is correct.
Get-ScheduledTask -TaskName 'PSScript' | Disable-ScheduledTask

After we finish making the script changes we need to go ahead and enable the task again. Just like before, we will get the task and pipe into the [Enable-ScheduledTask](<https://docs.microsoft.com/en-us/powershell/module/scheduledtasks/enable-scheduledtask?view=win10-ps>) cmdlet.
Get-ScheduledTask -TaskName 'PSScript' | Enable-ScheduledTask

Removing a Scheduled Task
Ultimately we may find that our scheduled task should not be needed anymore. In this case, we will need to remove the scheduled task. To do this we will simply call [Unregister-ScheduledTask](<https://docs.microsoft.com/en-us/powershell/module/scheduledtasks/unregister-scheduledtask?view=win10-ps>). There are alternatives if you need to keep the task around, such as Disable-ScheduledTask, but this will remove the task entirely.
Get-ScheduledTask -TaskName 'PSScript' | Unregister-ScheduledTask

Although this cmdlet asks for confirmation, you can use -Confirm:$False to bypass that check and immediately unregister the task.
Conclusion
Windows Scheduled Tasks are incredibly powerful and flexible. By leveraging PowerShell to create, modify, and remove tasks we expose the power that programmatic access to this underlying Windows system has. This can also be used to retrieve tasks from other servers across the network, to manage errant tasks, and discover incorrect service accounts as well.
Use Windows Scheduled Tasks to create and manage repeating tasks whether they be on a local server or across the network!