


How To Share A Document Library In Office 365
Overview
With Office 365, you can use SharePoint as a collaboration tool for people working in the same department, or those working on the same project, but you can also set up a document library to share documents with people outside your organization, such as clients or contractors.
In this article, I show you how to set up the sharing features of your document libraries so that you can share a document library with someone that doesn’t have an account in your organization’s Office 365 deployment.
If you haven’t set up a document library yet, we’ll show you some of the things you should consider before you create one, and then show you the steps to create one in my previous article, Create a Document Library for SharePoint in Office 365.
If you don’t have Office 365 yet, but are wondering about whether it’s a good fit for your organization, then you should definitely try out the software for yourself. You can even use your own domain name during the trial, like we show in the Petri article, Set Up Office 365 Trial With Your Own Domain Name.
First, you can’t give somebody outside your organization permission to a document library without first giving them some permissions to the site the document library is in. Also, when a person gets permission to access a site, they also get access to any sub-sites that inherit their permissions from their parent site, so plan out your strategy first. You may need to create a site under your team site for working with a specific client so that you can share exactly what you want to share, without granting them access to everything at your team site.
How To Grant View Permissions to an Office 365 Site for Somebody Outside the Organization
 Adding someone into the “Visitors” group allows them to read items, but not change them. For this example, I want to grant an external user the permissions to add and edit documents in a document library, but I do not want them to be able to change items in other lists, libraries, and pages in other parts of this site or any sub-sites. I am granting only Visitor permissions to the user for the site. This is the lowest permission possible for users.
Once they have been invited to the site, their user account is enrolled into the organization. Once enrolled, the external user can be granted permissions to other sites and site components.
Note that there is no additional license that is required for this. You can have up to 50 external users on your SharePoint sites in Office 365 (with more available through additional licensing).
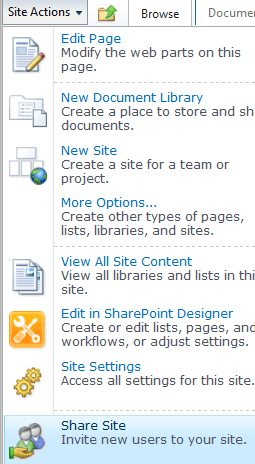
Log onto your Office 365 team site with an account that has permissions to perform administrative tasks. The site actions menu contains the menu item “Share Site.”
Step 1: Click Site Actions > Share Site
Step 1 can be completed from any page, list, or library on the site. The permissions you’re granting right now are for the entire site, and any sites under it that inherit their permissions from the parent, so if you’re already on the document library you want to share, you will still be adding the user to the site that the document library is a part of.
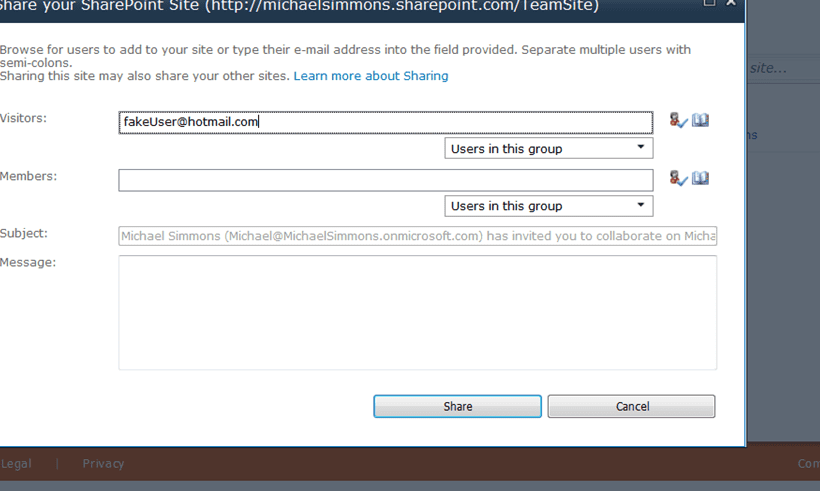 After clicking Share Site, the Share your SharePoint Site window opens. Add the email address of the users you want to be able to read the site to the Visitors list. You can add multiple email accounts to either the Visitors or the Members. Any user that you add to the Visitors list will be able to view the site and any sub-sites that inherit permissions from the site. Members can read, create, and update content to the site and to all sub-sites that inherit permissions from the site.
Step 2: Add the Email addresses of your external users to either the Visitors (read only for whole site) or Members (contribute for whole site)
The users will get an email message inviting them to log in. They must use a live account, which is by default either a hotmail, live, or msn email account. However, you can now use your own email account from another service. So your users can use an already existing email account if they need to create a live account but already have an existing email that they’d like to keep.
There are two boxes off to the side:
The person with a check mark   ![]() is used to verify the account is correct. This can only be done for accounts that are already enrolled in the organization. This won’t help with external users that have not yet been added to any other sites. If you know that an external user has already been set up on one site in your organization, and now want to give them access to a different one, then this button would verify the account.
is used to verify the account is correct. This can only be done for accounts that are already enrolled in the organization. This won’t help with external users that have not yet been added to any other sites. If you know that an external user has already been set up on one site in your organization, and now want to give them access to a different one, then this button would verify the account.
The second box, which looks like an open book   ![]()   is the browse button, which can be used to find users to add to your site.
  is the browse button, which can be used to find users to add to your site.
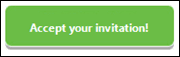
You may have to remind the users to accept the invitation from the email.
Just because you have invited them to access your site does not mean that they have accepted the invitation. If they have not yet accepted the invitation, they will still get an access denied message if they try to log on. If one of your external users says they get an access denied message, it may be because they did not accept the invitation.
Once they’ve accepted the invitation, and logged on, they will be able to see the site. If all you wanted to do was allow them to read the files in the document library, then you would be all done. Since we want to also permit them to update and add files to the document library, we will modify the permissions of the document library.
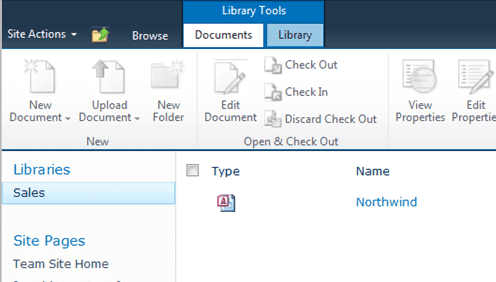
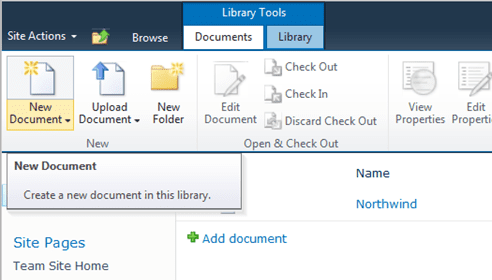
The picture on the left shows what a visitor sees on the document library. Notice the “New Document” buttons are not enabled, and the link to “Add Documents” on the file view is missing. The picture on the right shows an administrators view. Though you don’t have to be an administrator to modify documents, (a Member has the contribute permission), you can see that when you have contribute permissions, the “New Document” button on the ribbon and the “Add Document” link on the file list is enabled.

Now that the external user has been set up in the organization, we need to add the them into the Members group for the document library.
Step 3: Add the external user to the Members group on the document library.
- Go to the document library you want to add the external user to
- Click Library under “Library Tools”
- Click Library Permissions in the Settings section of the ribbon

- Click Members from the list of groups on the permissions page
- Add email address for the external user to the Users/Groups section of the Grant Permissions page
- Click OK
The next time the user logs onto your SharePoint site, they will be added to the correct groups, and they will have the permissions to not only read documents but to add, edit, and create new documents as well.
Conclusion
It’s great to set up a document library to work with files, and to share them easily between coworkers. Document libraries can also be used to share with external users. Each instance of Office 365 includes licensing for up to 50 external users. Those users can work with sites, lists, and document libraries like they are part of the group.
Users have to first be part of the organization by being added to the site that the document library is in. They will then have the same permissions on the document library as they do on the site. If you want them to have more permissions in the document library, you can add them to a security group on the document library which allows them more permissions.