


How to Set Up an AWS EFS File System

Amazon Elastic File System (AWS EFS) is an easy-to-use and serverless storage solution allowing companies to optimize file storage in Amazon Web Services (AWS). In this article, we’ll show you how to set up and test access to an EFS file system with an AWS EC2 instance.
What is AWS EFS?
Amazon Elastic File System is one of the main file system options on AWS along with Amazon FSx. It provides a cloud-based serverless file storage option for workloads capable of using the Network File System protocol (NFSv4).
The service is built for use with Amazon EC2 Linux instances, the Amazon Elastic Container Service (ECS), and the serverless computing platform AWS Lambda. However, the absence of SMB protocol support means that the service is not designed for Microsoft Windows workloads.
Amazon EFS also offers automatic storage scaling from gigabytes to petabytes as well as consumption-based pricing, removing much of the need plan upfront for increased capacity.
How AWS EFS works with Amazon EC2 and on-premises resources
Amazon Elastic File System is primarily accessed from Amazon EC2 Linux instances: This is because once created, an EFS file system can be accessed through a mount target created in an Amazon Virtual Private Cloud (VPC), and it can be mounted on an EC2 instance (in the same VPC) with relative ease.
If you want your on-premises servers to connect to an EFS file system, you’ll need to connect your on-premise networks to your VPC using Site-to-Site VPN or AWS Direct Connect, which is Amazon’s service for hybrid cloud connections. Once you have enabled network connectivity, the same mount targets can be used to connect to the provisioned EFS service.
Amazon EFS storage classes
Amazon Elastic File System offers two types of storage:
- Standard storage classes – Amazon EFS Standard and Amazon EFS Standard-Infrequent Access (EFS Standard-IA)
- One Zone storage classes – Amazon EFS One Zone and Amazon EFS One Zone-Infrequent Access (EFS One Zone-IA).
Files stored on EFS standard storage classes are replicated across multiple availability zones (AZs) for site recovery, whereas One Zone storage classes are only available within a single availability zone.
AWS EFS pricing details
With Amazon Elastic File System, you typically only pay for the storage used by your file system. Pricing depends on the AWS region you choose, and it ranges from $0.043 for the infrequent access tier storage to $0.08 for standard storage.
There’s an exception when Provisioned Throughput is optionally configured, which regardless of used storage, is billed at $6 per MB/s. In addition, expect charges for data backup and data egress charges.
With the AWS Free Tier, you can also get 5 GB of storage in the EFS Standard storage class for 12 months. However, please note that this Free Tier isn’t applicable to files stored in the EFS One Zone storage class.
How to create your Amazon EFS file system
To create your Amazon Elastic File System, start by logging into your AWS account and searching for the EFS service. You can find it by searching for EFS in the top search bar.
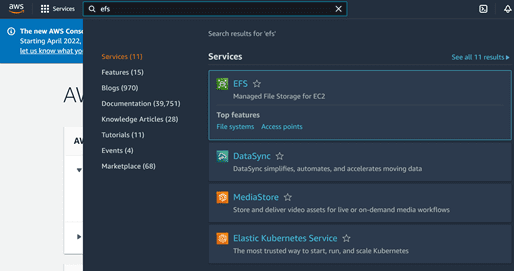
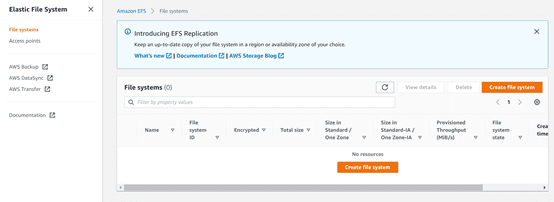
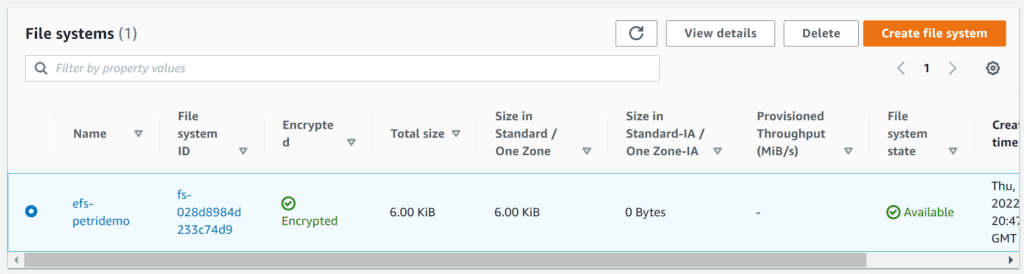
Here, you will see any existing EFS services provisioned. If you have not provisioned an EFS service before, though, you will see no resources.
To start provisioning, select Create File System.
Configure your AWS EFS file system settings
Now that you created your Amazon EFS file system, you will then be presented with a wizard that prompts you for the basic EFS configuration settings required, which include Name, Virtual Private Cloud, and storage class. The VPC you choose will determine where your mount targets will be connected. These mount targets will also allow other resources within the same VPC to connect to the EFS service.
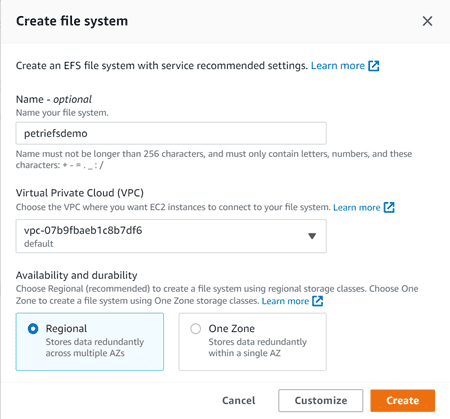
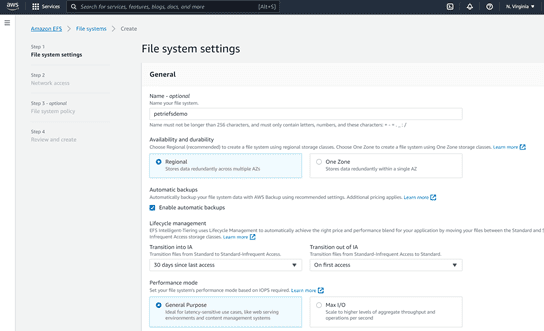
If you select Customize, you can configure more advanced settings such as backup configuration, automatic archiving to Infrequent Access storage, as well as performance and throughput modes.
Once you’re creating your EFS file system, you will receive a Success! message.
Configure your mount targets
To configure your mount targets, select your new EFS file system, then click on the Network tab. Here, you will see the different mount targets.
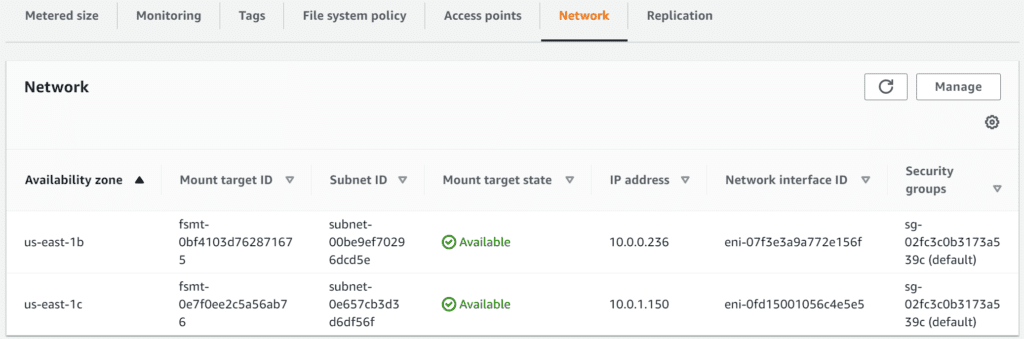
By default, a mount target is created for subnets in each availability zone. These are the connection points used to mount the EFS service within a virtual machine.
While creating your EFS file system, a security group was attached to each mount target. In order to access the EFS file system, inbound rules must be added to the security group to allow inbound traffic on the NFS port. You can learn more about how to add inbound rules on the AWS website.
Once you’re done, the file system will be available to connect to.
Using your EFS File system with an AWS EC2 instance
To verify we can connect to the EFS service, we’ll be creating a new Linux-based Amazon EC2 instance.
Create a new Amazon EC2 instance
To create an EC2 instance, search for EC2 in the top search bar and select it in the search results.
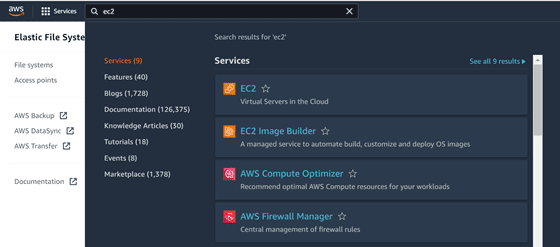
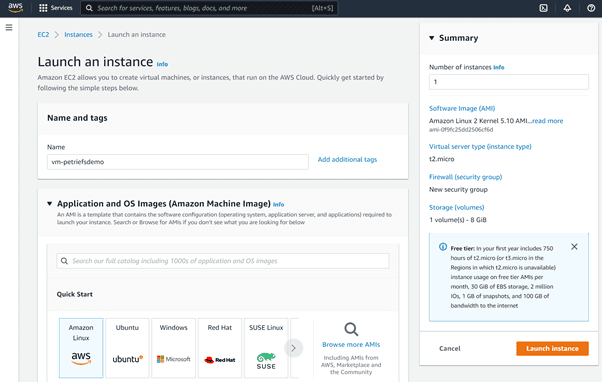
You’ll be presented with the EC2 dashboard, where you can see any previous EC2 instances you have. Select Launch Instance to start the provisioning process.

As we mentioned earlier, the EFS service will only work with the NFSv4 protocol, which limits its use to Linux operating systems. Any Linux-based image can be used (Ubuntu, RHEL, CentOS, and so on), though be aware that the method for mounting the EFS service will differ across Linux distributions.
For the purposes of this guide, we will be provisioning an Amazon Linux image.
Linux servers require an SSH key pair, so you will need to create one if you don’t already have it. If needed, you can learn how to create an SSH key pair on the AWS website.
Mounting the created EFS file system to an EC2 instance
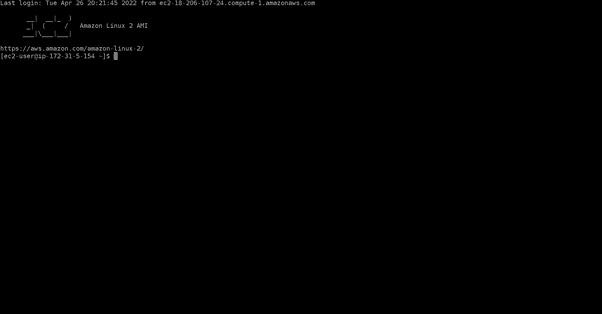
To connect to the EFS file system from the EC2 instance, we’ll be using the browser-based client from the Amazon EC2 console to connect to our instance using EC2 Instance Connect.
On the EC2 console, select your instance, Choose EC2 Instance Connect, verify the user name and choose Connect.
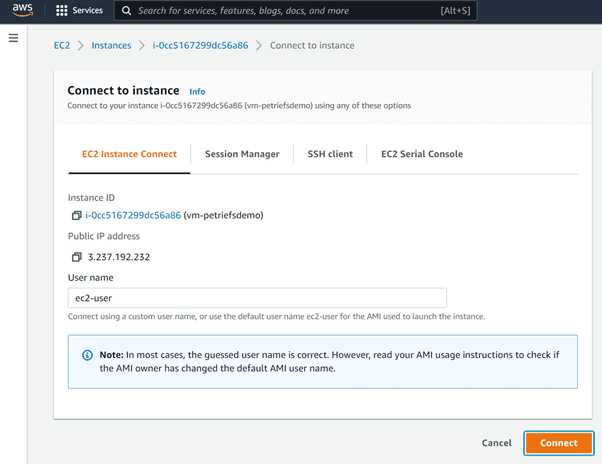
This will open a terminal window where you can type commands. Once connected, the first thing you need to do is to install the Amazon EFS client. This package contains a set of utilities to make mounting EFS services easier.
To install the package, run the following command:
sudo yum install -y amazon-efs-utils
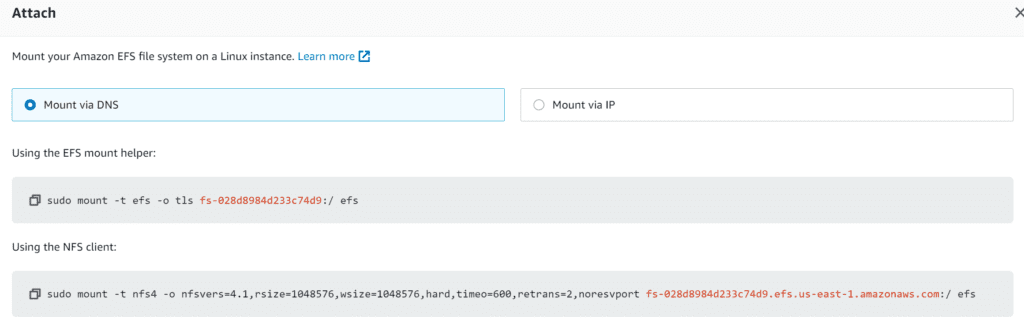
After installing the package, you can find the mount commands from the EFS service. Go to your EFS service and select Attach.
We’re now ready to mount your Amazon EFS file system on our EC2 Linux instance using the EFS mount helper. The command on display here can be run from your EC2 instance command line.
sudo mount -t efs -o tls fs-0228d8984d233c74d9:/ efs
After mounting your EFS file system on your EC2 instance, you’re now ready to create or transfer files to it.
Use Amazon DataSync to transfer files to Amazon EFS
Unless you are setting up a greenfield environment or deploying a new application, you’ll likely need to migrate data into the EFS service from other sources. This could be from on-premises file systems, another EFS service, or even other Amazon storage services such as Amazon S3.
The Amazon DataSync service allows you to move data into an EFS service, and it provides end-to-end encryption support while doing so. Amazon DataSync is a paid service, but you’ll only pay for the amount of data that you migrate with a per-gigabyte fee that varies depending on your region.
Transferring files from an existing on-premises file system
Transferring data from an on-premises file system requires a DataSync agent to be installed on the on-premises network. The agent is a piece of software installed onto a virtual machine within the on-premises network that is used to read data from the source file system. You can learn more about how to deploy and activate an AWS DataSync agent on this page.
Transferring data between AWS storage services
Transferring data from other AWS storage services (S3, EFS, or FSx) does not require the installation of an agent. The source and destination file systems can be configured within the AWS DataSync console, and you can learn more about how to proceed on this support page.
How to delete an Amazon EFS file system
Once you are finished with your EFS service, it can be deleted to prevent any further consumption charges to be incurred. To delete the EFS Service, open the Amazon Elastic File System console, Select the file system you want to delete on the File systems page, and choose Delete.
A dialog box will open and you will be prompted to confirm the deletion. Enter the relevant file system id and choose Confirm to delete the EFS file system for good.
Conclusion
We’ve detailed the different steps required to set up an Amazon EFS file system, mounting it on an EC2 instance, and transferring data to it with Amazon DataSync. As a serverless storage solution, Amazon EFS makes it quite easy to create and configure file systems without having to manage the file storage infrastructure, and the service is also built to scale.
If Amazon EFS can’t be used with Windows environments, Amazon FSx supports SMB access from Windows. Amazon also launched Amazon FSx for Windows File Server back in 2018 to provide fully managed shared storage built on Windows Server.
Related Article: