Service Manager 2012 Beta Part 6 – Self-Service Portal Installation
Overview
In parts one through five of this series, we went through the SCSM 2012 System Requirements, a step-by-step walkthrough of the installation and configuration of the Service Manager Management Server and the Data Warehouse Server, as well as the configuration of the SCCM and AD Connectors in order to make our SCSM environment functional. Here are links to the previous parts in this series in case you missed them:
- Part 1: System Center Service Manager System Requirements
- Part 2: Installing the Service Management Server
- Part 3: Installing the Data Warehouse Server
- Part 4: Configuration Manager 2007 R3 Connector Configuration
- Part 5: Active Directory Connector Configuration
In this final chapter of this documentation, we will detail the required steps to install and configure the Self-Service Portal, based on SharePoint Foundation 2010.
How to Install the Self-Service Portal
The first step involves the installation of SharePoint Foundation 2010, after which the specific Service Manager web console components will be installed.
Step 1: Download the SharePoint Foundation 2010 (with SP1) from the following website:
http://www.microsoft.com/download/en/details.aspx?id=26640
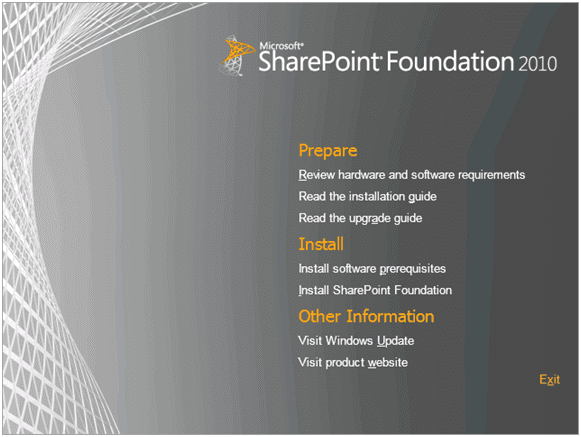
Step 2: Begin the setup by selecting Install software prerequisites
Figure 1: Installing SharePoint Foundation 2010
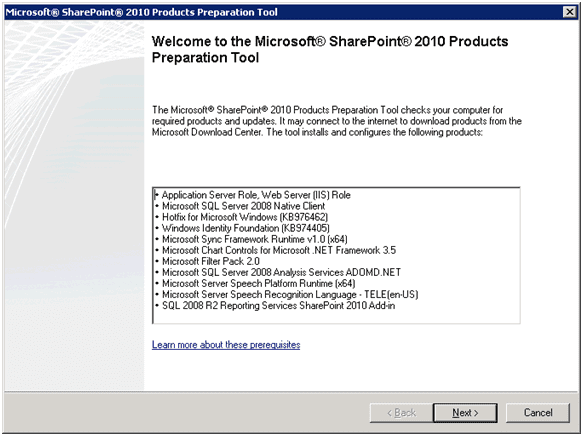
Step 3: Once the SharePoint Preparation Tool lauches, click Next.
Figure 2: SharePoint 2010 Preparation Tool
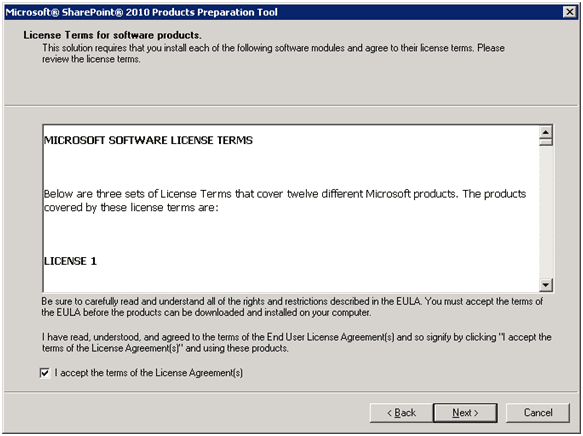
Step 3: Review the license terms, mark the checkbox for accept and click Next.
Figure 3: License Terms for SharePoint 2010
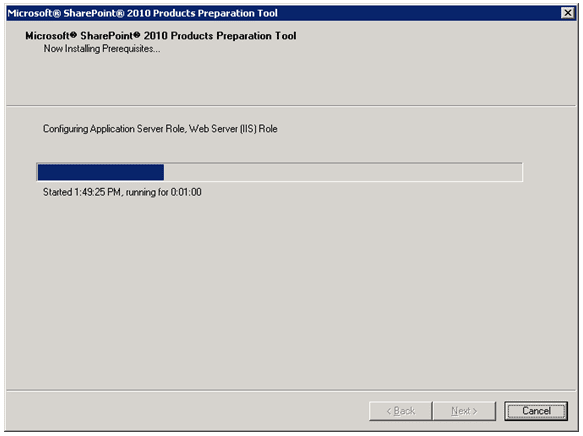
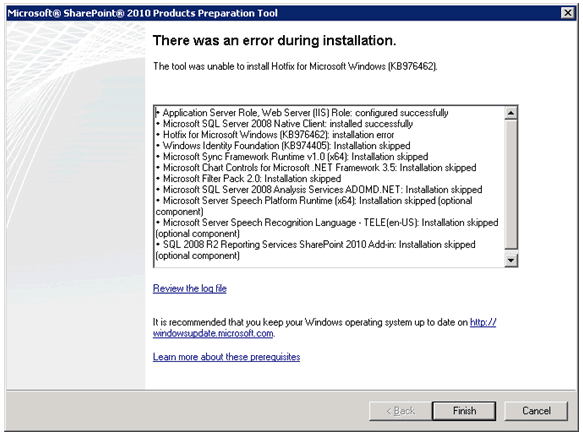
Step 4: You’ll see that the prerequisites will all be installed (Figure 4). You’ll also see that some components were installed successfully, however, some other components need to be installed manually or were already installed on the Windows Server we are using (Figure 5).
Figure 4: Installing Prerequisites
Figure 5: Installation Error
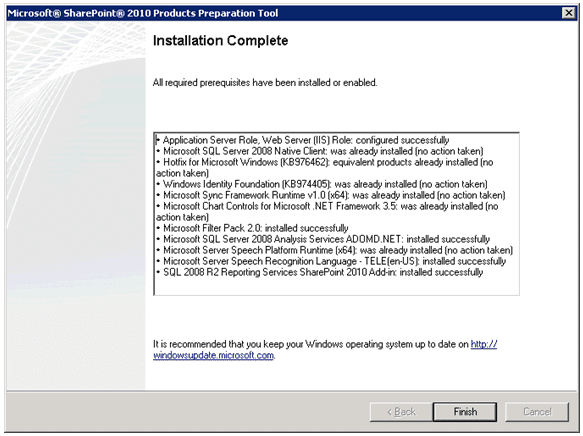
Step 5: Review any errors you might have and install and enable any missing prerequisites. Once your installation completes successfully, you can close by clicking Finish and continue with the setup of SharePoint Foundation.
Figure 6: Installation Complete
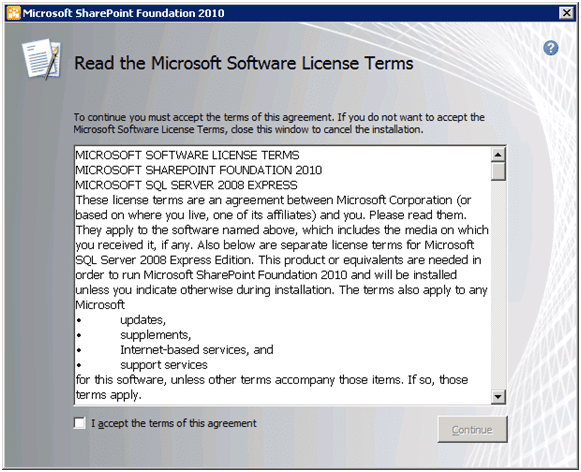
Step 6: Next we’ll voce on to installing SharePoint Foundation 2010. Read through the license agreement, select accept at the bottom and click Continue.
Figure 7: SharePoint Foundation 2010 License Terms
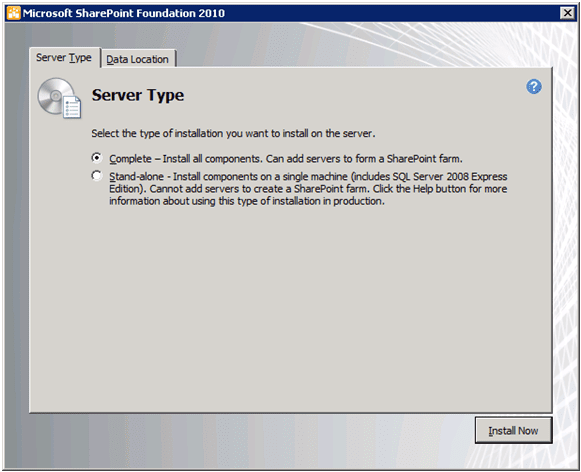
Step 7: For server type choose Stand-alone, which will allow us to select a SQL server to use, as well as give us the option to add additional SharePoint Foundation servers afterwards. Continue with Install Now.
Figure 8: Choose your server type
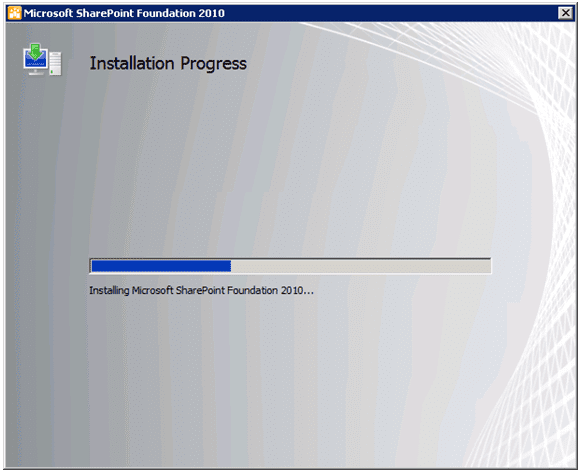
Figure 9: Installation process
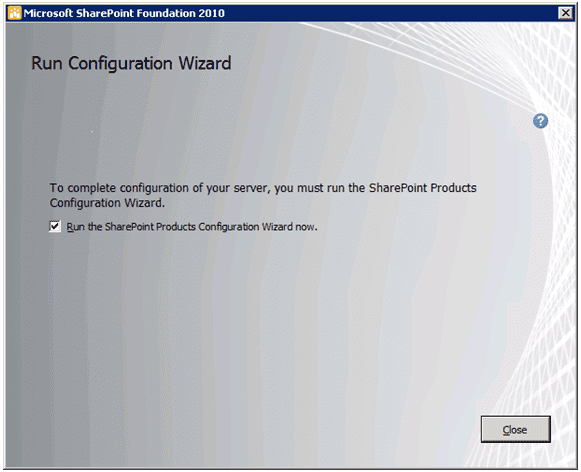
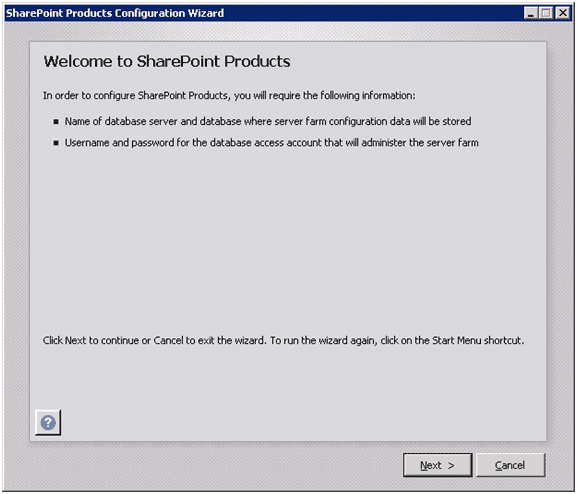
Step 8: Next you’ll see the SharePoint Foundation Configuration Wizard, select Run Configuration Wizard to begin the process (Figure 10) and Next on the Welcome screen (Figure 11).
Figure 10: Configuration Wizard
Figure 11: Welcome screen
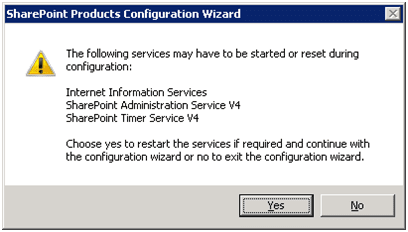
Step 9: When you see the popup stating some services may have to be started or reset during configuration, click Yes .
Figure 12: Restart required services
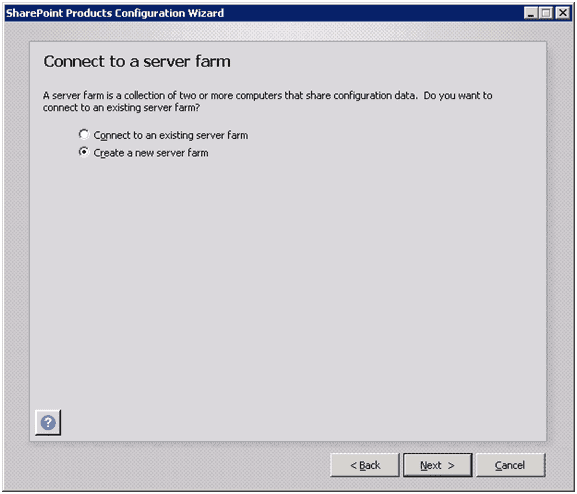
Step 10: Next, choose the second radio button that says Create a new server farm and click Next.
Figure 13: Create a new server farm
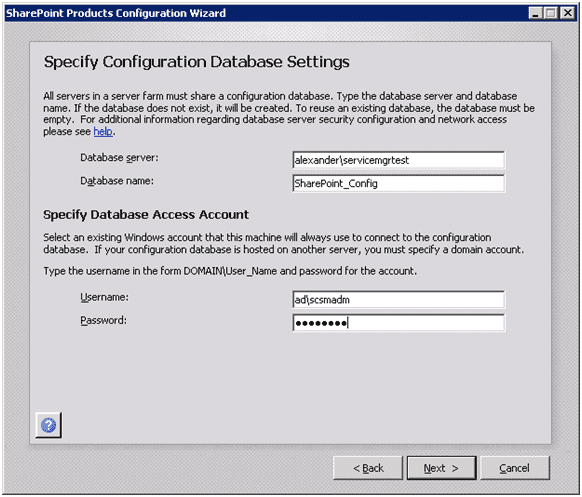
Step 11: On the following screen, enter the required data for your database server, database name, username and password for your database access account. Click Next.
Figure 14: Configureation Database Settings
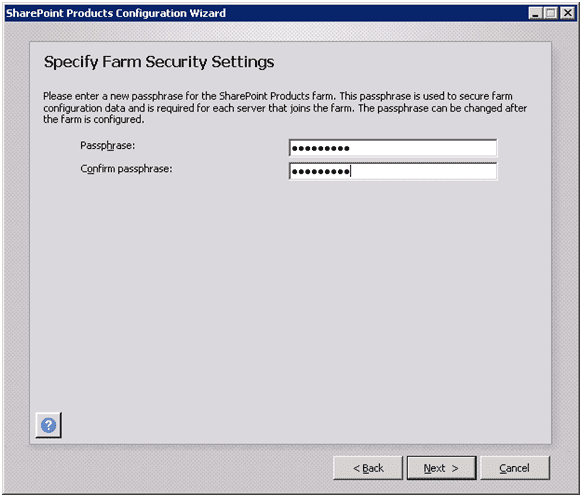
Step 12: Next we’ll have to specify the security settings for our farm; enter in your passphrase twice and click Next.
Figure 15: Farm Security Settings
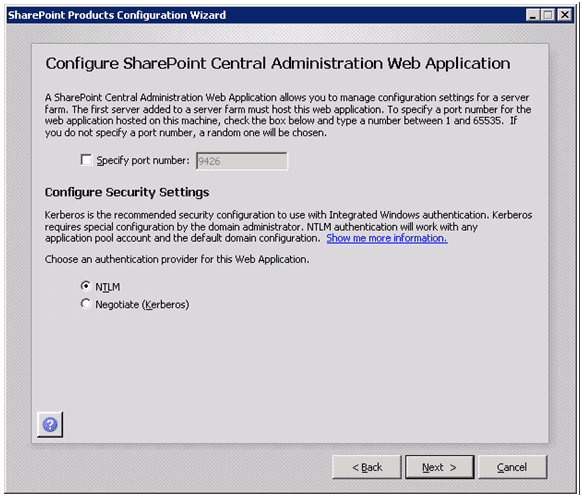
Step 13: Leave all the defaults on the SharePoint Center Administraiton Web Application page and click Next to continue (Figure 16). On the following screen review your configuration settings and click Next (Figure 17). The configuration process will begin (Figure 18).
Figure 16: Configuring SharePoint Center Administraiton Web Application
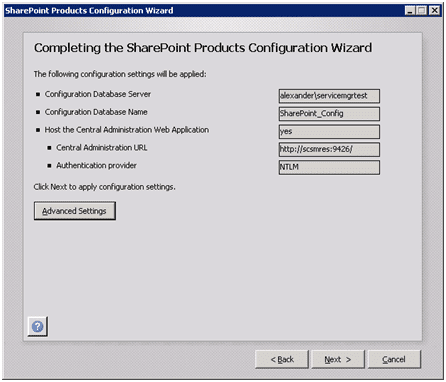
Figure 17: Review Configuration Settings
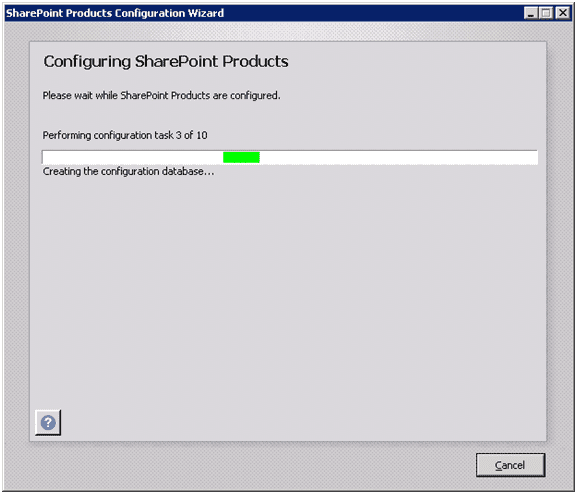
Figure 18: SharePoint Foundation Configuration in Progress
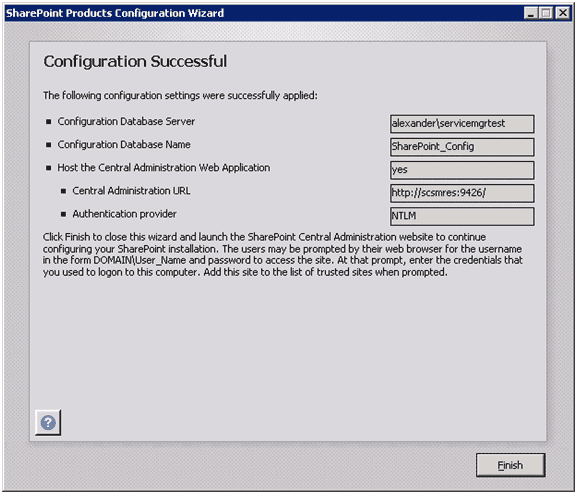
Step 14: Once the installation is complete , we can browse to our SharePoint Foundation 2010 configuration website.
Figure 19: SharePoint Foundation Installation Complete
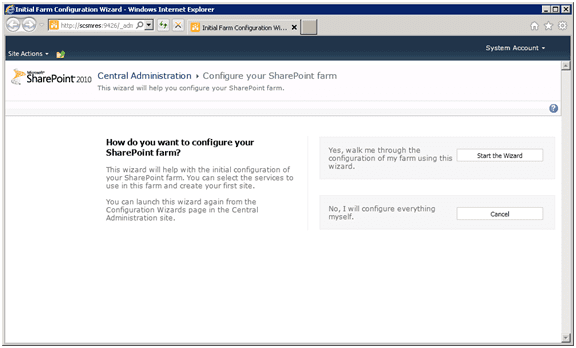
Step 15: Once you’re on your SharePoint site, click Start the wizard to begin the configuration process.
Figure 20: SharePoint Configuration Wizard
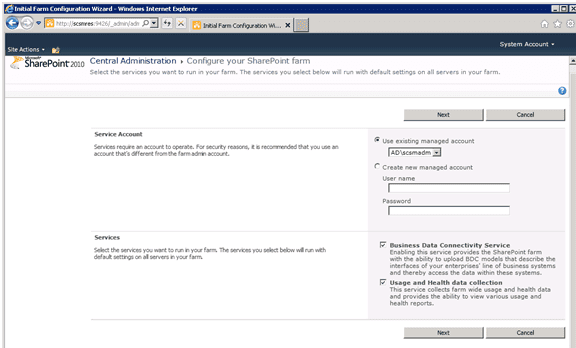
Step 16: Enter in the required data; in our scenario we chose Use existing account for your service account and we checked off both of the services.
Figure 21: SharePoint Service Account and Services
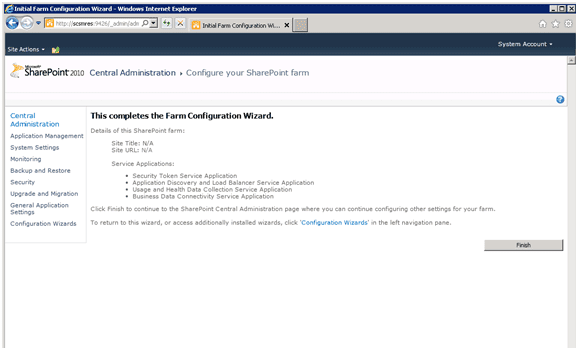
Step 17: Once done, click finish in the browser window to complete the Farm Configuration Wizard.
Figure 22: Farm Configuration Wizard Completed
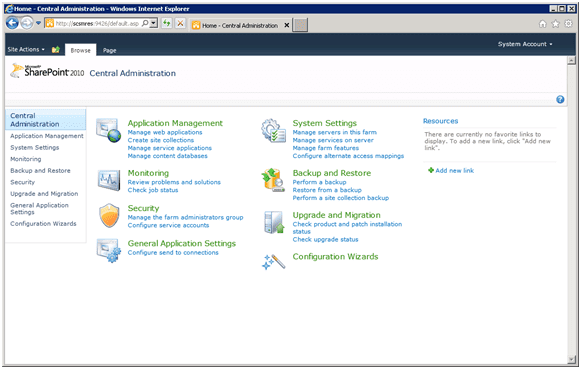
Note: After the configuration is done, you can update SharePoint Foundation to SP1 form the Central Administration screen.
Figure 23: Update SharePoint Foundation to SP1
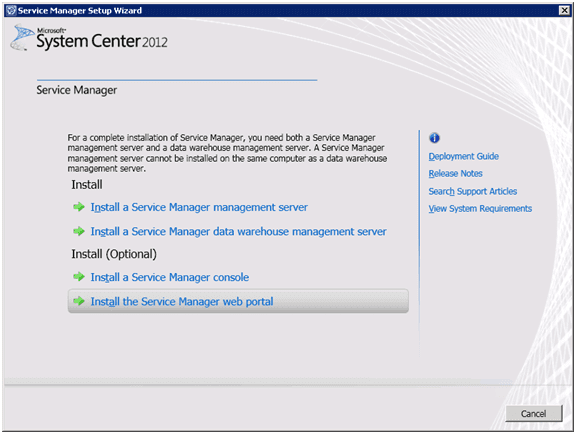
Step 18: Next, we will install the Service Manager Web Portal components. Start the Service Manager setup and click Install the Service Manager Web Portal.
Figure 24: Install the Service Manager Web Portal
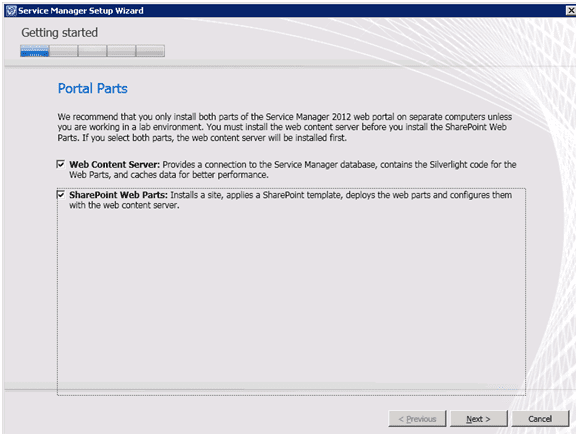
Step 19: Make sure both Portal Parts options are selected: Web Content Server and SharePoint Web Parts, and click Next.
Figure 25: Portal Parts
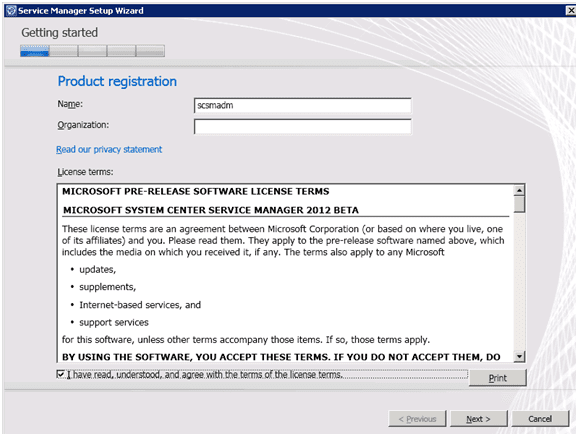
Step 20: Enter the name, organization and accept the terms at the bottom before clicking Next.
Figure 26: Product registration
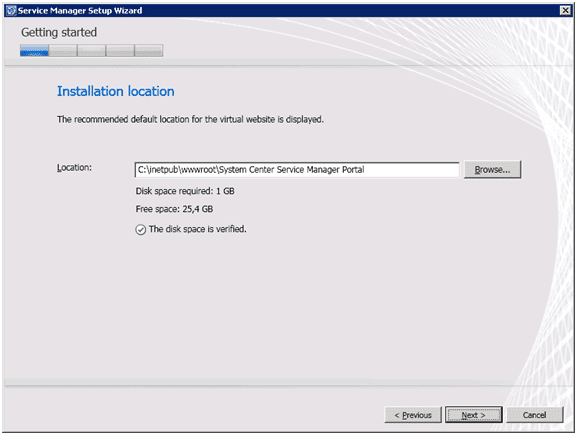
Step 21: Select the location where you want the website components to be installed and click Next to continue.
Figure 27: Installation Location
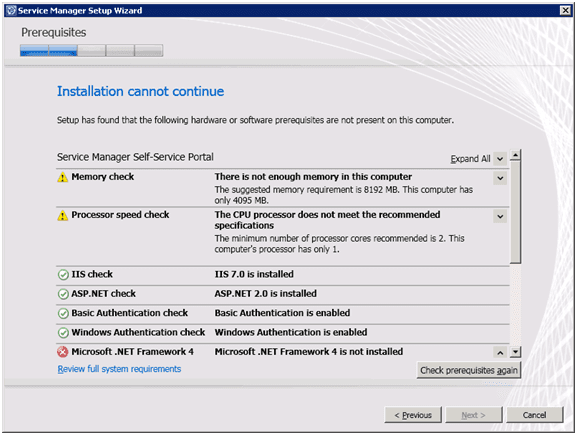
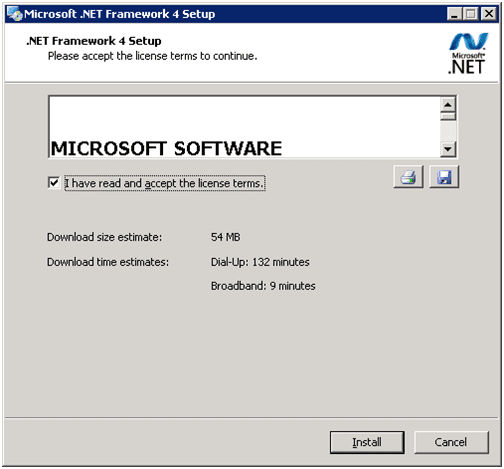
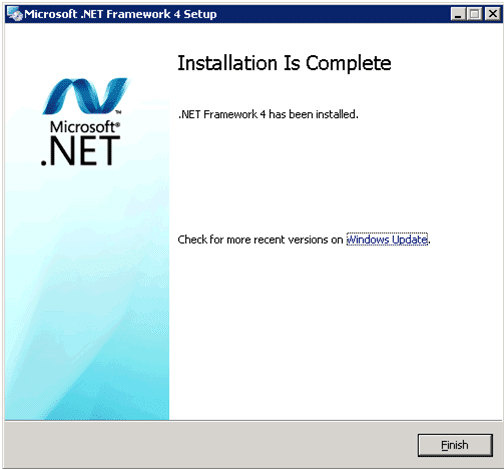
Step 22: Validate the prerequisites; in our scenario, only the .NET Framework 4 is missing. We will download the latest version from the Microsoft website and run the installation. The steps for this are easy, simply click Install (Figure 24) and Finish (Figure 25).
Figure 28: Installation Errors
Figure 29: Installing the .NET Framework
Figure 30: .NET Installation Complete
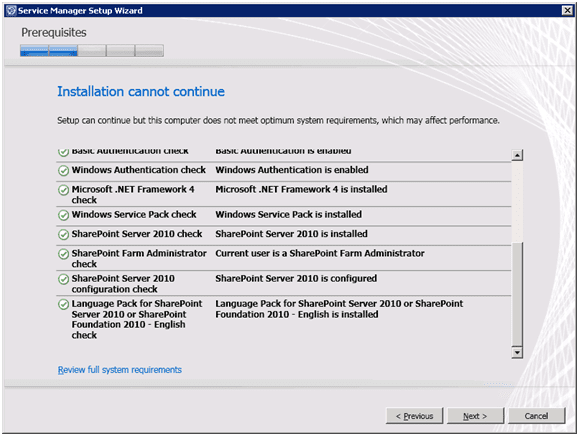
Step 23: Retry the prerequisite check, which should be successful at this time and click Next to continue.
Figure 31: Prerequisite Check Complete
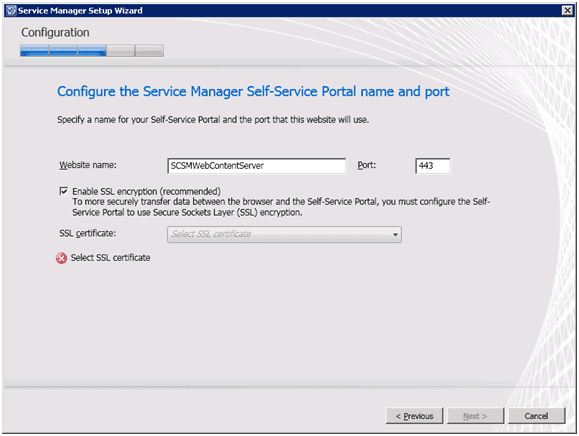
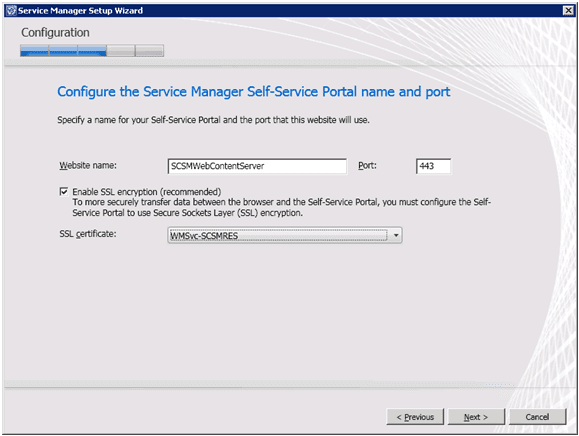
Step 24: Enter a Website Name and Port number; a SSL certificate is required, which is not yet configured within IIS 7. We will do this first to allow us to complete this step.
Figure 32: Configure SSL Certificate
Once the self-signed certificate is configured from within IIS, we can continue by clicking Next.
Figure 33: Configuring the Self-Service Portal name and port
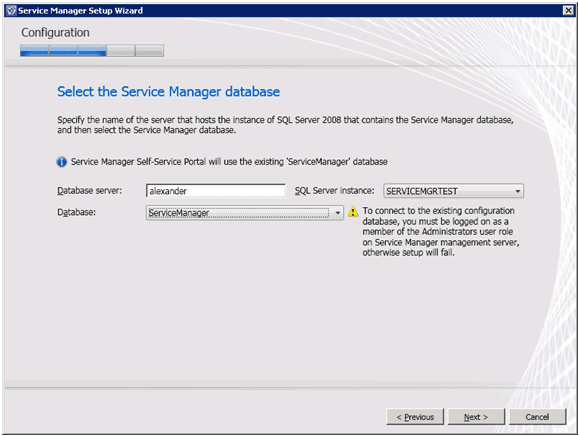
Step 25: Next enter the database server, select the SQL server instance you want to use and the database. Click Next to continue.
Figure 34: Select the Service Manager database
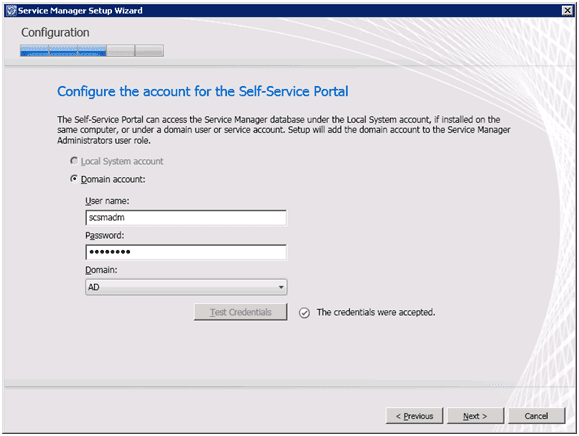
Step 26: Enter in your domain account information and click Next.
Figure 35: Domain account credentials
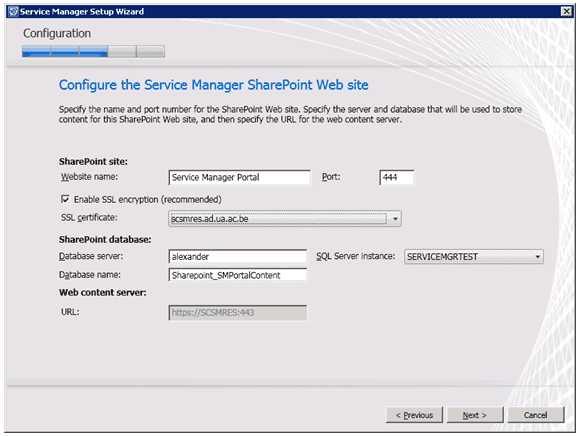
Step 27: Next we’ll specify the name and port number for the SharePoint Website as well as the database information. When doen click Next.
Figure 36: Configuring the Service Manager SharePoint Website
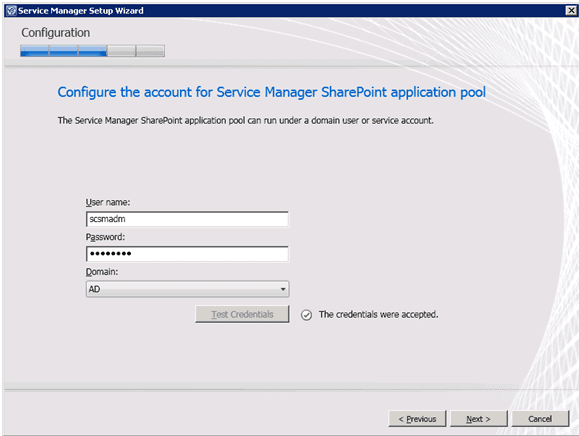
Step 28: Enter in your username and password for the SharePoint application pool and click Next.
Figure 37: Configuring account information for SharePoint application pool
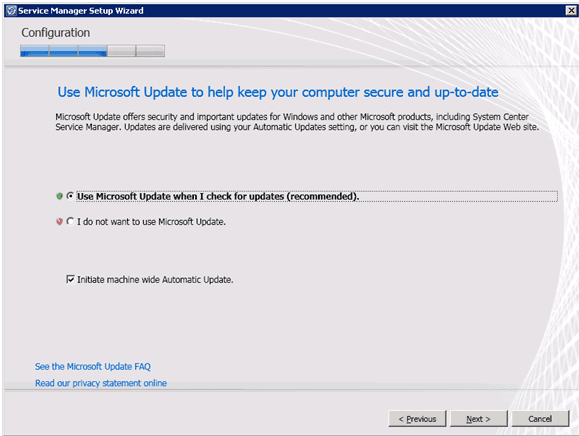
Step 29: Select wheter you’d like to use Microsoft Updates for your SharePoint site and click Next.
Figure 38: Microsoft updates
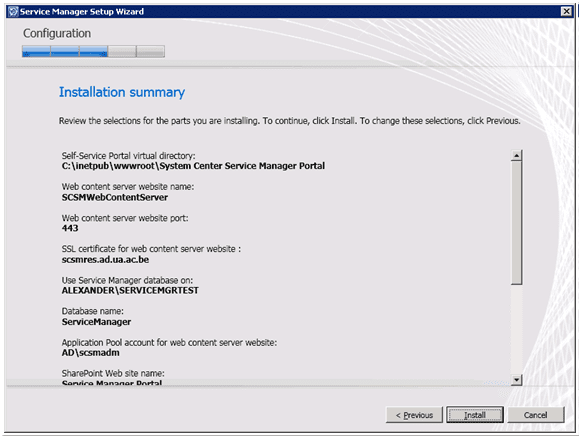
Step 30: Review your installation summary to ensure there are no errors and click Install.
Figure 39: Instalaltion Summary
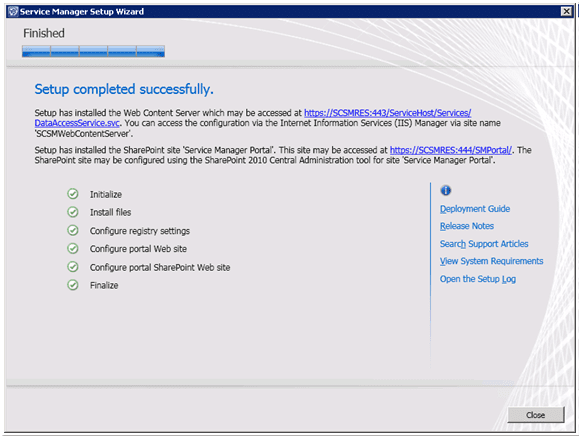
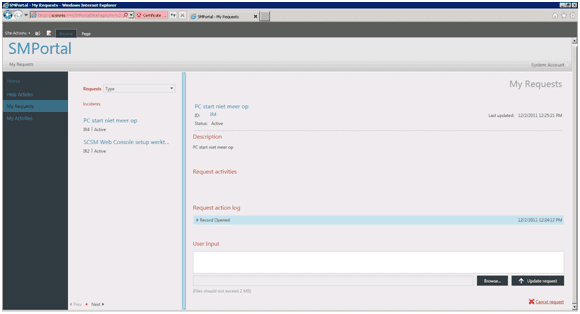
This completes the installation and configuration of the Service Manager Web Portal components. By browsing to the Web Server Website name (https://<servername>/SMPortal:<SSLPort>) by default, we can logon to our Self-Service Portal.
Figure 40: Setup completed
In below screenshot, some incident tickets were already initiated as an example.
Conclusion
This finalizes our series on installing the System Center Service Manager 2012, including installing the Service Management Server, installing the Data Warehouse Server, configuring System Center Configuration Manager 2007 R3 Connector, configuring Active Directory Connector and the Self-Service Portal.


