


Managing Windows Server with Puppet Part 7: Installing Active Directory

In this Ask the Admin, I’ll show you how to install and configure Active Directory using Puppet.
It has been a while since I wrote the previous installment of this series, so in case you need a refresher, here are links to the other articles available on Petri. If you’re not familiar with Puppet, PowerShell DSC, or configuration management in general, I recommend reviewing the articles to get a grip on the concepts.
Managing Windows Server with Puppet Part 1: Configure Puppet Master and Bootstrap the Puppet Agent in Windows Server
Managing Windows Server with Puppet Part 2: Log in to Puppet Master, Accept Node Certificate, and Test Connectivity
Managing Windows Server with Puppet Part 3: Install Modules and Edit the Site Manifest
Managing Windows Server with Puppet Part 4: Working with Files and ACLs
Managing Windows Server with Puppet Part 5: Managing Local Users and Groups
Managing Windows Server with Puppet Part 6: Installing, Updating, and Removing Software
Before following the instructions in this article, you should also be familiar with installing Active Directory. For more information, see Install Active Directory on Windows Server 2012 with Server Manager on Petri.
Using DSC and Puppet to Install Active Directory
First, let’s talk about the good news. Installing and configuring Active Directory using Puppet doesn’t differ much from using PowerShell DSC. In fact, the DSC code just needs a little tweaking to work in Puppet. The manifest will use three DSC resources: file, windowsfeature, and xaddomain. The first two resources are built-in to Windows. But xaddomain is part of the xActiveDirectory module, which can be found in the PowerShell DSC Resource Kit on GitHub. But there’s more good news. The Puppet agent automatically makes sure all the latest resources from the resource kit are installed on each node. So, there’s no need to manually download and install the resource kit modules on your Puppet nodes.
Let’s create an NTDS directory for the Active Directory (AD) database and logs using the file resource. Ideally, the database and logs should be on separate volumes. But I’m going to keep it simple in this demonstration and put everything in the NTDS directory on the system drive.
dsc_file  {'adfile':
            dsc_destinationpath => 'c:\NTDS',
            dsc_type => 'Directory',
            dsc_ensure => 'Present',
        } ->
To indicate that this is a PowerShell DSC resource as opposed to a Puppet resource, prefix the DSC resource name with ‘dsc_’. Any required DSC parameters should be similarly prefixed. As you can see, there are three parameters which are used to create the NTDS directory. The resource name, in this case, ‘adfile’, can be anything you like. Finally, while resources in a Puppet manifest should run in the order in which they appear, Puppet recommends explicitly specifying the order if it’s important. The resource is followed by a chaining arrow that ensures it runs before the next resource starts.
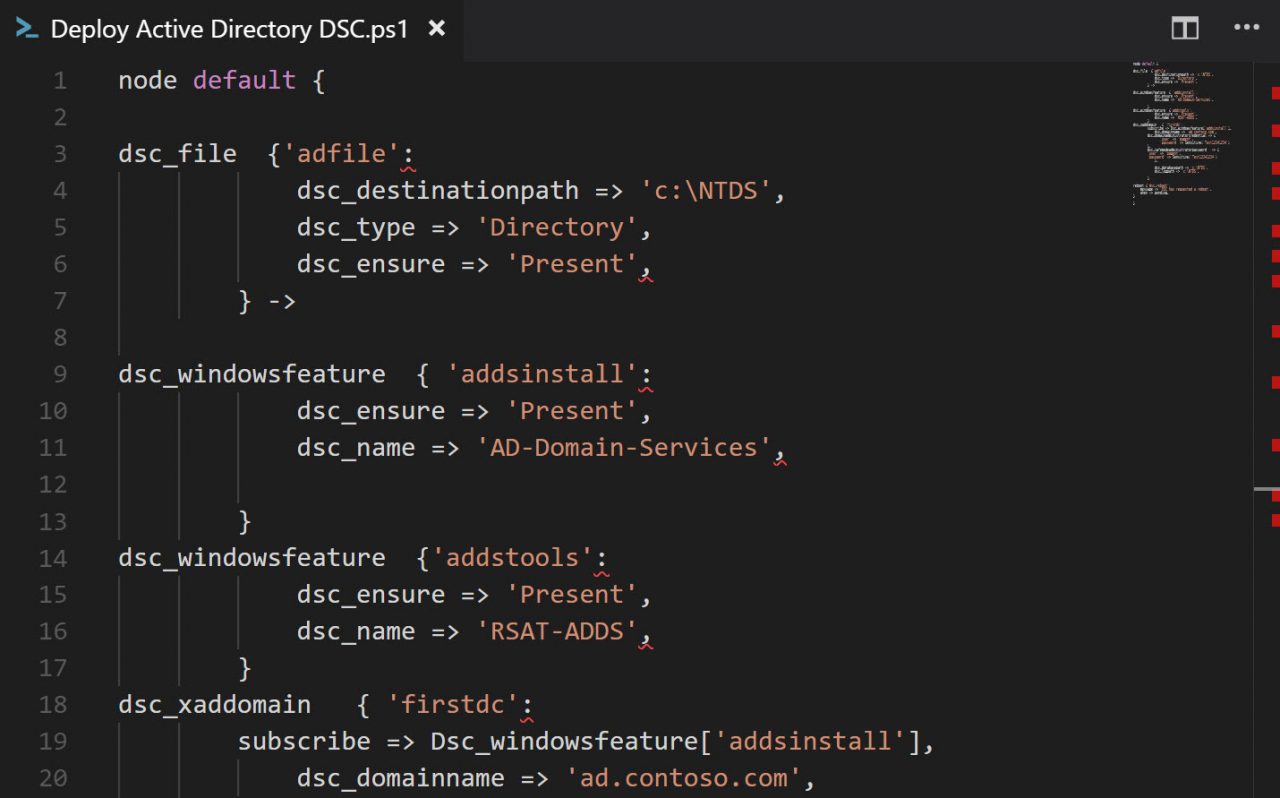
The next two resources install the AD Domain Services server role and the Remote Server Administration Active Directory Tools using windowsfeature. I used Get-WindowsFeature to determine what the exact role and feature names should be in the name parameter.
dsc_windowsfeature  { 'addsinstall':
            dsc_ensure => 'Present',
            dsc_name => 'AD-Domain-Services',

        }
dsc_windowsfeature  {'addstools':
            dsc_ensure => 'Present',
            dsc_name => 'RSAT-ADDS',
        }
The bulk of the configuration work is carried out using the xaddomain resource. The subscribe parameter ensures that xaddomain doesn’t run before the AD Domain Services role is installed. It’s important that the name of the resource is specified starting with a capital letter. The domainadministratorcredential parameter is required but isn’t used. This will be the first domain controller (DC) in a new forest and the local administrator username and password is used instead.
dsc_xaddomain   { 'firstdc':
	    subscribe => Dsc_windowsfeature['addsinstall'],
            dsc_domainname => 'ad.contoso.com',
	    dsc_domainadministratorcredential => {
               'user' => 'pagent',
               'password' => Sensitive('Test12341234')
	    },
	    dsc_safemodeadministratorpassword   => {
		'user' => 'pagent',
		'password' => Sensitive('Test12341234')
            },

            dsc_databasepath => 'c:\NTDS',
            dsc_logpath => 'c:\NTDS',

        }
Both the domainadministratorcredential and safemodeadministratorpassword parameters are protected using Sensitive, which is optional to ensure that the password doesn’t appear in cleartext anywhere in Puppet’s logs. Puppet passes credentials to Windows Server using the MSFT_Credential object, which ensures that the data is encrypted. If you don’t want to include the password in the Puppet manifest, you should include it in a Hiera configuration file and encrypt the text block using eyaml.
Finally, a reboot resource is used to restart the node when a reboot is pending. The message parameter is optional.
reboot {'dsc_reboot':
	message => 'DSC has requested a reboot',
	when => pending,
}
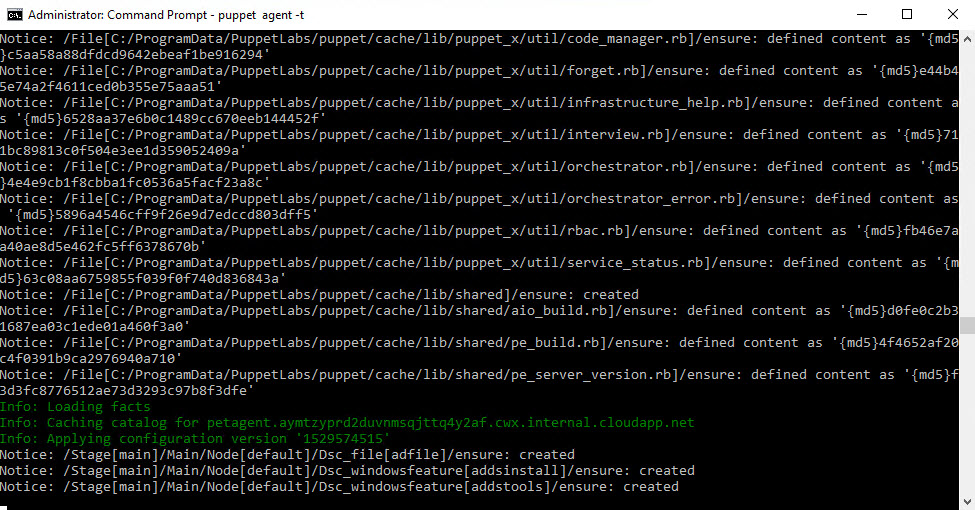
Download the complete code here and paste it into your Puppet manifest file. The easiest way to test it in an isolated environment is to paste the code into the site.pp manifest file. Once the updated site.pp manifest is saved, it will apply to your test node and reboot the server.
When the server reboots it will have a different name, which means you’ll need to reregister the node in the Puppet console. See part 2 of this series for more information on how to do that. You’ll need to either trigger the Puppet agent on the node, using puppet agent -t at the command line or wait for it to run automatically before you can accept the server again in the Puppet console.
In this Ask the Admin, I showed you how to install and configure Active Directory using Puppet.
Follow Russell on Twitter @smithrussell.