


Managing Windows Server with Puppet Part 2: Log Into Puppet Master, Accept Node Certificate, and Test Connectivity
In today’s Ask the Admin, I’ll show you how to log in to Puppet master using Secure Shell, accept the certificate from the Windows Server node, and how to test connectivity between agent and master.
In the first part of this series, I showed you how to deploy a Puppet Enterprise master server in Azure and provision a Windows Server virtual machine with the Puppet agent installed and configured to work with the Puppet master.
Let’s pick up where we left off. The first step is to log into the Puppet master. There are two ways to log into the master. Most of the time you will use Secure Shell (SSH). But there’s also the Puppet Console, which you can open in a browser. The console provides a dashboard that gives an overview of the status of all your nodes. You can also perform some basic tasks in the console.
Log Into Puppet Master Using Secure Shell
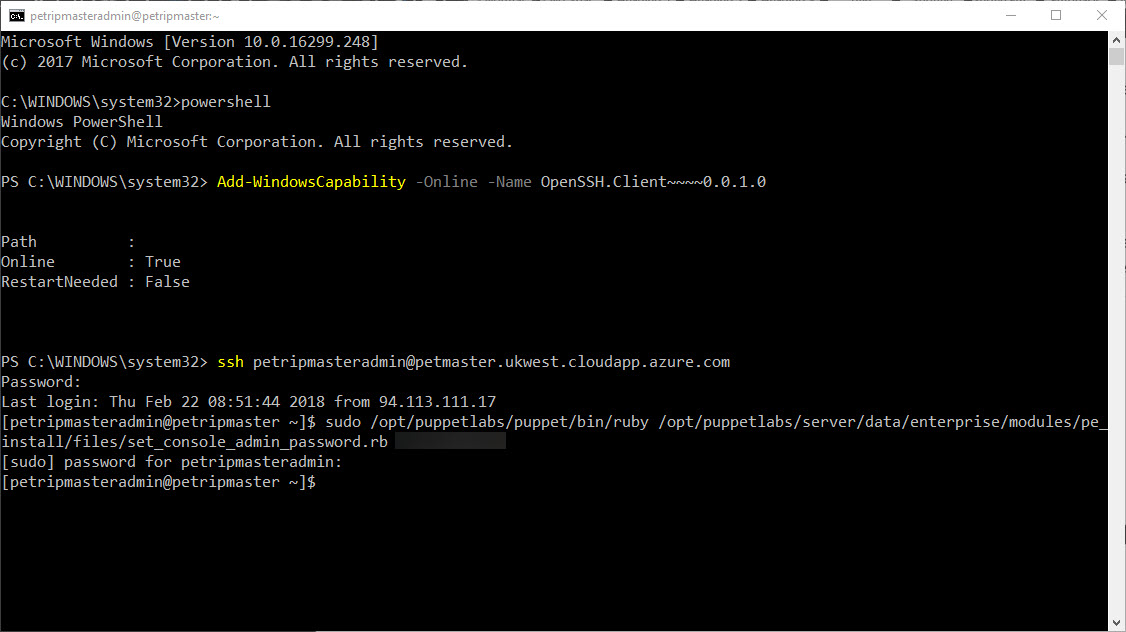
Before using Secure Shell (SSH), you’ll need an SSH client. If you are using the Windows 10 Fall Creators Update, there’s a beta client built in to the OS. To install it, open a PowerShell prompt with administrator privileges and run the command below:
Add-WindowsCapability -Online -Name OpenSSH.Client~~~~0.0.1.0
If you are using another version of Windows, you can download Putty, which is the most commonly-used free SSH client.
To log into the Puppet master, open a command prompt and type ssh, followed by the username of the Puppet master server, which you entered when provisioning the VM. After the username, add an ampersand followed by the DNS name of the Puppet master server. You find the DNS name of the server in the Overview section of the VM’s configuration panel in the Azure management portal.
ssh [email protected]
Enter the password you provided when provisioning the Puppet master VM in Azure. If you are prompted with a security warning, type yes and press ENTER to continue. You should see the command prompt change to indicate that you are now connected to the remote server.
Now we’ll use the set_console_admin_password.rb script to change the admin user’s password for the Puppet Console. Paste the two commands below into the shell window, replacing <password> with the password you’d like to use for the Puppet Console. Note that sudo is used here to give us root access to change the /opt/puppetlabs/puppet/bin/ruby directory. You’ll be asked to enter your password again to get root access.
sudo /opt/puppetlabs/puppet/bin/ruby
/opt/puppetlabs/server/data/enterprise/modules/pe_install/files/set_console_admin_password.rb <password>
If you don’t get any errors, it means the script successfully changed the password.
Log Into Puppet Console
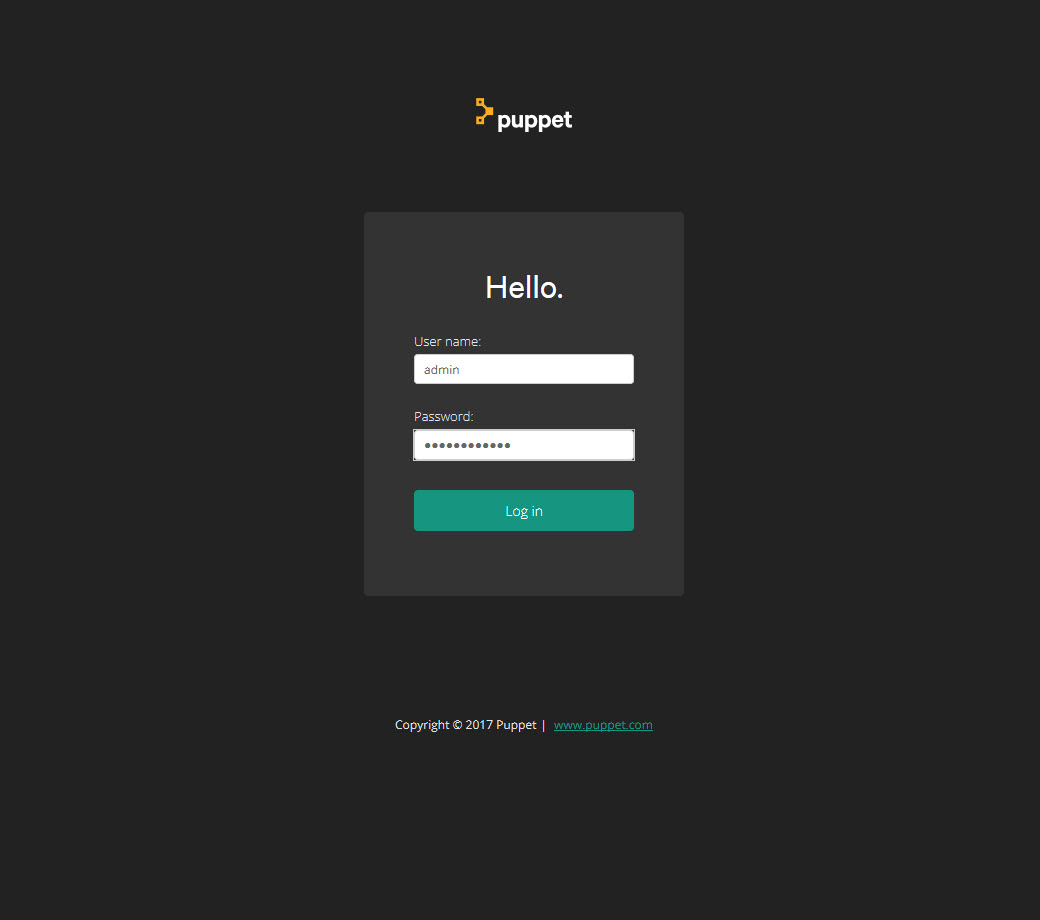
Let’s try logging in to the Puppet Console. Open a browser and use the Puppet master’s DNS name to open the console. Don’t forget to add https:// to the beginning of the DNS name.
https://petmaster.ukwest.cloudapp.azure.com
Because the browser doesn’t trust the server’s certificate, you’ll need to bypass any security warnings displayed in the browser and continue to the web page. When you get to the login screen, type admin in the Username field and the password you set using the Ruby script in the steps above.
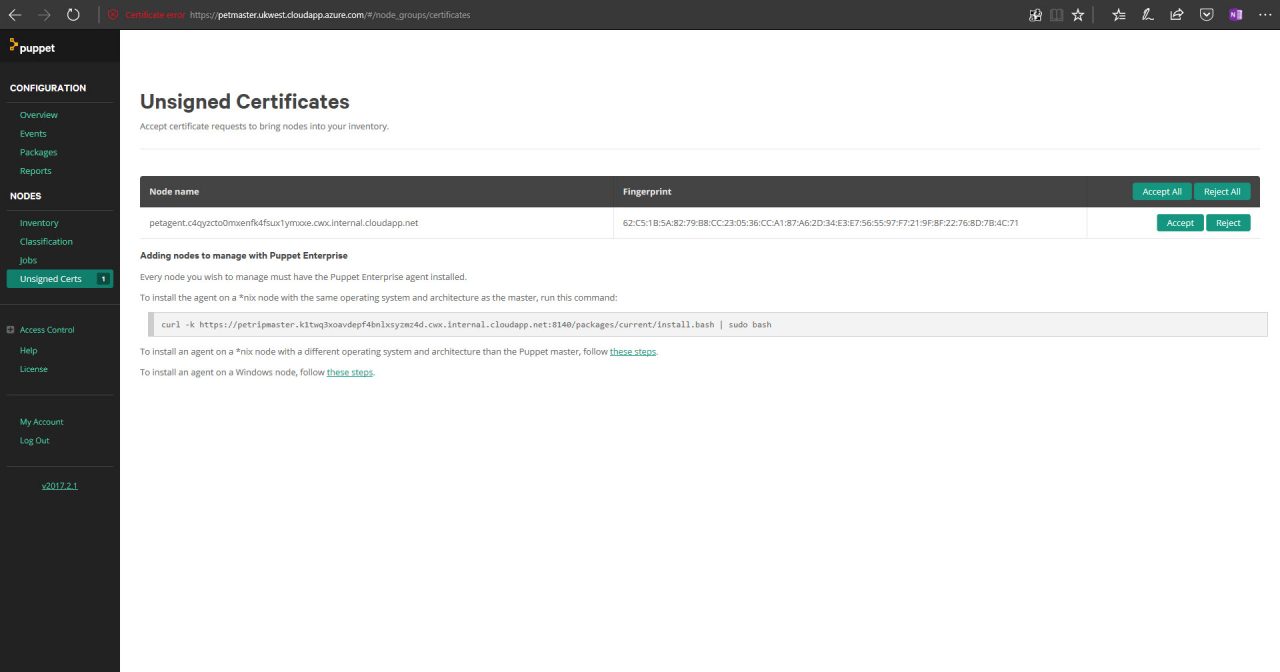
Accept Node Certificate
In the console, click Unsigned Certs in the left pane.

This is where we’ll accept the server certificate installed on the Windows Server node. On the right, you’ll see the Windows Server agent node listed. Click Accept to add the node to the list of accepted servers.
Check Agent/Master Connectivity
Log into Windows Server using the username and password you provided when you provisioned the VM. Open a command prompt and type the following command to trigger the agent:
puppet agent -t
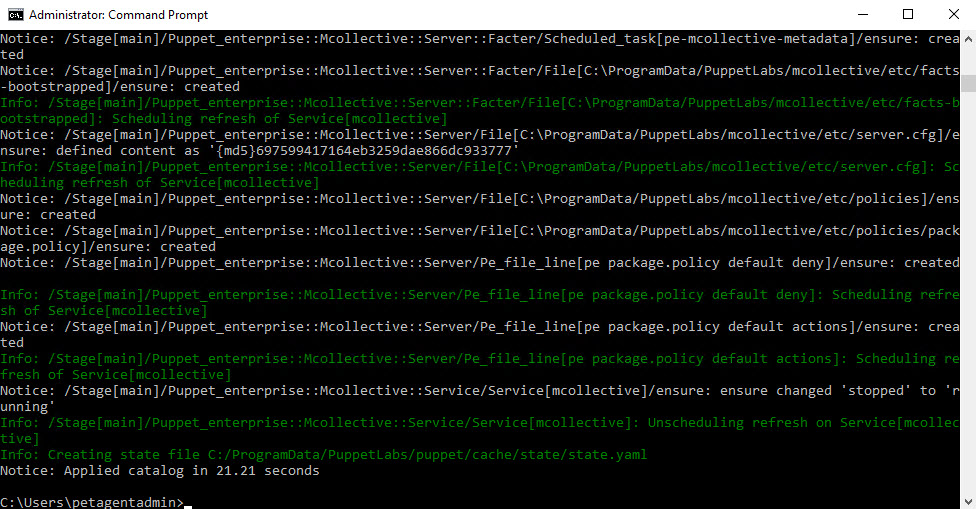
If the agent connects, you’ll see a message saying how long the agent took to apply the catalog it downloaded from the master. If this is the first time the agent has run, you’ll see a lot of additional messages. If you don’t see them, don’t worry. It means the agent has already run at least once because it was automatically triggered.
In this Ask the Admin, I showed you how to log in to Puppet master using Secure Shell and the Puppet Console. We also checked connectivity between a Windows Server Puppet node and the master. In the next part of this series, I’ll show you how to perform some basic Windows administration tasks using Puppet.