


Managing Windows Server with Puppet Part 1: Configure Puppet Master and Bootstrap the Puppet Agent in Windows Server

In today’s Ask the Admin, I’ll show you how to set up Puppet Enterprise Master in Azure and provision Windows Server so that it bootstraps with the Puppet agent installed and is configured to talk to your master.
In this series, I’m going to look at managing Windows Server using Puppet and PowerShell DSC. If you need a primer on Puppet and configuration management principles, read my recent article PowerShell DSC and Puppet — Why It Is Not Either/Or on Petri. In the article, I explain some DevOps principles pertaining to configuration management and why Puppet and PowerShell DSC are ideal partners when it comes to Windows Server config management.
Puppet Architecture
Puppet uses a client/server model or can be used in a stand-alone architecture. But for the purposes of these articles, I will discuss the most commonly deployed architecture, the client/server model. Puppet compiles catalogs that describe the desired state of each node. Catalogs are like the .mof files used by PowerShell DSC. Puppet automatically creates catalogs from files (manifests) that are written in Puppet’s own Ruby-based language. These files are built up from resources. Below you can see a resource that ensures the Windows time service is running:
service { 'w32time':
   ensure => 'running'
}
Resources can be grouped together to form classes, which might describe everything needed to configure a service or app. Nodes are devices where the Puppet agent is installed. You can target sets of nodes with different classes using node classification.
Puppet agents periodically send information about the configuration (facts) to the Puppet master and request a catalog. The master creates the node’s catalog and sends it to the agent. The node then checks each resource in the catalog and applies those that are not in the desired state. A report is then sent back to the Puppet master. Puppet master has a built-in public key infrastructure (PKI) for managing secure communications (HTTPS with client verification) between nodes and the server.
Provision Puppet Master in Azure
I’ve chosen to use Azure for these articles because you can quickly deploy all the infrastructure required without needing to know much about Linux. Azure has a template for automating the deployment of Puppet Enterprise master and an extension for bootstrapping the Puppet agent in Windows Server. If you don’t already have an account in Azure, you can sign up for a free 30-day trial here.
- Log in to Azure using your Microsoft account.
- Click Virtual machines under FAVORITES on the left.
- In the Virtual machines panel, click + Add.
- On the Compute panel, type Puppet into the Search compute box and press ENTER.
- Select Puppet Enterprise 2017.2 Template from the list.
- In the Puppet Enterprise 2017.2 Template panel, click Create.
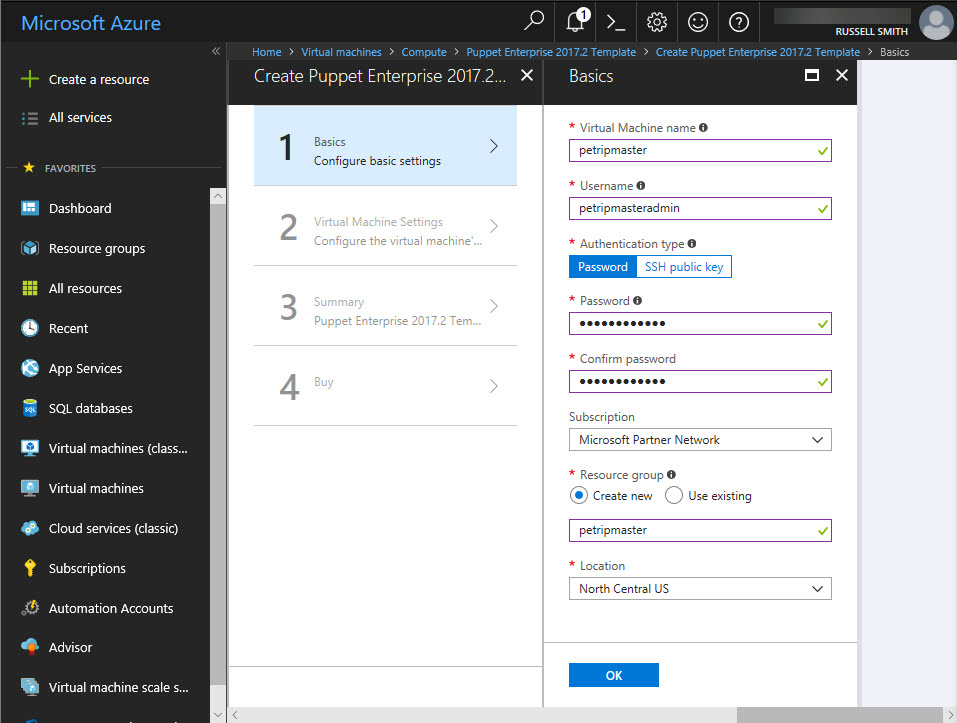
- In the Basics panel, give the VM a name.
- Enter a username for the new VM.
- Make sure the Password is selected for Authentication type.
- Enter and confirm a password for the VM.
- Select Create new under Resource group and enter a name for the new resource group.
- Finally, select a location and click OK.
For more information about resource groups, see What Are Microsoft Azure Resource Groups? on Petri.
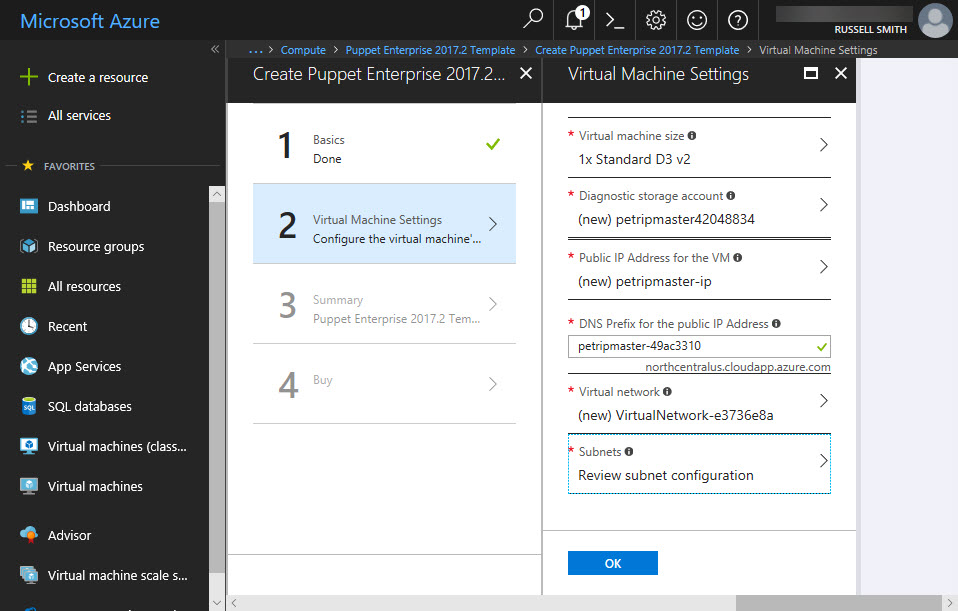
- On the Virtual Machine Settings panel, you can leave all the default settings. A new virtual network will be created for the Puppet master. All you need to do is click Configure subnets and accept the default configuration by clicking OK in the Subnets panel.
- Click OK in the Virtual Machine Settings panel to continue.
- Once the settings have been validated, click OK on the Summary panel.
- In the Create panel, click Create to accept the terms and conditions.
A tile for the new resource group will appear on the dashboard. The deployment usually takes around ten minutes. We need to wait for the deployment to complete before we can provision a VM running Windows Server. A notification will appear in the top right of the Azure management portal when provisioning is complete. The tile on the dashboard will also change to show the resources in the resource group.
Provision Windows Server with Puppet Agent
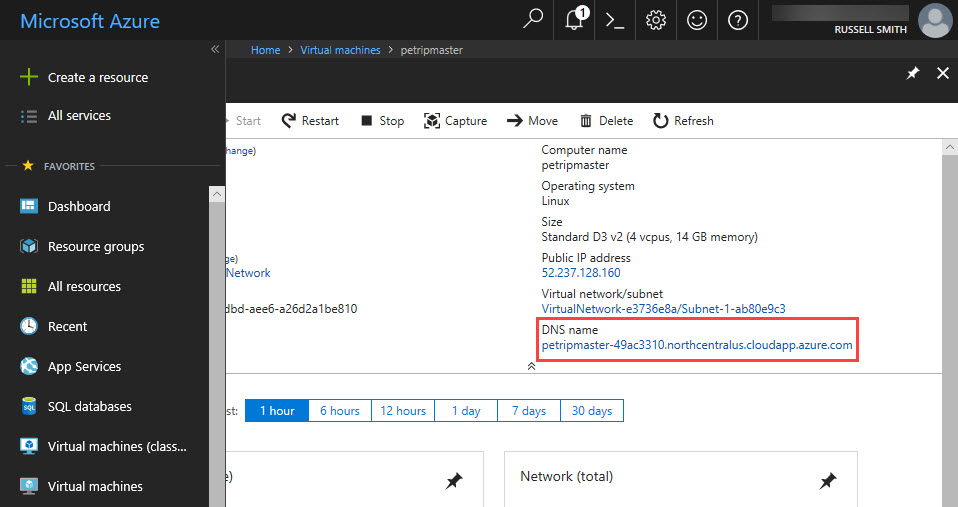
Before we can provision Windows Server with the Puppet agent, we need to get the DNS name of the Puppet master.
- On the dashboard, click the icon for the Puppet master VM in the resource group tile.
- In the VM panel, find the DNS name information for the VM, hover the mouse pointer to the right of the DNS name, and click the copy icon that appears.
- Close the VM panel.
- Click Virtual machines in the list of options on the left.
- In the Virtual machines panel, click + Add.
- On the Compute panel, type Windows Server 2016 into the Search compute box and press ENTER.
- Select Windows Server Datacenter from the list.
- In the Windows Server Datacenter panel, make sure that Resource Manager is selected as the deployment model, and then click Create.
- In the Basics panel, give the new VM a name, username, and password.
- Select Create new under Resource group and enter a name for the new resource group.
- Finally, select a location and click OK.
Creating a new resource group ensures that a new virtual network will be created for Windows Server. Using Windows Server on the same virtual network as the Puppet master will block Remote Desktop access to Windows Server because of the default Network Security Group (NSG) rules applied to the virtual network created by the Puppet master template.
- On the Choose a size panel, choose a VM size and click Select.
- In the Settings panel, click No extensions.
- In the Extensions panel, click Add extension.
- In the New resource panel, select Puppet Agent (preview) from the list.
- In the Puppet Agent (preview) panel, click Create.
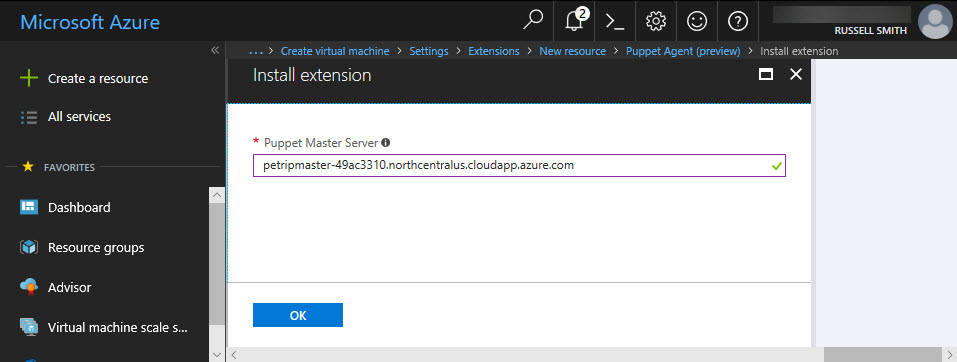
- In the Install extension panel, paste the DNS name of the Puppet master server you previously copied to the clipboard and click OK.
- Click OK in the Extensions panel.
- Click OK in the Settings panel.
- Once the settings have been validated in the Create panel, click Create to accept the terms and conditions.
The VM will take several minutes to provision. You’ll receive a notification once the process has completed and be taken directly to the new virtual machine’s configuration panel.
In part two of this series, I’ll show you how to log in to the Puppet master and test connectivity between the agent and the master.