


Downloading Prerequisites
As mentioned, we need VMware Player, so if you don’t have that already go ahead and download it from VMware. Next, you need the pre-configured disk file from gdgt and when that’s finished, we’re just a couple of small steps away from testing out the Chromium Preview.
Installing Chromium
Find the pre-configured disk file you downloaded and extract it to a known location. We need to use that file at the very end of the installation, so remember where you extracted it to.
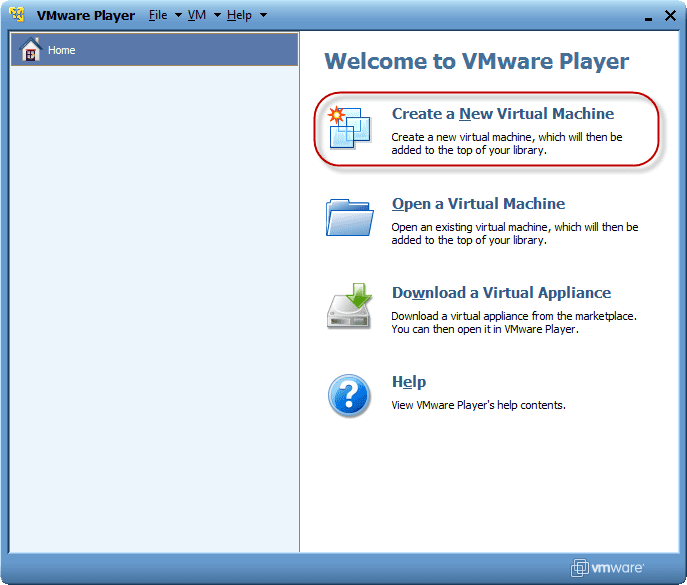
Configuring a new Chromium virtual machine is very easy in VMware Player 3.0. Start VMware Player, and click on the “Create a New Virtual Machine” option
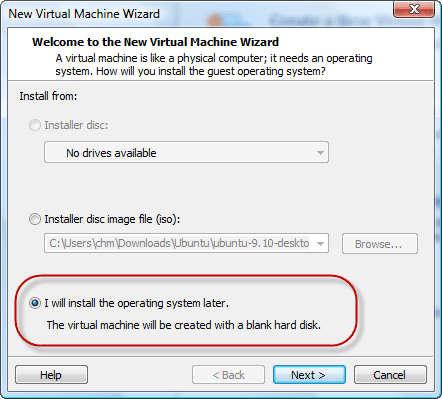
Since we have downloaded a preconfigured disk image for use with VMware Player, we select the “I will install the operating system later” option, and click on “Next”
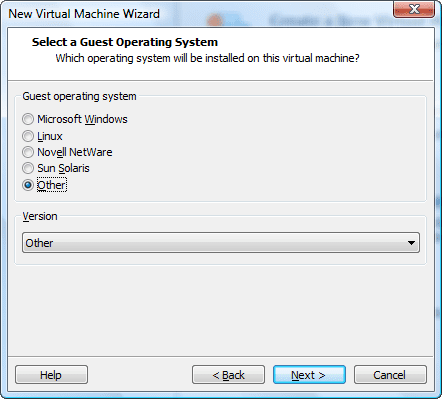
As you might expect, VMware Player doesn’t come with a predefined and supported template for Chromium. This is no problem, we just need to define the new virtual machine as running an unsupported operating system. We do this by selecting “Other” in the “Guest Operating System” section, and “Other” in the version dropdown and click “Next”
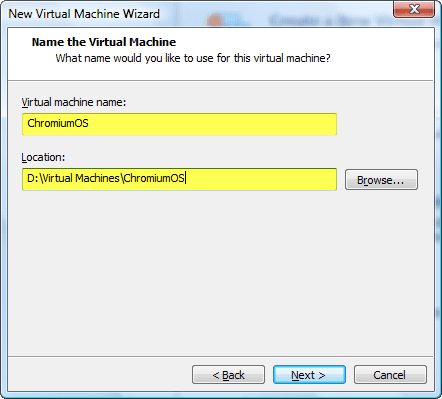
Name your virtual machine and select a location. Remember the location of the virtual machine, as we need to do some “magic” later on to make VMware Player boot Chromium.
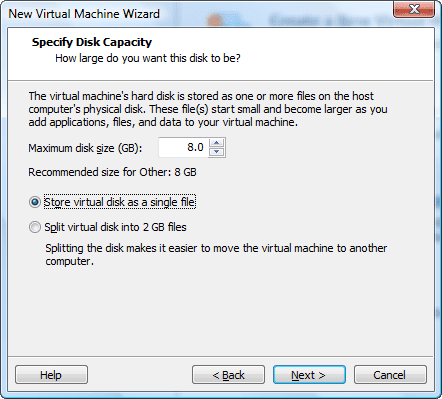
Specify the disk size and options, the defaults offered are fine so we’ll move right along by clicking “Next”
Review your settings and continue by clicking “Next”

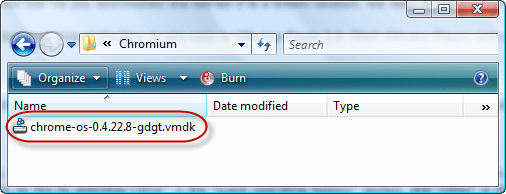
Now, here comes that magic. Find the extracted disk image you downloaded earlier and rename the chrome-os-0.4.22.8-gdgt.vmdk file to ChromiumOS.vmdk
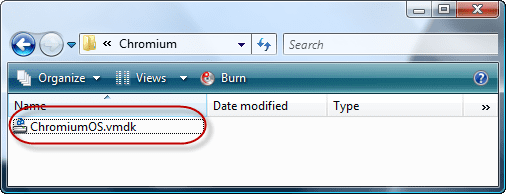
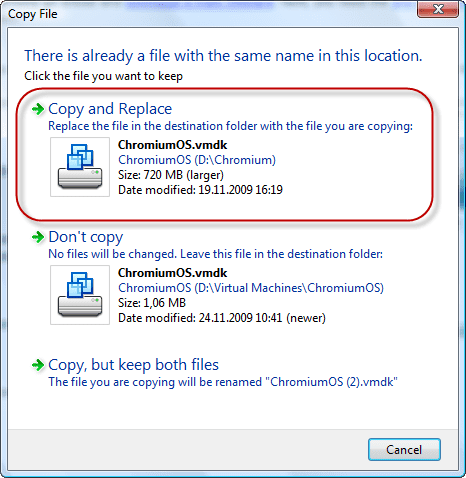
Copy the new ChromiumOS.vmdk file to the location of the newly created virtual machine, overwriting the existing file.
Switch back to the VMware Player console and select “Edit virtual machine settings“. We could boot the virtual machine as it is right now, but that leaves us without network connectivity and if there ever was an operating system that requires a network connection Chromium is it.
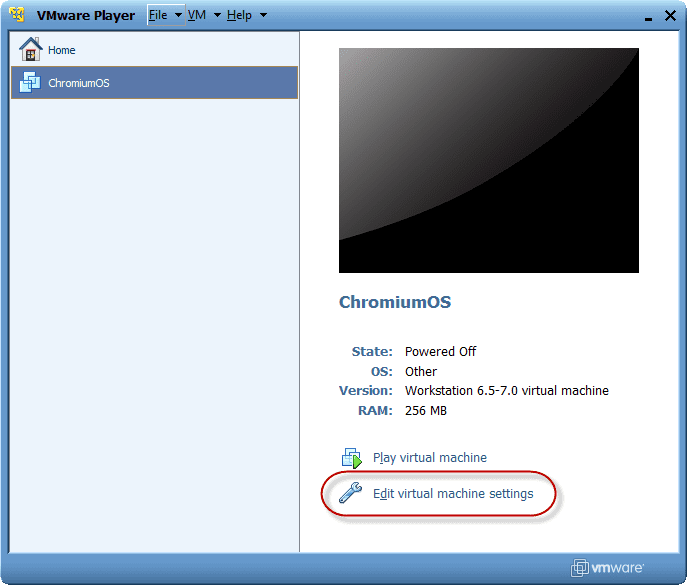
To enable proper networking inside the Chromium virtual machine, there is a small change we need to do. By default the network adapter is set to NAT mode, and we need to change that to Bridge mode. After changing the setting, click “ok”

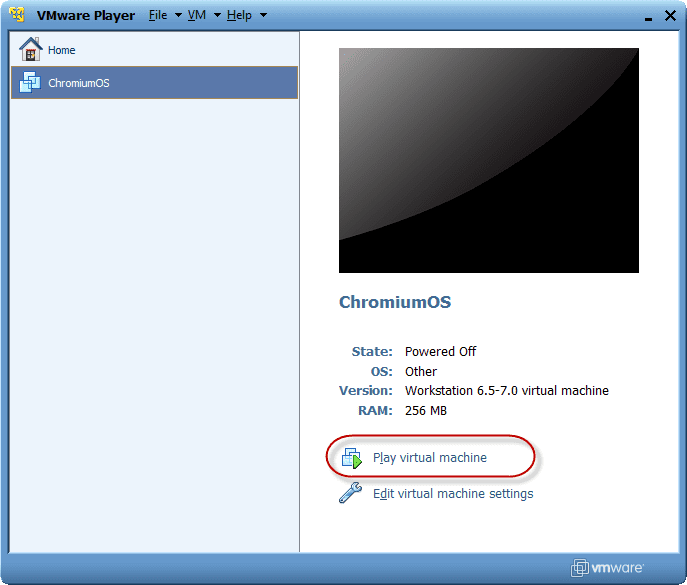
We can now start the virtual Chromium installation and get ready to play around! Click on “Play Virtual Machine” to boot it.
Chromium should now boot, and present you with a blue logon screen.
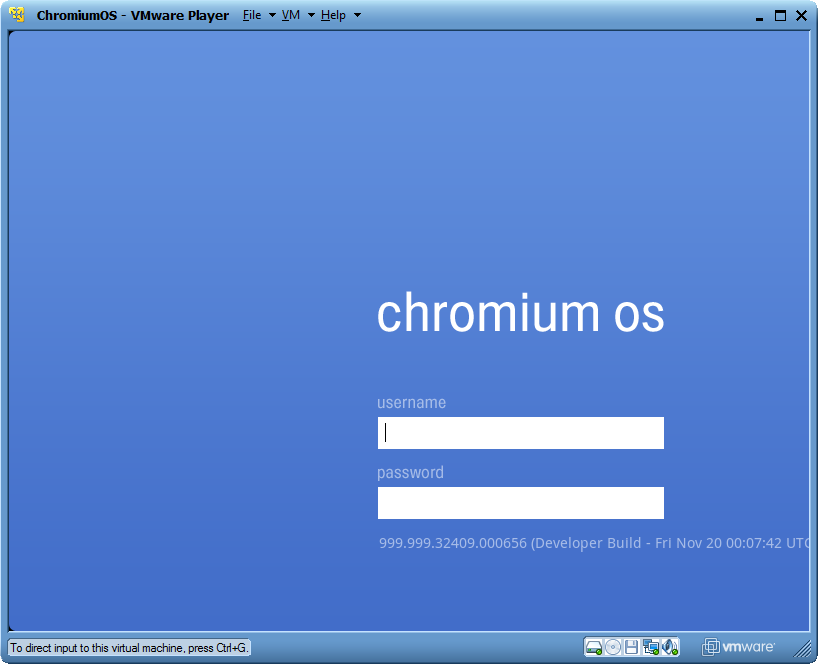
I’ve had mixed results with trying to logon with my own Google account, but at least the default account works. If you can’t logon with your own, use this information instead:
username: chronos
password: password
After you log on, you can then use your own Google account to access everything.