


Install Windows Server Technical Preview in Microsoft Azure
In this easy Ask the Admin, I’ll show you how to get the new technical preview of Windows Server up and running in the cloud.
Unless you’ve been living under a rock for the last few days, you will have no doubt heard that Microsoft released Windows 10 Technical Preview on Tuesday, and the Windows Server Technical Preview also slipped out the door more or less simultaneously, albeit with much less fanfare. If you’re interested in downloading the bits to install it in your own lab, you can download the bits on TechNet.
If you don’t have the resources or time to install the technical preview, a quick and easy way to experiment with the new product is to fire up an Azure virtual machine and install the server technical preview, which is now available in the image gallery. If you don’t already have a subscription, you can sign up with your Windows Live ID for a free one month trial on the Azure website.
Additionally, if you’d like to get a better taste of the Windows 10 Technical Preview, then you can install the Windows Server Technical Preview on Azure and add the Desktop Experience feature to get the client features, which are supported in Windows Server. For more information on installing the Desktop Experience feature in Windows Server, see “Installing the Desktop Experience on Windows Server 2012” on the Petri IT Knowledgebase.
The rest of this article assumes you have an active Azure subscription or trial.
Log in to Azure and create a new virtual machine
Start by logging in to Azure and creating a new virtual machine from the image gallery.
- Log in to the Azure management portal using your Windows Live ID. Note that the new Azure preview portal doesn’t currently include the Windows Server Technical Preview image, although I expect that to change soon.
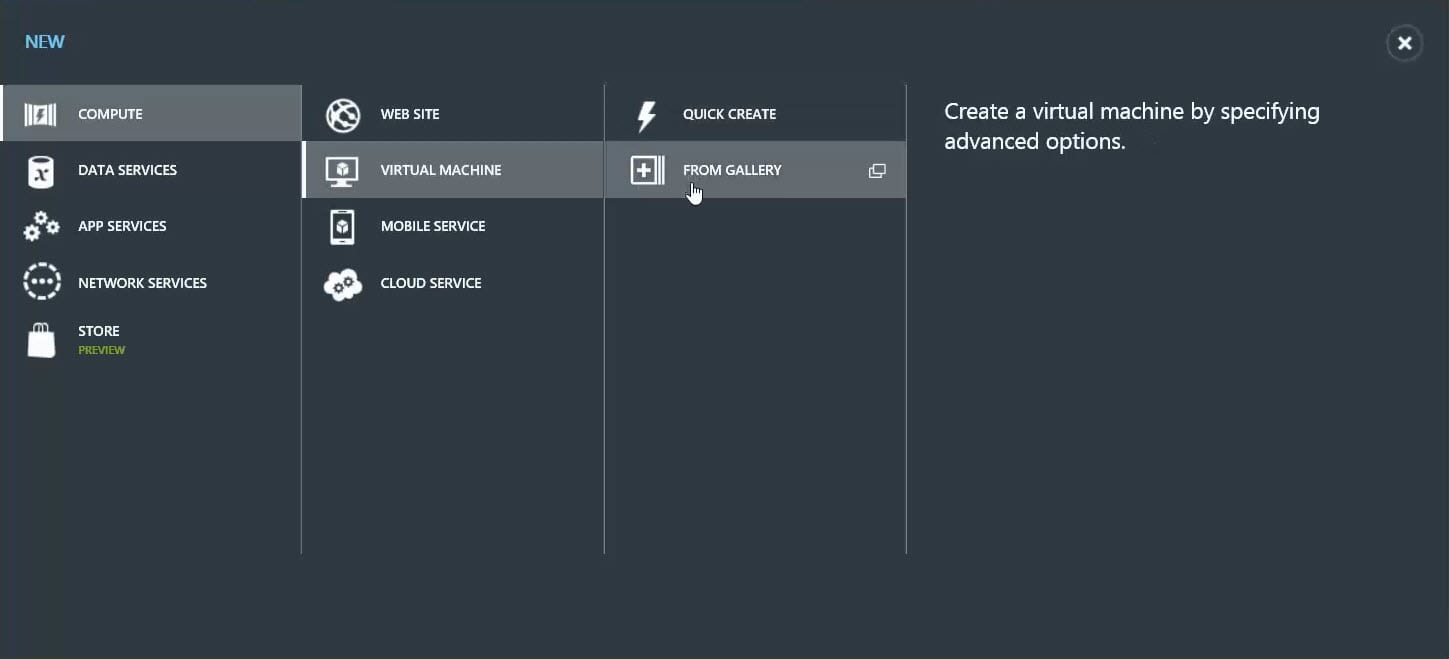
- In the Azure management portal, click NEW in the bottom left corner.
- In the panel, click VIRTUAL MACHINE in the second column.
- In the third panel that appears to the right, click FROM GALLERY.
- In the Choose an image window, click WINDOWS SERVER in the far left column.
- Scroll down to the bottom of the list of available images, select Windows Server Technical Preview October 2014, and click the Next arrow in the bottom right corner.
- In the Virtual machine configuration window, give the new VM a name, and then enter a username and password. Click the Next arrow to continue.
- In the CLOUD SERVICE DNS NAME box, type a unique cloud service name for the new VM. This is the DNS name you will use to connect to the VM using Remote Desktop.
It might take a couple of attempts to find a name that’s available. Hint: Don’t include Windows in the cloud service name. A green tick will appear on the right of the box once you’ve typed a name that can be used.
- Select a geographical region that’s close to you from the REGION/AFFINITY GROUP/VIRTUAL NETWORK drop-down menu, and click the Next arrow.
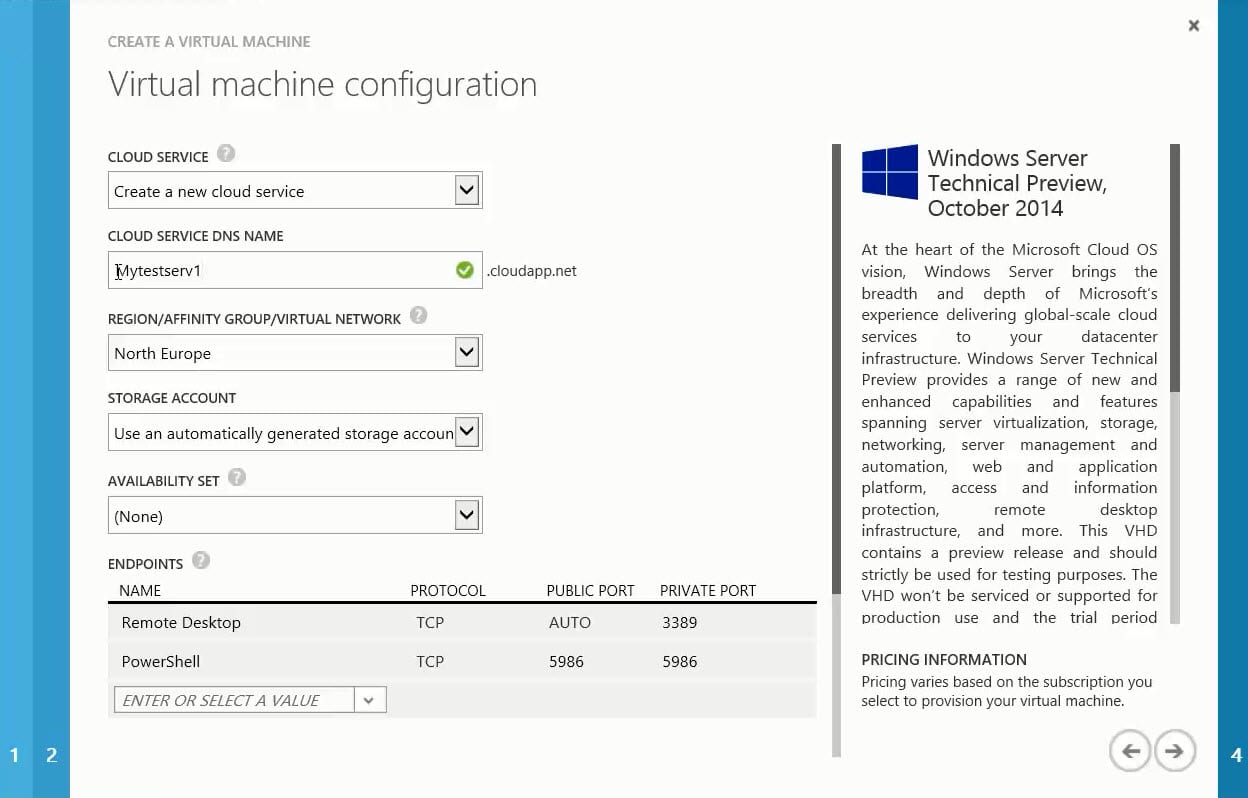
- We’ll accept the default options on the agent configuration screen, so you can click the FINISH tick symbol at the bottom of the Virtual machine configuration window to start the provisioning process.
You should now see the new virtual machine status set to Starting (Provisioning) in the list of virtual machines in the main portal window. The provisioning process will take a few minutes.
Connect to the virtual machine using Remote Desktop
Now we can make a connection to the virtual machine using Remote Desktop.
- Once the status of the virtual machine has changed to Running, make sure that the virtual machine is selected in the portal and click CONNECT.
- Click Open in the pop-up Internet Explorer dialog to launch the Remote Desktop connection, and then follow through the prompts, entering the username and password you specified when creating the virtual machine.
Once you’ve finished with the virtual machine, don’t forget to stop it in the Azure management portal. The status should be set to Stopped (De-allocated) to ensure that it’s not using compute resources and incurring a fee on your account.