Import and Export Lists of Servers with Windows Server 2012 Server Manager
As I mentioned in one of my previous posts, Server Manager in Windows 8 and Windows Server 2012 is a useful tool that allows you to manage remote servers from one focus point, usually a management workstation. That’s fine if you only use one management workstation. However, if there is more than one system administrator sharing the same tasks, and if they all need to manage the same set of remote servers, there must be an easy method of sharing this servers’ list between them, right? Well, there is. In today’s article, I’m going to show you how to import and export lists of managed servers in Windows Server 2012 Server Manager.
Exporting Server Manager Settings
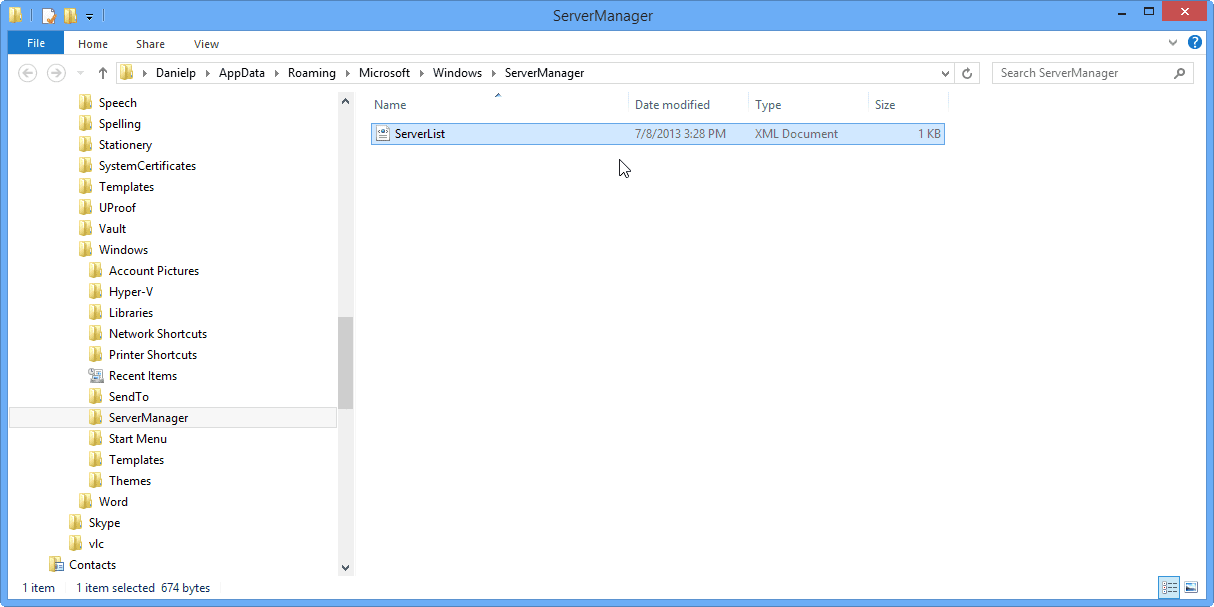
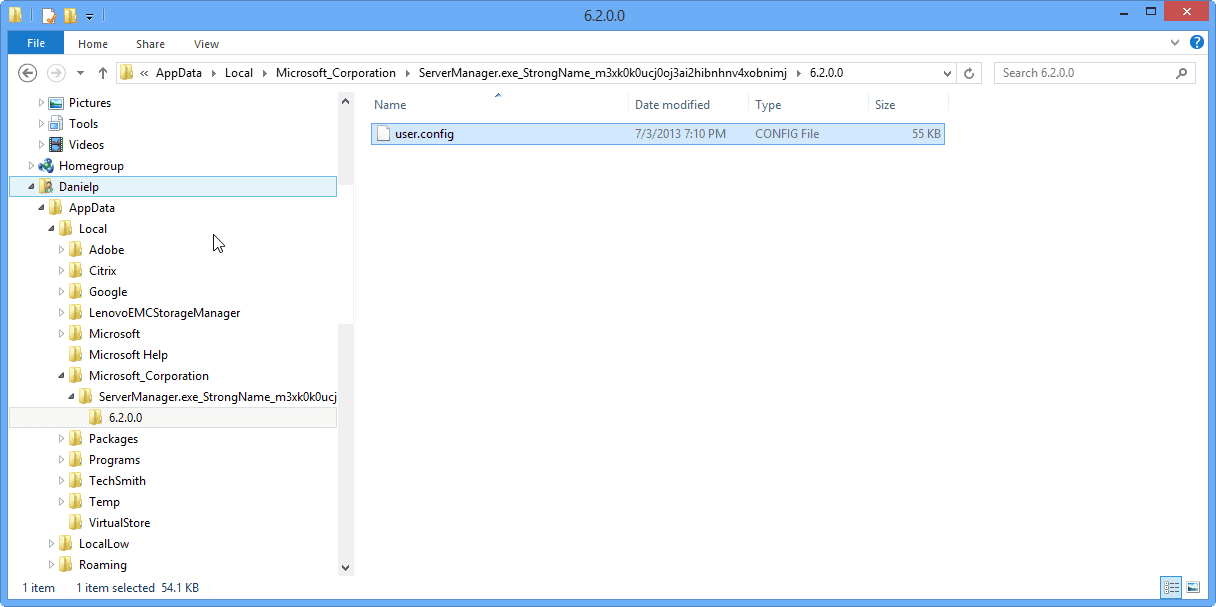
Instead of manually configuring each management workstation with the same set of possibly tens or hundreds of servers, you can export Server Manager’s settings away from one machine and use them on other computers. How is this accomplished? Well, Server Manager configuration information is stored in the ServerList.xml and user.config files found here:
- %appdata%\Microsoft\Windows\ServerManager\ServerList.xml
- %appdata%\Local\Microsoft_Corporation\ServerManager.exe_StrongName_GUID\6.2.0.0\user.config
The settings that are stored in those files can be used on other computers that are running the same Server Manager version (meaning – Windows Server 2012 > Windows 8, and Windows Server 2008 R2 > Windows 7). Note: You cannot use this trick to manage Windows Server 2008/R2 or 2012 servers that that are using the Server Core installation option.
You should also make sure that Remote Server Administration Tools (RSAT) is also installed and running on any servers to which you want to export Server Manager settings. (Editor’s note: See our articles on how to install RSAT on Windows 8, Windows 7, and Windows Vista if you need a refresher on how to do so.)
Basically there are two methods of sharing that information between computers. One is the easy way, but it may have drastic consequences on your user profile and the way it works on the network. The second is a tiny bit more manual process, but once it’s done, it has no consequences on your profile. However, when using the second option (which I will describe in a moment), any time you make a change on one of your management workstations in regards of Server Manager (i.e. adding servers to the list for example), you will have to repeat this procedure.
Method #1: Export Files with a Roaming Profile
The problem with this approach is that you create a situation in which your (or another administrator’s) user profile is turned into a roaming profile, and that is, in my opinion, a bad thing. In today’s GPO-managed environments, having a roaming profile just to copy a couple of files is like trying to kill a fly with a baseball bat. Roaming profiles take up a huge amount of disk space on all the computers where that user logs onto, and it take a lot of time and bandwidth to build it the first time the user logs into a new computer. Also, it takes a lot of time and bandwidth to sync when the user logs off; this happens each time a user logs on or logs off.
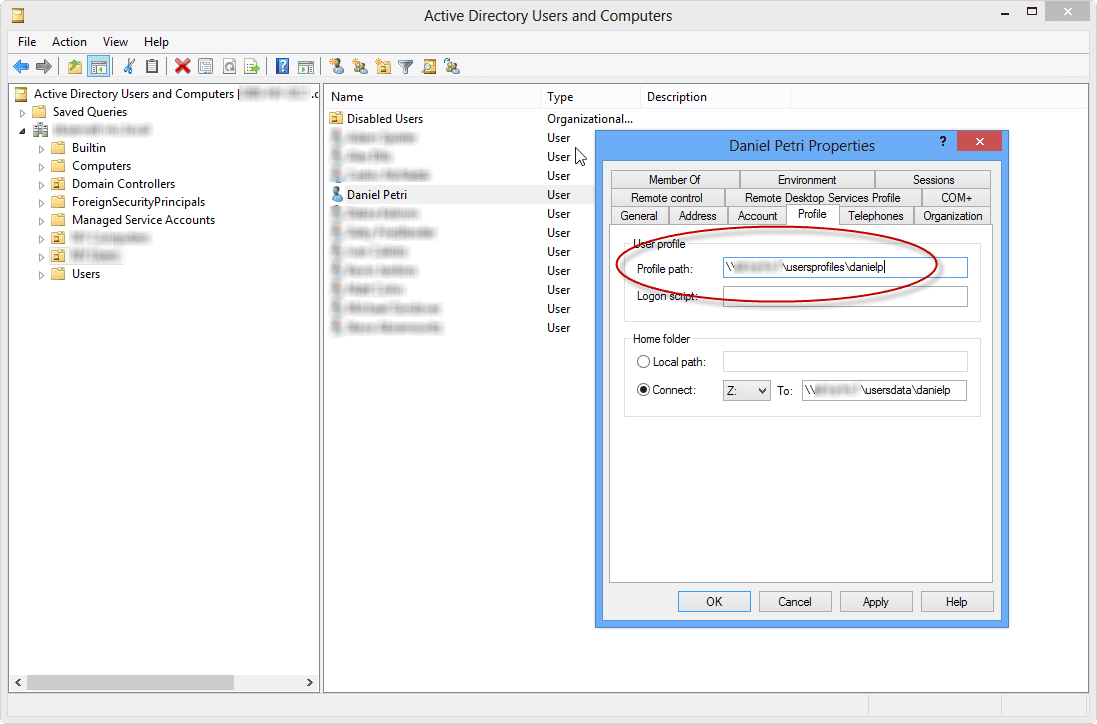
As mentioned, one of the methods to export settings to another domain-joined computer is by configuring the user’s account for the user that’s about to use Server Manager to have a roaming user profile. This is done in Active Directory Users and Computers by editing the user’s account properties.
If you really want to use this approach, do the following:
- In Active Directory Users and Computers, open the Properties dialog box for the user that is going to use Server Manager (for example – you).
- On the Profile tab, add a path to a network share to store the user’s profile. Click OK.
In addition, please note that the “Manage As” credentials for servers in your server list are not stored in the user’s roaming profile. This means that you must add them manually in Server Manager on each computer from which they want to manage.
Method #2: Manually Export the Files
To manually export settings to another computer, copy the preceding two files from the first computers to the same location on the second computer from which you want to manage by using Server Manager.
On the second computer that you’re planning to use to manage your remote servers, overwrite the ServerList.xml and user.config files (see directory locations below) with the Server Manager configuration files that you’re using from another computer with a Server Manager installation that has the specific configuration settings that you need.
- %appdata%\Microsoft\Windows\ServerManager\ServerList.xml

- %appdata%\Local\Microsoft_Corporation\ServerManager.exe_StrongName_GUID\6.2.0.0\user.config

You need to repeat this process anytime you make a change on one of your management workstations in regards to Server Manager.


