


How to Create an Approval Workflow in Teams

Introduction
One of the most important workflows in a business is the approval process. This can range from administration-like approvals like vacation requests, expense reports, and document signoffs. However, there is almost an innumerable amount of approval categories in the business world besides these. Think Finance, Manufacturing, HR, heck, even IT. (Imagine having to get an IT-related task approved….!) As an IT Pro, it would behoove you to be familiar with the Approval app that allows you to create an integrated, easy-to-use digital paper trail for security, compliance, and legal reasons, not to mention being intuitive and easy for all your users to participate. Microsoft started rolling out the Approvals app in Microsoft Teams earlier this year. To verify you’re licensed and prepared to roll out this app for your organization, use this documentation link from Microsoft for all the details.
The Approvals app in Teams presents an easy-to-follow process, however, there is a lot more power behind the scenes. This is built on Power Automate, a platform service that automates workflows across a large number of apps and SaaS services that business users rely on. I’ll give you a crash course (meaning – high-level overview) in Power Automate later. First, let’s start with the Approval app.
Working with Approvals in Teams
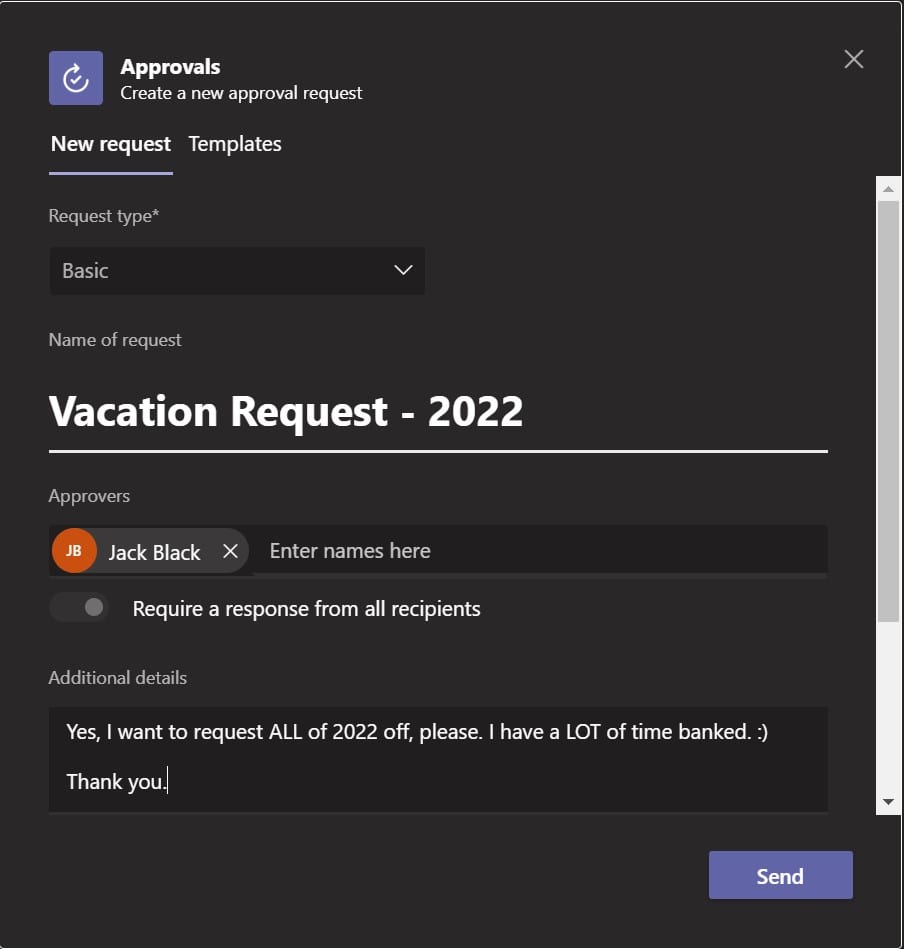
Approvals in Teams allow you to create, manage, and share approvals directly from your digital hub quickly and easily. Microsoft wanted to build an experience across a broad range of teams so they provided an easy app experience to onboard onto, but they also wanted to give users the ability to extend further the capabilities with the full power of Power Automate.
You can access the Approvals app along the left side of Teams. All you need to do is click the ‘…’ at the bottom of the left navigation bar, type to search for ‘approvals’, and Add it. (Be sure to right-click on it and choose ‘Pin’ so it sticks)

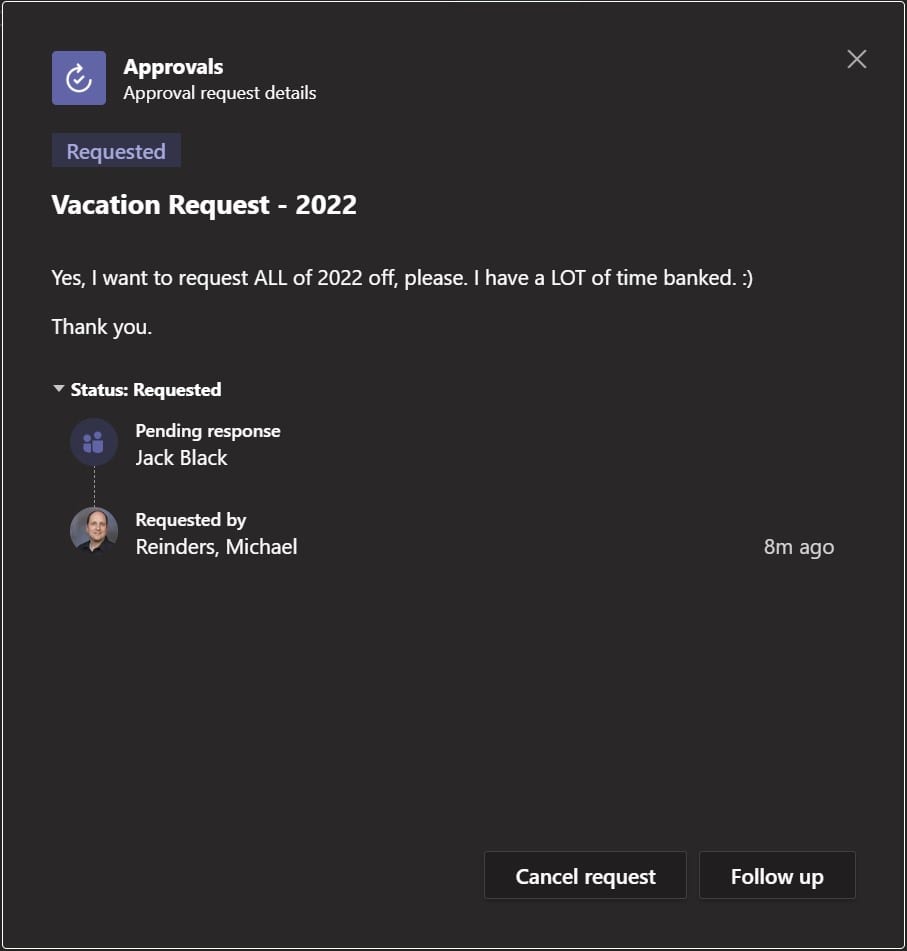
Here you can see the list of Approvals you’ve Sent. The ‘Received’ tab above will list the Approvals that have been sent to you.

If you click on the Approval, you’ll see the requests of all approvals and each user’s history. This makes it easy and efficient if you say want to upgrade from Microsoft Exchange Server 2016 to Microsoft Exchange Server 2019. If you’re in a larger company, it may be helpful to pass this onto more than one person before initiating the big switch.
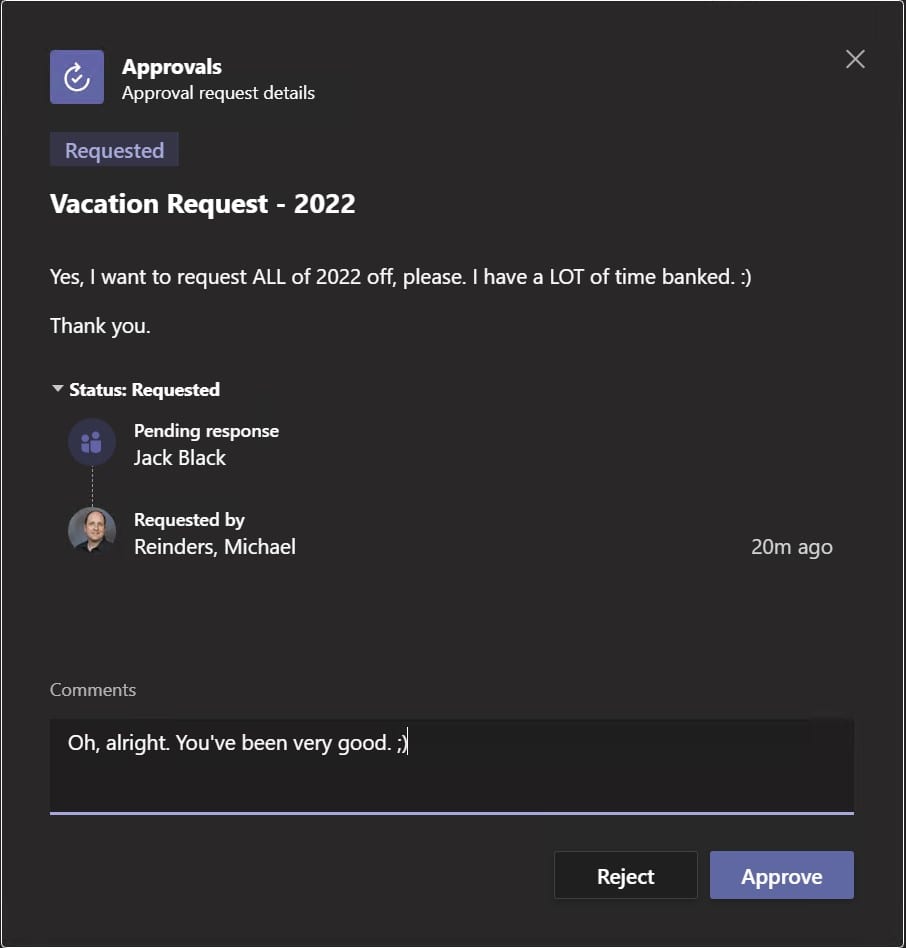
Let’s show you how things look on the receiving side of the coin. The users receiving the approval will get a notification in Teams if they have the approval app installed. If they don’t respond, they’ll get a daily email (digest of sorts) mentioning that Approvals are awaiting their action. So, I’ll click on the Approval and enter my optional comments and click Approve.

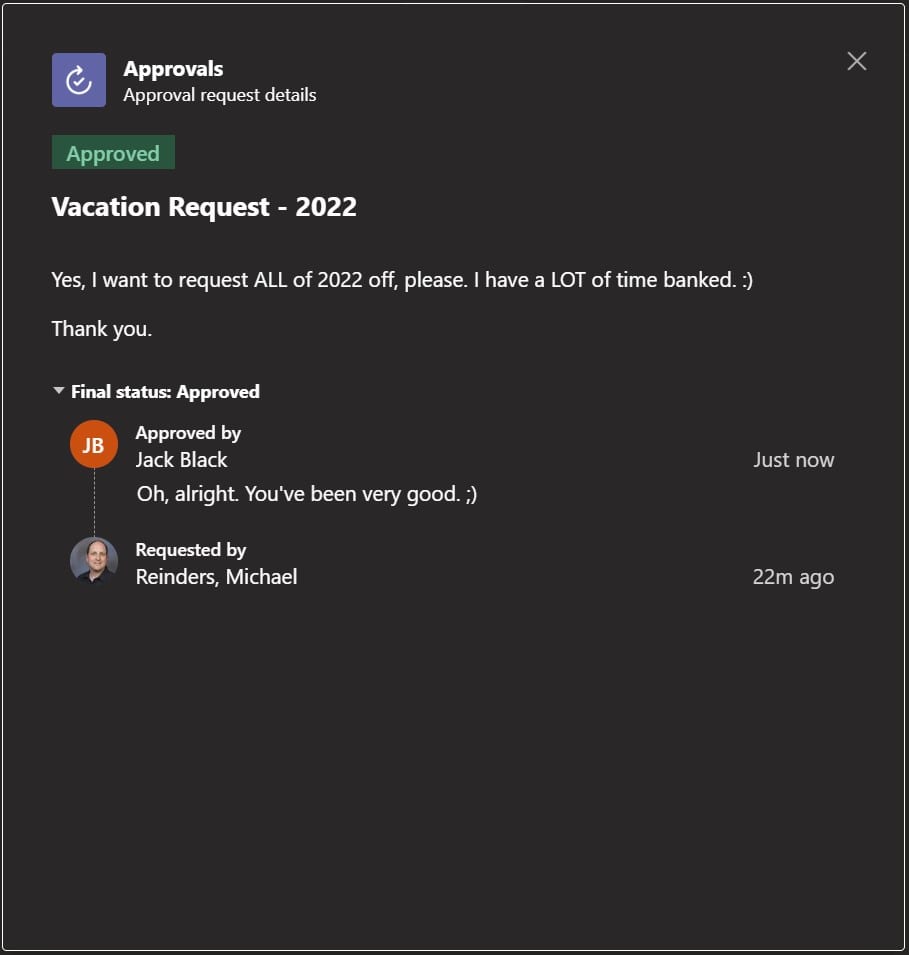
And this is how it will look from the sender’s point of view. Again, all the history is right there.
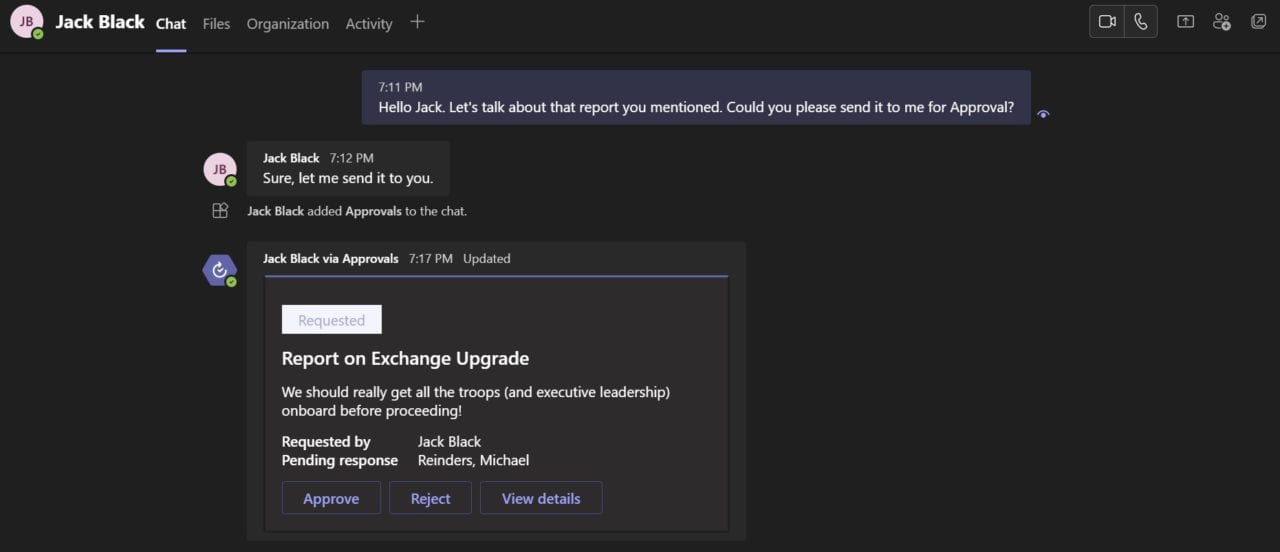
As I stated above, this can be initiated right from a personal Chat window or in a specific Teams channel. The beauty is the workflow engine works the same way regardless of its origin. If you’re chatting with one of your direct reports about a document you’ve never seen, you can have them send you an Approval right in the Chat so you can efficiently proceed with the task or project being discussed.
And Approved!
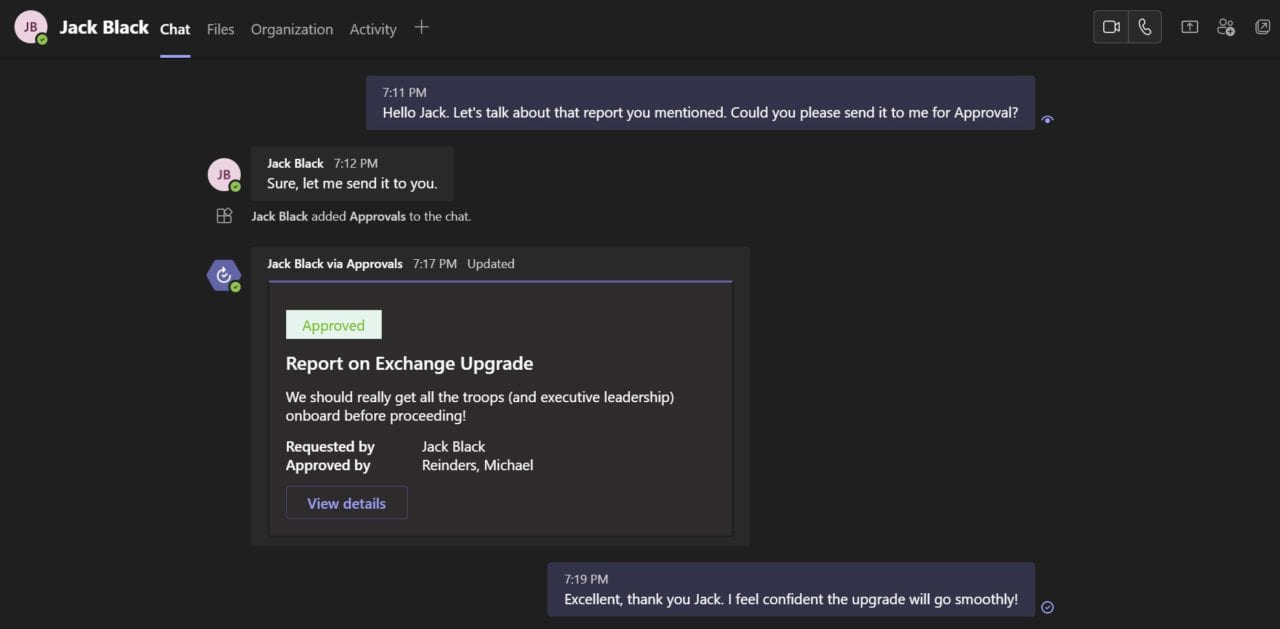
What did I say? Piece of cake.
Customizing with Power Automate
There is some serious firepower behind Power Automate, including developing and customizing flows based on the ‘Approval’ templates. Microsoft is creating templates as well as the greater ‘Microsoft Power Automate Community’. You can start by clicking the ‘Power Automate’ app icon on office.com or your Office app (in Windows 10/11). You can also go right to https://flow.microsoft.com/. (I simply clicked on the ‘Approval’ tab under the ‘Start from a template’ heading)
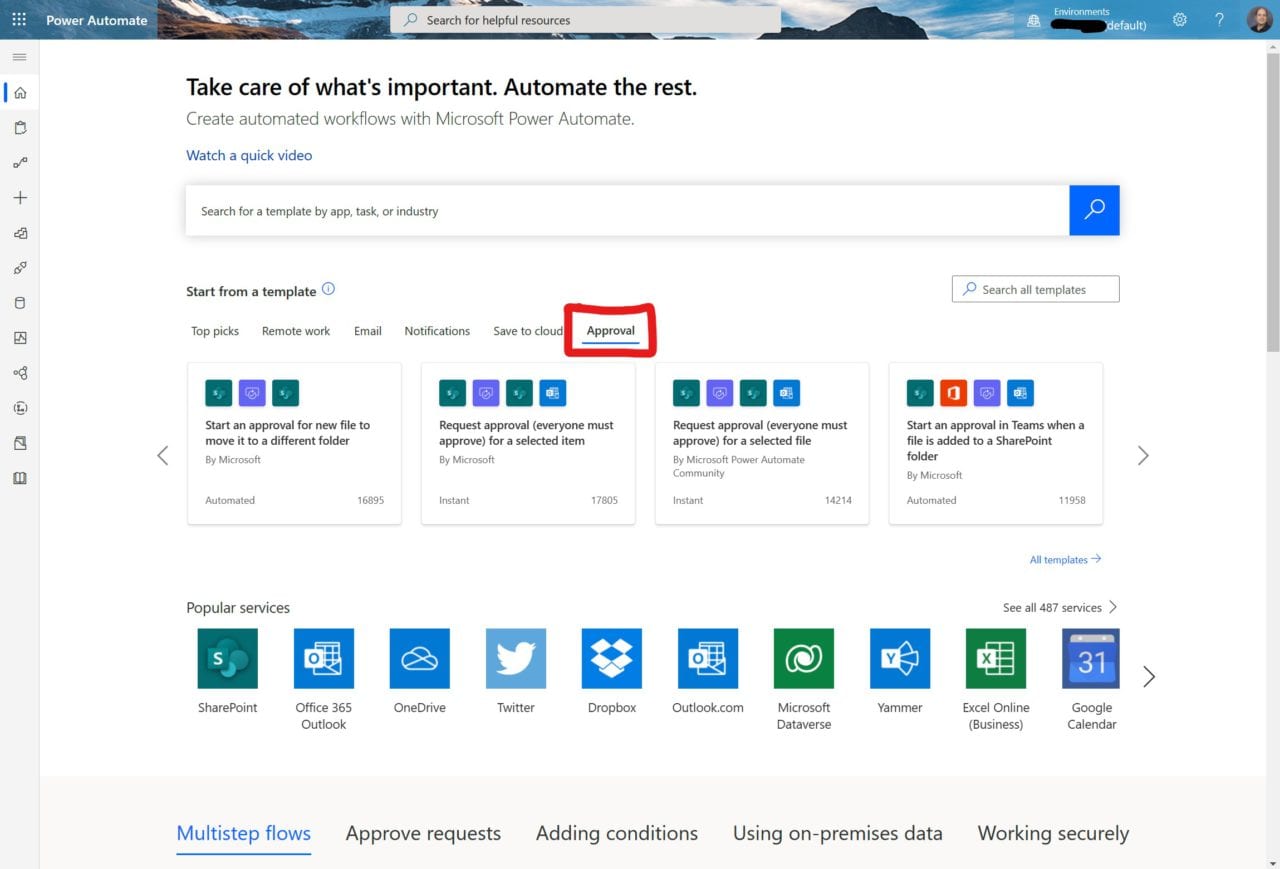
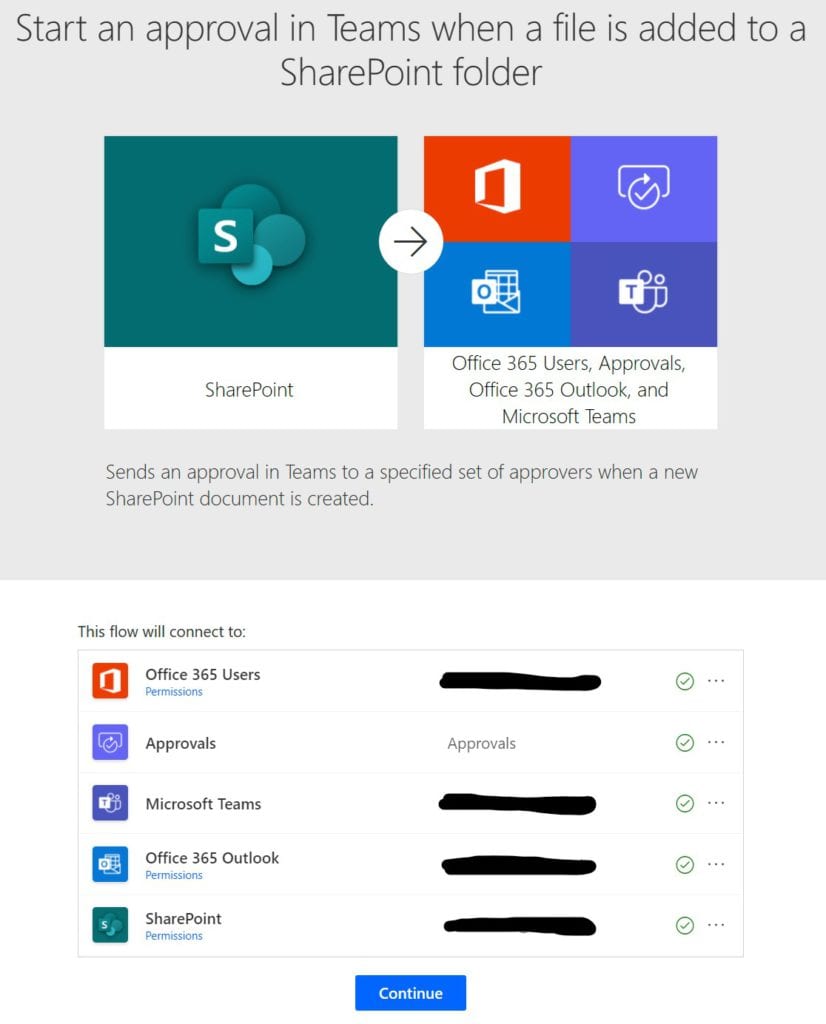
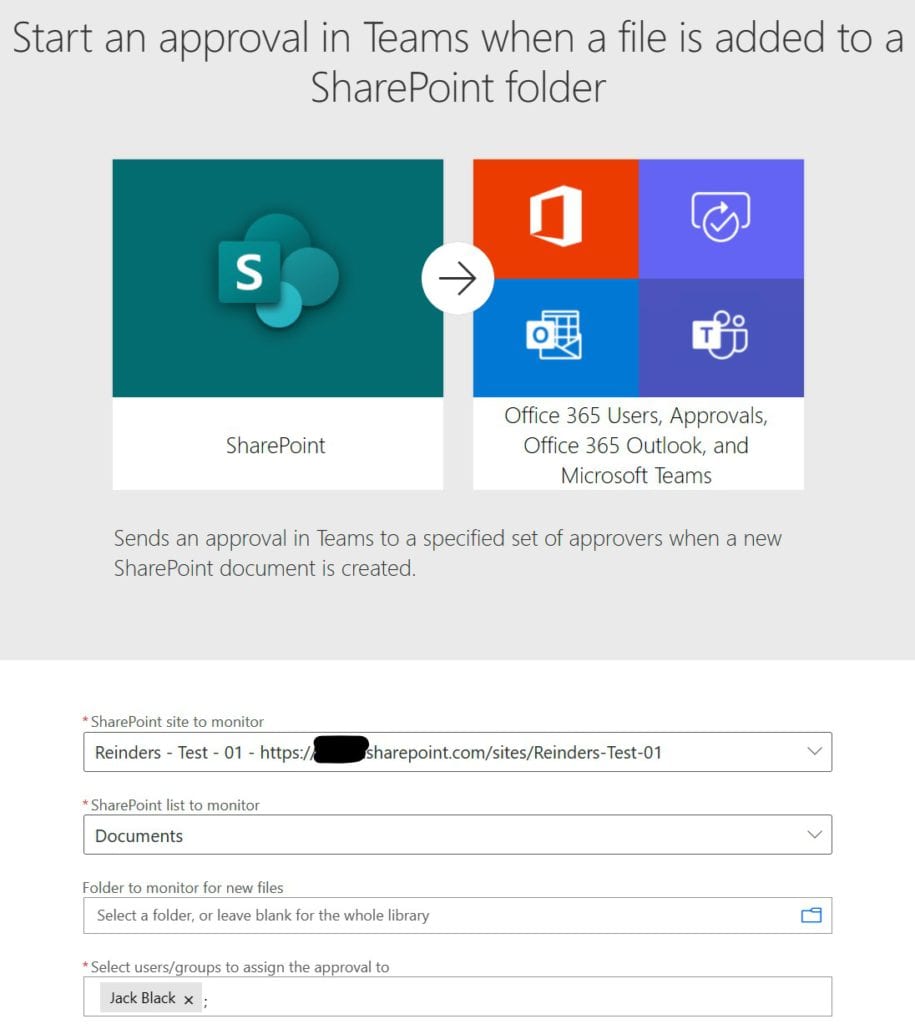
Let’s go with ‘Start an approval in Teams when a file is added to a SharePoint folder.’ Again, this is one of the countless examples. This will likely spark a hint of creative vision in your minds about how you can transform some of your IT or business processes into automated magic!
You may need to re-authenticate or modify some of the ‘Connectors’ involved with the flows. You’ll get visual guidance on what needs resolving. Once you have green checkmarks across the board, you’re cleared for takeoff. Click Continue!
As you see below, I chose which SharePoint site to monitor, the specific list or library, optionally a specific subfolder to monitor, and then what users/groups the approval should be assigned to. Remember, you can add multiple users and they’ll receive requests for approval in order. You’re ready, click Create.
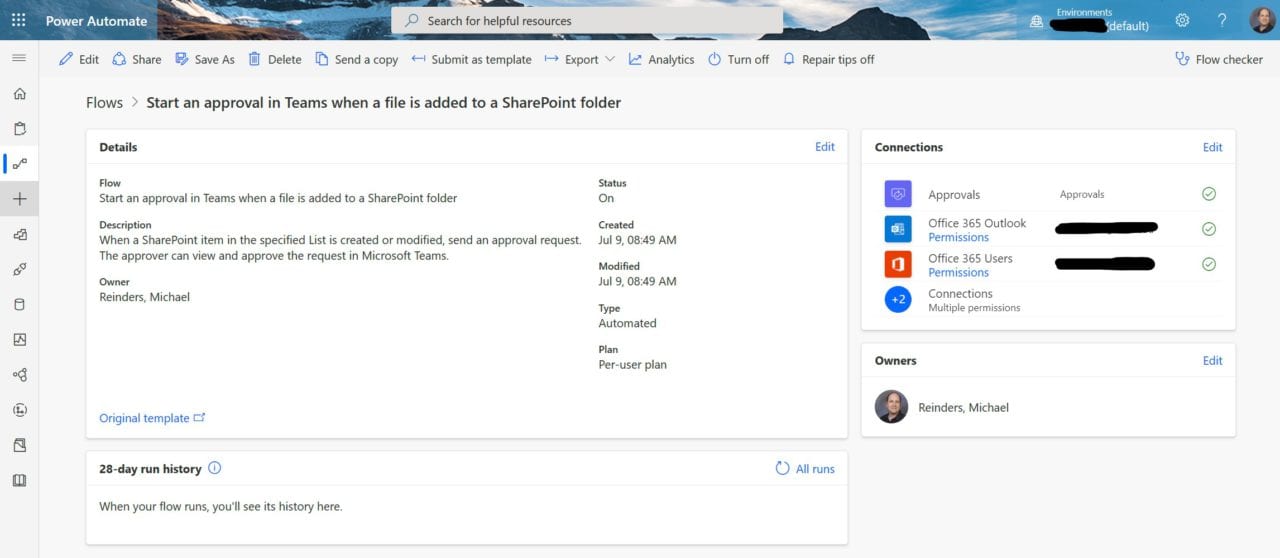
And here’s your brand new Flow.
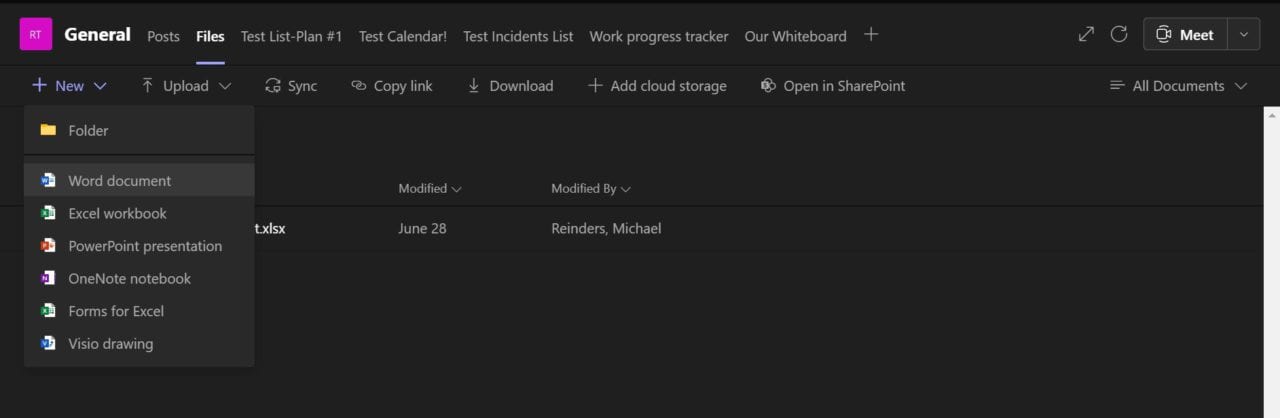
Well, what are we waiting for? Let’s test this wizardry and see if Dumbledore would ‘approve’ :). I’m heading to Teams and clicking the Files tab on top to access the SharePoint (document library) location specified in the flow. I’ll create a new Word document.
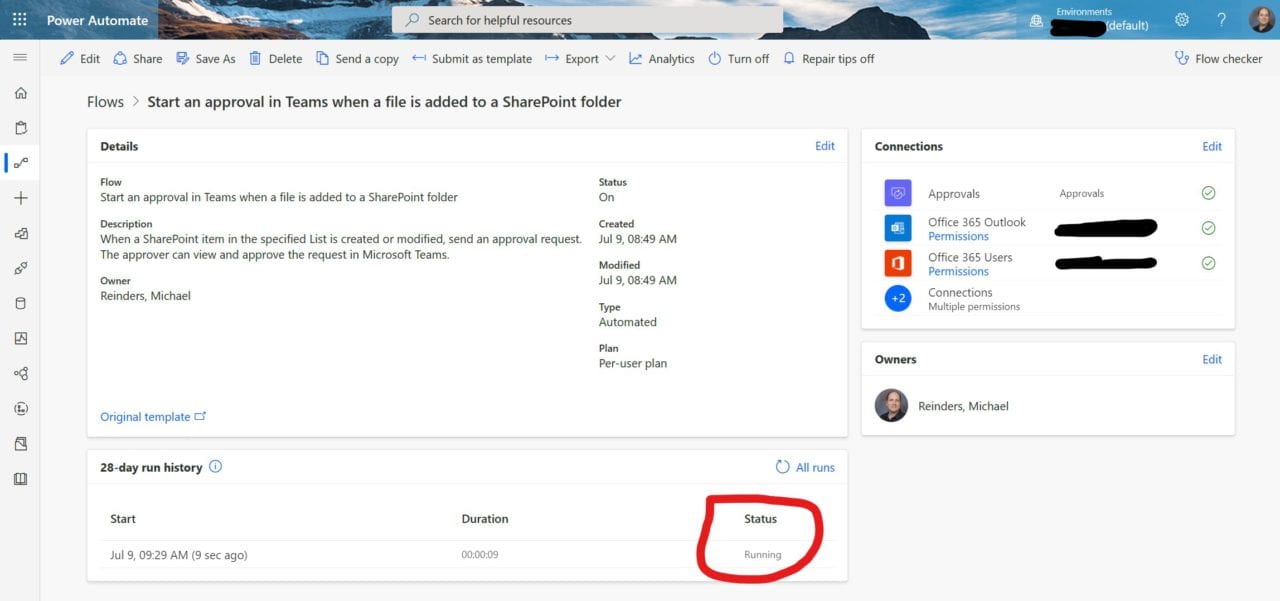
I refreshed the Power Automate website and lo and behold!
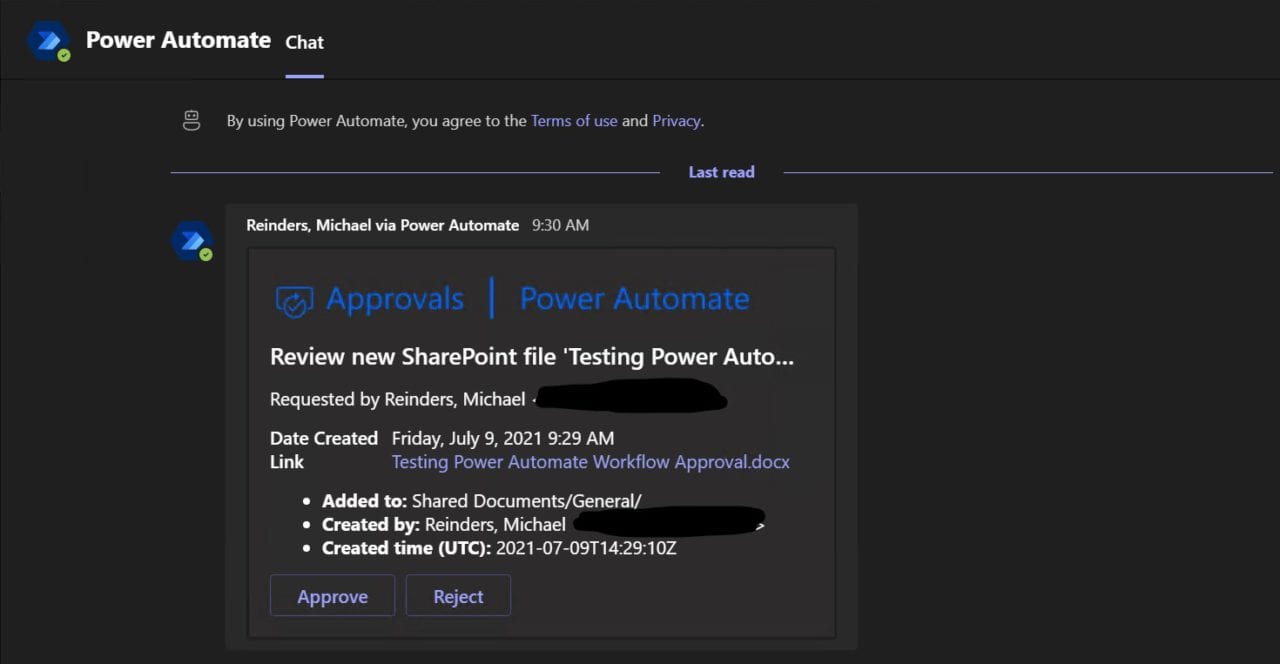
I head over to Jack Black’s Teams app and I spy, with my little eye…

Click on the Chat window and there’s the request for approval for the newly created Word document.
In Teams, Jack (Black) clicked Approve, left some comments, and clicked Submit. Back at the Batcave…(my Teams notification)
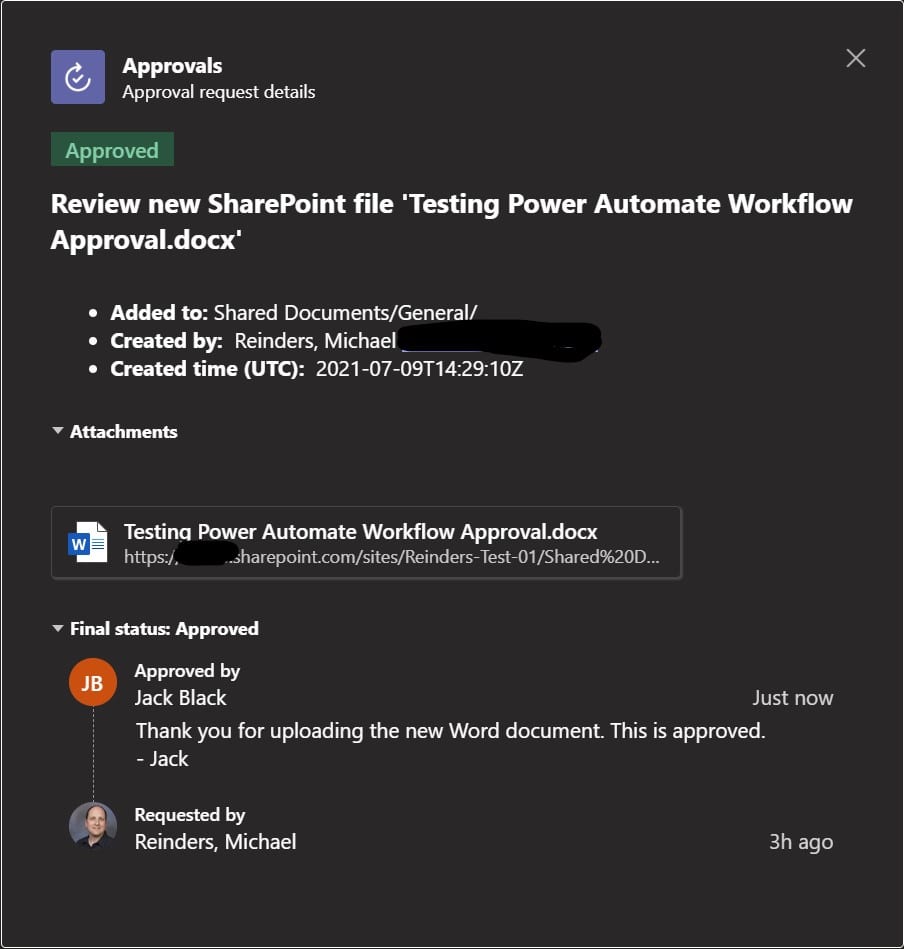
Very slick, if I do say so myself.
Conclusion
Obviously, there is a wide range of processes, tasks, and workflows that could see an efficiency boost, and a reliability boost with Approvals and the underlying Power Automate platform. Besides Teams, I see Power Automate as an important and impactful vertical pillar in Microsoft’s arsenal. They hit it out of the park with the breadth of services, apps, and programs that can be automated. I highly recommend downloading Power Automate Desktop. This allows you to automate and script common tasks and sequences you perform right on your very own Desktop. As I begin to wet my feet, already I can tell it’s a very deep ocean.
If anyone has any questions or comments on this topic, please let me know. I would be glad to delve deeper into a specific area of Power Automate you feel would help your life as an IT Pro get just a little smoother. 🙂
Related Article: