


How to Download and Install Windows Admin Center

Back at Microsoft Ignite 2017 in Orlando, FL, I attended the session where ‘Project Honolulu’ was announced and demonstrated. This was a fresh, built-from-scratch new server management tool for Windows Servers, Windows 10, and Azure resources. I do recall there being a large number of applause sessions from all the IT Pros in the audience!
When the product officially went live on April 12, 2018, they christened it ‘Windows Admin Center.’ In this article, I will show you how to download and install Windows Admin Center (WAC).
Windows Admin Center Installation
You can install the Windows Admin Center MSI on any supported version of Windows Server, Windows 10, or Windows 11. It only needs network access, of some kind, to the servers and computers you wish to manage. For this guide, I’ll be using my Windows Server 2022 Hyper-V AD lab environment. I’ll be installing the tool on a small file server running the latest version of Windows Server 2025 (in the Windows Server Insider Program), due to be released during the 2nd half of 2024. Let’s see how things go.
Download Windows Admin Center
Windows Admin Center is available for download as a Microsoft Install (MSI) file. You can download Windows Admin Center from Microsoft’s website. The link provides you with the latest version of WAC. Once WAC has been installed, it is updated automatically using its internal updating mechanism and/or Microsoft (Windows) Update.
Install Windows Admin Center
Now let’s install Windows Admin Center.
- Copy the MSI file you just downloaded to your desktop and double-click the file to run the installer.
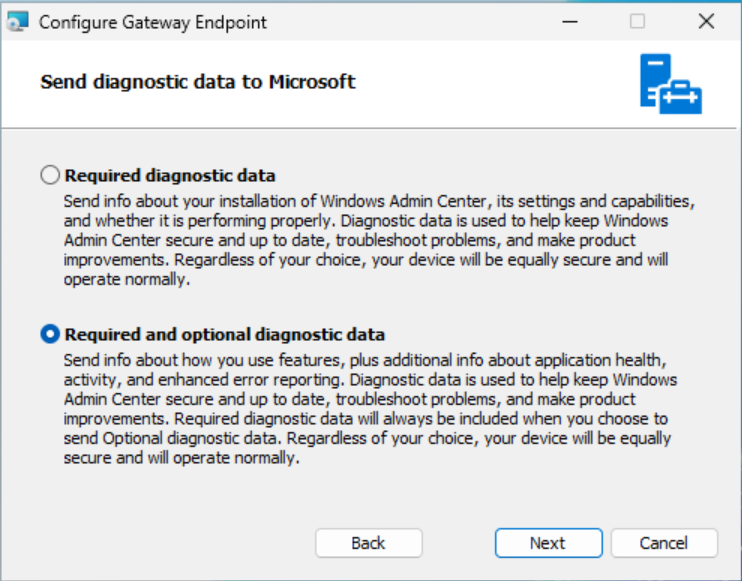
- You can choose if you want to send optional diagnostic data to Microsoft or not.
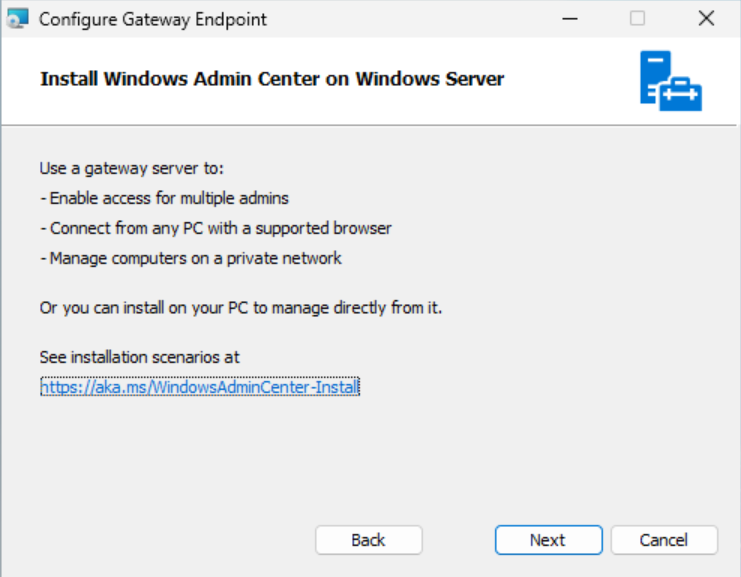
- Make sure you understand the different Windows Admin Center architecture options before clicking Next.
- If you prefer (or require) SSL-encrypted communications between your gateway server and your managed servers, check the ‘Use WinRM over HTTPS only’ checkbox. This will utilize secure traffic with Windows Remote Management (WinRM) and prevent any HTTP traffic.
- After reviewing the information, click Next.

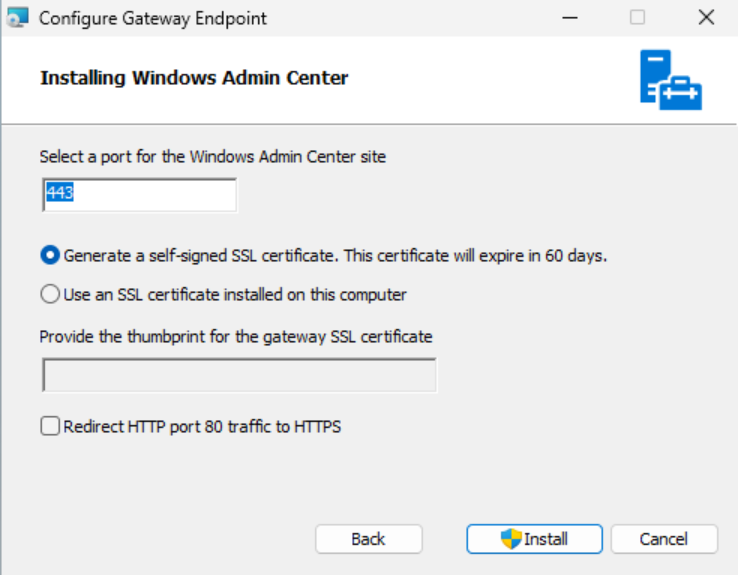
- You can choose a different port to be used to browse the software. You can also choose to use a 3rd-party or CA certificate for secure browsing.
- If you want to enforce HTTPS-only browsing on your network for Windows Admin Center, check the box labeled ‘Redirect HTTP port 80 traffic to HTTPS‘.
- Click Install.
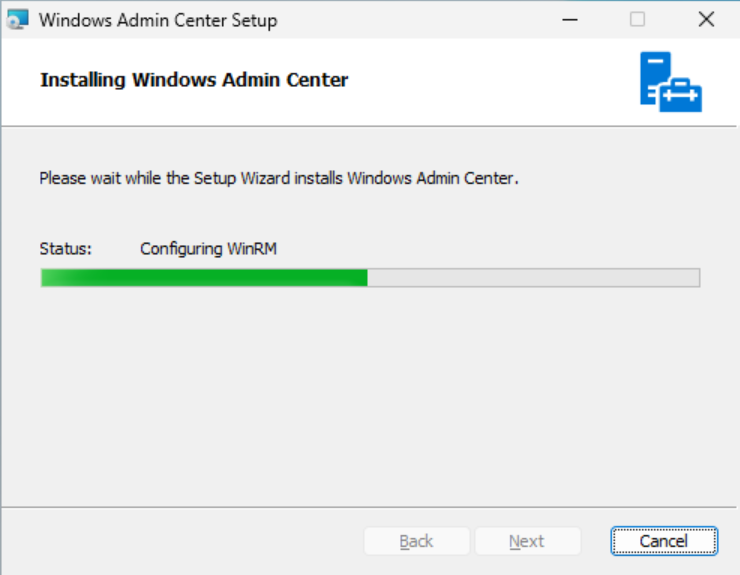
- Be patient while the setup program installs Windows Admin Center on your computer.
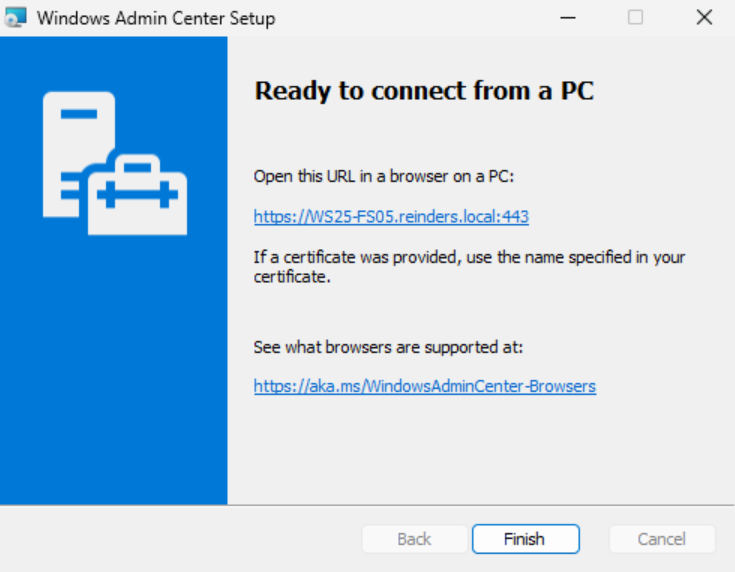
- On the final screen, Setup is complete. Make note of the URL as you will need this to access Windows Admin Center on your network.
Install the new Windows Admin Center modernized gateway
In December 2023, the Windows Admin Center modernized gateway was released in public preview with the Windows Server Insider program. This new modernized gateway has gone through a significant backend upgrade of infrastructure components including moving from .NET 4.6.2 to .NET Core, an updated installer, multi-process and micro-service based architecture, a new web server, and more.
Let me give you a brief demo of installing this new modernized gateway. Because it can be installed side-by-side with the existing ‘production’ version of WAC (version 2311 as of this writing), I’ll install it on the same Windows Server 2025 server as above. Let’s get started.
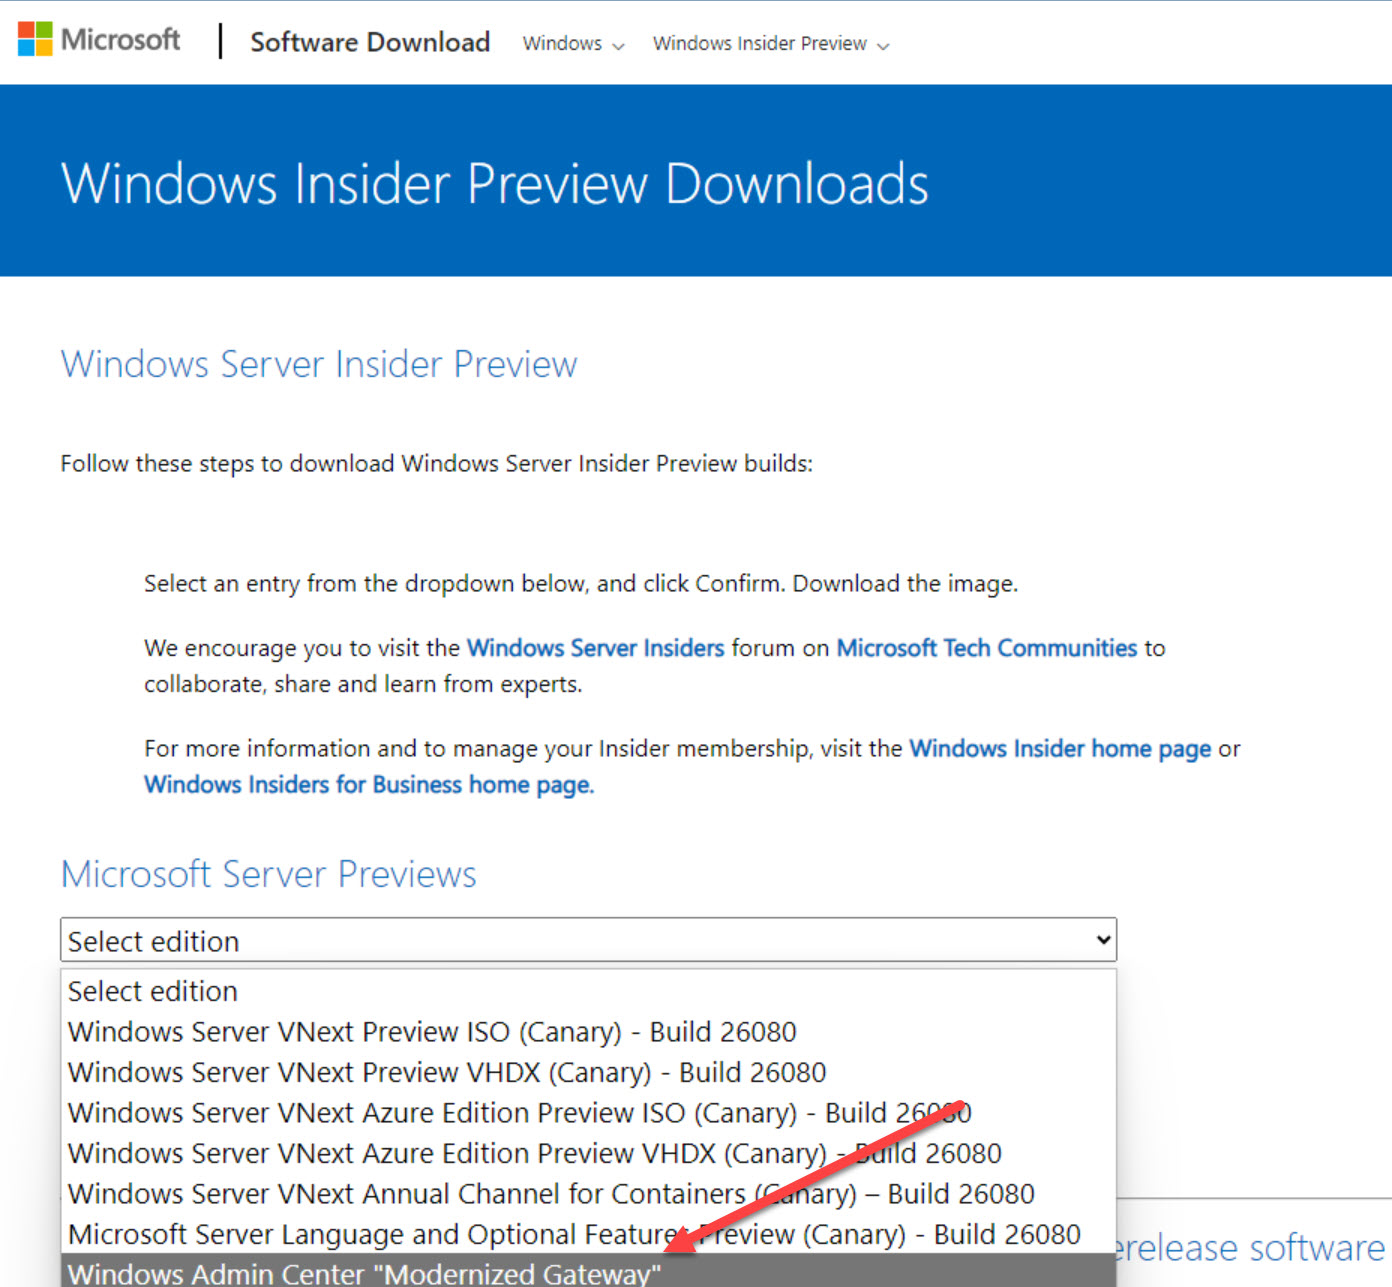
- First, you need to download the MSI from the Windows Server Insider program link I gave you above. Once you have the MSI, double-click on it to start.
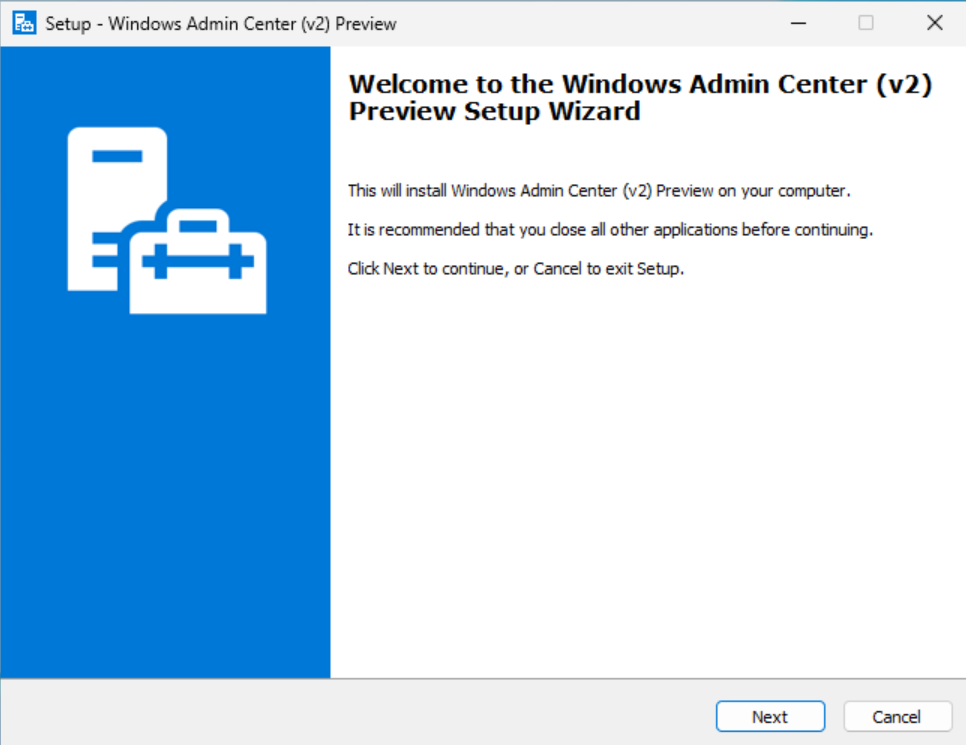
- Click Next to begin.
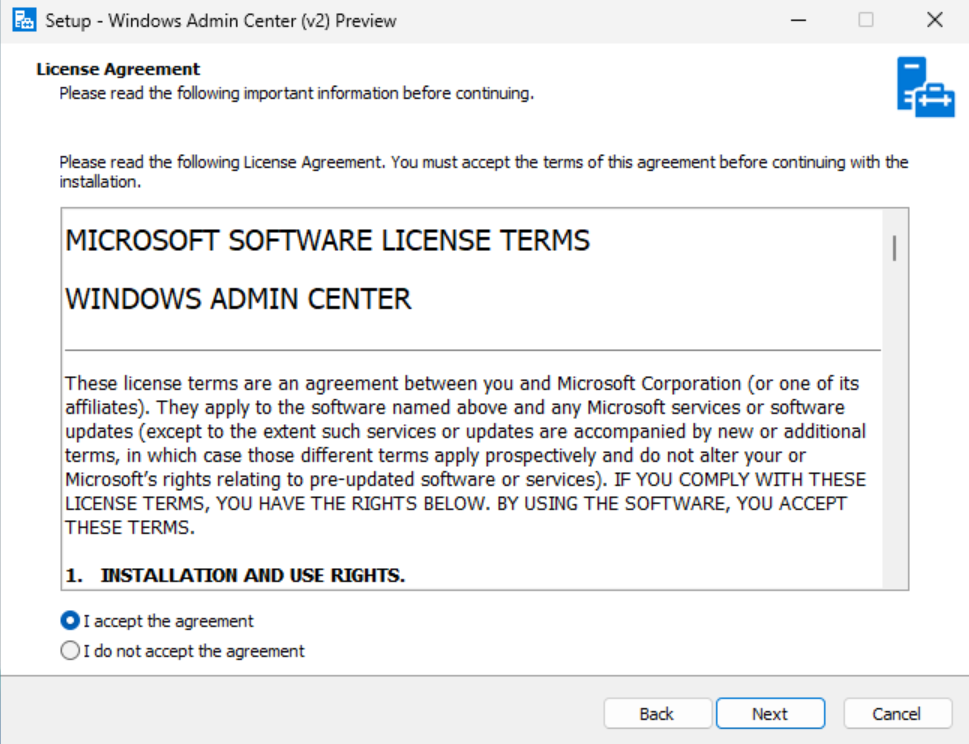
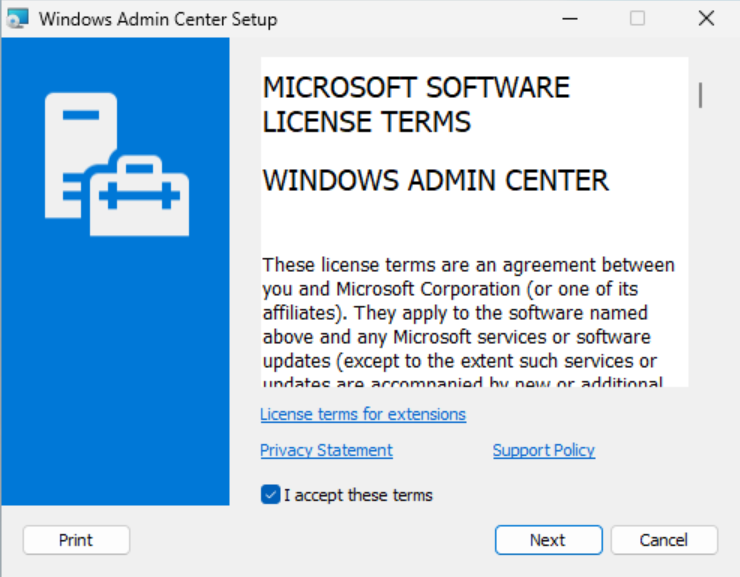
Click to accept the licensing agreement, and click Next.
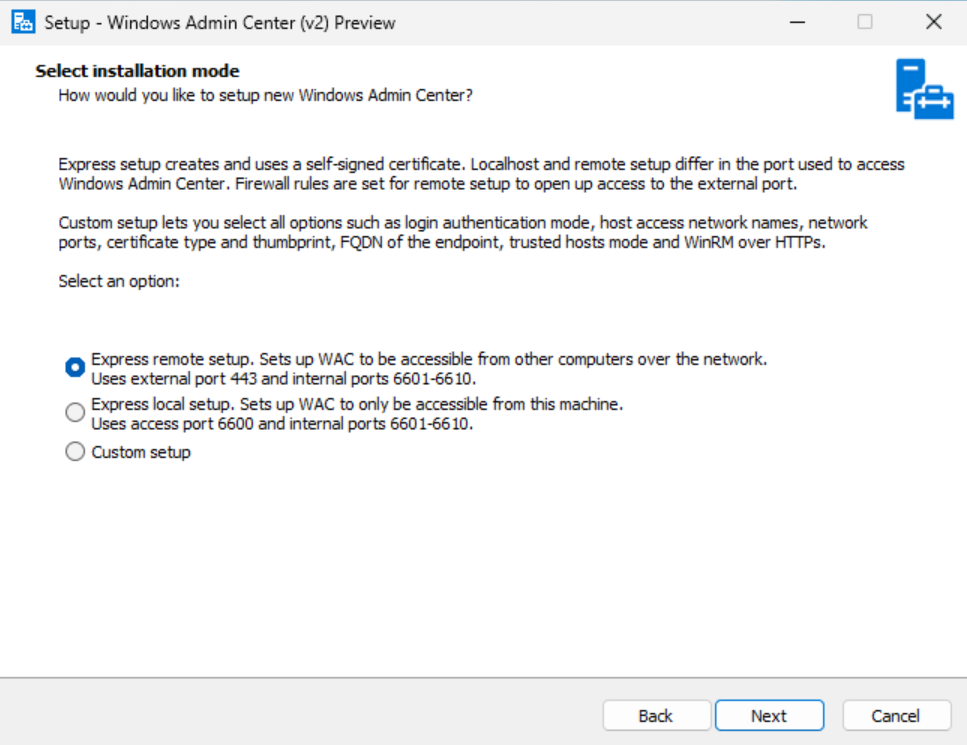
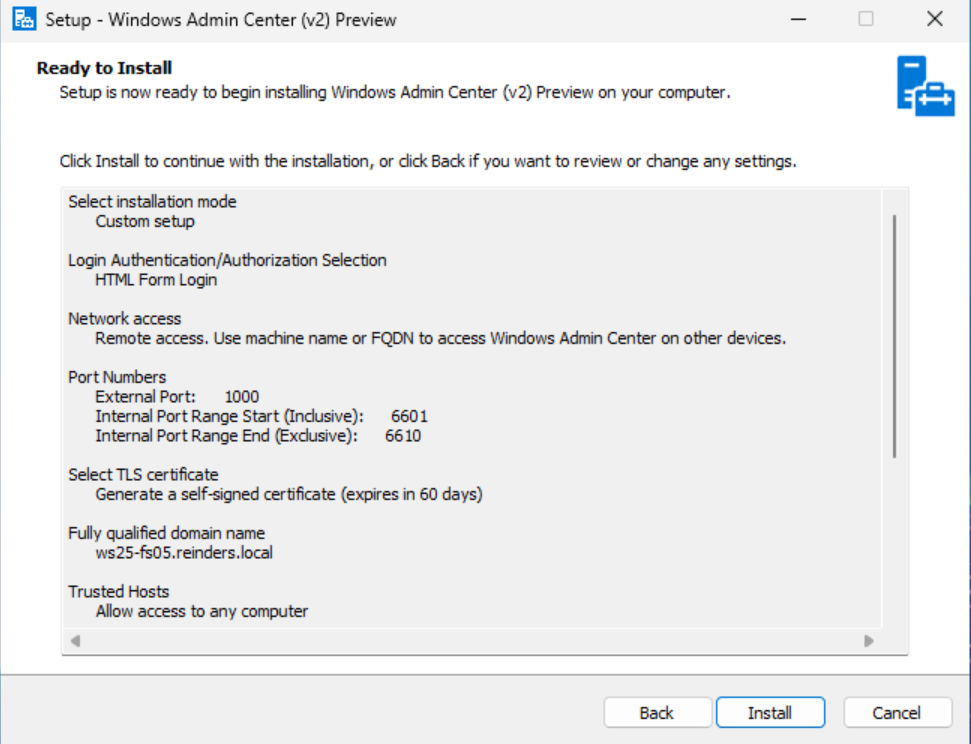
- One of the nice enhancements to the new gateway is the choice of installation options here. Normally, you would choose Express remote setup as it most closely matches how the current version of WAC is installed. But because I already have my production version listening on port 443, I need to choose another port. I’ll choose Custom setup and click Next.
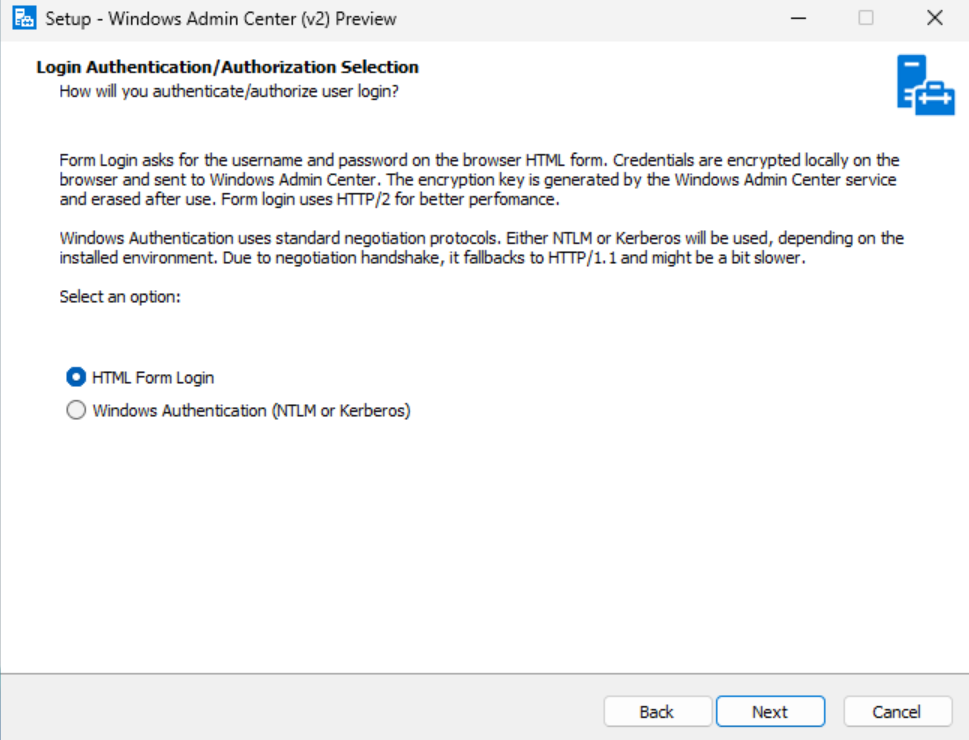
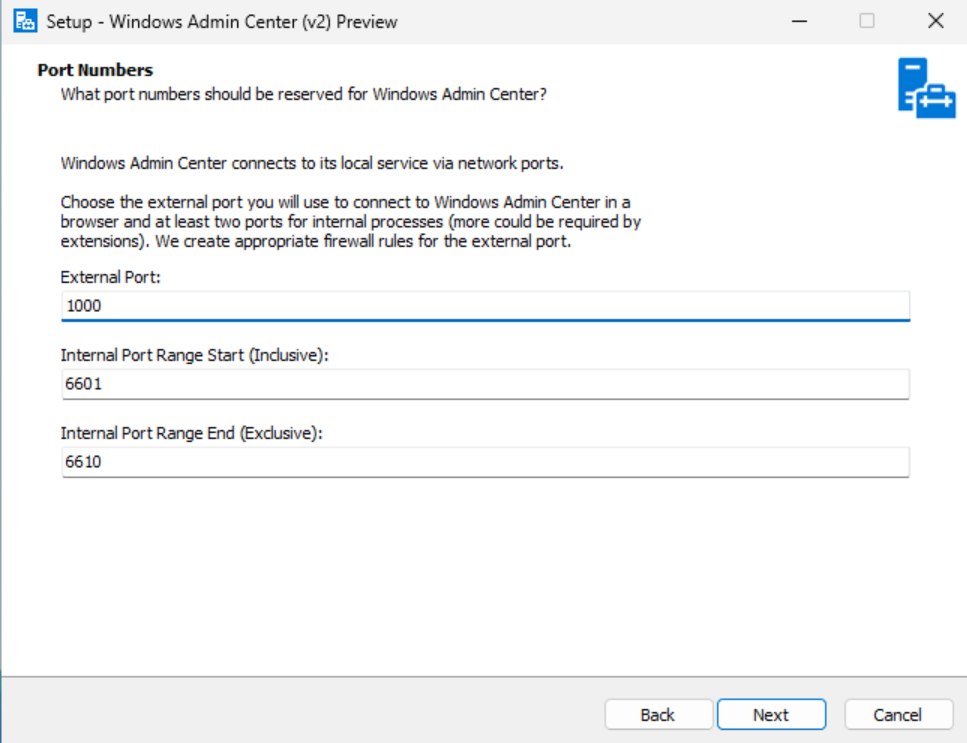
- There are quite a few more setup options on the Custom setup train. Be advised, that the defaults for almost all of them will be fine for your needs. I skipped to the (external) port used, and chose to use 1000.
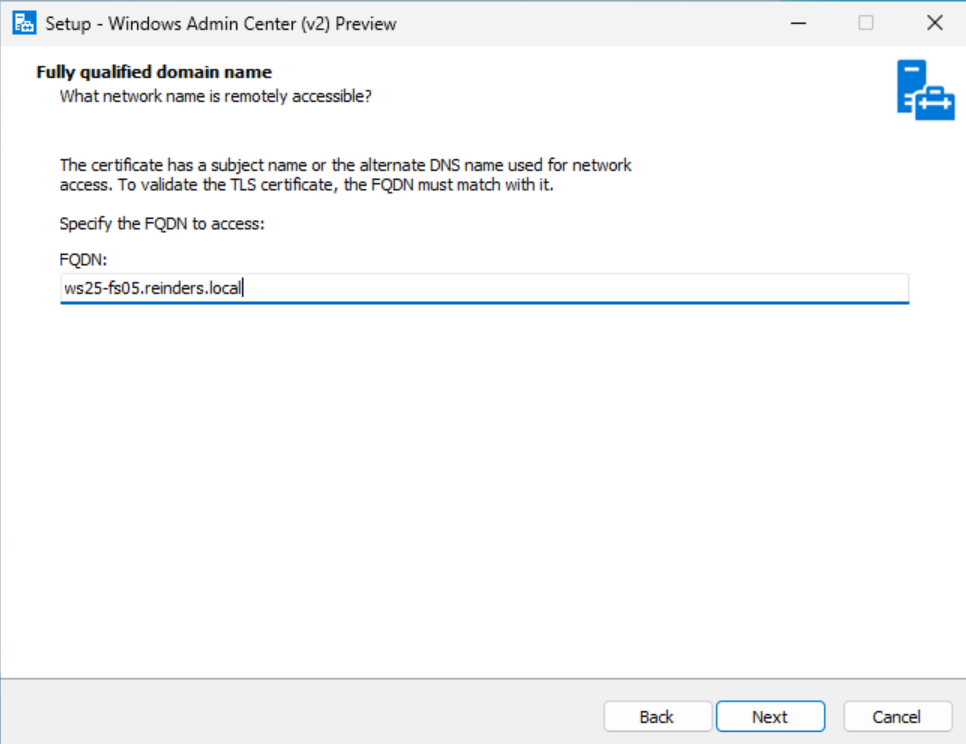
- During the setup of a self-signed certificate, I entered the DNS name of the server.
- After clicking Next through a few more screens, I got to the final summary page. I then clicked Install.
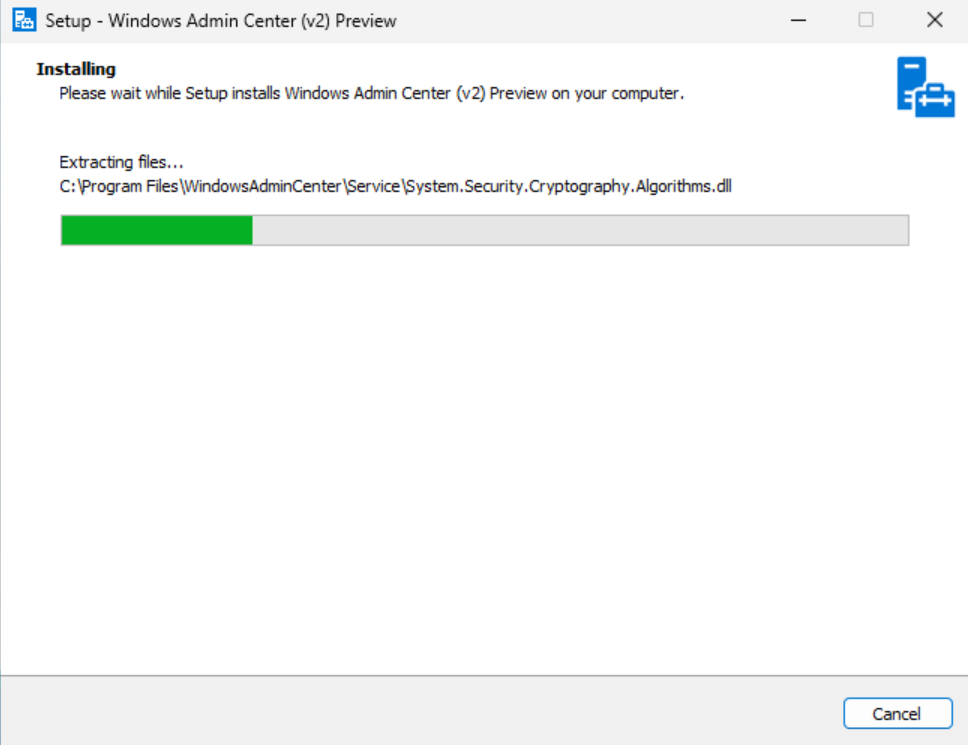
- Sit back while the Windows Admin Center (v2) Preview setup program progresses…
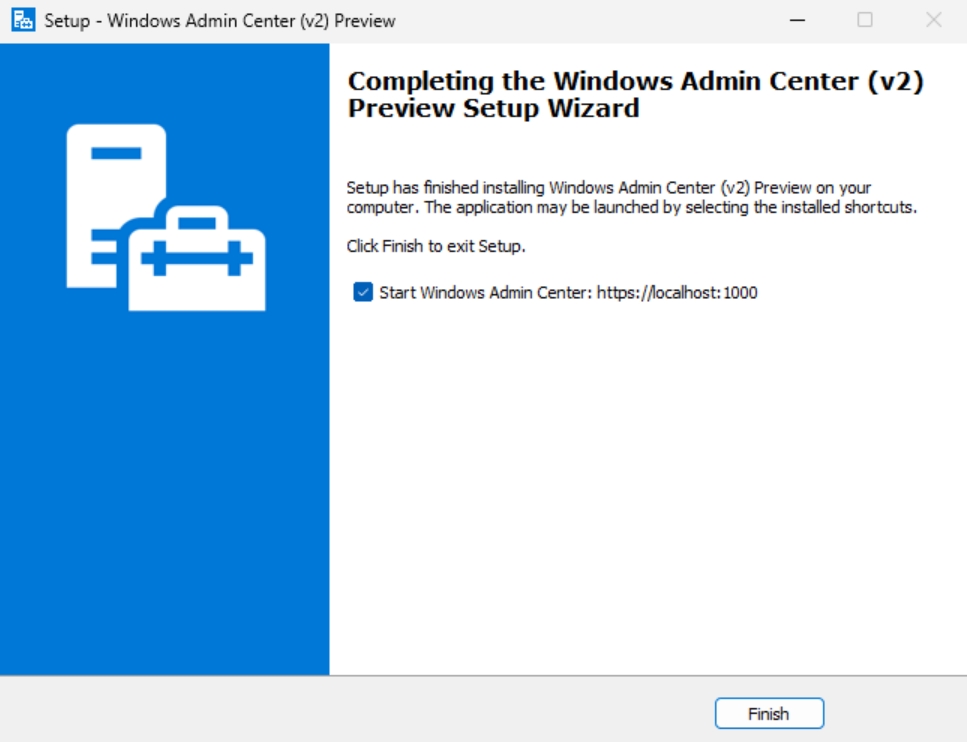
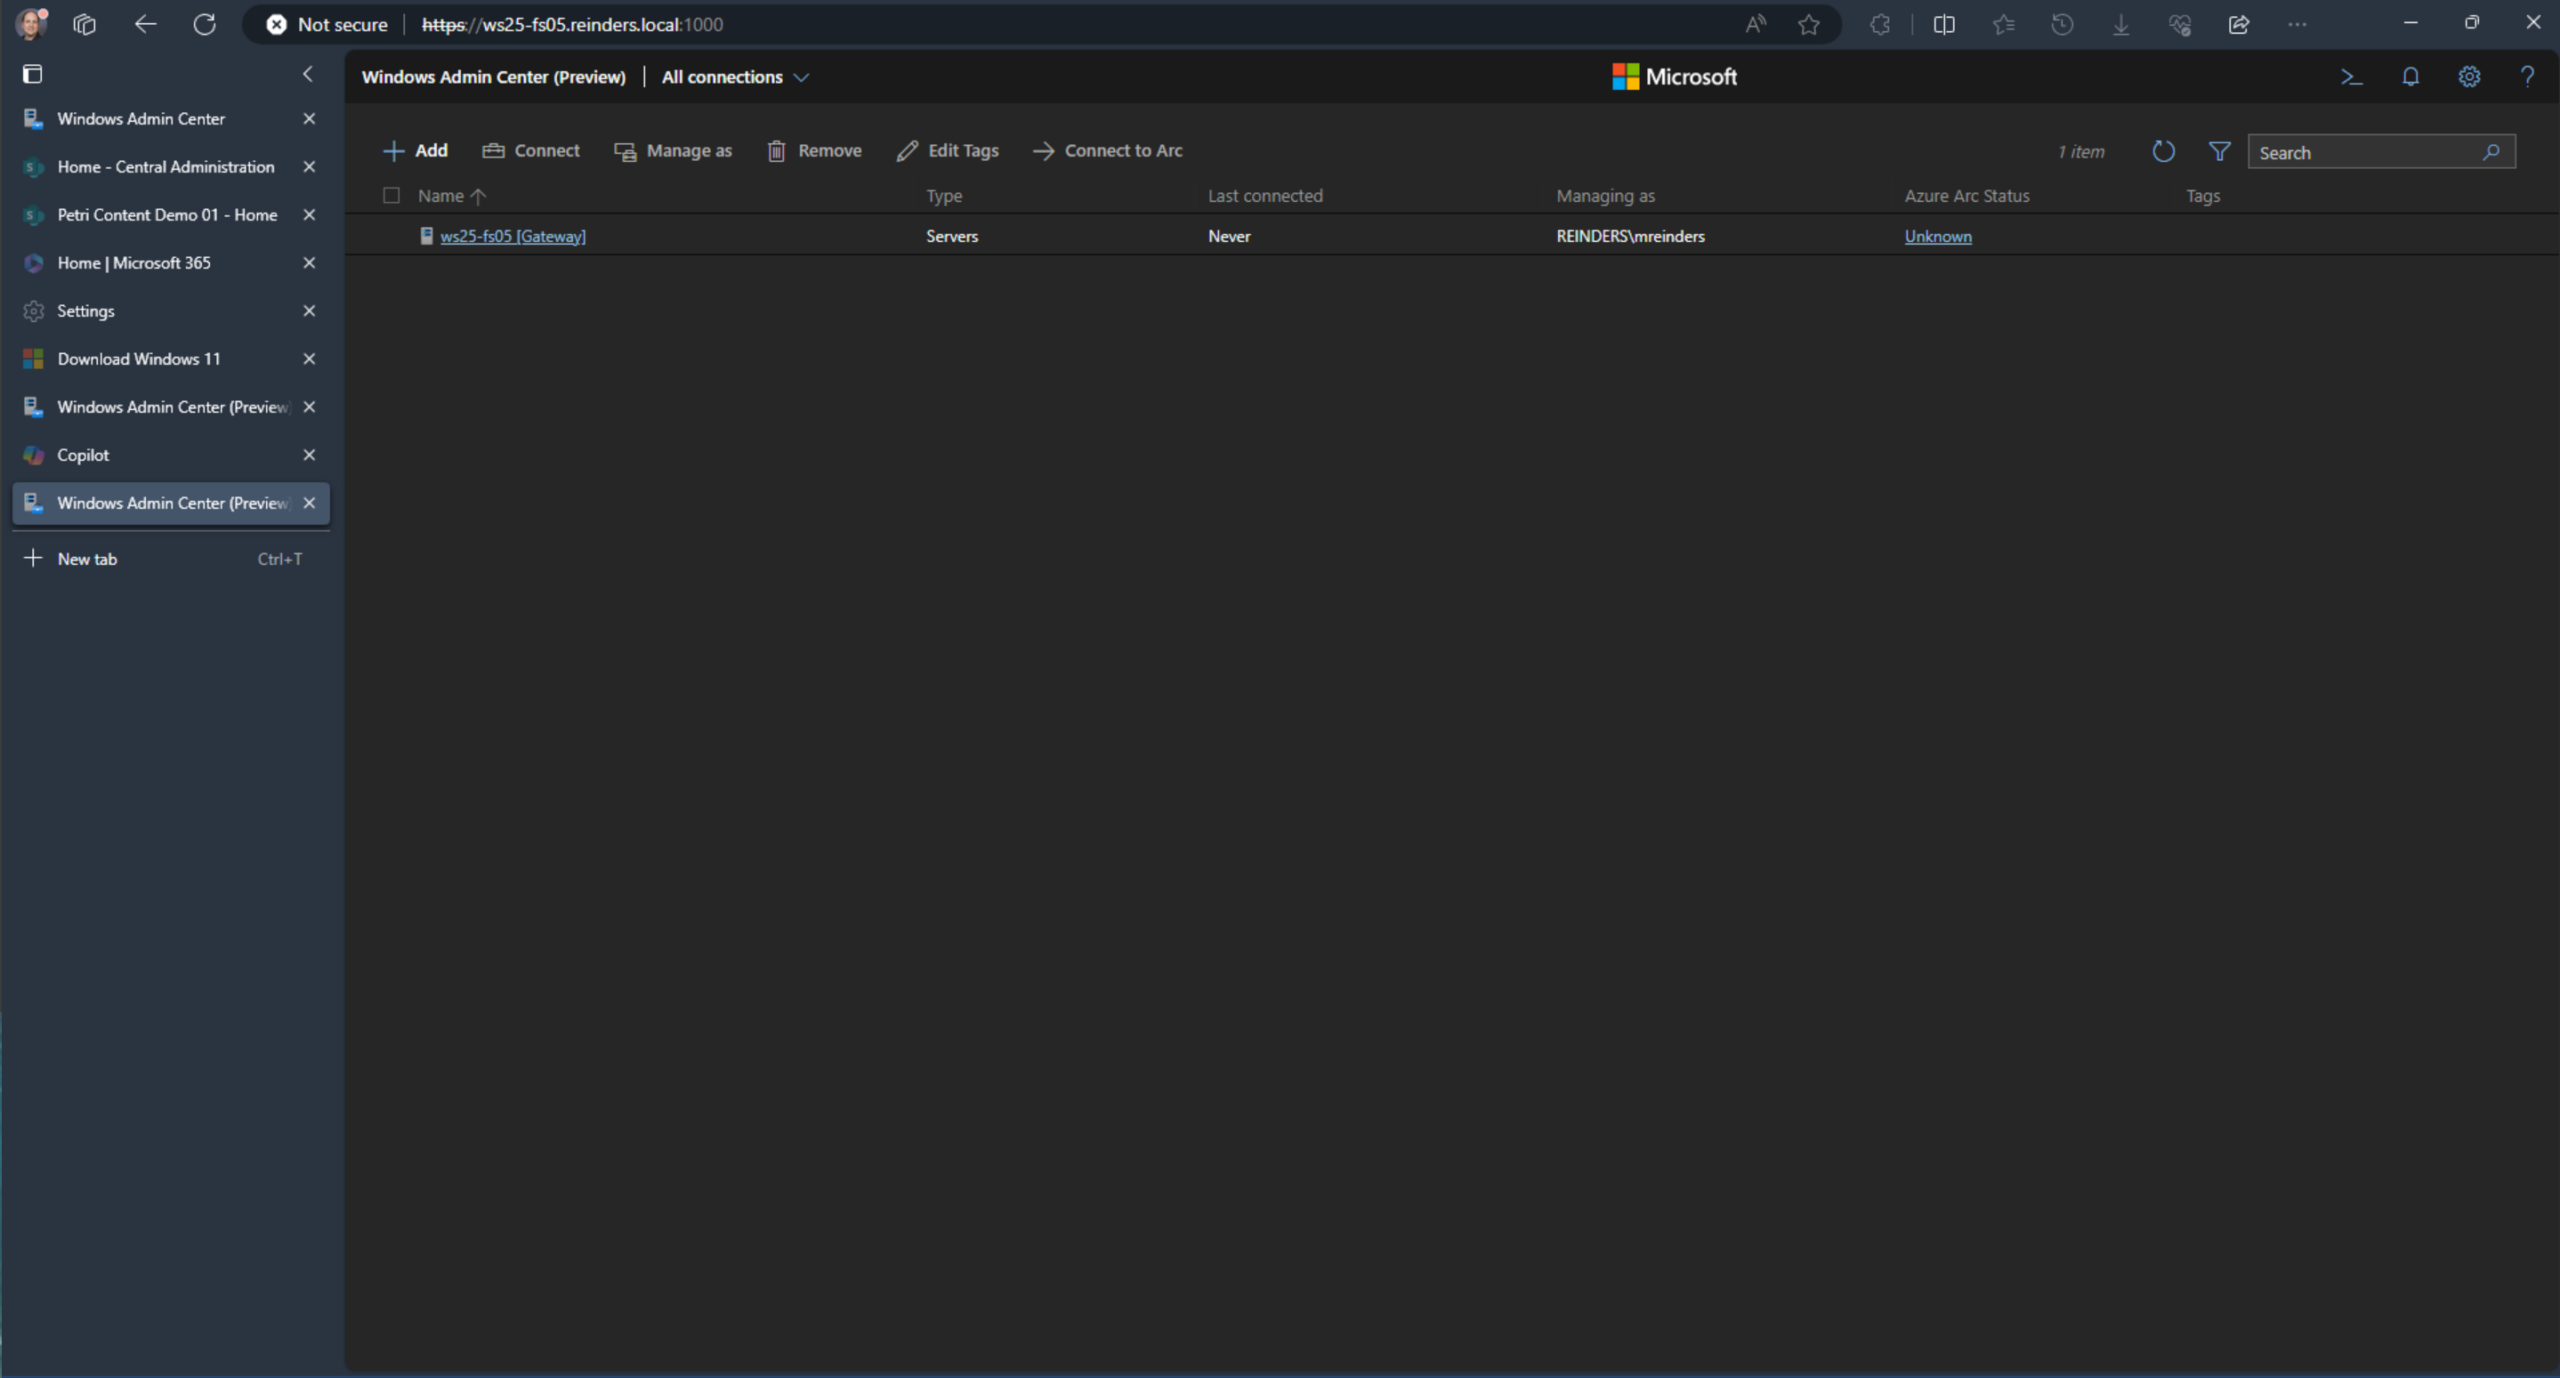
- Done! Again, be sure to take note of the URL to access the newer Windows Admin Center (v2) Preview.
I tested it by logging in with my Domain Admin account on one of my Windows 11 client PCs and it worked.
Install Windows Admin Center in Windows Server Core
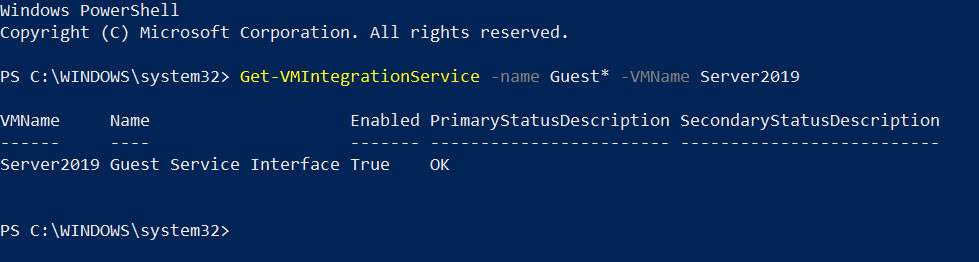
First, you’ll need to download the latest version of WAC. You can download Windows Admin Center from Microsoft’s website. Once downloaded, transfer the .msi file to your Windows Server virtual machine. The easiest way to do that is using the Copy-VMFile PowerShell cmdlet. But before you can run Copy-VMFile, make sure that guest services are enabled for the VM. You can check the status of guest services for your Windows Server 2019 VM using the Get-VMIntegrationService cmdlet.
Open a PowerShell prompt in the Hyper-V host OS and run the command shown below, replacing Server2019 with the name of your VM as it is displayed in Hyper-V manager.
Get-VMIntegrationService -name Guest* -VMName Server2019
If guest services aren’t enabled for the VM, enable them using Enable-VMIntegrationService as shown below, again replacing Server2019 with the name of your virtual machine:
Enable-VMIntegrationService -name Guest* -VMName Server2019 -Passthru
Now we’re ready to copy the WAC installer file to Windows Server 2019. Using the command line below, replace Server2019 with the name of your virtual machine as you see it in the Hyper-V management console. The -SourcePath parameter should be the full path to the .msi file on the host OS and -DestinationPath where you want to transfer it to in the guest OS.
Copy-VMFile “Server2019” -SourcePath “C:\Users\User\Downloads\WindowsAdminCenter1804.msi” -DestinationPath “C:\temp\WindowsAdminCenter1804.msi” -CreateFullPath -FileSource Host
The final step is to run the WAC installer file silently on Server Core. If you haven’t already logged in to Windows Server 2019, log in using a local administrator account. In a command prompt window, run the following command.
msiexec /i c:\temp\WindowsAdminCenter1804.msi /qn /L*v log.txt SME_PORT=443 SSL_CERTIFICATE_OPTION=generate
SME_PORT sets the port on which users will connect to the WAC gateway. In this test environment, we don’t have our own certificate to use with WAC, so the SSL_CERTIFICATE_OPTION is used to generate a certificate for Secure Sockets Layer (SSL). Before closing the command prompt, type ipconfig and press ENTER. Make a note of the VM’s IP address.
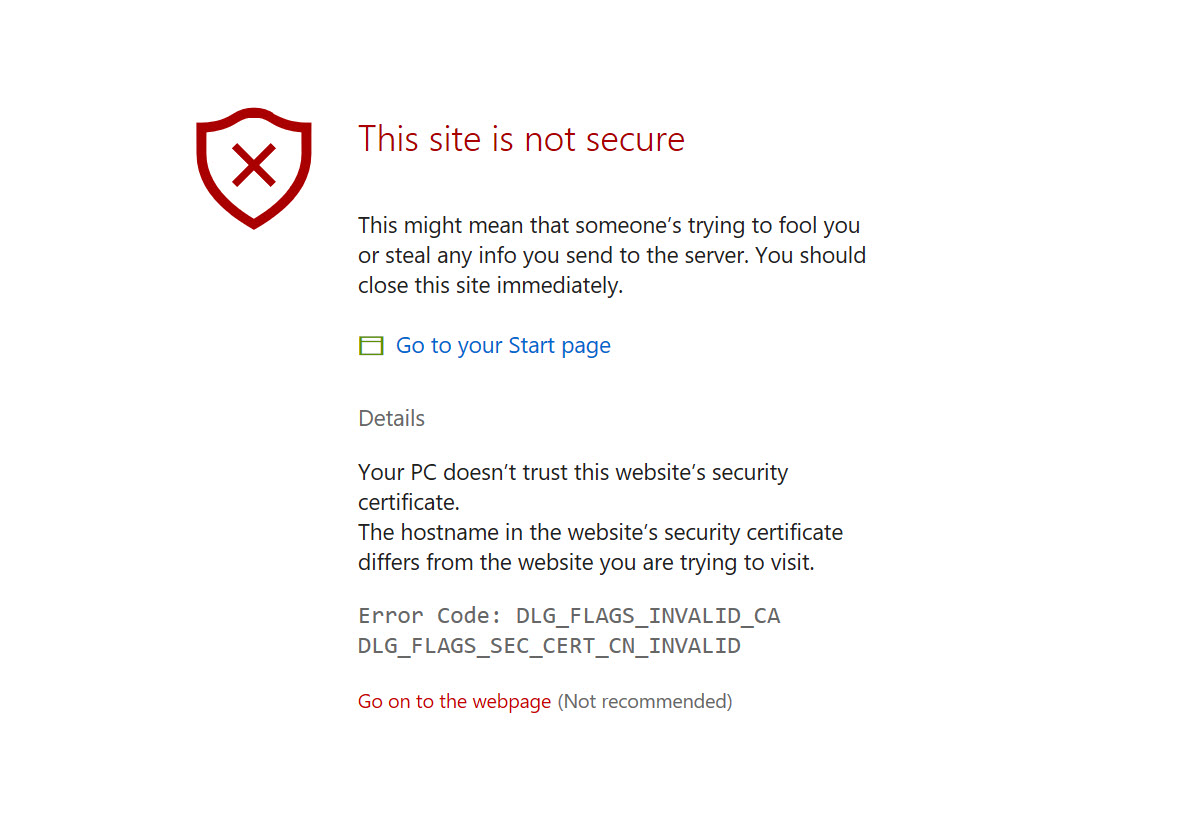
Once WAC is installed, which takes just a few seconds, connect to WAC from the Hyper-V host OS or other device that has network connectivity to the Windows Server 2019 VM. WAC supports Microsoft Edge and Google Chrome, although it might work in other browsers. Open a browser, type https://192.168.1.67 in the address bar, and press ENTER, replacing 192.168.1.67 with the IP address of your Windows Server 2019 VM. You’ll get a warning that the site is not secure because the browser doesn’t trust the certificate that was generated when WAC was installed. In our test environment, that’s OK. I’m using Edge, so to continue I need to click Details on the warning page and then Go on to the web page (Not recommended).
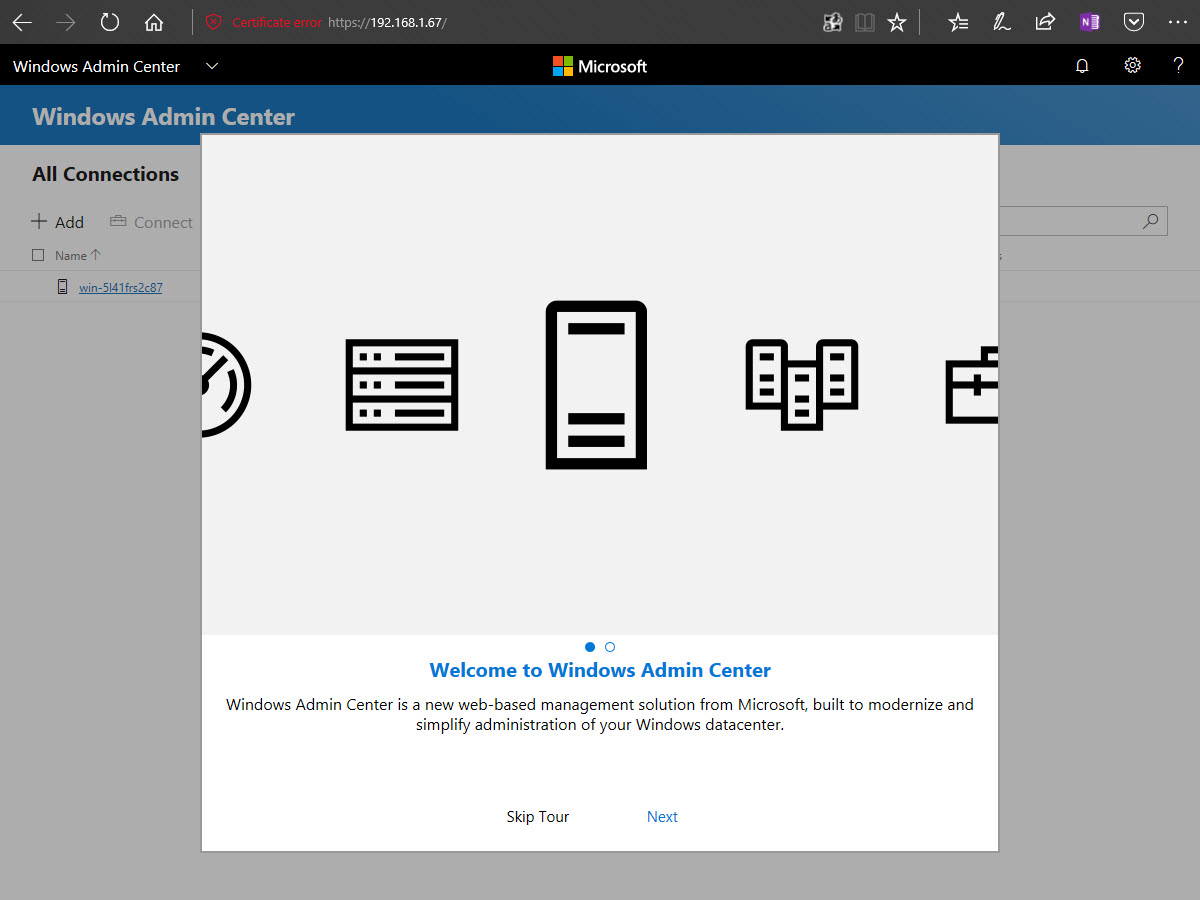
You will be prompted to log in to the gateway. Enter a username and password, in this case the administrator account in Windows Server 2019, and click OK. Click Skip Tour on the welcome screen. Under All Connections, you should see your Windows Server 2019 VM. Click on the server, enter the local administrator account for your Windows Server again in the Specify your credentials panel and click Continue. Now you have access to the WAC tools page for your Windows Server!