


How to Elevate Privileges in Windows Terminal
Windows Terminal is delivered by Microsoft as a packaged app through the Microsoft Store and on GitHub in MSIX format. But because of the way Windows Terminal is developed and packaged, there are some challenges when it comes to elevating privileges.
Users have called for Microsoft to allow tabs in Windows Terminal to optionally run with elevated privileges. But Microsoft has determined there is a risk, albeit small, that hackers could weaponize elevated tabs to compromise Windows. So, elevating privileges in Windows Terminal tabs isn’t on Microsoft’s roadmap. And that sounds fair enough.
Mike Griese, a software engineer at Microsoft working on the Windows Terminal and the Windows command line experience, says that because of the way Windows is architected:
“If you had an elevated commandline running in an unelevated window, an untrusted bad actor could execute an elevation-of-privilege attack by driving the unelevated windows that’s running the elevated commandline.”
And that has also led to conversations on developing a Unix-style sudo command for Windows to a dead-end. But for developers and system administrators who would like to elevate privileges in Windows Terminal, there are a couple of workarounds.
#1 Use RunAs to launch Windows Terminal
The first method for elevating privileges with Windows Terminal is to run the app as an administrator. This method only works if you are signed in to Windows 10 with a Protected Administrator account. I.e., an administrator account that is protected by User Account Control (UAC). Or an administrator account that isn’t protected by UAC (not recommended).
The first account created in Windows is always a Protected Administrator unless your organization has changed the default configuration. If you are signed in to Windows with a standard user account, launching Windows Terminal using ‘Run as administrator’ doesn’t work.
Here’s how to elevate Windows Terminal to run with administrator privileges:
- Sign in to Windows 10 using an account that is a member of the local Administrators group.
- In the search box in the bottom of the taskbar, type windows terminal.
- In the search results, make sure that Windows Terminal is highlighted and then click the arrow in the pane on the right to expand the options menu.
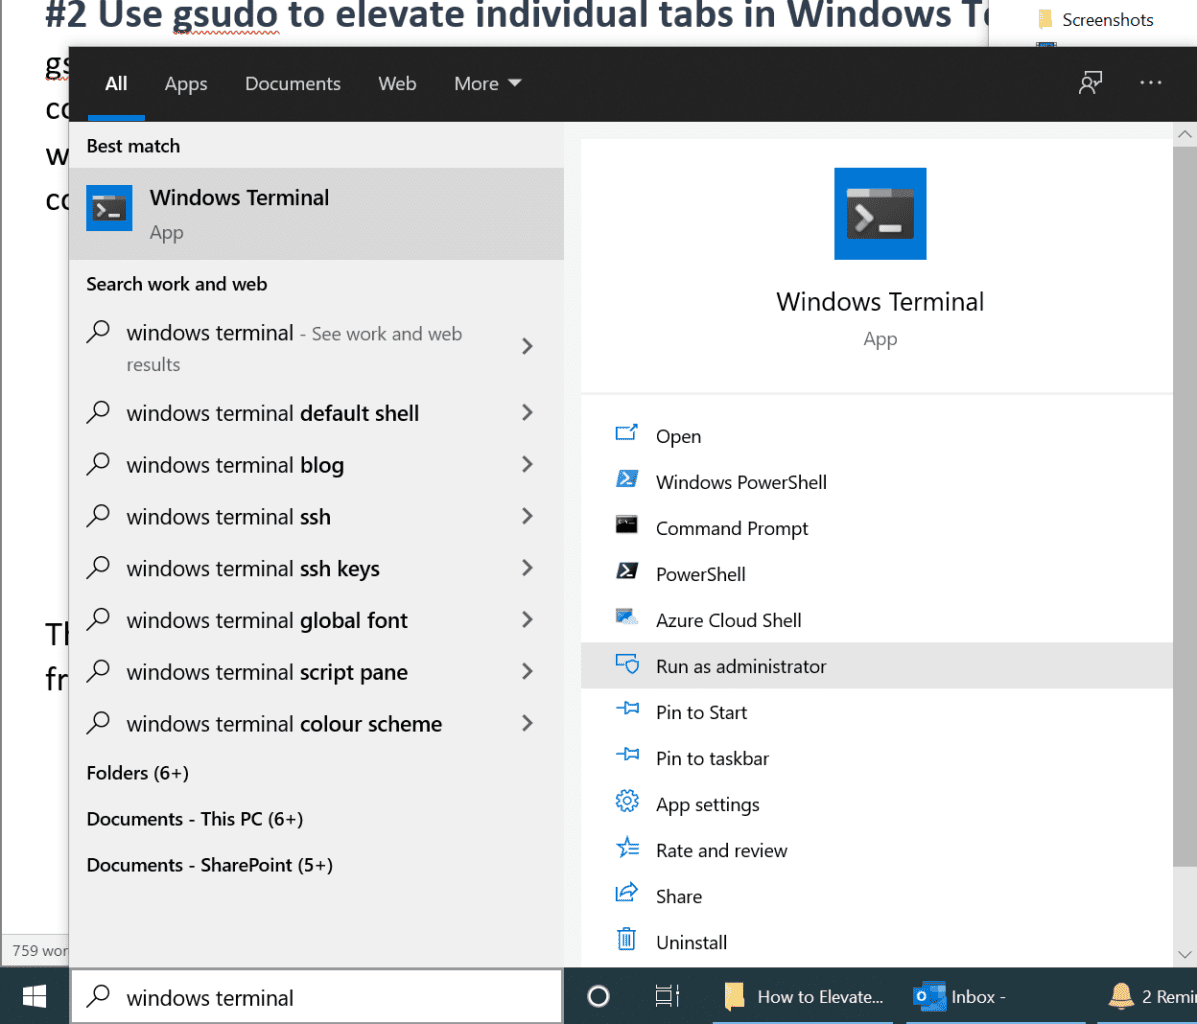
- In the list of options under Windows Terminal, click Run as administrator.
- If UAC is enabled, which is the default setting in Windows 10, you will be prompted to give consent to run Windows Terminal with administrator privileges. Click Yes to continue.
#2 Use gsudo to elevate individual tabs and commands in Windows Terminal
gsudo is an open-source project on GitHub that provides a sudo equivalent for Windows. It lets you run individual commands with elevated privileges; and elevate the current shell (tab) in a Windows Terminal window or in a new window. If you use gsudo to elevate the current shell (tab) in a Windows Terminal window, then you should take into consideration the security concerns that I outlined above.
- Open Windows Terminal. By default, you should be in a PowerShell tab. If not, open one.
- Open the gsudo GitHub page here.
- Scroll down to the section on Installation. Copy the PowerShell command line, paste the command into Windows Terminal, and press ENTER. You will see a warning about pasting a command that has multiple lines. You can safely ignore it and click Paste anyway.
- You’ll be prompted to create an alias ‘sudo’ for gsudo. This is optional but if want to create the alias, type y and press ENTER. UAC will require you provide consent to make this change.
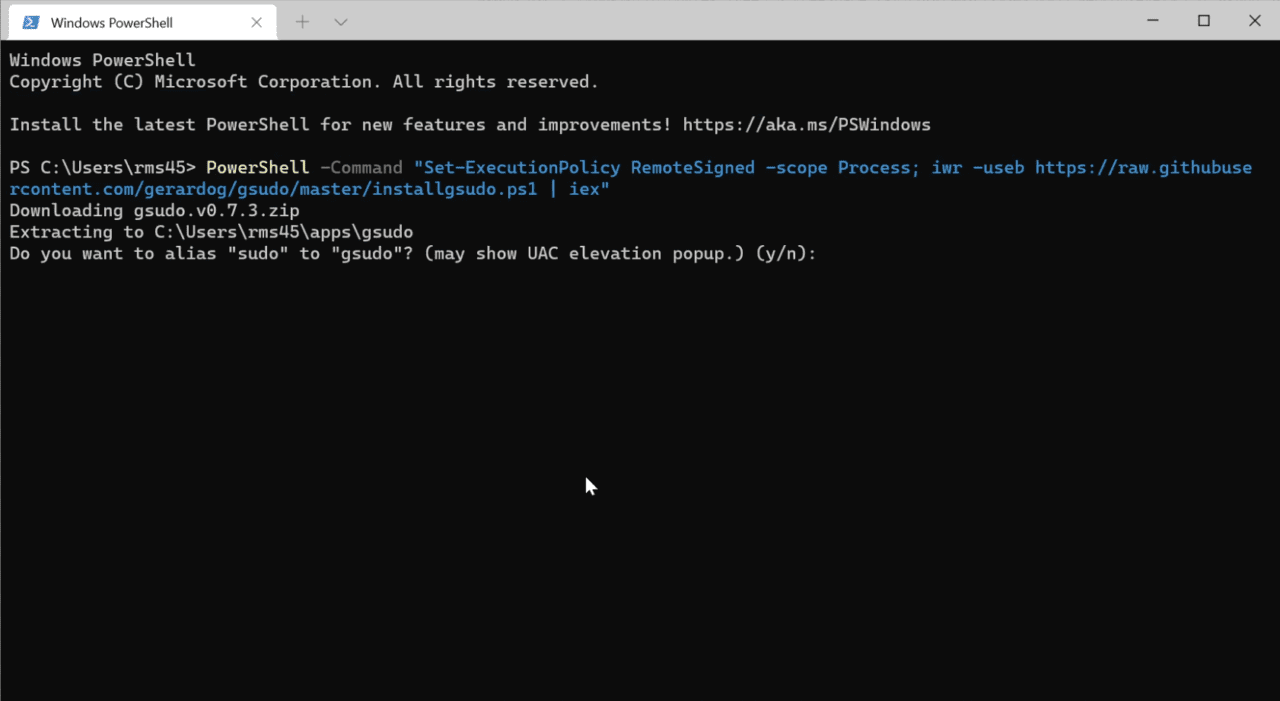
The command runs a script that downloads gsudo, unzips it, and places it on your PC so that you can access gsudo from the command line and Windows Terminal.
- Now close Windows Terminal and reopen it.
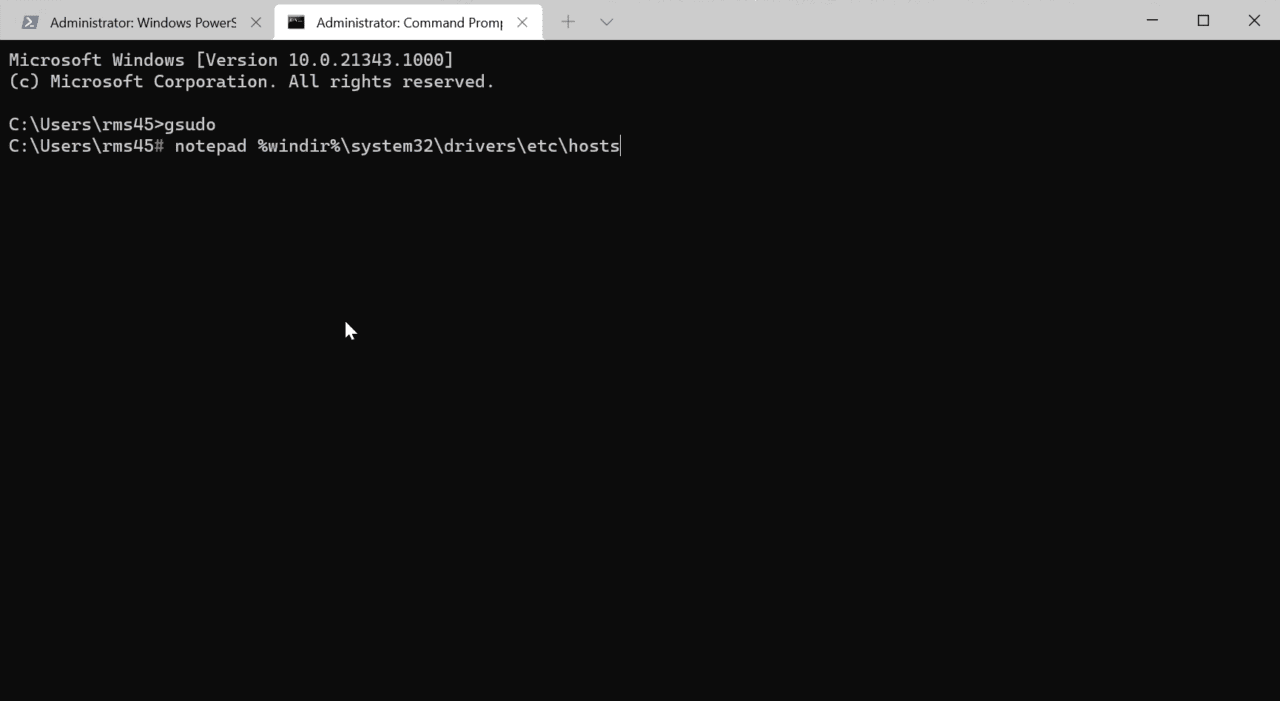
- Once Windows Terminal has restarted, you can use gsudo to elevate any PowerShell or command line tab. Just type gsudo followed by the command you want to run with elevated privileges, and press ENTER. In the example below, I use gsudo to open the hosts file.
gsudo notepad %windir%\system32\drivers\etc\hosts
- Or type gsudo and press ENTER to elevate all further commands in the tab. Note that the tab label is now prefixed with ‘Administrator’.
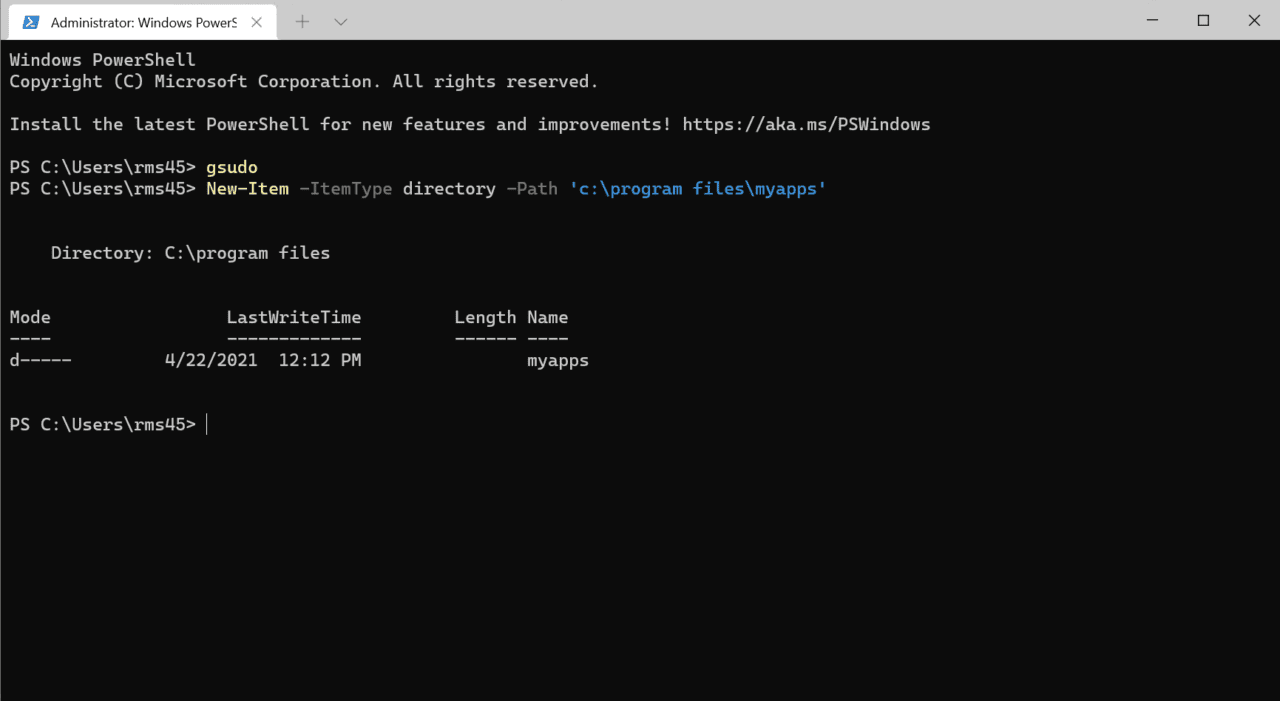
I’ve found gsudo to work reliably in command line tabs in Windows Terminal. But in Windows PowerShell or PowerShell 7 tabs, calling apps like Notepad with gsudo throws an error. But as providing you stick to running PowerShell cmdlets, like the one shown below, gsudo seems to work just fine.
New-Item -ItemType directory -Path 'c:\program files\myapps'
For a full description of what you can do with gsudo, check out the project’s GitHub page here.