


How to Connect to Exchange Online Using PowerShell

Exchange Online PowerShell is a command-line tool that allows you to manage your Exchange Online mailboxes and users. It can be used to perform a variety of tasks, such as creating and managing mailboxes, configuring mail flow rules, and managing user permissions. In this guide, we’ll show you how to install and connect to Exchange Online PowerShell. If you’re an IT Pro with Microsoft 365 administrative duties in the Exchange Online service, this guide is for you!
How to install and connect to Exchange Online PowerShell
As an IT Pro, your Microsoft 365 admin duties likely cover Exchange Online. Although a large majority of these tasks can be accomplished using the Exchange Admin Center website, there are great efficiencies available via the command line, especially scripting!
Prerequisites
You can connect to Exchange Online like any other Office 365 service by using the standard Connect-* cmdlet. However, there are a couple of prerequisites to keep in mind when installing and utilizing Exchange Online PowerShell.
There have been several versions of these modules over the years. Version 2.0.5 and earlier are referred to as the Exchange Online PowerShell V2 module (EXO V2). Version 3.0.0 and later is known as the Exchange Online PowerShell V3 module (EXO V3).
We will focus on this newer module as it supports multi-factor authentication (MFA), it includes performance improvements over its predecessors, and it’s also more secure! Plus, it is supported on the latest PowerShell Version 7.x versions. In addition, a host of newer cmdlets (EXO-*) enable IT pros to be faster and more productive when getting the job done.
Installing the Echange Online PowerShell module with ‘Install-Module’
As I stated, I will focus on the latest ‘V3’ module for the rest of this article. Based on what steps you’ve previously completed on a specific computer, there is the potential to perform between 2 and 3 main steps. I’ll go through the steps individually so you can jump right in based on your environment.
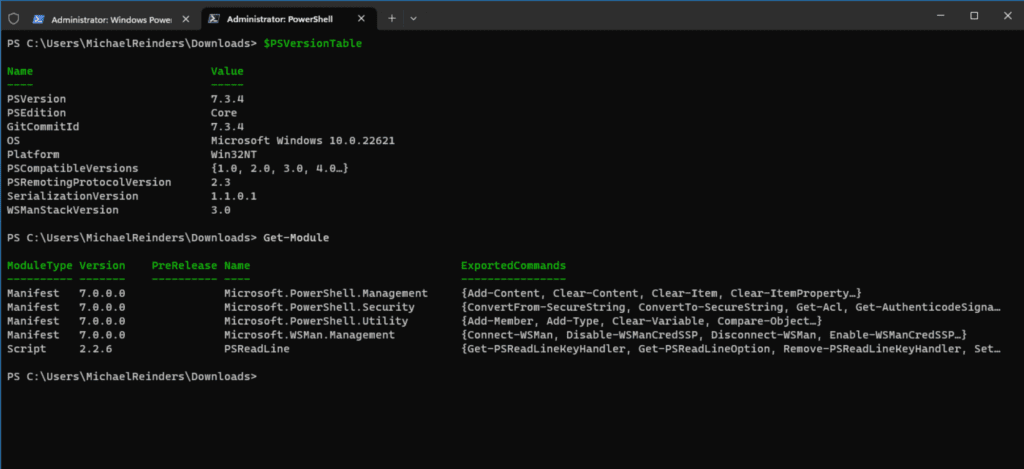
I am working on a Windows 11 22H2 virtual machine (VM) in my Hyper-V lab. This machine is Azure-AD joined to my Microsoft 365 Developer tenant. This will allow me to show you the procedure and also include some basic commands at the end of this article to demonstrate how it operates.
I am using the latest version of PowerShell, version 7.3.4, at the time of writing. This will enable me to install the Exchange Online PowerShell module. All I need is a PowerShell window!
- The first step we should follow is to set our execution policy. We need to change the policy setting with the Set-ExecutionPolicy cmdlet:
Set-ExecutionPolicy RemoteSigned
- Next, run the Get-Module command to check what modules are installed.
Get-Module
- I have only the base set of modules installed on my computer. So, I need to install the ‘ExchangeOnlineManagement‘ module. Let’s do this with the Install-Module command:
Install-Module -Name ExchangeOnlineManagement
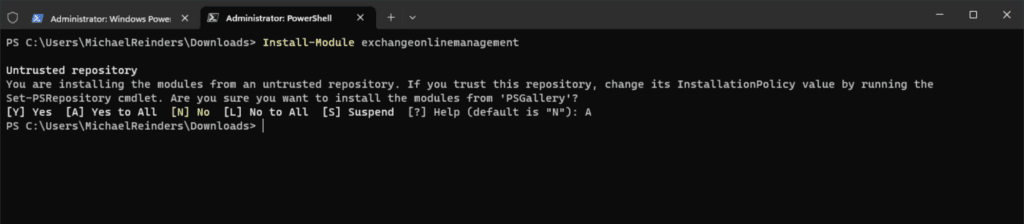
Note: Because I am using an ‘untrusted repository’, I need to specify that I want to download this from the ‘PSGallery’ repository. I entered ‘A‘ to choose ‘Yes to All‘.
Loading the module with ‘Import-Module’
Let’s now perform the next main step, which is loading the module.
- We can import the module using the Import-Module command.
- Next, we can run another Get-Module command to get a confirmation.
Import-Module ExchangeOnlineManagement
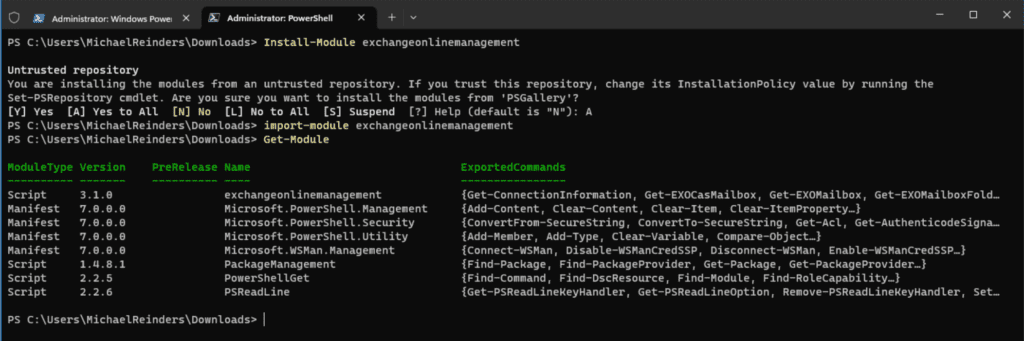
There we go, we have now confirmed the module is ready to go!
Connecting to your Exchange Online tenant with ‘Connect-ExchangeOnline’
The final step to complete in order to gain access to your tenant’s Exchange Online information is to make the connection using credentials that allow said access. There are several role levels in Azure that will allow this. For these purposes, I will be using my Global Administrator role as part of my Developer tenant. This account role, incidentally, gives me full access to Azure AD and all Microsoft 365 services via PowerShell.
- Let’s use the Connect-ExchangeOnline cmdlet below:
Connect-ExchangeOnline -userprincipalname
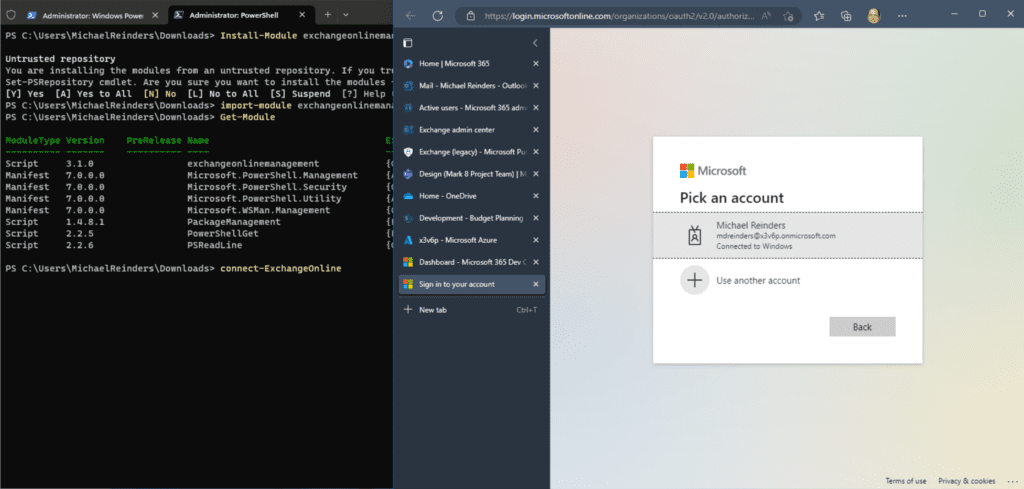
- It opened a browser authentication window asking for my username and password. This is where I can log in with my Global Administrator account.
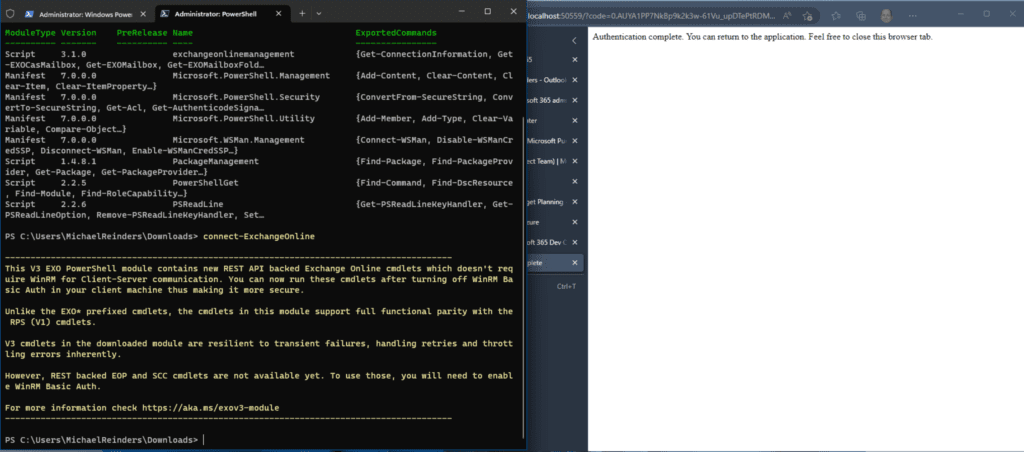
Excellent! You’ll get some yellow text describing the ‘EXO V3’ module and a documentation link to get more info.
We now have the ability to run PowerShell cmdlets against our Exchange Online tenant. I will go over some basic/essential commands you can get started with next.
Note: If we are always keeping security in mind, it is best to end your session after you are done. Disconnecting your session is possible by running the following command before closing your shell.
Disconnect-ExchangeOnline
Easy as pie!
Basic Exchange Online PowerShell commands
Once you’re connected to the Exchange Online Version 3 Powershell module (EXO V3), you can start to run Exchange Online cmdlets. Let’s first list all the mailboxes in our tenant.
Because this is a developer tenant, the list is rather small. Be advised that in normal, larger environments, the output won’t be as useful. I’ll get to that in a bit. Plus, we have various PowerShell articles on Petri that can assist you.
Instead of using the ‘legacy’ Get-Mailbox cmdlet (scheduled for deprecation), let’s show you the newer commands in EXO V3. Here, I’ll use the Get-EXOMailbox command then ‘pipe’ (|) it to the ‘ft’ switch (same as ‘Format-Table’). Using the ‘Autosize’ switch also auto formats the column widths to match your console window.
Get-EXOMailbox | ft -Autosize
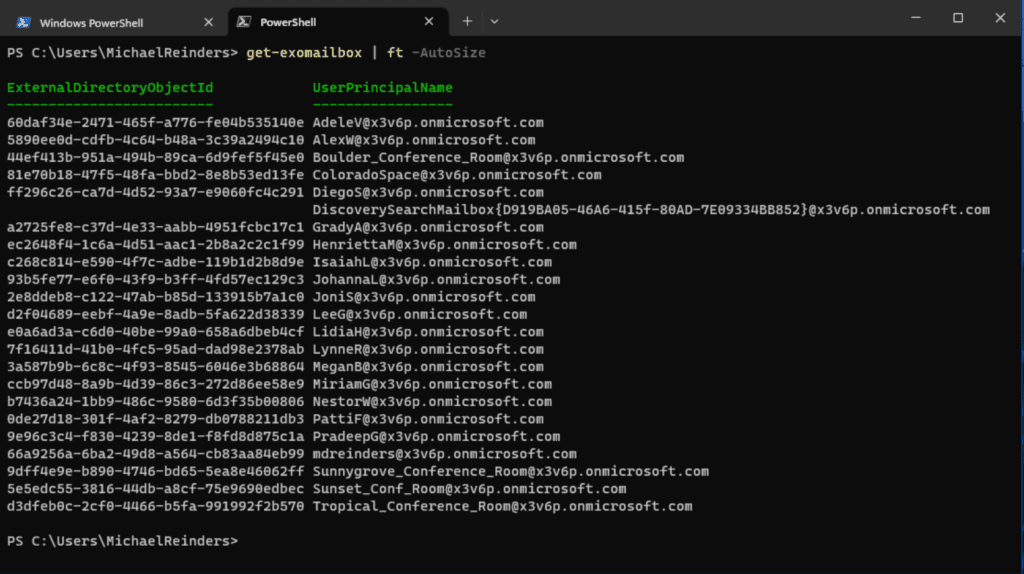
By default, we get the ‘ExternalDirectoryObjectId’, the ‘UserPrincipalName’ (usually the email address), and the mail alias. Let’s ask it to give us some more info.
Get-EXOMailbox | Select DisplayName,PrimarySMTPAddress,Alias
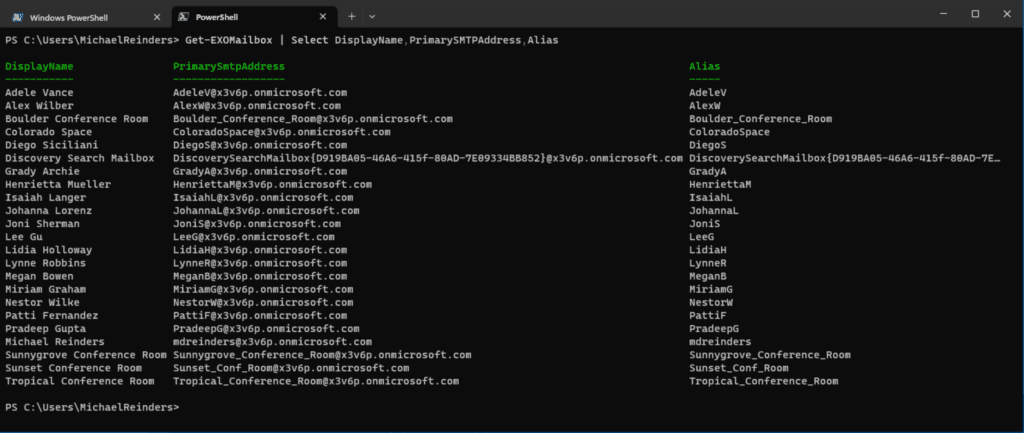
This gives us some slightly more useful info, right? Now, let’s get some mailbox size statistics with the Get-EXOMailboxStatistics command. Here, I’m running that first command to gather all the mailboxes, then piping that into ‘Get-EXOMailboxStatistics with its default attributes, then using ‘ft’ again to make it pretty.
Get-EXOMailbox | Get-EXOMailboxStatistics | ft
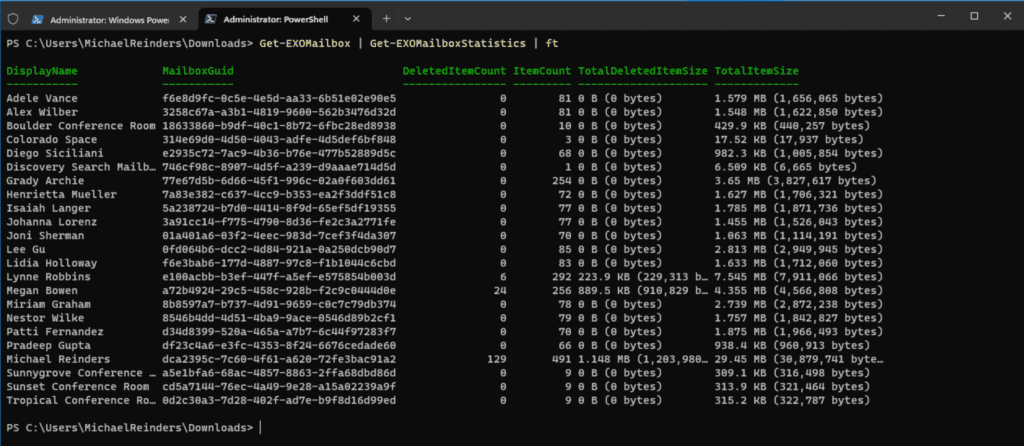
This gives us a decent amount of information on our organization’s item count and mailbox size. There are many other parameters you can use to get specific attributes from your accounts and mailboxes.
How to connect to Exchange Online via PowerShell with MFA?
Thankfully, there’s nothing special you need to do to connect when your account is protected with multi-factor authentication (it better be!). When you enter the command and you’re using PowerShell 7 or higher, you’ll see the browser-based authentication screen appear in my screenshot above.
If you happen to be using PowerShell 5.1 or lower, you will see the standard modern authentication window open where you will enter your password and fulfill your MFA request.
Can you to connect to Exchange Online PowerShell on a Mac?
There are multiple ways to install PowerShell on a Mac, but the most straightforward is to use the direct download links from Microsoft’s website. Starting with version 7.2, PowerShell supports Apple Silicon Macs.
Once you’ve installed PowerShell on your Mac running macOS 11 Big Sur or newer, you can use the same instructions provided above to connect to Exchange Online on macOS.
Additional benefits of using Exchange Online PowerShell
Exchange Online PowerShell is a valuable tool for any IT Pro/administrator who wants to have more control over their Exchange Online environment.
Here are some additional benefits of using Exchange Online PowerShell:
- It can be used to automate processes with Powershell scripts, which can save you time and effort with scripts.
- It can be used to troubleshoot problems, which can help you to resolve issues more quickly.
- It can be used to customize your Exchange Online environment, which can make it more efficient and user-friendly.
If you have any questions or comments, please feel free to leave a comment below. Thank you for reading!