


Guide: How to Setup a Microsoft Bookings Site
I’m going to bet you probably haven’t heard of Microsoft Bookings. Would you like an alternate infrastructure to take care of scheduling appointments with your customers and users over the phone? Microsoft has just the thing for you! A website service called Bookings. The easy-to-use, customizable webpage interface provides your users the ability to find available times to book appointments with relevant IT staff in your organization 24/7. Microsoft Bookings makes scheduling and managing appointments a piece of cake. The included calendar integrates with Outlook to optimize your staff’s calendars and schedules. It also allows your users or customers the flexibility to book a time that works best for them. Let’s learn more about MS Bookings and show you how to get started!
Initial Configuration
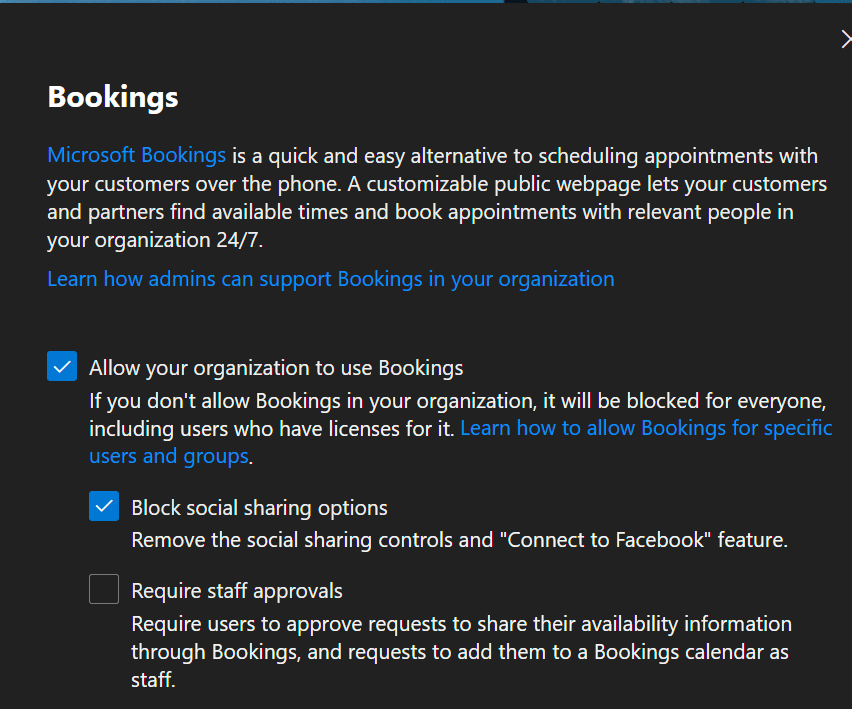
First, let’s make sure Bookings is enabled in your organization. Follow these steps to verify the service is turned on.
- Browse to the Microsoft 365 admin center -> https://admin.microsoft.com/ and login as an Admin.
- Navigate to Settings -> Org settings -> Bookings.
- Make sure the ‘Allow your organization to use Bookings’ option is checked.
- You can read the other two options and decide if you want to use them or not.
Automated notification emails give you efficiency and avoid missed appointments on both sides. Your company also benefits by saving time with a reduction in repetitive scheduling tasks. With built-in flexibility and the ability to customize to your needs, Bookings can be designed to fit the situation and needs of multiple parts of your organization. You could create a Bookings site for your IT staff to handle your users’ technology needs, for scheduling HR appointments with your company’s employees…you could even offer sign-up scheduling to teach the Klingon language to your users and their friends. Qapla’!
You can also make your organization’s meetings virtual with online meetings via Microsoft Teams. Each appointment you book includes a unique meeting link that is sent to attendees. They can join via web browser, phone dial-in (if your org offers this capability), or the Teams app. Bookings is also available as an app in Teams, allowing you to create Bookings calendars, assign staff, and schedule new and manage existing appointments without having to leave Teams. There are more information links at the end of this post that describe the requirements for the Bookings app in Teams.
Primary Components
Bookings has three primary components:
- A booking page is where your customers or users schedule appointments with your staff who provides the service in question. This web-based page can be shared via a link, on your Facebook page, and also as a link embedded on your website.
- A web app contains web-based pages where Bookings calendar owners and admins within your organization can define appointment types, staff schedules, availability, set business hours, and customize how appointments can be scheduled. You’re afforded the versatility and ability to customize the Bookings calendar experience to fit your needs and the needs of your specific company dynamic.
- A business-facing mobile app is where Bookings calendar owners and admins can see all of their appointments, access customer information, and make manual bookings while on the go!
Bookings Calendar Setup
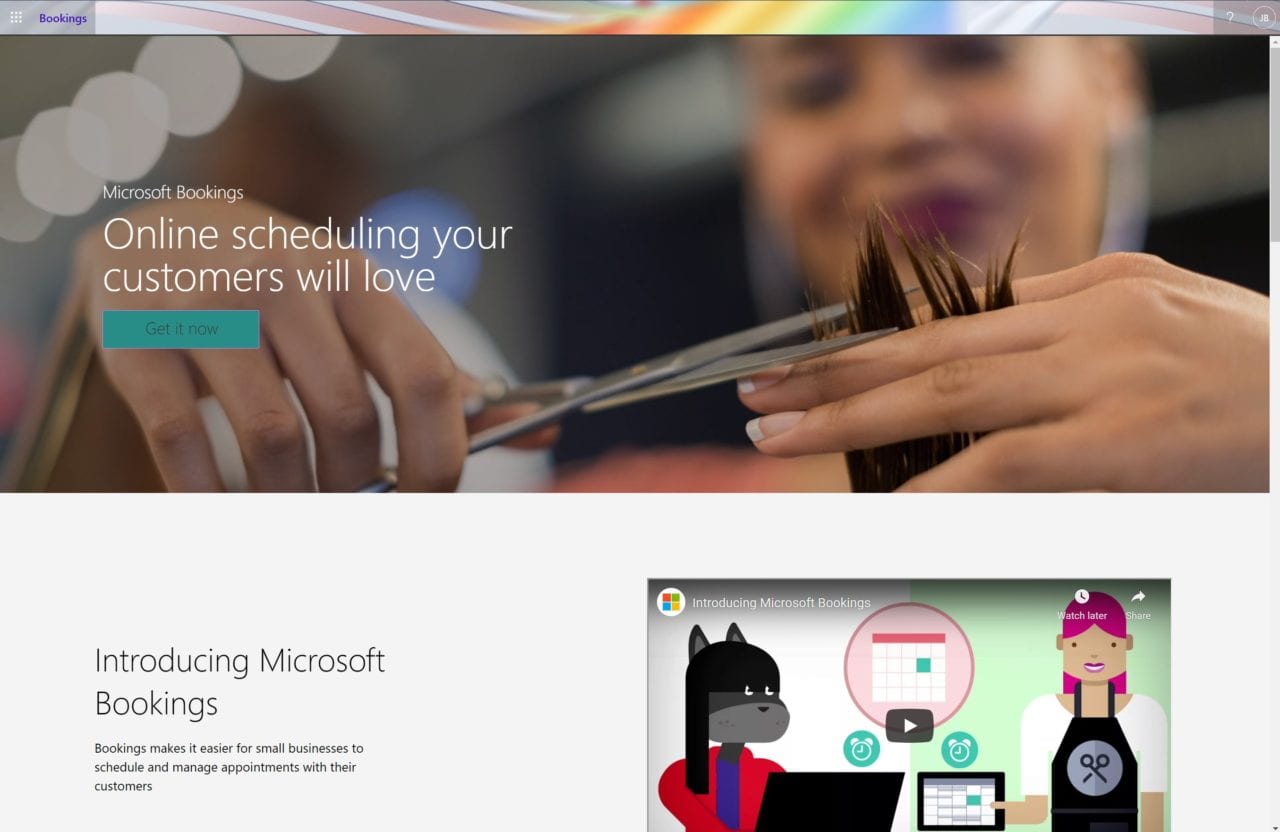
Once you have verified that you’re provisioned for Microsoft Bookings, you can perform the initial setup via this link -> Get started!
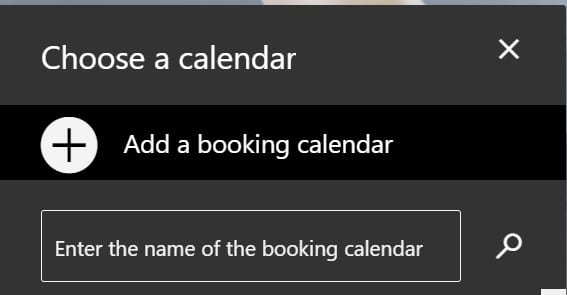
Click ‘Get it now’ and enter the name of the new ‘Business/Calendar’
Then, enter the ‘business name’ and ‘business type’
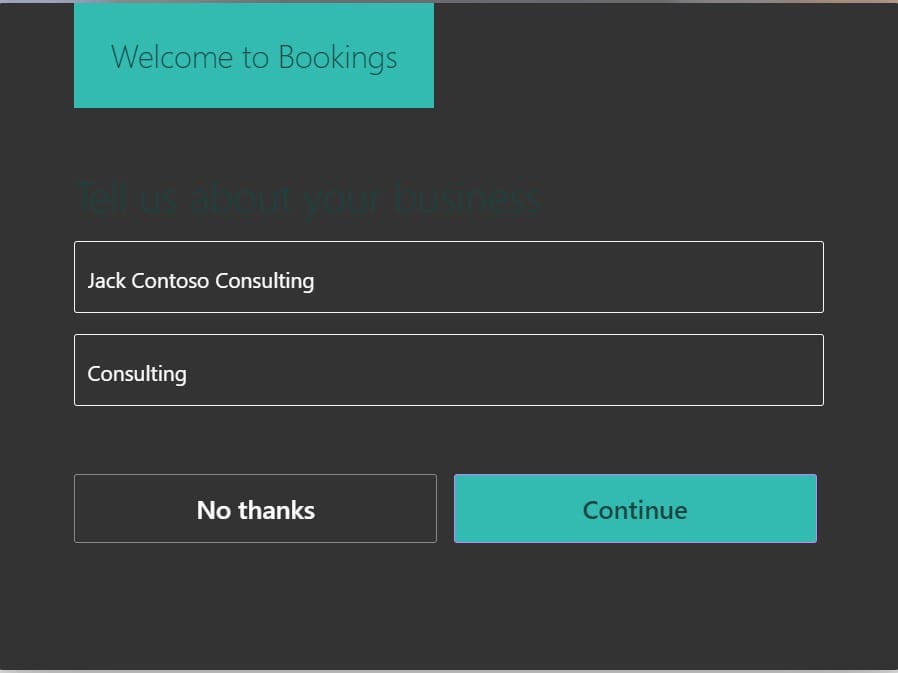
A few moments later and voila! You have your very own MS Bookings site!
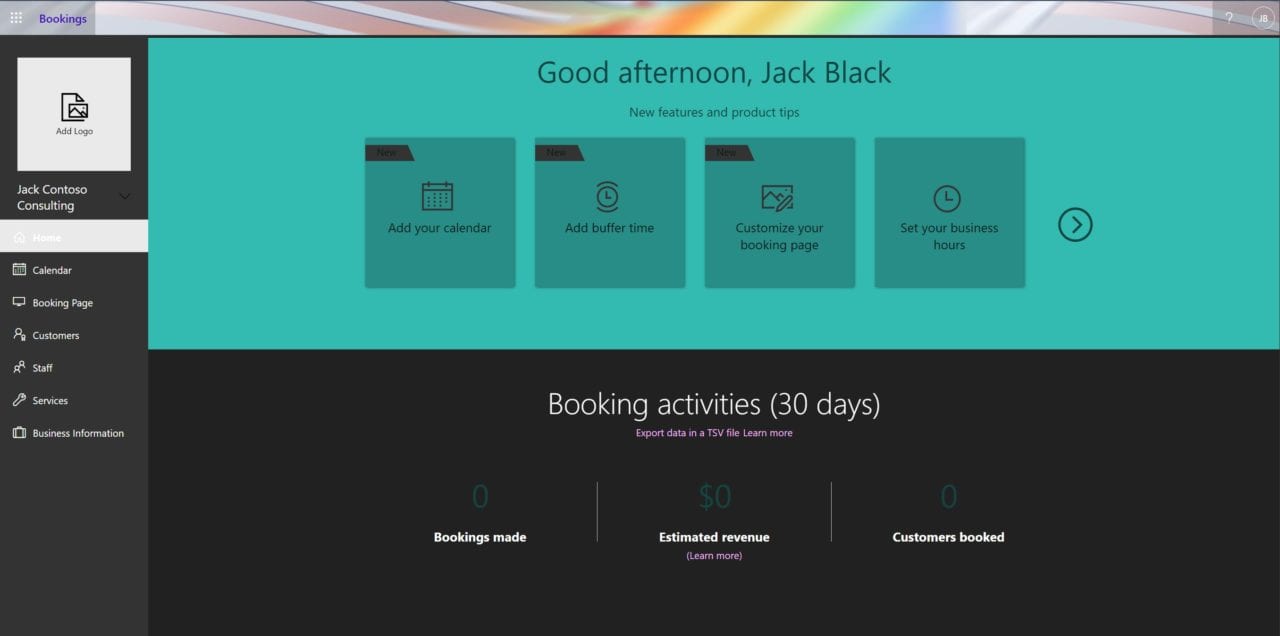
Booking Page Creation
Alright, now what? Thankfully, it’s pretty intuitive on how to proceed. Let’s get going! First, click on the ‘Booking Page’ link on the left.
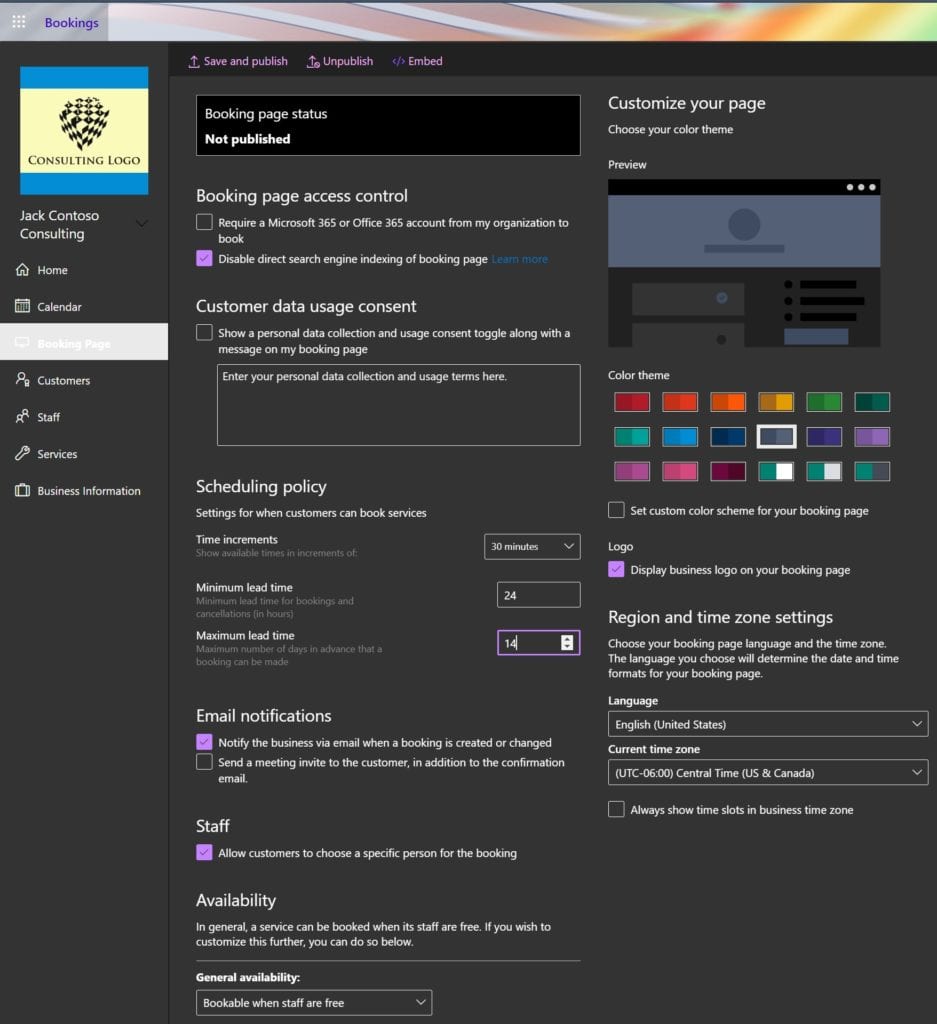
You can read through and understand pretty much everything on this page. Choose if you require a M365 or O365 account to book appointments, show a personal data collection and usage consent toggle for your customers, set your Scheduling policy, enable email notifications, and even choose the color theme and company logo for your booking page. You can see you have a lot of customization available to you. When ready, click ‘Save and publish’ at the top!
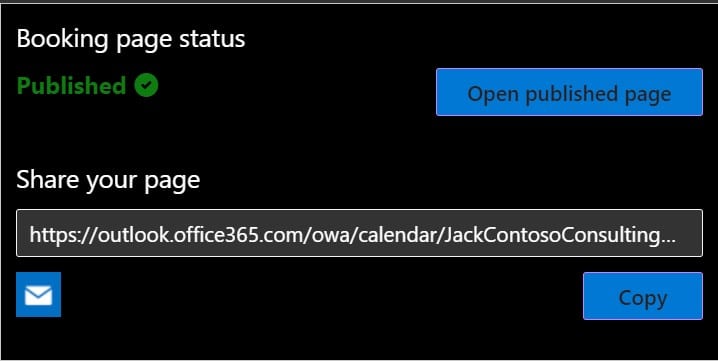
That’s it! We now have a booking page to send to our users/customers.
Adding Staff
Now, we’ll get back to booking an appointment in a little bit. First, we have some initial setup to continue with. We need to add our Staff, add the Services we will be offering, and enter in our initial Customer (User) base. Let’s start with our Staff!
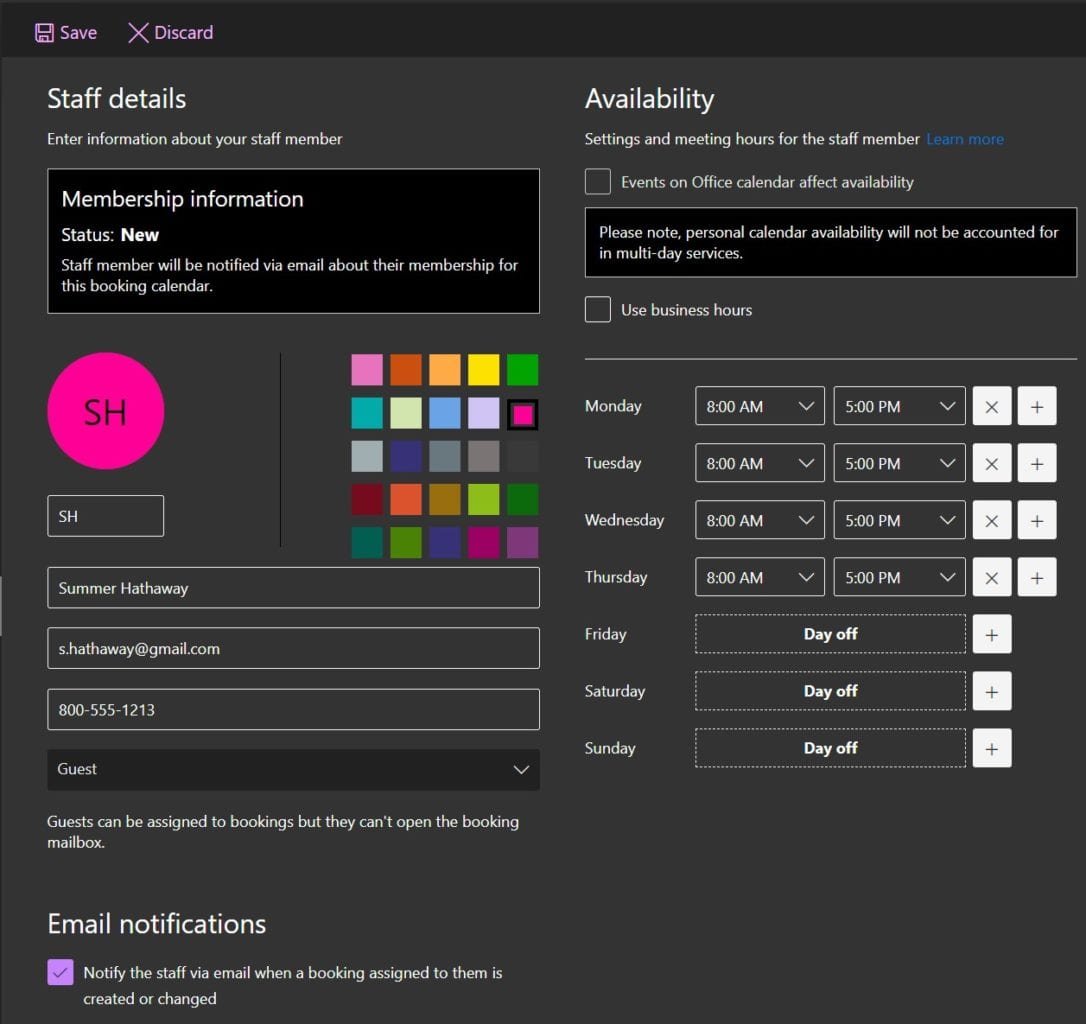
On the left, click on the ‘Staff’ category and click the ‘Add staff’ button. We’re going to add our first staff person, Summer Hathaway. We’ll choose the basic contact info, set her hours (Lucky…she gets Fridays off!), and click ‘Save.’
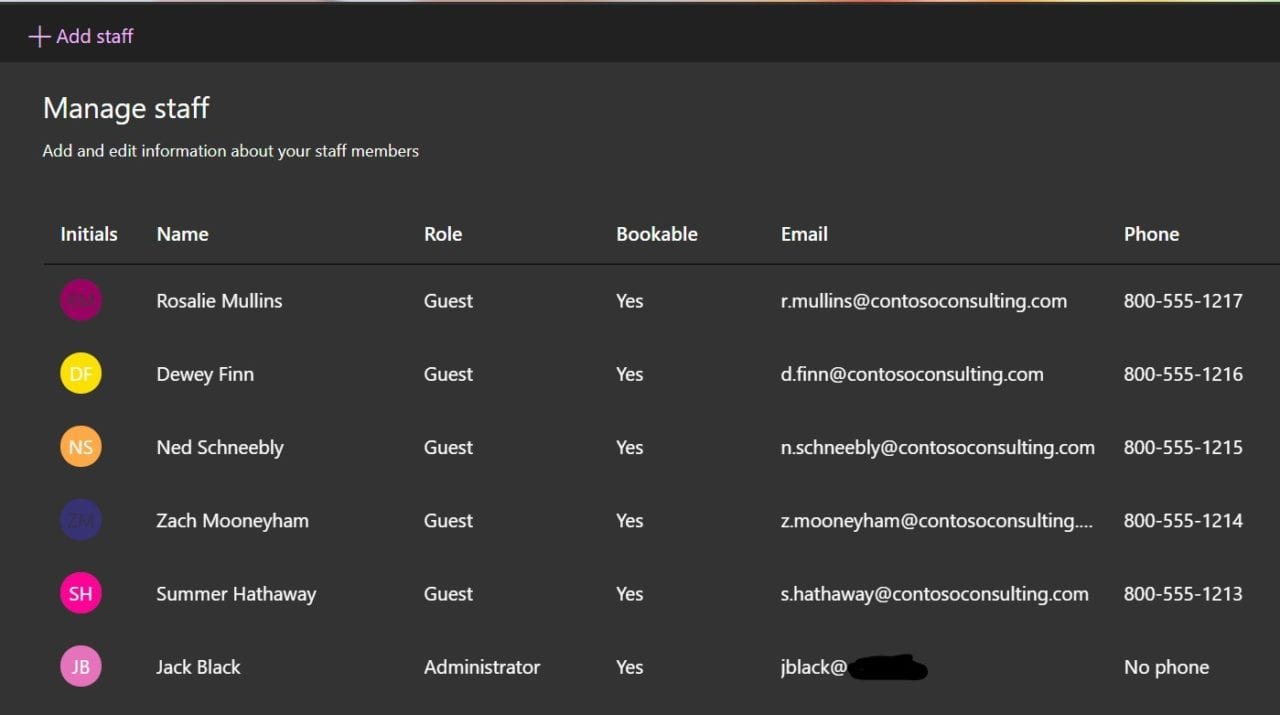
I’ll go ahead and add some more staff…and here’s our complete list. (Of course, you can always remove and add staff per your needs at any time…)
Adding Services
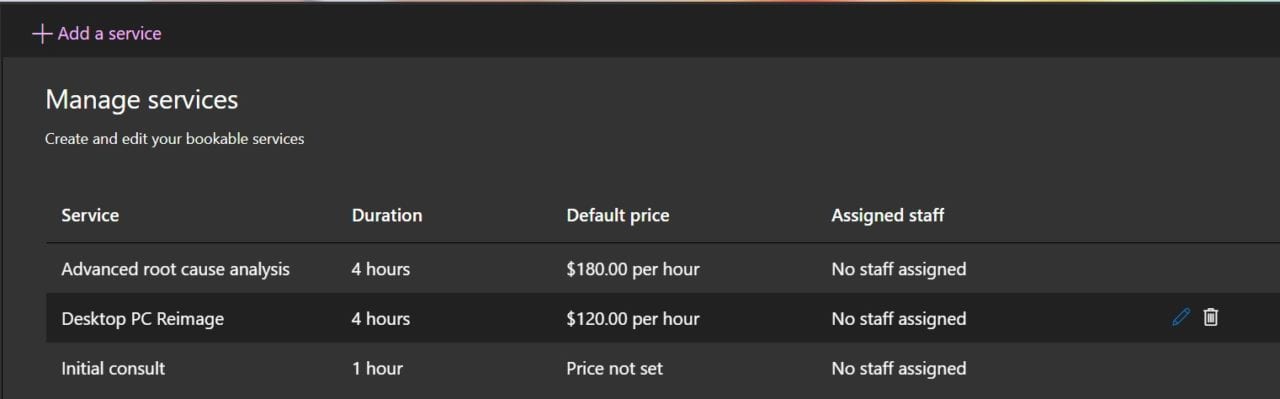
Now, onto Services. Click ‘Services’ on the left.
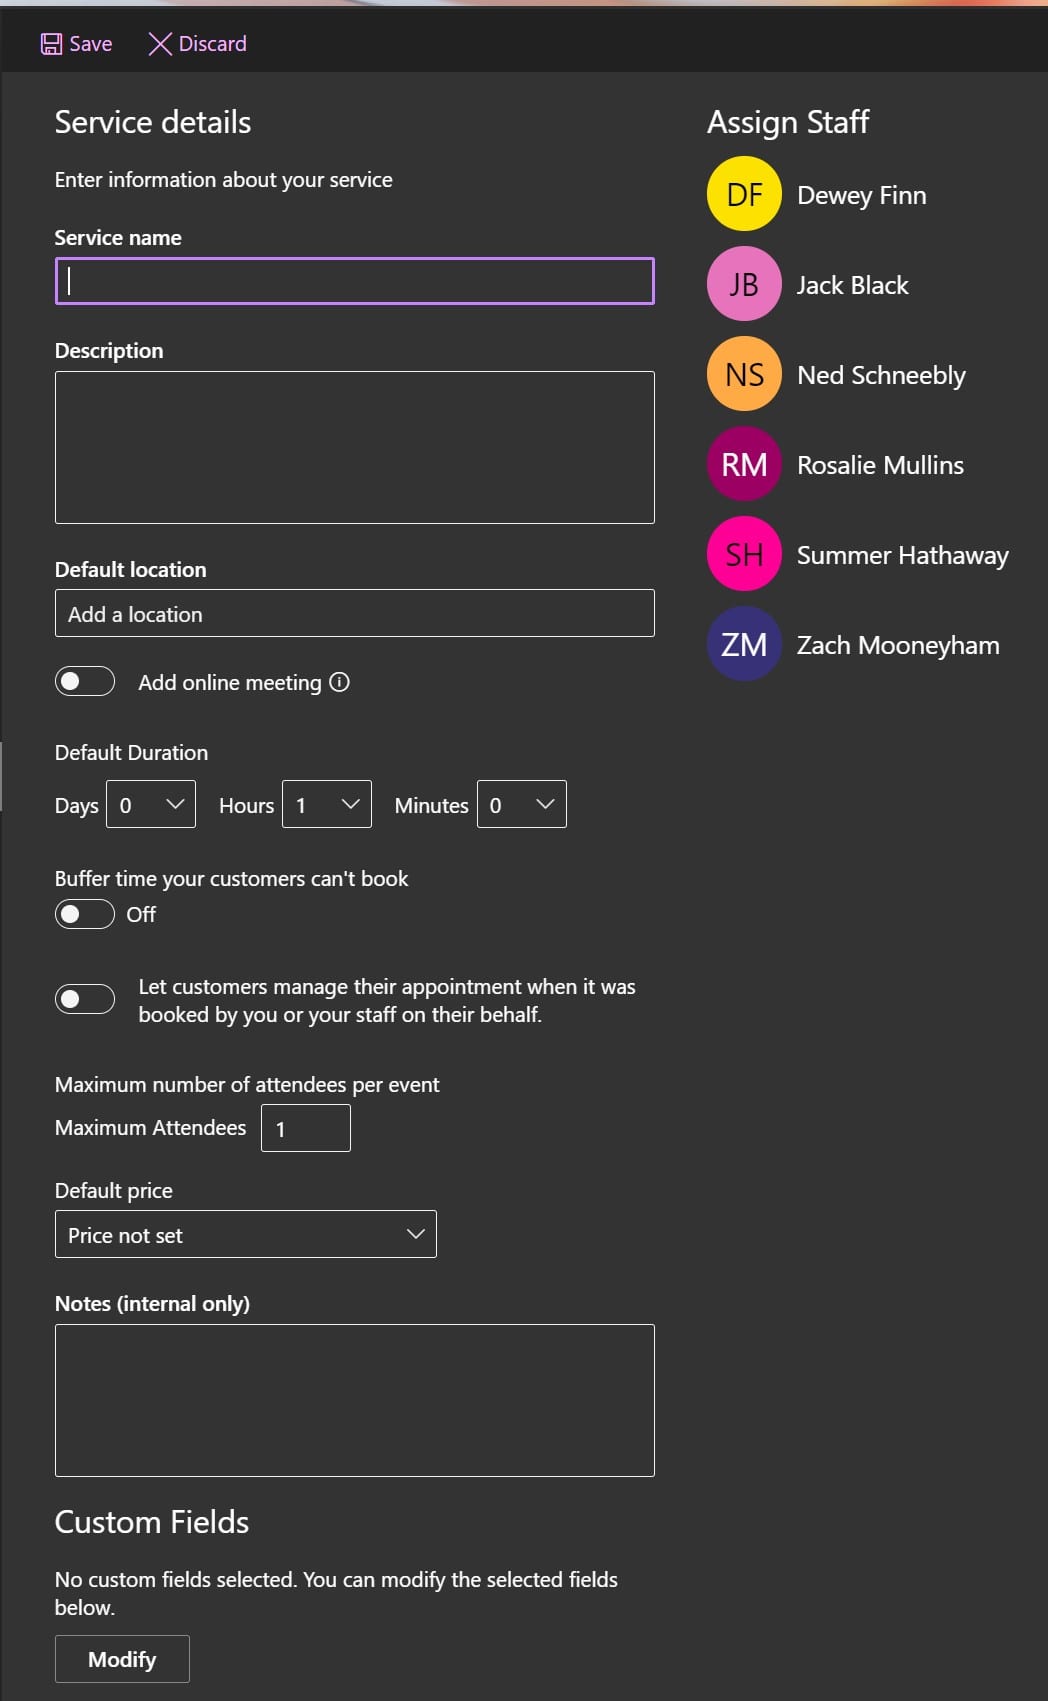
You can fill in the details. Here is the initial set of services I created for our Bookings site.
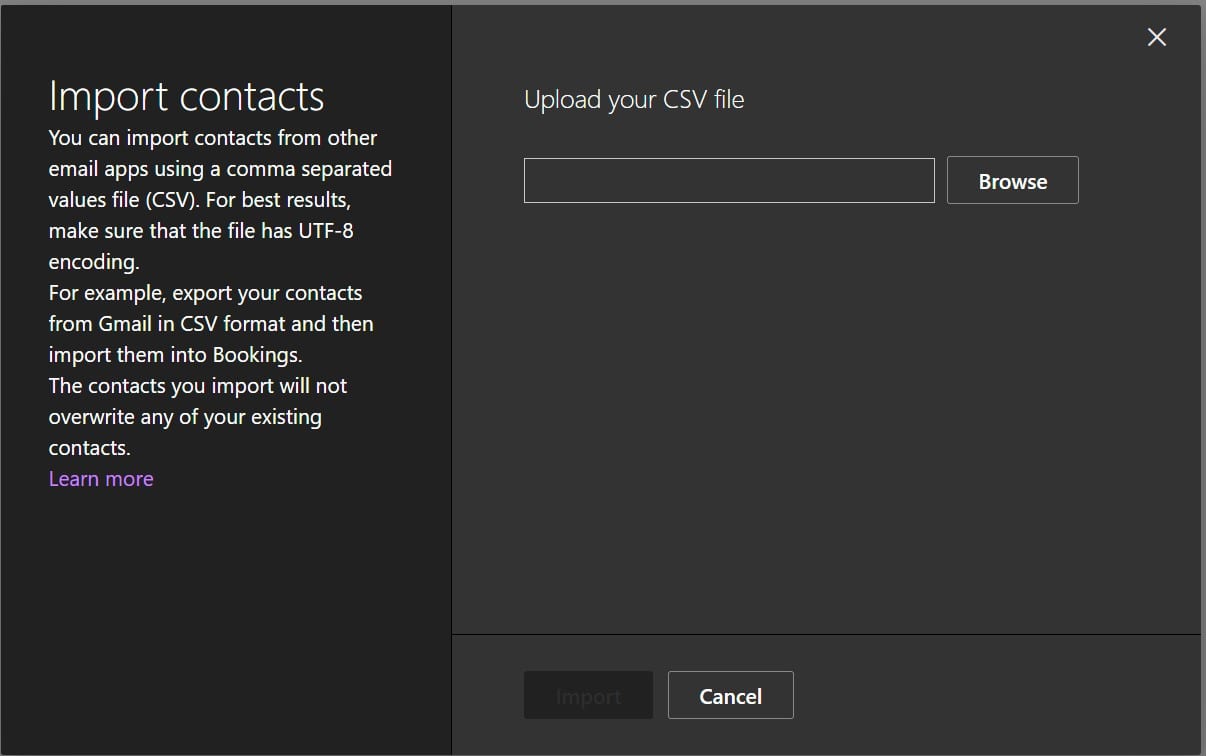
Adding Customers
We just need to enter in our Customer listing. Click ‘Customers’ on the left. Normally, you would then click ‘Import customers’ and browse to a CSV file you’ve exported from your customer database.
I’ve added a customer or two manually using the site. Let’s get to a Booking!
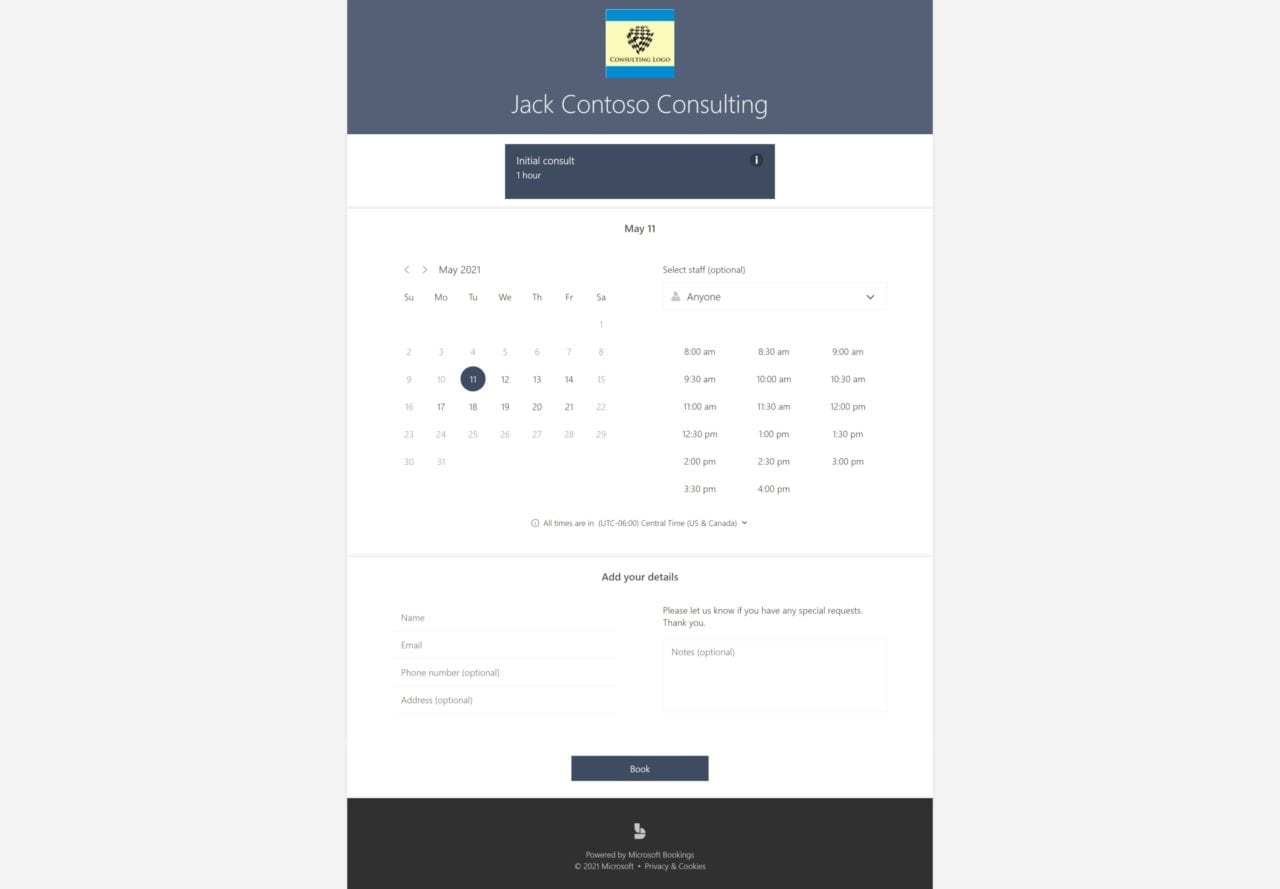
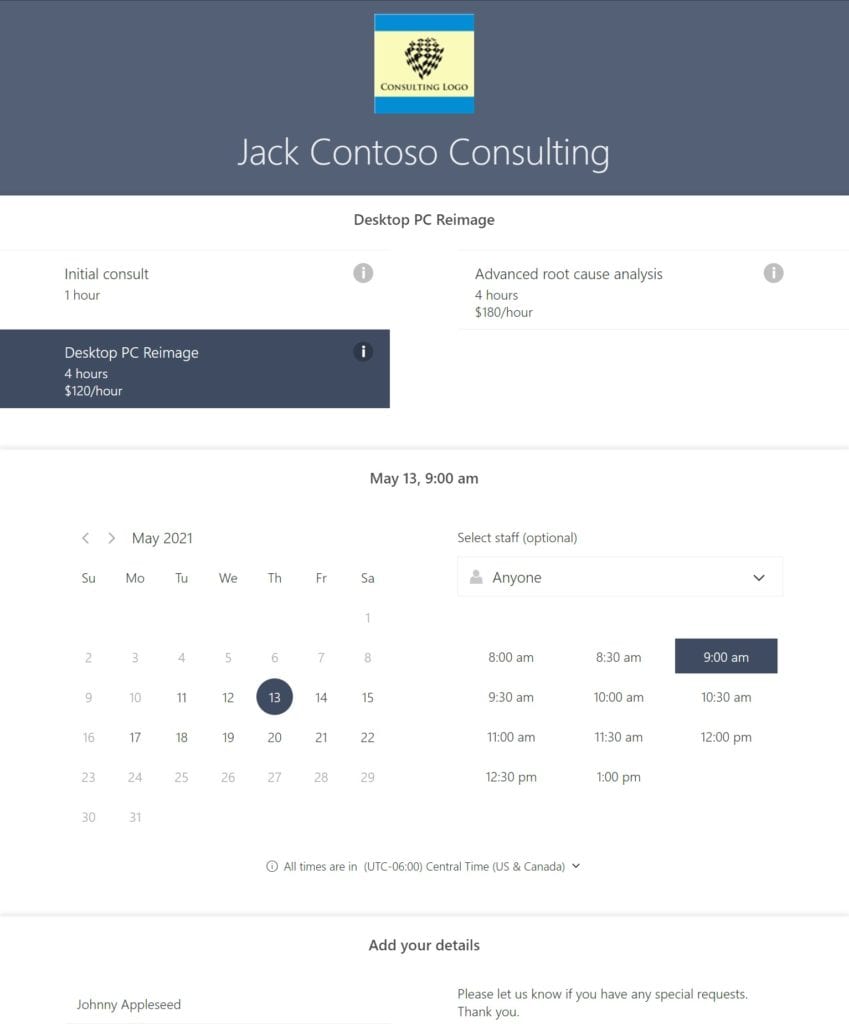
Book a Service
I clicked on the Booking page link from earlier in this post and have filled out my requested service and details.
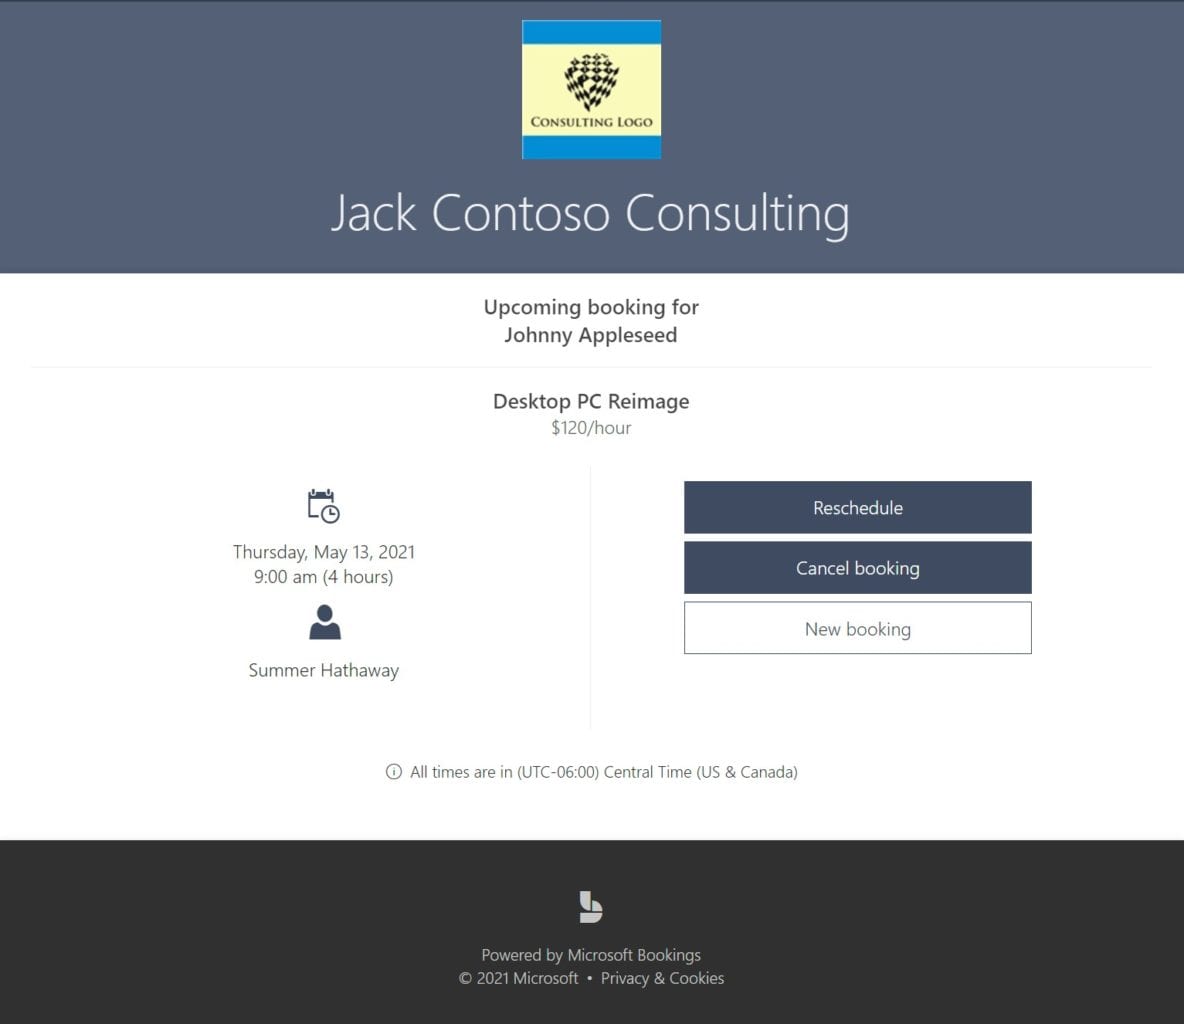
I clicked the ‘Book’ button at the bottom of the webpage and a confirmation email was sent. Here is the confirmation on the Bookings website.
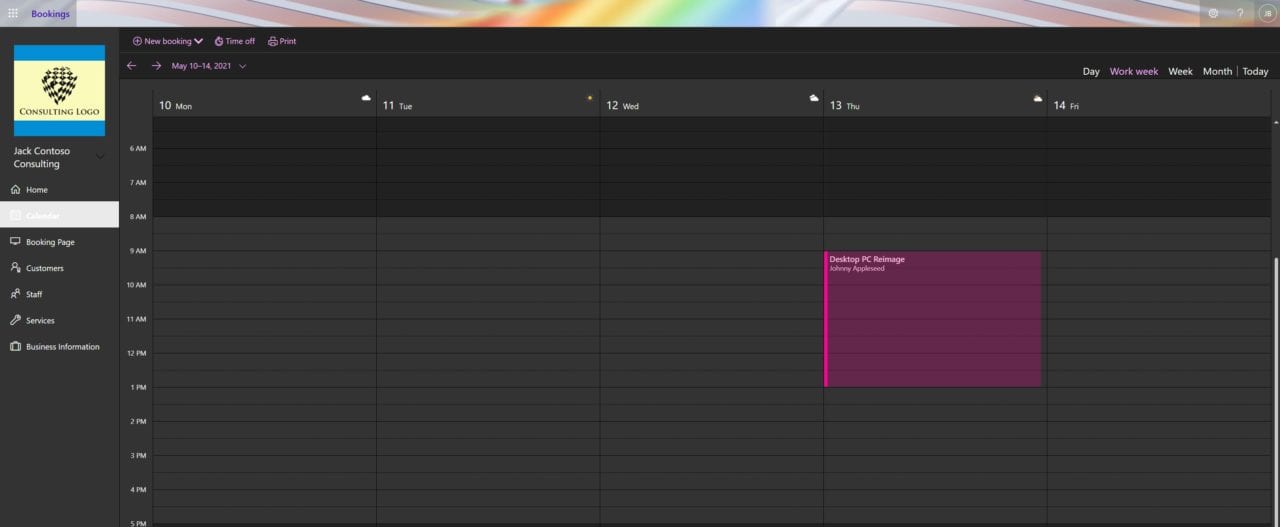
You can click on the ‘Calendar’ item on the left to see our new booking.
Conclusion
I hope you gained a solid foundation of what Microsoft Bookings has to offer you and your company. As you can see, it is straightforward to get your initial site up and running with your business hours, your staff (and their assigned hours), the services you offer, and a public webpage link that allows your customers and users to book their appointment from anywhere! However, there is a lot more content and options available with Microsoft Bookings than covered in this introductory post. If you’re interested in a more comprehensive blog post, please let me know in the comments!
To read more information about using the Bookings app in Microsoft Teams -> Click here!