Creating Recipient Filters in Exchange 2007
In previous articles I’ve noted that when you view the Exchange Management Console’s Recipient Configuration | Mailbox container, Exchange shows you up to a thousand mailboxes, and these mailboxes can be spread across the entire Exchange Server organization. Filtering can be really handy in helping you to locate specific mailboxes, but it’s real power comes in its ability to be used in the Exchange Management Shell. In this article, I will show you how it’s done.
Why Use the Exchange Management Shell?
When I have spoken on Exchange 2007 at various IT conferences, one of the questions that I get asked most often is why anyone would want to use the Exchange Management Shell to perform an operation that could be performed just as easily through the GUI. Well, my philosophy is that if an operation really is just as easy to do with the GUI, then you should use the GUI. As Exchange administrators we are all overworked, and it just makes sense to use the tool that is going to make our job the easiest.
Having said that, if all you want to do is to create a filtered view of the mailboxes, then it is probably going to be easier to create that filter by using the GUI. Most of the time though, if someone is going through the trouble of creating a filter, then they are going to be performing some kind of operation on the filtered results. This is where the Exchange Management Shell comes into play. The Exchange Management Shell makes it simple to perform an action against your filtered results.
A Simple Filter
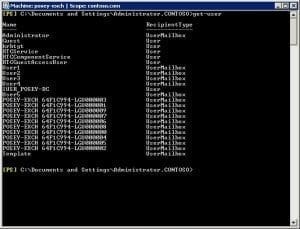
The first thing that I want to show you is how you can create a simple filtered view of the mailboxes. There are actually several different commands to which filters can be applied, but the one that is most commonly used is the Get-User command. If you enter the Get-User command by itself, you will see a list of all of the users in the organization. Keep in mind that the results of this command show you user accounts, not mailboxes, although the results do tell you which users have mailboxes.
The Get-Users command returns all the users in the organization, as shown below:
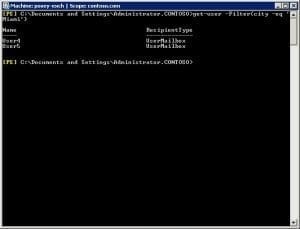
The image above was taken from a lab server, so the list of users is pretty short. Imagine however, that we wanted to narrow down the list by location and view only the users who were located in a particular city. We could do so by creating a filter that is based on the city name. For instance, to create a filter that would show us the users who are located in Miami, we could enter the following command:
Get-User –Filter{City –eq ‘Miami’}
Simple filter results:
A Compound Filter
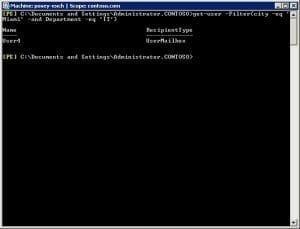
In the command above, we simply enclosed our filter in brackets, and used –eq as the operator that states that we want the attribute (city) to be equal to the specified string (‘Miami’). We can easily turn this into a compound filter by adding some more operators and attributes. For instance, suppose we wanted to see all of the users who worked in the IT department in Miami. We could do so by entering the following command:
Get-User {City –eq ‘Miami’ –and Department –eq ‘IT’}
Compound filter results:
Using the Filtered Results
The Exchange Management Shell allows you to redirect the output from a command into another command by separating the commands with a pipe symbol (|). This means that it is easy to create a filter, and then have some kind of action performed on the filter results.
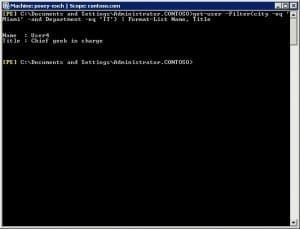
You could really perform just about any kind of action on the filtered results, but let’s pretend for the sake of demonstration that you just wanted to create a nice neat list of the user names to whom the filter applies. In such a case, you could redirect the filter results into the Format-List command. For example, you might use a command like this:
Get-User{City –eq ‘Miami’ –and Department –eq ‘IT’} | Format-List Name, Title
This command would display the name and title of every user to whom the filter applied.
Conclusion
As you can see, recipient filtering can be a handy way to quickly locate a user or a mailbox, but it can also be a great way to perform an action on a subset of users. If you would like to know more about the specific filtering attributes that are available, I recommend visiting this Microsoft article.


