


Cloud Security: Create a Custom RBAC Role in Microsoft Azure

In this Ask the Admin, I’ll show you how to add a custom role for restarting virtual machines.
Microsoft Azure uses Role-Based Access Control (RBAC) to determine ‘which users get access to what’. There are 60 built-in roles that you can use out-of-the-box, such as Owner, Contributor, and Reader. RBAC is more flexible than group-based access control. If you need more granular control than the built-in roles provide, you can create one or more custom roles.
Each role has a set of actions that it will be assigned. In addition to who will be a member of a role, role scope determines the users and devices the role can manage. In the case of Azure, that means subscriptions, resource groups, or resources. The definition of a role’s members and scope is known as an assignment. Roles can have more than one assignment.
If none of the built-in roles meet your requirements, you can create up to 2000 custom roles per subscription. Roles are stored in Azure AD and can be shared between subscriptions. There are three ways that you can create custom roles: using Azure PowerShell, Azure Command-Line Interface (CLI), and the REST API. In this article, I’ll show you how to use PowerShell to add a custom role to your subscription that allows members to restart virtual machines.
Before continuing, make sure that you have access to an Azure subscription. If you don’t already have one, you can sign up for a free trial here. Additionally, you’ll need to install Azure PowerShell on your local PC. I recommend using Microsoft’s Web Platform Installer to download the latest version of Azure PowerShell.
Add a Custom Role to Azure
Open a Windows PowerShell command prompt on your PC and log into your Azure subscription using your Microsoft account by running the Login-AzureRmAccount cmdlet. You’ll be required to enter your credentials in a pop-up window. Note that to create a custom role, you must be a member of the Owner or User Access Administrator roles.
Now let’s select the Azure subscription to work with. The following code gets the Azure subscriptions associated with your Microsoft account using Get-AzureRmSubscription. You can then select the subscription you want to work with in the Grid View window. Click OK.
$subscriptionId = (Get-AzureRmSubscription | Out-GridView -Title 'Select an Azure Subscription …' -PassThru).SubscriptionId

Select-AzureRmSubscription -SubscriptionId $subscriptionId
Once the subscription is set, you can list the existing RBAC roles using Get-AzureRmRoleDefinition:
Get-AzureRmRoleDefinition | Format-Table Name, Description
Actions and NotActions
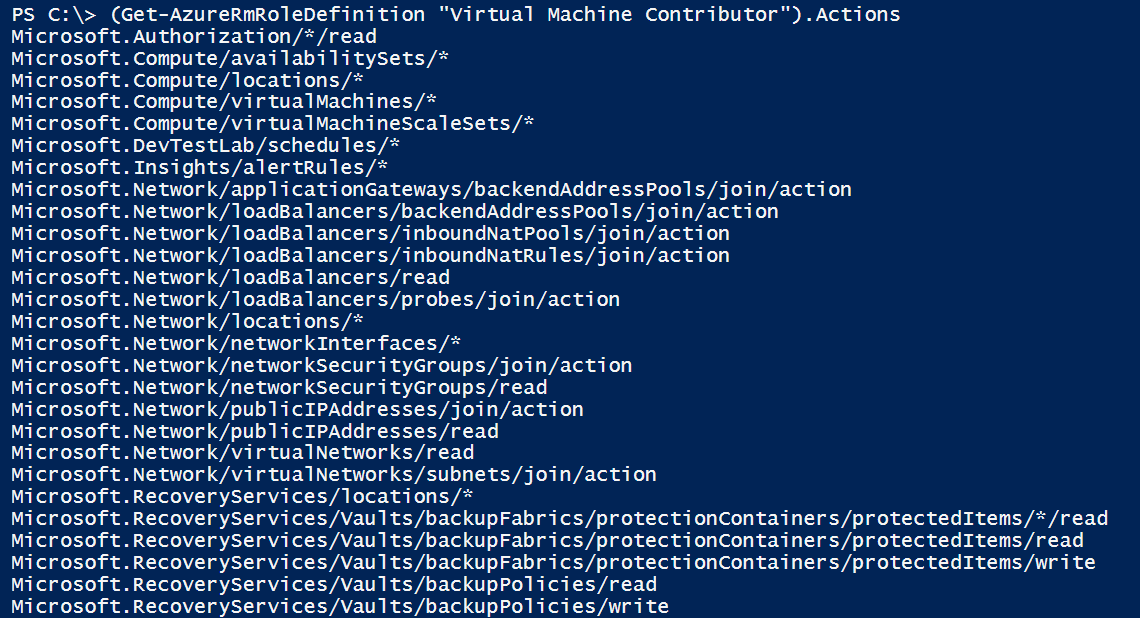
Let’s see what actions are assigned to the Virtual Machine Contributor role using Get-AzureRmRoleDefinition:
(Get-AzureRmRoleDefinition "Virtual Machine Contributor").Actions
NotActions can also be specified for a role to exclude restricted operations. If both Actions and NotActions are defined for a role, access is granted by taking away the NotActions from the Actions. But NotActions are not deny rules. If a user is a member of more than one role and an Action grants access to an Azure operation, despite the existence of a NotAction in another rule, the user will be granted access. Use Get-AzureRmRoleDefinition to view NotActions specified for a role:
(Get-AzureRmRoleDefinition “Virtual Machine Contributor”).NotActions
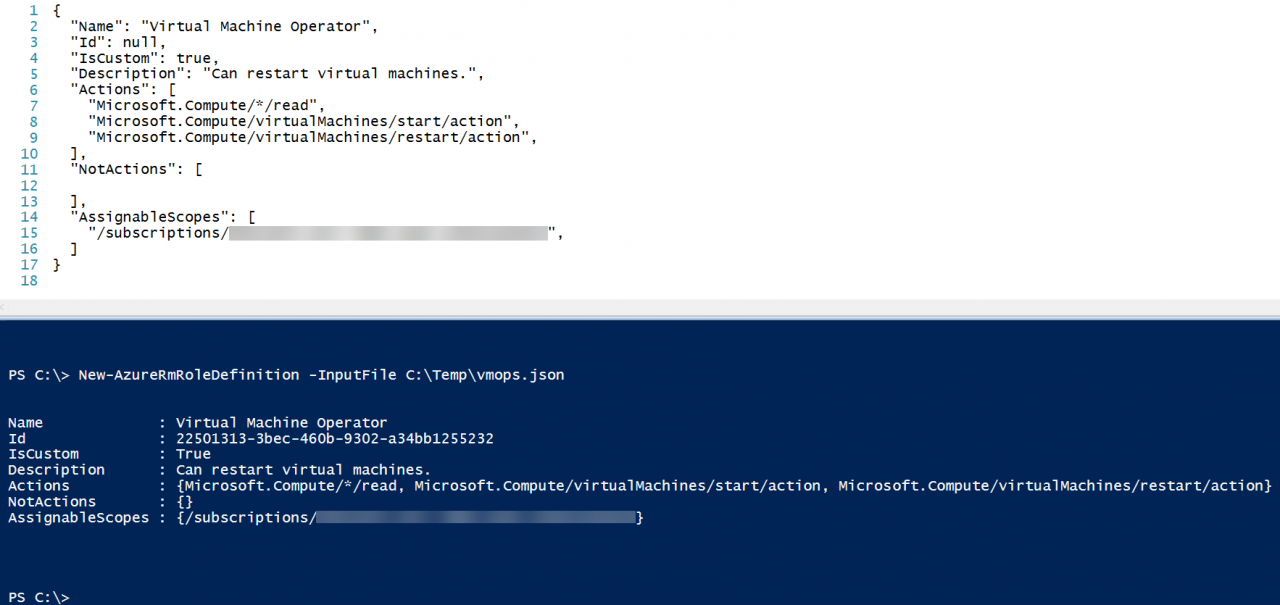
Let’s create a new custom role using New-AzureRmRoleDefinition. We need to supply the New-AzureRmRoleDefinition cmdlet with a JSON template that defines the Actions, NotActions if required, and scope(s). The JSON template below contains all the information we need to create a custom role that allows members to restart VMs.
{
  "Name": "Virtual Machine Operator",
  "Id": null,
  "IsCustom": true,
  "Description": "Can restart virtual machines.",
  "Actions": [
    "Microsoft.Compute/*/read",
    "Microsoft.Compute/virtualMachines/start/action",
    "Microsoft.Compute/virtualMachines/restart/action",
  ],
  "NotActions": [

  ],
  "AssignableScopes": [
    "/subscriptions/xxxxxxxx-xxxxxxxx-xxxxxxxx",
  ]
}
Id is set to null because this is a new role. If you want to modify an existing custom role, you need to specify the role’s Id. If you want to determine a role’s ID, use Get-AzureRmRoleDefinition as shown below.
Get-AzureRmRoleDefinition "Virtual Machine Operator"
Actions and NotActions are specified in the template using providers, which you can list using the Get-AzureRmProviderOperation cmdlet:
Get-AzureRmProviderOperation *
If you want to be more specific, you can filter the search like this:
(Get-AzureRmProviderOperation */virtualMachines/*).Operation
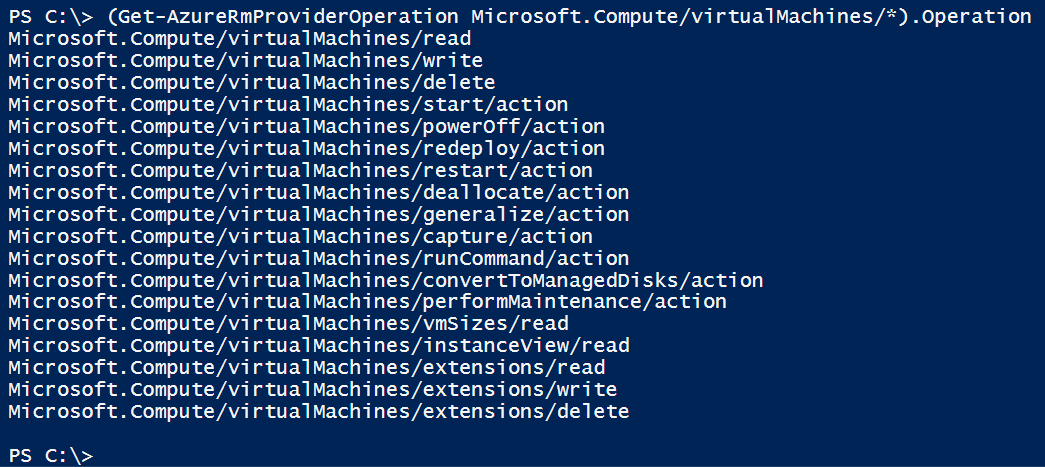
You further narrow it down until you’ve found the providers and operations needed for the actions you want to include in the role:
(Get-AzureRmProviderOperation Microsoft.Compute/virtualMachines/*).Operation
Once you’ve decided on the Actions and NotActions for the role, you need to add one or more scopes. To get the Id for your Azure subscription, use run Get-AzureRmSubscription to get a list of subscriptions and the IDs associated with the Microsoft account. If you want to set a resource group or resource as the scope, use Get-AzureRmResourceGroup and Get-AzureRmResource respectively to get the required IDs. The string for a resource group called Petri would be specified as follows:
“/subscriptions/xxxxxxxx-xxxxxxxx–xxxxxxxx/resourceGroups/Petri”
Once you’ve finished creating the template, save it and use the New-AzureRmRoleDefinition cmdlet to create the new role in Azure:
New-AzureRmRoleDefinition -InputFile C:\Temp\vmops.json
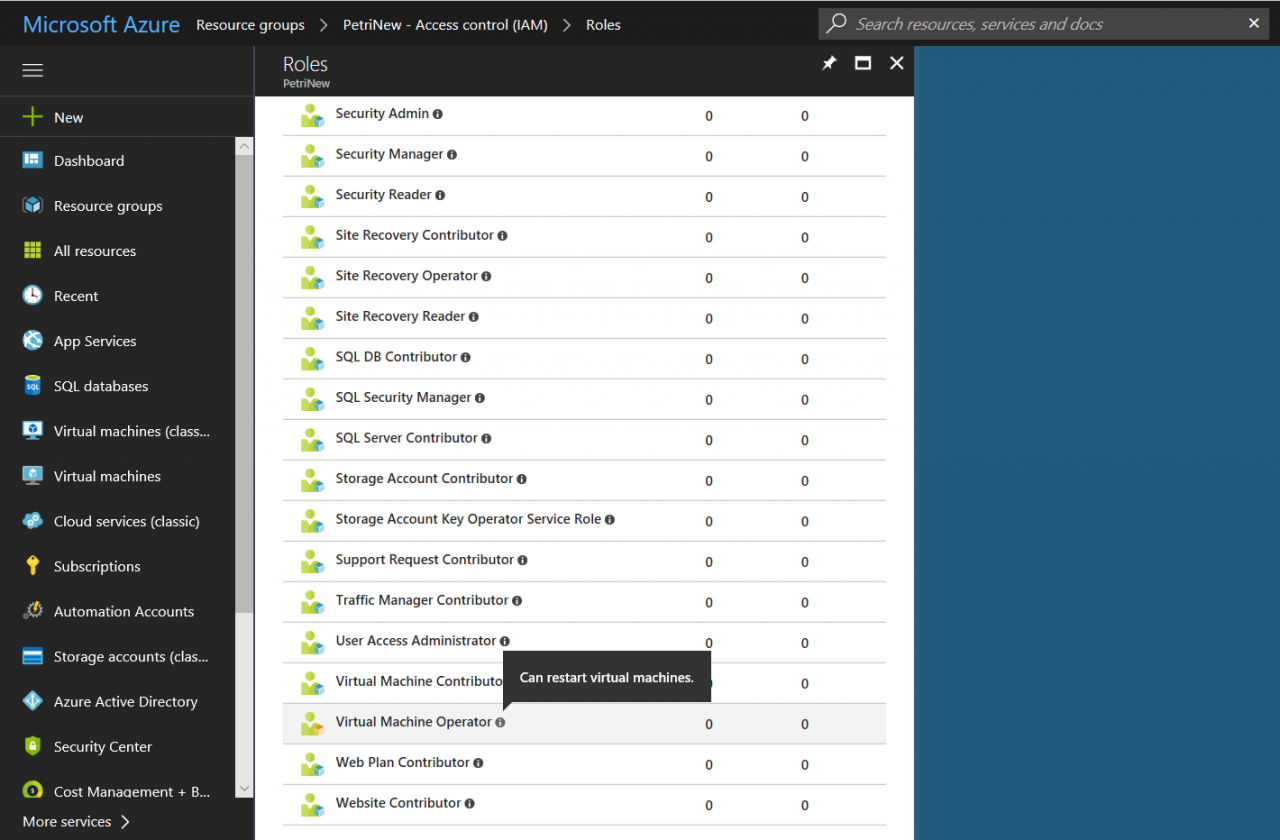
Run Get-AzureRmRoleDefinition and you will see the new custom role appear in the list. Custom roles appear at the top of the table.
Get-AzureRmRoleDefinition | Format-Table Name, Description
The new role will also be available in the Azure management portal from where you can assign members to the role.
In this Ask the Admin, I showed you how to create custom RBAC roles in Microsoft Azure using PowerShell.